How to Install Laravel with Docker on Ubuntu 22.04
This tutorial exists for these OS versions
- Ubuntu 22.04 (Jammy Jellyfish)
- Ubuntu 18.04 (Bionic Beaver)
On this page
- Prerequisites
- Step 1 - Configure Firewall
- Step 2 - Install SSL
- Step 3 - Install Docker and Docker Compose
- Step 4 - Download Laravel and Installing Dependencies
- Step 5 - Create the Docker Compose File
- Step 6 - Create the Dockerfile
- Step 7 - Configure PHP
- Step 8 - Configure Nginx
- Step 9 - Configure MySQL
- Step 10 - Setting up the Environment File
- Step 11 - Start the Containers and complete Laravel installation
- Step 12 - Configure SSL Renewal
- Step 13 - Data Migration and Tinker Console
- Conclusion
Laravel is a free and open-source PHP framework that provides a set of tools and resources to build modern PHP applications. With a wide variety of compatible packages and extensions, Laravel has grown popular, with many developers adopting it as their framework of choice. Laravel provides powerful database tools including an ORM (Object Relational Mapper) called Eloquent and built-in mechanisms for creating database migrations. It ships with a command-line tool Artisan using which developers can bootstrap new models, controllers, and other application components, which speeds up the overall application development.
To containerize an application refers to the process of adapting an application and its components to be able to run it in lightweight environments known as containers. This guide will use Docker Compose to containerize a Laravel application for development.
We will create three Docker containers for our Laravel application.
- An
appservice running PHP 8.2-FPM - A
dbservice running MySQL 8.0 - An
nginxservice which uses theappservice to parse PHP code before serving the Laravel application to the user
We will also create an SSL certificate for our Laravel website using Let's Encrypt.
Prerequisites
-
A server running Ubuntu 22.04.
-
A non-root user with sudo privileges.
-
A fully qualified domain name (FQDN) pointing to your server. For our purposes, we will use
example.comas the domain name. -
Make sure everything is updated.
$ sudo apt update
-
Install basic utility packages. Some of them may already be installed.
$ sudo apt install wget curl nano software-properties-common dirmngr apt-transport-https gnupg gnupg2 ca-certificates lsb-release ubuntu-keyring unzip -y
Step 1 - Configure Firewall
The first step is to configure the firewall. Ubuntu comes with ufw (Uncomplicated Firewall) by default.
Check if the firewall is running.
$ sudo ufw status
You should get the following output.
Status: inactive
Allow SSH port so the firewall doesn't break the current connection on enabling it.
$ sudo ufw allow OpenSSH
Allow HTTP and HTTPS ports as well.
$ sudo ufw allow http
$ sudo ufw allow https
Enable the Firewall
$ sudo ufw enable
Command may disrupt existing ssh connections. Proceed with operation (y|n)? y
Firewall is active and enabled on system startup
Check the status of the firewall again.
$ sudo ufw status
You should see a similar output.
Status: active

To                         Action      From
--                         ------      ----
OpenSSH                    ALLOW       Anywhere
80/tcp                     ALLOW       Anywhere
443                        ALLOW       Anywhere
OpenSSH (v6)               ALLOW       Anywhere (v6)
80/tcp (v6)                ALLOW       Anywhere (v6)
443 (v6)                   ALLOW       Anywhere (v6)
Step 2 - Install SSL
Before proceeding ahead, let us first create an SSL certificate for our domain. We will create this outside Docker as it is easy to maintain. We will later sync up the certificates to the container which will be renewed and refreshed regularly.
We need to install Certbot to generate the SSL certificate. You can either install Certbot using Ubuntu's repository or grab the latest version using the Snapd tool. We will be using the Snapd version.
Ubuntu 22.04 comes with Snapd installed by default. Run the following commands to ensure that your version of Snapd is up to date. Ensure that your version of Snapd is up to date.
$ sudo snap install core
$ sudo snap refresh core
Install Certbot.
$ sudo snap install --classic certbot
Use the following command to ensure that the Certbot command runs by creating a symbolic link to the /usr/bin directory.
$ sudo ln -s /snap/bin/certbot /usr/bin/certbot
Run the following command to generate an SSL Certificate.
$ sudo certbot certonly --standalone --agree-tos --no-eff-email --staple-ocsp --preferred-challenges http -m [email protected] -d example.com
The above command will download a certificate to the /etc/letsencrypt/live/example.com directory on your server.
Generate a Diffie-Hellman group certificate.
$ sudo openssl dhparam -dsaparam -out /etc/ssl/certs/dhparam.pem 4096
Do a dry run of the process to check whether the SSL renewal is working fine.
$ sudo certbot renew --dry-run
If you see no errors, you are all set. Your certificate will renew automatically.
After setting up Docker and installing Laravel, the renewal process will need to be modified. We will cover it in a later section.
Step 3 - Install Docker and Docker Compose
Ubuntu 22.04 ships with an older version of Docker. To install the latest version, first, import the Docker GPG key.
$ curl -fsSL https://download.docker.com/linux/ubuntu/gpg | sudo gpg --dearmor -o /etc/apt/keyrings/docker.gpg
Create a Docker repository file.
$ echo \
  "deb [arch=$(dpkg --print-architecture) signed-by=/etc/apt/keyrings/docker.gpg] https://download.docker.com/linux/ubuntu \
  $(lsb_release -cs) stable" | sudo tee /etc/apt/sources.list.d/docker.list > /dev/null
Update the system repository list.
$ sudo apt update
Install the latest version of Docker.
$ sudo apt install docker-ce docker-ce-cli containerd.io docker-compose-plugin
Verify that it is running.
$ sudo systemctl status docker
? docker.service - Docker Application Container Engine
     Loaded: loaded (/lib/systemd/system/docker.service; enabled; vendor preset: enabled)
     Active: active (running) since Sat 2023-01-14 10:41:35 UTC; 2min 1s ago
TriggeredBy: ? docker.socket
       Docs: https://docs.docker.com
   Main PID: 2054 (dockerd)
      Tasks: 52
     Memory: 22.5M
        CPU: 248ms
     CGroup: /system.slice/docker.service
             ??  2054 /usr/bin/dockerd -H fd:// --containerd=/run/containerd/containerd.sock
By default, Docker requires root privileges. If you want to avoid using sudo every time you run the docker command, add your username to the docker group.
$ sudo usermod -aG docker $(whoami)
You will need to log out of the server and back in as the same user to enable this change or use the following command.
$ su - ${USER}
Confirm that your user is added to the Docker group.
$ groups
navjot wheel docker
Step 4 - Download Laravel and Installing Dependencies
The first step is to download the latest version of Laravel and install the dependencies, including Composer, the PHP package manager.
Create the Laravel application directory.
$ mkdir ~/laravel
Switch to the directory.
$ cd ~/laravel
Clone the latest Laravel release to the directory. Don't forget the . at the end of the command which means Git will clone the files into the current directory.
$ git clone https://github.com/laravel/laravel.git .
Use Docker's Compose image to mount the directories you need for your Laravel project. This avoids the need to install Composer globally.
$ docker run --rm -v $(pwd):/app composer install
The above command creates an ephemeral container that is bind-mounted to your current directory before being removed. It copies the contents of your Laravel directory to the container and ensures that the vendor folder Composer creates inside the container is copied back to the current directory.
Set permissions on the Laravel directory so that it is owned by the currently logged-in user.
$ sudo chown -R $USER:$USER ~/laravel
Step 5 - Create the Docker Compose File
Create and open the Docker compose file for editing.
$ nano docker-compose.yml
Paste the following code in it. Here, we define three services: app, webserver, and db. Replace MYSQL_ROOT_PASSWORD under the db service with a strong password of your choice.
services:
  app:
    build:
      context: .
      dockerfile: Dockerfile
    image: howtoforge/app
    container_name: app
    restart: unless-stopped
    tty: true
    environment:
      SERVICE_NAME: app
      SERVICE_TAGS: dev
    working_dir: /var/www
    volumes:
      - ./:/var/www
      - ./php/local.ini:/usr/local/etc/php/conf.d/local.ini
    networks:
      - app-network

  webserver:
    container_name: webserver
    image: nginx:alpine
    restart: unless-stopped
    tty: true
    ports:
        - 80:80
        - 443:443
    volumes:
        - ./:/var/www
        - ./nginx/conf.d:/etc/nginx/conf.d
        - ./nginx/logs:/var/log/nginx
        - /etc/ssl/certs/dhparam.pem:/etc/ssl/certs/dhparam.pem
        - /etc/letsencrypt:/etc/letsencrypt
    logging:
        options:
            max-size: "10m"
            max-file: "3"
    networks:
      - app-network

  db:
    image: mysql:latest
    container_name: db
    restart: unless-stopped
    tty: true
    ports:
      - "3306:3306"
    environment:
      MYSQL_DATABASE: laravel
      MYSQL_ROOT_PASSWORD: MYSQL_ROOT_PASSWORD
      MYSQL_USER: laraveluser
      MYSQL_PASSWORD: password
      SERVICE_TAGS: dev
      SERVICE_NAME: mysql
    volumes:
      - dbdata:/var/lib/mysql
      - ./mysql/my.cnf:/etc/mysql/my.cnf
    networks:
      - app-network

volumes:
  dbdata:
    driver: local

networks:
  app-network:
    driver: bridge
Save the file by pressing Ctrl + X and entering Y when prompted.
Let us go through the services in detail.
app- This service defines the Laravel application and runs a customer Docker image titledhowtoforge/app. We will create this image in the next step. The working directory for Laravel inside the container is set at/var/wwwwhich is mapped to the current directory on the host. We also mount a PHP configuration file which is copied to the PHP container. We will configure this in a later step.webserver- This service creates a container using the Nginx Docker image and exposes ports 80 and 443 to the host. We also bind-mount volumes for Nginx logs, custom configuration, the Laravel application directory, and SSL certificates.db- This service creates a container using the MySQL Docker image and defines environment variables setting up the database name and the MySQL root password. You can name the database whatever you want and replaceMYSQL_ROOT_PASSWORDwith a strong password of your choice. Also, set the MySQL user name (MYSQL_USER_NAME) and password (MYSQL_USER_PASSWORD) which will have access to the database you chose. This service also maps port 3306 from the container to port 3306 on the host. We also bind-mount volume for custom MySQL configuration and a local volume for MySQL data. This allows you to restart thedbservice without losing the data.
To make the services communicate with each other, we have created a Docker network called app-network . It is set as a bridge network. It allows containers connected to it to communicate with each other. The bridge network driver installs rules in the host machine so that containers on different bridge networks cannot communicate directly with each other.
Step 6 - Create the Dockerfile
A Dockerfile is used to create custom images. There is no standard image for Laravel which is why we need to define a Dockerfile to create a custom image for Laravel. It contains commands to install packages and configure the Linux environment depending on your application needs. You can also publish your custom image to Docker Hub or any private Docker registry.
Create and open the Dockerfile for editing.
$ nano Dockerfile
Paste the following code in it.
FROM php:8.2-fpm

# Copy composer.lock and composer.json
COPY composer.lock composer.json /var/www/

# Set working directory
WORKDIR /var/www

# Install dependencies
RUN apt-get update && apt-get install -y \
    build-essential \
    libpng-dev \
    libjpeg62-turbo-dev \
    libfreetype6-dev \
    locales \
    zip \
    jpegoptim optipng pngquant gifsicle \
    vim \
    libzip-dev \
    unzip \
    git \
    curl \
    libonig-dev

# Clear cache
RUN apt-get clean && rm -rf /var/lib/apt/lists/*

# Install extensions
RUN docker-php-ext-install pdo_mysql mbstring zip exif pcntl
RUN docker-php-ext-configure gd --enable-gd --with-freetype --with-jpeg
RUN docker-php-ext-install gd

# Install composer
RUN curl -sS https://getcomposer.org/installer | php -- --install-dir=/usr/local/bin --filename=composer

# Copy existing application directory contents to the working directory
COPY . /var/www

# Assign permissions of the working directory to the www-data user
RUN chown -R www-data:www-data \
        /var/www/storage \
        /var/www/bootstrap/cache

# Assign writing permissions to logs and framework directories
RUN chmod 775 storage/logs \
        /var/www/storage/framework/sessions \
        /var/www/storage/framework/views

# Expose port 9000 and start php-fpm server
EXPOSE 9000
CMD ["php-fpm"]
Save the file by pressing Ctrl + X and entering Y when prompted.
Let us see what's happening here. First, we create our custom image on top of the php:8.2-fpm Docker image. This is a Debian-based image that has PHP 8.2-FPM installed. The Dockerfile uses various directives to perform operations, RUN directive specifies the commands to update, install, and configure settings inside the container, COPY directive to copy files into the container, EXPOSE directive to expose a port in the container, and CMD directive to run a command.
First, we copy the Composer files from the Laravel directory on the host inside the container to the /var/www directory. We also set the working directory for the container to /var/www. Then, we install various prerequisites and packages required for Laravel to work including PHP extensions including mbstring, gd, exif, zip, pdo_mysql, and pcntl. Then, we install the Composer package manager.
Next, we copy all the files from the Laravel directory to the container and set permissions on the working directory for the www-data user. This is the user PHP uses by default on the Debian platform. Next, we set correct writing permissions to the Laravel logs, sessions, and views directories.
And finally, we expose the 9000 port for the PHP-FPM service which will be used by the Nginx server, and run the PHP command to start the container.
Step 7 - Configure PHP
Create the PHP directory.
$ mkdir ~/laravel/php
Create and open the local.ini file for editing.
$ nano local.ini
Paste the following code in it.
upload_max_filesize=40M
post_max_size=40M
Save the file by pressing Ctrl + X and entering Y when prompted. These directives set the maximum uploaded size for uploaded files. Change the value as per your requirements. You can put any PHP-specific configuration to override the default directives.
Step 8 - Configure Nginx
Create the Nginx directory for the site configuration.
$ mkdir ~/laravel/nginx/conf.d -p
We need to create an Nginx configuration file to use PHP-FPM as the FastCGI server to serve Laravel.
Create and open the app.conf file for editing.
$ nano ~/laravel/nginx/conf.d/app.conf
Paste the following code in it.
server {
    # Redirect any http requests to https
    listen 80;
    listen [::]:80;
    server_name example.com;
    return 301 https://$host$request_uri;
}

server {
    listen 443 ssl http2;
    listen [::]:443 ssl http2;
    index index.php index.html;

    error_log  /var/log/nginx/error.log;
    access_log /var/log/nginx/access.log;

    root /var/www/public;
    client_max_body_size 40m;

    ssl_certificate /etc/letsencrypt/live/example.com/fullchain.pem;
    ssl_certificate_key /etc/letsencrypt/live/example.com/privkey.pem;
    ssl_trusted_certificate /etc/letsencrypt/live/example.com/chain.pem;
    ssl_session_timeout 1d;
    ssl_session_cache shared:SSL:10m;
    ssl_session_tickets off;
    ssl_protocols TLSv1.2 TLSv1.3;
    ssl_ciphers ECDHE-ECDSA-AES128-GCM-SHA256:ECDHE-RSA-AES128-GCM-SHA256:ECDHE-ECDSA-AES256-GCM-SHA384:ECDHE-RSA-AES256-GCM-SHA384:ECDHE-ECDSA-CHACHA20-POLY1305:ECDHE-RSA-CHACHA20-POLY1305:DHE-RSA-AES128-GCM-SHA256:DHE-RSA-AES256-GCM-SHA384;
    ssl_prefer_server_ciphers off;
    ssl_ecdh_curve secp384r1;
    ssl_dhparam /etc/ssl/certs/dhparam.pem;

    # OCSP stapling
    ssl_stapling on;
    ssl_stapling_verify on;
    resolver 8.8.8.8 8.8.4.4 valid=300s;
    resolver_timeout 5s;

    location ~ \.php$ {
        try_files $uri =404;
        fastcgi_split_path_info ^(.+\.php)(/.+)$;
        fastcgi_pass app:9000;
        fastcgi_index index.php;
        include fastcgi_params;
        fastcgi_param SCRIPT_FILENAME $document_root$fastcgi_script_name;
        fastcgi_param PATH_INFO $fastcgi_path_info;
    }
    location / {
        try_files $uri $uri/ /index.php?$query_string;
        gzip_static on;
    }
}
Save the file by pressing Ctrl + X and entering Y when prompted.
The above file configures Nginx to serve both HTTP and HTTPS versions of the Laravel site and redirect any HTTP request to HTTPS automatically. Make sure the value of the variable client_max_body_size matches the upload size set in the previous step.
In the PHP location block, the fastcgi_pass directive specifies that the app service is listening on a TCP socket on port 9000. PHP-FPM server can also listen on a Unix socket which has an advantage over a TCP socket. But it doesn't work if the services are running on different hosts which is the case here as the app container is running on a different host from your webserver container.
Step 9 - Configure MySQL
We will configure MySQL to enable the general query log and specify the corresponding log file.
Create the MySQL directory.
$ mkdir ~/laravel/mysql
Create and open the my.cnf file for editing.
$ nano ~/laravel/my.cnf
Paste the following code in it.
[mysqld]
general_log = 1
general_log_file = /var/lib/mysql/general.log
Save the file by pressing Ctrl + X and entering Y when prompted.
Step 10 - Setting up the Environment File
Now that we have created and configured all the services, it is time to start the containers. But before we do that, we need to configure the environment variables for Laravel. Laravel comes with a default environment file, .env.example.
Create a copy of the example environment file.
$ cp .env.example .env
Open the .env file for editing.
$ nano .env
Find the block starting with DB_CONNECTION and update the values of the variables according to your requirements.
DB_CONNECTION=mysql
DB_HOST=db
DB_PORT=3306
DB_DATABASE=laravel
DB_USERNAME=laraveluser
DB_PASSWORD=your_laravel_db_password
The value of the DB_HOST will be the db service. The DB_NAME, DB_USERNAME, and DB_PASSWORD will be the database name, username, and password you chose in step 4 in the Docker compose file.
Save the file by pressing Ctrl + X and entering Y when prompted.
Step 11 - Start the Containers and complete Laravel installation
It is finally time to start the containers.
$ docker compose up -d
This command when run for the first time will pull the Nginx, MySQL images and will create the app image using the Dockerfile we created. Once the process is complete, you can check the status of your containers using the following command.
$ docker ps
You will see a similar output.
CONTAINER ID   IMAGE            COMMAND                  CREATED       STATUS       PORTS                                                                      NAMES
a57be976c0fa   mysql:latest     "docker-entrypoint.s…"   6 hours ago   Up 6 hours   0.0.0.0:3306->3306/tcp, :::3306->3306/tcp, 33060/tcp                       db
85e515c4a404   howtoforge/app   "docker-php-entrypoi…"   6 hours ago   Up 6 hours   9000/tcp                                                                   app
8418bbc83bd3   nginx:alpine     "/docker-entrypoint.…"   6 hours ago   Up 6 hours   0.0.0.0:80->80/tcp, :::80->80/tcp, 0.0.0.0:443->443/tcp, :::443->443/tcp   webserver
Once the containers are running, it is time to finish installing Laravel using the docker compose exec command to run commands inside the container.
Generate an application key and copy it to your .env file to secure user sessions and encrypt user data.
$ docker compose exec app php artisan key:generate
Create the Laravel application cache.
$ docker compose exec app php artisan config:cache
This command will load the configuration settings into the /var/www/bootstrap/cache/config.php file.
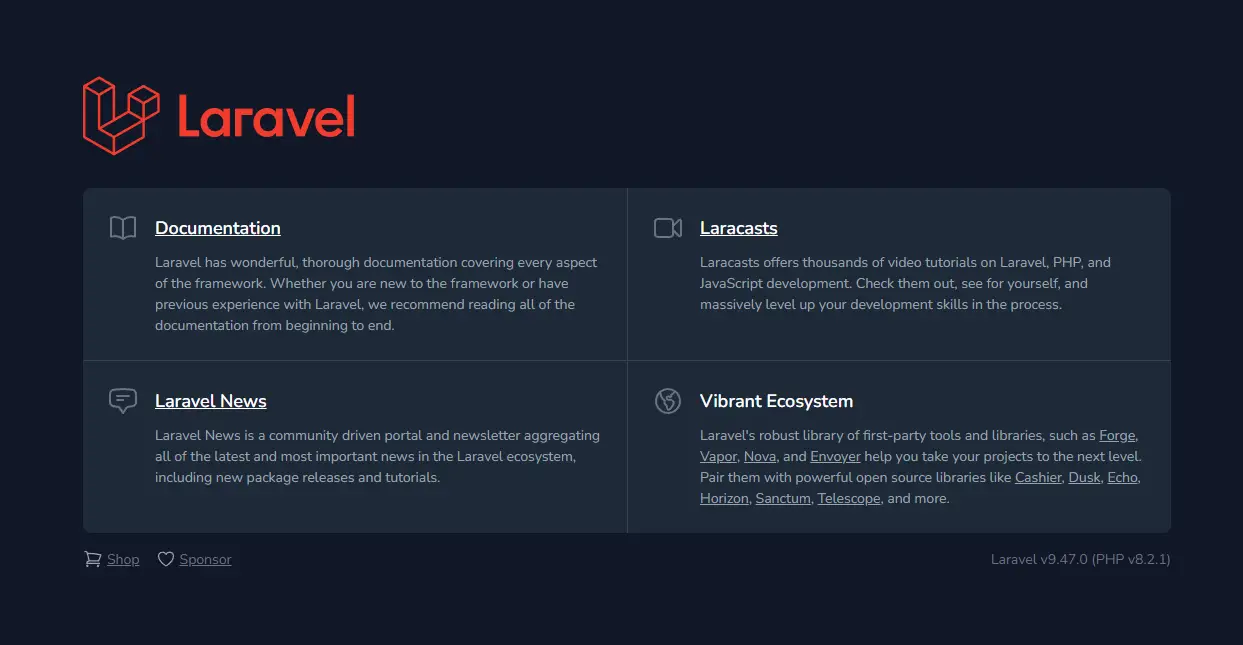
Visit https://example.com in your browser and you will see the following page implying the successful installation of Laravel.
Step 12 - Configure SSL Renewal
Now that the Laravel site is active, it is time to revisit the SSL settings to configure the renewal. For this, we will need to create scripts to stop the webserver service before starting the renewal and start the service again once the certificate is renewed. Certbot provides two hooks, pre_hook and post_hook for this purpose.
Create the SSL directory to store the scripts.
$ mkdir ~/laravel/ssl
Create the server-stop.sh script.
$ sh -c 'printf "#!/bin/sh\ndocker stop webserver\n" > ~/laravel/ssl/server-stop.sh'
Create the server-start.sh script.
$ sh -c 'printf "#!/bin/sh\ndocker start webserver\n" > ~/laravel/ssl/server-start.sh'
Make the scripts executable.
$ chmod +x ~/laravel/ssl/server-*.sh
Now we need to tell Certbot to use these scripts. Open the /etc/letsencrypt/renewal/example.com.conf file for editing.
$ sudo nano /etc/letsencrypt/renewal/example.com.conf
Paste the following lines at the end of the file.
pre_hook = /home/<username>/laravel/ssl/server-stop.sh
post_hook = /home/<username>/laravel/ssl/server-start.sh
Save the file by pressing Ctrl + X and entering Y when prompted.
Test the Certificate renewal process by doing a dry run.
$ sudo certbot renew --dry-run
You will get a similar output confirming the success.
Saving debug log to /var/log/letsencrypt/letsencrypt.log

- - - - - - - - - - - - - - - - - - - - - - - - - - - - - - - - - - - - - - - -
Processing /etc/letsencrypt/renewal/example.com.conf
- - - - - - - - - - - - - - - - - - - - - - - - - - - - - - - - - - - - - - - -
Account registered.
Hook 'pre-hook' ran with output:
 webserver
Simulating renewal of an existing certificate for example.com

- - - - - - - - - - - - - - - - - - - - - - - - - - - - - - - - - - - - - - - -
Congratulations, all simulated renewals succeeded:
  /etc/letsencrypt/live/example.com/fullchain.pem (success)
- - - - - - - - - - - - - - - - - - - - - - - - - - - - - - - - - - - - - - - -
Hook 'post-hook' ran with output:
 webserver
Your SSL certificates will now be renewed automatically and be used by the Docker container to serve your Laravel application.
Step 13 - Data Migration and Tinker Console
Now that the application is running, you can migrate your data and experiment with the tinker command. Tinker is a REPL (Read-Eval-Print Loop) for Laravel. The tinker command initiates a PsySH console with Laravel preloaded. PsySH is a runtime developer console and an interactive debugger for PHP. The tinker command allows you to interact with the Laravel application from the command line in an interactive shell.
Test the MySQL connection using the artisan migrate command on the container. It will create a migrations table in the database.
$ docker compose exec app php artisan migrate
You will get the following output.
 INFO  Preparing database.

  Creating migration table .............................................................................................. 32ms DONE

 INFO  Running migrations.

  2014_10_12_000000_create_users_table .................................................................................. 184ms DONE
  2014_10_12_100000_create_password_resets_table ......................................................................... 259ms DONE
  2019_08_19_000000_create_failed_jobs_table ............................................................................ 102ms DONE
  2019_12_14_000001_create_personal_access_tokens_table .................................................................. 46ms DONE
Next, start the PsySH console using the tinker command.
$ docker compose exec app php artisan tinker
You will get the following prompt.
Psy Shell v0.11.10 (PHP 8.2.1 — cli) by Justin Hileman
>
Test the MySQL connection by getting the data you just migrated by running the following command at the console prompt.
> \DB::table('migrations')->get();
You will get the following output.
= Illuminate\Support\Collection {#3670
    all: [
      {#3679
        +"id": 1,
        +"migration": "2014_10_12_000000_create_users_table",
        +"batch": 1,
      },
      {#3681
        +"id": 2,
        +"migration": "2014_10_12_100000_create_password_resets_table",
        +"batch": 1,
      },
      {#3682
        +"id": 3,
        +"migration": "2019_08_19_000000_create_failed_jobs_table",
        +"batch": 1,
      },
      {#3683
        +"id": 4,
        +"migration": "2019_12_14_000001_create_personal_access_tokens_table",
        +"batch": 1,
      },
    ],
  }
Type exit to come out of the console.
> exit
   INFO  Goodbye.
You can use tinker to interact with your databases and to experiment with services and models. You can now start using Laravel for further development.
Conclusion
This concludes our tutorial, where you containerized and installed the Laravel application using Docker, MySQL, and PHP. You also served the application on a secure domain name. If you have any questions, post them in the comments below.

