
Now and then you have to create a new project repository, run that git init command locally and kick off a new awesome project. I have to admit I like the feeling of starting something new; it’s like going on an adventure!
Lao Tzu said:
The journey of a thousand miles begins with one step
We can think about the project setup as the very first step of our thousand miles (users!) journey. We aren’t sure where exactly we are going to end up, but it will be fun!
We also should keep in mind the advice from prof. Donald Knuth:
Premature optimization is the root of all evil (or at least most of it) in programming.
Our journey towards a stable, robust, high-performance web app will start with the simple but functional application — the so-called minimum viable product (MVP). We’ll populate the database with random content, do some benchmarks and improve performance incrementally. Every article in this series will be a checkpoint on our journey!
This article will cover the basics of setting up the project and organizing files for our Symfony Flex project. I’ll also show you some tips, tricks and helper scripts I’m using for speeding up the development.
What Are We Building?
Before starting any project, you should have a clear vision of the final destination. Where are you headed? Who will be using your app and how? What are the main features you’re building? Once you have that knowledge, you can prepare your environment, third-party libraries, and dive into developing the next big thing.
In this series of articles, we’ll be building a simple image gallery blog where users can register or log in, upload images, and create simple public image galleries with descriptions written in Markdown format.
We’ll be using the new Symfony Flex and Homestead (make sure you’ve read tutorials on them, as we’re not going to cover them here). We picked Flex because Symfony 4 is just about to come out (if it hasn’t already, by the time you’re reading this), because it’s infinitely lighter than the older version and lends itself perfectly to step-by-step optimization, and it’s also the natural step in the evolution of the most popular enterprise PHP framework out there.
All the code referenced in this article is available at the GitHub repo.
We’re going to use the Twig templating engine, Symfony forms, and Doctrine ORM with UUIDs as primary keys.
Entities and routes will use annotations; we’ll have simple email/password based authentication, and we’ll prepare data fixtures to populate the database.
Getting started with the app
To try out the example we’ve prepared, do the following:
- Set up an empty database called “blog”.
- Clone the project repository from GitHub.
- Run
composer install. - If you now open the app in your browser, you should see an exception regarding missing database tables. That’s fine, since we haven’t created any tables so far.
- Update the
.envfile in your project root directory with valid database connection string (i.e., update credentials). - Run the database init script
./bin/refreshDb.shand wait until it generates some nice image galleries. - Open the app in your browser and enjoy!
After executing bin/refreshDb.sh you should be able to see the home page of our site:
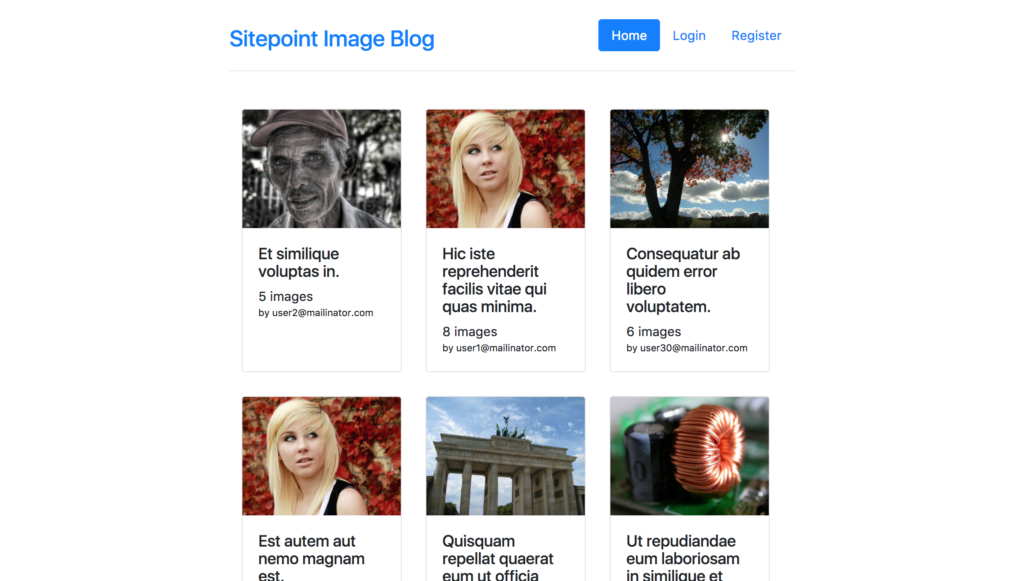
You can log in to the app with credentials user1@mailinator.com and password 123456. See LoadUserData fixture class for more details regarding generated users.
Starting from scratch
In this section, we’ll describe how to set up a new project from scratch. Feel free to take a look at the sample app codebase and see the details.
After creating a new project based on symfony/skeleton by executing the command
composer create-project "symfony/skeleton:^3.3" multi-user-gallery-blog
… we can first set minimum stability to “dev” because of some cutting edge packages:
composer config minimum-stability dev
… and then require additional packages (some of them are referenced by their aliases, the new feature brought by Flex):
composer req annotations security orm template asset validator ramsey/uuid-doctrine
Dependencies used only in the dev environment are required with the --dev flag:
composer req --dev fzaninotto/faker doctrine/Doctrine-Fixtures-Bundle
Flex is doing some serious work for us behind the scenes, and most of the libraries (or bundles) are already registered and configured with good-enough defaults! Check the config directory. You can check all the dependencies used in this project in the composer.json file.
Routes are defined by annotations, so the following will be automatically added into config/routes.yaml:
controllers:
  resource: ../src/Controller/
  type: annotation
Database, Scripts and Fixtures
Configure the DATABASE_URL environment variable (for example, by editing the .env file) to set up a working DB connection. If you’re using our own Homestead Improved (recommended), you’ve got a database set up called homestead with the user / pass homestead / secret. A DB schema can be generated from existing entities by executing:
./bin/console doctrine:schema:create
If this doesn’t run, try executing the console by invoking the PHP binary, like so:
php bin/console doctrine:schema:create
If this step executed fine in the “Getting Started with the app” section above, you should be able to see newly created tables in the database (for Gallery, Image and User entities).
If you want to drop the database schema, you can run:
./bin/console doctrine:schema:drop --full-database --force
Fake it ’til you make it!
I can’t imagine developing an app today without having data fixtures (i.e., scripts for seeding the DB). With a few simple scripts, you can populate your database with realistic content, which is useful when it comes to rapid app development and testing, but it’s also a requirement for a healthy CI pipeline.
I find the Doctrine Fixtures Bundle to be an excellent tool for handling data fixtures as it supports ordered fixtures (i.e., you can control the order of execution), sharing objects (via references) between scripts, and accessing the service container.
Default Symfony services configuration doesn’t allow public access to services, as best practice is to inject all dependencies. We’ll need some services in our fixtures, so I’m going to make all services in App\Services publicly available by adding the following to config/services.yaml:
App\Service\:
  resource: '../src/Service/*'
  public: true
I’m also using Faker to get random but realistic data (names, sentences, texts, images, addresses, …).
Take a look at the script for seeding galleries with random images to get a feeling of how cool this combination is.
Usually, I combine commands for dropping the existing DB schema, creating the new DB schema, loading data fixtures, and other repetitive tasks into a single shell script — for example, bin/refreshDb.sh — so I can easily regenerate the schema and load dummy data:
# Drop schema
./bin/console doctrine:schema:drop --full-database --force

# Create schema
./bin/console doctrine:schema:create

# Load fixtures
./bin/console doctrine:fixtures:load -n --fixtures src/DataFixtures/ORM

# Install assets
./bin/console assets:install --symlink

# Clear cache
./bin/console cache:clear
Make sure you restrict execution of this script on production, or you’re going to have some serious fun at one point.
One can argue that randomly generated data can’t reproduce different edge cases, so your CI can sometimes fail or pass depending on the data generation. It’s true, and you should make sure all edge cases are covered with your fixtures.
Every time you find an edge case causing a bug, make sure you add it to data fixtures. This will help you build a more robust system and prevent similar errors in the future.
Controllers, Templates and Services
Controller classes are located under the src\Controller directory and are not extending the existing Controller class provided by FrameworkBundle. All dependencies are injected through constructors, making the code less coupled and easier to test. I don’t like “magic” for simple stuff!
In the new Symfony directory structure, templates are located under templates.
I’ve created a master template base.html.twig that defines basic HTML structure and references external resources.
Other templates are extending it and overriding its blocks (for example, style sheets, body, header, content, JavaScripts and other blocks).
Local assets are referenced by using the asset Twig function, as it will provide us with better control later (such as changing hosts and appending query strings for versioning). Other templates are organized in subdirectories within the src/templates directory.
Services are automatically registered and configured by default in Symfony’s service configuration. That way, you don’t need to manually configure Twig extensions with filters for Markdown support and generating URLs for Image entities located under src/Twig.
Source Code Management / Version Control
Hopefully, you already know about Git basics and understand how .gitignore works.
Symfony Flex manages the default project .gitignore by adding known bundle files and folders to the ignore list. For example, Flex would add the following files to the ignore list for symfony/framework-bundle:
.env
/public/bundles/
/var/
/vendor/
We’re going to store uploaded files in var/uploads, so we need to create it first. Instead of doing it manually on every project setup, we can add a command for creating all the needed directories to post-install-cmd event in our composer.json scripts section and make Composer run that for us (for example, "mkdir -p var/uploads"). Read more about composer scripts here and auto-scripts here.
We should add all other directories and files we want to be ignored to .gitignore but outside the commented and clearly marked section managed by Flex.
Other Tips and Troubleshooting
- Check your
Homestead.yamlfile for environment variables. If you already have anAPP_ENVvariable, Symfony won’t try to load the one from the.envfile. Your best bet is to comment out theAPP_ENVsection inHomestead.yamljust to be safe. - Cache clear within your Vagrant machine can fail because of permissions. You can simply run
sudo rm -rf var/cache/*to clear the cache manually, or if that fails, clear it from outside the VM, on the host machine in the shared folder.
Conclusion
In this article, we successfully set up a project with entities, controllers, templates and helper scripts. The database is populated with dummy content, and users are able to register and create their galleries.
In the next article, we’ll demonstrate how to populate the database with a more massive dataset to test the app’s performance in a more realistic environment, how to set up a simple testing suite, and simple CI based on Docker.
Frequently Asked Questions (FAQs) about Building an Image Gallery Blog with Symfony Flex
What is Symfony Flex and why is it used in building an image gallery blog?
Symfony Flex is a modern replacement for the Symfony Installer, and not the name of the next Symfony version. It is a tool that uses a new way to automate Symfony configuration. When building an image gallery blog, Symfony Flex makes it easy to select specific packages for the functionality you need, such as an image uploader or a paginator. It also simplifies the process of installing and removing these packages.
How does Symfony Flex differ from other PHP frameworks?
Symfony Flex is not a PHP framework; it’s a tool to manage Symfony applications. It automates many tasks, so you don’t have to manually configure everything. It’s flexible, allowing you to start small with a micro-framework and grow your project with the features you need. It’s also efficient, as it removes and manages dependencies automatically.
How can I install and configure Symfony Flex for my project?
To install Symfony Flex, you need to use Composer, a tool for dependency management in PHP. You can install Symfony Flex globally to use it in all your Symfony projects or locally for a specific project. After installation, Symfony Flex will automatically modify your Symfony applications whenever you add or remove bundles.
What are the benefits of using Artgris MediaBundle in my Symfony Flex project?
Artgris MediaBundle is a Symfony bundle that provides a simple way to manage your media files. It includes features like file upload, image cropping, and file sorting. It’s easy to install and configure, and it integrates well with Symfony Flex.
How can I create a responsive image gallery with CSS Flexbox?
CSS Flexbox is a layout module that allows you to design flexible responsive layout structure without using float or positioning. To create a responsive image gallery, you can use the flex property to specify how images should grow and shrink to fill the available space. You can also use the flex-wrap property to allow the images to wrap onto multiple lines.
How can I set up Symfony Flex according to the official documentation?
The official Symfony documentation provides a detailed guide on how to set up Symfony Flex. It covers the installation process, how to create a new Symfony Flex project, and how to install and remove bundles. It also explains how Symfony Flex automates configuration tasks.
What is the role of GitHub in Symfony Flex setup?
GitHub hosts the official Symfony Flex server, which is a repository of Symfony recipes. When you install or remove a bundle, Symfony Flex communicates with the server to get the recipe for that bundle. The recipe contains instructions on how to automatically configure the bundle.
How can I use Harentius Blog Bundle in my Symfony Flex project?
Harentius Blog Bundle is a powerful bundle that provides blog functionality for your Symfony project. It includes features like post management, comment management, and tag management. You can install it using Composer and Symfony Flex will automatically configure it for you.
How can I make my image gallery blog more interactive?
You can make your image gallery blog more interactive by adding features like image zoom, image slider, and lightbox. You can also allow users to comment on and rate images. Symfony Flex makes it easy to add these features by installing the appropriate bundles.
How can I optimize my image gallery blog for performance?
There are several ways to optimize your image gallery blog for performance. You can use lazy loading to load images only when they are visible to the user. You can also optimize your images for the web by reducing their file size. Additionally, you can use a CDN to deliver your images faster to users around the world.
 Zoran Antolovic
Zoran Antolović is an engineer and problem solver from Croatia. CTO, Startup Owner, writer, motivational speaker and usually the good guy. He adores productivity, hates distractions and sometimes overengineers things.


