
In this tutorial, we’ll explore Tauri, a modern, cross-platform framework for building desktop apps.
Key Takeaways
Contents:
- What is Tauri?
- Tauri vs Electron: a Quick Comparison
- Building a Note-taking App
- Getting started
- Creating the base app functionality
- Importing the necessary packages
- Setting up app storage and variables
- Adding add/delete note functionality
- Creating the JSX template
- Adding a note’s title and content updating functionality
- Adding functionality for importing and exporting notes
- Build the app
- Conclusion
For many years, Electron was the de facto cross-platform framework for building desktop apps. Visual Studio Code, MongoDB Compass, and Postman are all great examples of apps built with this framework. Electron is definitely great, but it has some significant drawbacks, which some other modern frameworks have overcome — Tauri being one of the best of them.
What is Tauri?
Tauri is a modern framework that allows you to design, develop and build cross-platform apps using familiar web technologies like HTML, CSS, and JavaScript on the frontend, while taking advantage of the powerful Rust programming language on the backend.
Tauri is framework agnostic. This means that you can use it with any frontend library of your choice — such as Vue, React, Svelte, and so on. Also, using Rust in a Tauri-based project is completely optional. You can use just the JavaScript API provided by Tauri to build your entire app. This makes it easy not only to build a new app, but also to take the codebase of a web app you’ve already built and turn it into a native desktop app while barely needing to alter the original code.
Let’s look at why we should use Tauri instead of Electron.
Tauri vs Electron: a Quick Comparison
There are three important elements to building a really great app. The app must be small, fast, and secure. Tauri outperforms Electron in all three:
- Tauri produces much smaller binaries. As you can see from the benchmarks results published by Tauri, even a super simple Hello, World! app can be a huge size (over 120 MB) when it’s built with Electron. In contrast, the binary size of the same Tauri app is much smaller, less than 2 MB. This is quite impressive in my opinion.
- Tauri apps perform way faster. From the same page mentioned above, you can also see that the memory usage of Tauri apps might be nearly half that of an equivalent Electron app.
- Tauri apps are highly secure. On the Tauri website, you can read about all the built-in security features Tauri provides by default. But one notable feature I want to mention here is that developers can explicitly enable or disable certain APIs. This not only keeps your app safer, but also reduces the binary size.
Building a Note-taking App
In this section, we’ll build a simple note-taking app with the following features:
- add and delete notes
- rename a note’s title
- edit a note’s content in Markdown
- preview a note’s content in HTML
- save notes in local storage
- import and export notes to the system hard drive
You can find all the project files on GitHub.
Getting started
To get started with Tauri, you first need to install Rust and its system dependencies. They are different depending on a user’s operating system, so I’m not going to explore them here. Please follow the instructions for your OS in the documentation.
When you’re ready, in a directory of your choice, run the following command:
npm create tauri-appThis will guide you trough the installation process as shown below:
$ npm create tauri-app

We hope to help you create something special with Tauri!
You will have a choice of one of the UI frameworks supported by the greater web tech community.
This tool should get you quickly started. See our docs at https://tauri.app/

If you haven't already, please take a moment to setup your system.
You may find the requirements here: https://tauri.app/v1/guides/getting-started/prerequisites

Press any key to continue...
? What is your app name? my-notes
? What should the window title be? My Notes
? What UI recipe would you like to add? create-vite (vanilla, vue, react, svelte, preact, lit) (https://vitejs.dev/guide/#scaffolding-your-first-vite-project)
? Add "@tauri-apps/api" npm package? Yes
? Which vite template would you like to use? react-ts
>> Running initial command(s)
Need to install the following packages:
  create-vite@3.2.1
Ok to proceed? (y) y

>> Installing any additional needed dependencies

added 87 packages, and audited 88 packages in 19s

9 packages are looking for funding
  run `npm fund` for details

found 0 vulnerabilities

added 2 packages, and audited 90 packages in 7s

10 packages are looking for funding
  run `npm fund` for details

found 0 vulnerabilities
>> Updating "package.json"
>> Running "tauri init"

> my-notes@0.0.0 tauri
> tauri init --app-name my-notes --window-title My Notes --dist-dir ../dist --dev-path http://localhost:5173

✔ What is your frontend dev command? · npm run dev
✔ What is your frontend build command? · npm run build
>> Updating "tauri.conf.json"
>> Running final command(s)

    Your installation completed.

    $ cd my-notes
    $ npm run tauri dev
Please make sure that your choices match the ones I did, which are mainly scaffolding a React app with Vite and TypeScript support and installing the Tauri API package.
Don’t run the app yet. First we need to install some additional packages needed for our project. Run the following commands in your terminal:
npm install @mantine/core @mantine/hooks @tabler/icons @emotion/react marked-reactThis will install the following packages:
- Mantine: a fully featured React components library
- Tabler icons: over 3000 pixel-perfect icons for web design
- Emotion for React: for simple styling in React
- marked-react: for rendering Markdown as React components using Marked
Now we’re ready to test the app, but before that, let’s see how the project is structured:
my-notes/
├─ node_modules/
├─ public/
├─ src/
│   ├─ assets/
│   │   └─ react.svg
│   ├─ App.css
│   ├─ App.tsx
│   ├─ index.css
│   ├─ main.tsx
│   └─ vite-env.d.ts
├─ src-tauri/
│   ├─ icons/
│   ├─ src/
│   ├─ .gitignore
│   ├─ build.rs
│   ├─ Cargo.toml
│   └─ tauri.config.json
├─ .gitignore
├─ index.html
├─ package-lock.json
├─ package.json
├─ tsconfig.json
├─ tsconfig.node.json
└─ vite.config.ts
The most important thing here is that the React part of the app is stored in the src directory and Rust and other Tauri-specific files are stored in src-tauri. The only file we need to touch in the Tauri directory is tauri.conf.json, where we can configure the app. Open this file and find the allowlist key. Replace its content with the following:
"allowlist": {
  "dialog": {
    "save": true,
    "open": true,
    "ask": true
  },
  "fs": {
    "writeFile": true,
    "readFile": true,
    "scope": ["$DOCUMENT/*", "$DESKTOP/*"]
  },
  "path": {
    "all": true
  },
  "notification": {
    "all": true
  }
},
Here, for security reasons, as I mentioned above, we enable only the APIs we’re going to use in our app. We also restrict the access to the file system with only two exceptions — the Documents and Desktop directories. This will allow users to export their notes just to these directories.
We need to change one more thing before closing the file. Find the bundle key. Under that key, you’ll find the identifier key. Change its value to com.mynotes.dev. This is needed on app build because the identifier must be unique.
The last thing I want to mention is that, in the last windows key, you can set up all window related settings:
"windows": [
  {
    "fullscreen": false,
    "height": 600,
    "resizable": true,
    "title": "My Notes",
    "width": 800
  }
]
As you can see, the title key was set up for you according to the value you gave it during the installation.
OK, so let’s finally start the app. In the my-notes directory, run the following command:
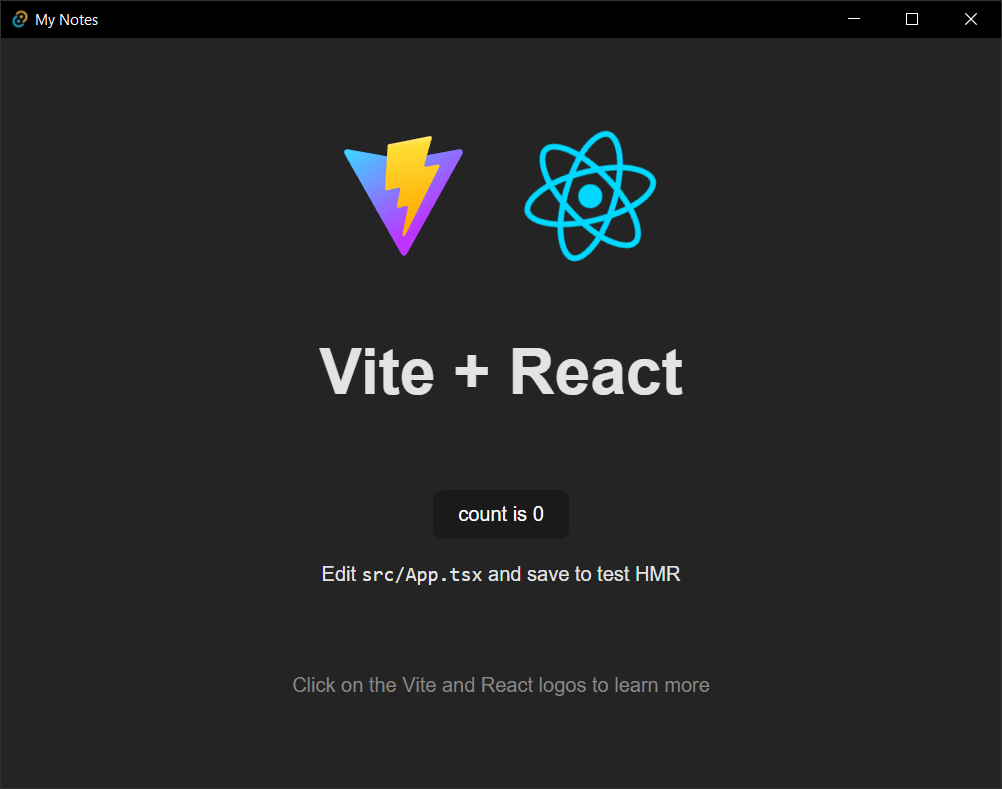
npm run tauri dev You’ll need to wait for a while until the Tauri setup is complete and all files have been compiled for the first time. Don’t worry. In the subsequent builds the process will be much faster. When Tauri is ready, it will open the app window automatically. The image below shows what you should see.
Note: after the app is run in development mode or it’s built, a new target directory is created inside src-tauri, which contains all the compiled files. In dev mode, they’re placed in the debug subdirectory, and in build mode they’re placed in the release subdirectory.
OK, let’s now adapt files to our needs. First, delete the index.css and App.css files. Then open the main.tsx file and replace its contents with the following:
import React from 'react'
import ReactDOM from 'react-dom/client'
import { MantineProvider } from '@mantine/core'
import App from './App'

ReactDOM.createRoot(document.getElementById('root') as HTMLElement).render(
  <React.StrictMode>
    <MantineProvider withGlobalStyles withNormalizeCSS>
      <App />
    </MantineProvider>
  </React.StrictMode>
)
This sets up Mantine’s components for use.
Next, open the App.tsx file and replace its content with the following:
import { useState } from 'react'
import { Button } from '@mantine/core'

function App() {
  const [count, setCount] = useState(0)

  return (
    <div>
      <Button onClick={() => setCount((count) => count + 1)}>count is {count}</Button>
    </div>
  )
}

export default App
Now, if you take a look in the app window you should see the following:
Make sure that the app is running properly by clicking the button. If something’s wrong, you might need to debug it. (See the following note.)
Note: when the app is running in development mode, you can open the DevTools by right-clicking on the app window and selecting Inspect from the menu.
Creating the base app functionality
Now let’s create the skeleton of our app. Replace the contents of the App.tsx file with the following:
import { useState } from 'react'
import Markdown from 'marked-react'

import { ThemeIcon, Button, CloseButton, Switch, NavLink, Flex, Grid, Divider, Paper, Text, TextInput, Textarea } from '@mantine/core'
import { useLocalStorage } from '@mantine/hooks'
import { IconNotebook, IconFilePlus, IconFileArrowLeft, IconFileArrowRight } from '@tabler/icons'

import { save, open, ask } from '@tauri-apps/api/dialog'
import { writeTextFile, readTextFile } from '@tauri-apps/api/fs'
import { sendNotification } from '@tauri-apps/api/notification'

function App() {
  const [notes, setNotes] = useLocalStorage({ key: "my-notes", defaultValue: [  {
    "title": "New note",
    "content": ""
  }] })

  const [active, setActive] = useState(0)
  const [title, setTitle] = useState("")
  const [content, setContent] = useState("")
  const [checked, setChecked] = useState(false)

  const handleSelection = (title: string, content: string, index: number) => {
    setTitle(title)
    setContent(content)
    setActive(index)
  }

  const addNote = () => {
    notes.splice(0, 0, {title: "New note", content: ""})
    handleSelection("New note", "", 0)
    setNotes([...notes])
  }

  const deleteNote = async (index: number) => {
    let deleteNote = await ask("Are you sure you want to delete this note?", {
      title: "My Notes",
      type: "warning",
    })
    if (deleteNote) {
      notes.splice(index,1)
      if (active >= index) {
        setActive(active >= 1 ? active - 1 : 0)
      }
      if (notes.length >= 1) {
        setContent(notes[index-1].content)
      } else {
        setTitle("")
        setContent("")
      }
      setNotes([...notes])
    }
  }

  return (
    <div>
      <Grid grow m={10}>
        <Grid.Col span="auto">
          <Flex gap="xl" justify="flex-start" align="center" wrap="wrap">
            <Flex>
              <ThemeIcon size="lg" variant="gradient" gradient={{ from: "teal", to: "lime", deg: 90 }}>
                <IconNotebook size={32} />
              </ThemeIcon>
              <Text color="green" fz="xl" fw={500} ml={5}>My Notes</Text>
            </Flex>
            <Button onClick={addNote} leftIcon={<IconFilePlus />}>Add note</Button>
            <Button.Group>
              <Button variant="light" leftIcon={<IconFileArrowLeft />}>Import</Button>
              <Button variant="light" leftIcon={<IconFileArrowRight />}>Export</Button>
            </Button.Group>
          </Flex>

          <Divider my="sm" />

          {notes.map((note, index) => (
            <Flex key={index}>
              <NavLink onClick={() => handleSelection(note.title, note.content, index)} active={index === active} label={note.title} />
              <CloseButton onClick={() => deleteNote(index)} title="Delete note" size="xl" iconSize={20} />
            </Flex>
          ))}
        </Grid.Col>
        <Grid.Col span={2}>
          <Switch label="Toggle Editor / Markdown Preview"  checked={checked} onChange={(event) => setChecked(event.currentTarget.checked)}/>

          <Divider my="sm" />

          {checked === false && (
            <div>
              <TextInput mb={5} />
              <Textarea minRows={10} />
            </div>
          )}
          {checked && (
            <Paper shadow="lg" p={10}>
              <Text fz="xl" fw={500} tt="capitalize">{title}</Text>

              <Divider my="sm" />

              <Markdown>{content}</Markdown>
            </Paper>
          )}
        </Grid.Col>
      </Grid>
    </div>
  )
}

export default App
There’s a lot of code here, so let’s explore it bit by bit.
Importing the necessary packages
In the beginning, we import all the necessary packages as follows:
- Markdown parser
- Mantine components
- a Mantine hook
- icons
- Tauri APIs
import { useState } from 'react'
import Markdown from 'marked-react'

import { ThemeIcon, Button, CloseButton, Switch, NavLink, Flex, Grid, Divider, Paper, Text, TextInput, Textarea } from '@mantine/core'
import { useLocalStorage } from '@mantine/hooks'
import { IconNotebook, IconFilePlus, IconFileArrowLeft, IconFileArrowRight } from '@tabler/icons'

import { save, open, ask } from '@tauri-apps/api/dialog'
import { writeTextFile, readTextFile } from '@tauri-apps/api/fs'
import { sendNotification } from '@tauri-apps/api/notification'
Setting up app storage and variables
In the next part, we use the useLocalStorage hook to set up the storage for the notes.
We also set a couple of variables for the current note’s title and content, and two more for determining which note is selected (active) and whether Markdown preview is enabled (checked).
Lastly, we create a utility function to handle the selection of a note. When a note is selected, it will update the current note’s properties accordingly:
const [notes, setNotes] = useLocalStorage({ key: "my-notes", defaultValue: [  {
  "title": "New note",
  "content": ""
}] })

const [active, setActive] = useState(0)
const [title, setTitle] = useState("")
const [content, setContent] = useState("")
const [checked, setChecked] = useState(false)

const handleSelection = (title: string, content: string, index: number) => {
  setTitle(title)
  setContent(content)
  setActive(index)
}
Adding add/delete note functionality
The next two functions are for adding/deleting a note.
addNote() inserts a new note object in the notes array. It uses handleSelection() to select the new note automatically after adding it. And finally it updates the notes. The reason we use the spread operator here is because otherwise the state won’t be updated. This way, we force the state to update and the component to rerender, so the notes will be displayed properly:
const addNote = () => {
  notes.splice(0, 0, {title: "New note", content: ""})
  handleSelection("New note", "", 0)
  setNotes([...notes])
}

const deleteNote = async (index: number) => {
  let deleteNote = await ask("Are you sure you want to delete this note?", {
    title: "My Notes",
    type: "warning",
  })
  if (deleteNote) {
    notes.splice(index,1)
    if (active >= index) {
      setActive(active >= 1 ? active - 1 : 0)
    }
    if (notes.length >= 1) {
      setContent(notes[index-1].content)
    } else {
      setTitle("")
      setContent("")
    }
    setNotes([...notes])
  }
}
deleteNote() uses the ask dialog to confirm that the user wants to delete the note and hasn’t clicked the delete button accidentally. If the user confirms deletion (deleteNote = true) then the if statement is executed:
- the note is removed from the
notesarray - the
activevariable is updated - the current note’s title and content are updated
- the
notesarray is updated
Creating the JSX template
In the template section, we have two columns.
In the first column, we create the app logo and name, and buttons for adding, importing and exporting notes. We also loop trough the notes array to render the notes. Here we use handleSelection() again to update the current note’s properties properly when a note title link is clicked:
<Grid.Col span="auto">
  <Flex gap="xl" justify="flex-start" align="center" wrap="wrap">
    <Flex>
      <ThemeIcon size="lg" variant="gradient" gradient={{ from: "teal", to: "lime", deg: 90 }}>
        <IconNotebook size={32} />
      </ThemeIcon>
      <Text color="green" fz="xl" fw={500} ml={5}>My Notes</Text>
    </Flex>
    <Button onClick={addNote} leftIcon={<IconFilePlus />}>Add note</Button>
    <Button.Group>
      <Button variant="light" leftIcon={<IconFileArrowLeft />}>Import</Button>
      <Button variant="light" leftIcon={<IconFileArrowRight />}>Export</Button>
    </Button.Group>
  </Flex>

  <Divider my="sm" />

  {notes.map((note, index) => (
    <Flex key={index}>
      <NavLink onClick={() => handleSelection(note.title, note.content, index)} active={index === active} label={note.title} />
      <CloseButton onClick={() => deleteNote(index)} title="Delete note" size="xl" iconSize={20} />
    </Flex>
  ))}
</Grid.Col>
In the second column, we add a toggle button to switch between note editing and previewing modes. In edit mode, there’s a text input for the current note’s title and a textarea for the current note’s content. In preview mode, the title is rendered by Mantine’s Text component, and the content is rendered by the marked-react’s Markdown component:
<Grid.Col span={2}>
  <Switch label="Toggle Editor / Markdown Preview"  checked={checked} onChange={(event) => setChecked(event.currentTarget.checked)}/>

  <Divider my="sm" />

  {checked === false && (
    <div>
      <TextInput mb={5} />
      <Textarea minRows={10} />
    </div>
  )}
  {checked && (
    <Paper shadow="lg" p={10}>
      <Text fz="xl" fw={500} tt="capitalize">{title}</Text>

      <Divider my="sm" />

      <Markdown>{content}</Markdown>
    </Paper>
  )}
</Grid.Col>
Phew! That was a lot of code. The image below shows what our app should look at this point.
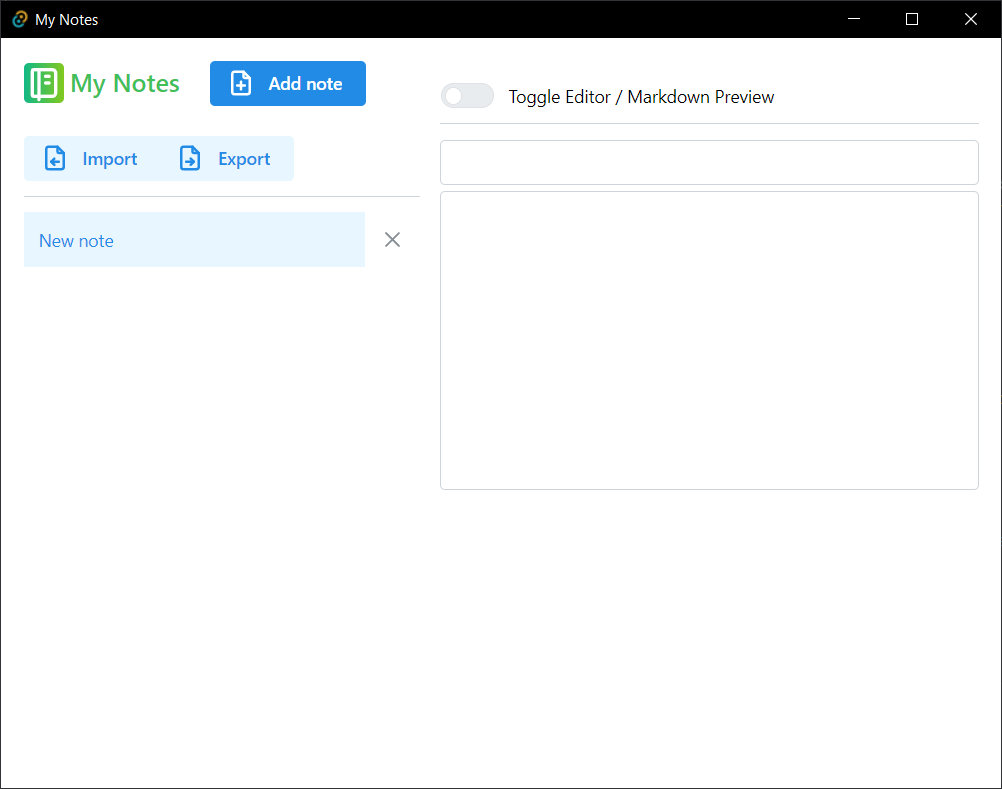
Great! We can add and delete notes now, but there’s no way to edit them. We’ll add this functionality in the next section.
Adding a note’s title and content updating functionality
Add the following code after the deleteNote() function:
const updateNoteTitle = ({ target: { value } }: { target: { value: string } }) => {
  notes.splice(active, 1, { title: value, content: content })
  setTitle(value)
  setNotes([...notes])
}

const updateNoteContent = ({target: { value } }: { target: { value: string } }) => {
  notes.splice(active, 1, { title: title, content: value })
  setContent(value)
  setNotes([...notes])
}
These two functions replace the current note’s title and/or content respectively. To make them work, we need to add them in the template:
<TextInput value={title} onChange={updateNoteTitle} mb={5} />
<Textarea value={content} onChange={updateNoteContent} minRows={10} />
Now, when a note is selected, its title and content will be displayed in the input text and textarea respectively. When we edit a note, its title will be updated accordingly.
I’ve added several notes to demonstrate how the app will look. The app with a selected note and its content is pictured below.
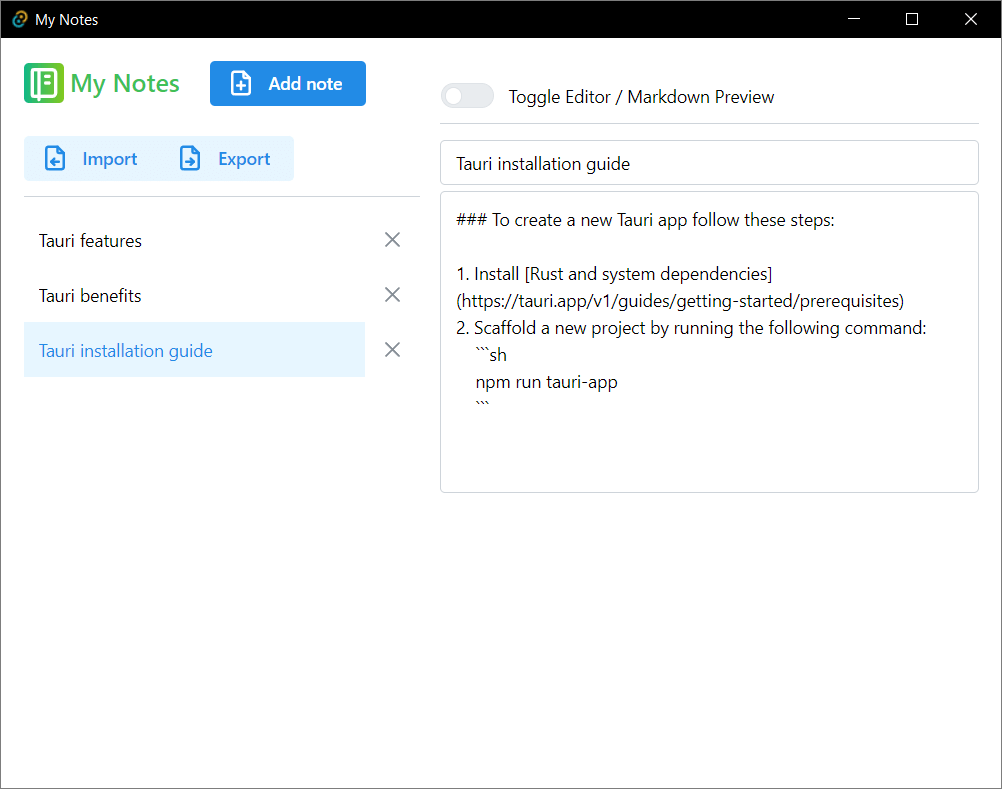
The image below shows the preview of our note.
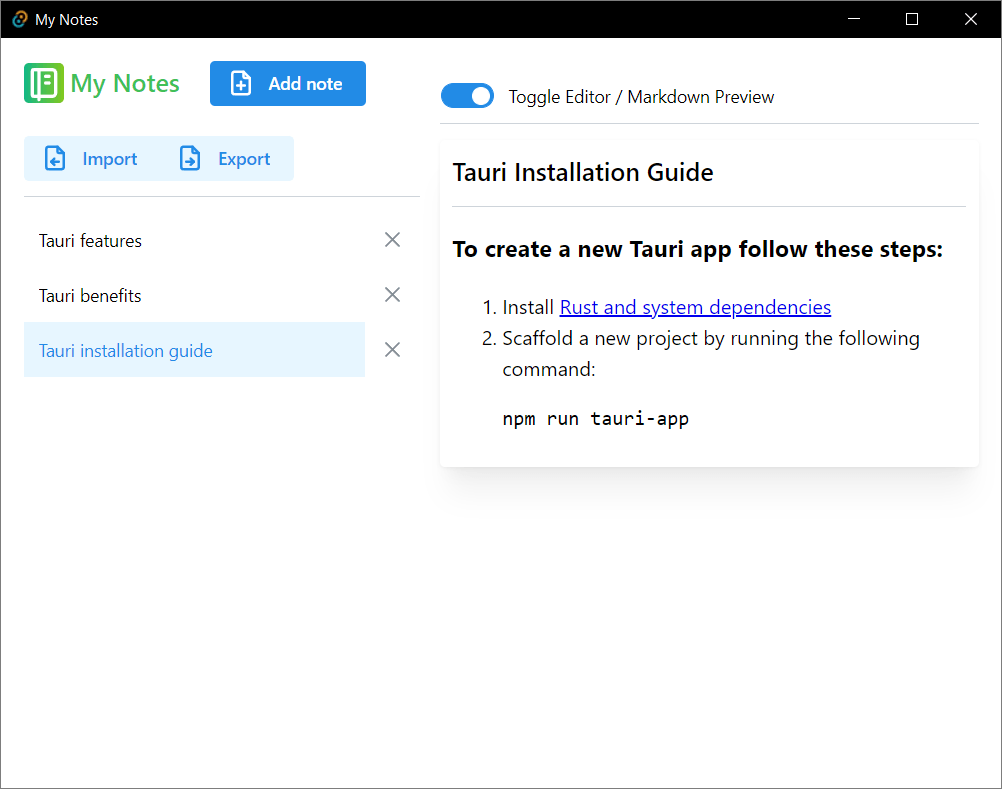
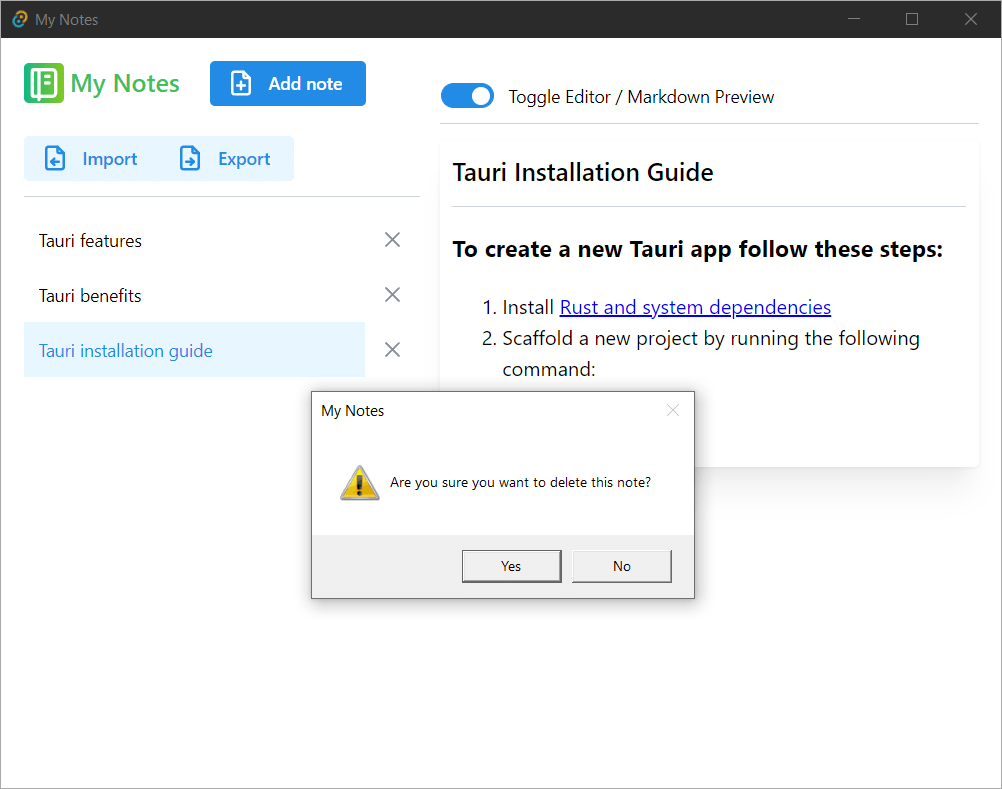
And the next image shows the confirmation dialog that’s shown during note deletion.
Great! The last thing we need to make our app really cool is to add functionality to export and import the user’s notes to the system hard drive.
Adding functionality for importing and exporting notes
Add the following code after the updateNoteContent() function:
const exportNotes = async () => {
const exportedNotes = JSON.stringify(notes)
const filePath = await save({
filters: [{
name: "JSON",
extensions: ["json"]
}]
})
await writeTextFile(`${filePath}`, exportedNotes)
sendNotification(`Your notes have been successfully saved in ${filePath} file.`)
}
const importNotes = async () => {
const selectedFile = await open({
filters: [{
name: "JSON",
extensions: ["json"]
}]
})
const fileContent = await readTextFile(`${selectedFile}`)
const importedNotes = JSON.parse(fileContent)
setNotes(importedNotes)
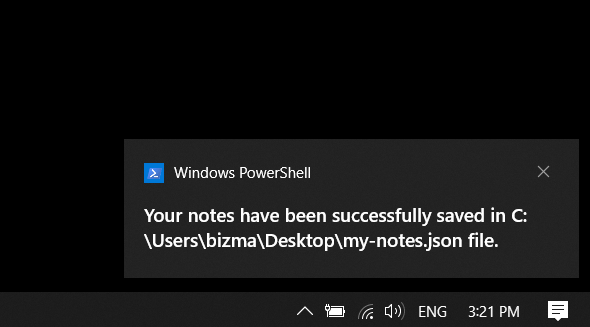
}In the first function, we convert notes to JSON. Then we use the save dialog to save the notes. Next, we use the writeTextFile() function to write the file physically on the disk. Finally, we use the sendNotification() function to inform the user that the notes have been saved successfully and also where they were saved.
In the second function, we use the open dialog to select a JSON file, containing notes, from the disk. Then the file is read with the readTextFile() function, its JSON content is converted to an object, and finally the notes storage is updated with the new content.
The last thing we need to do is change the template to make use of the above functions:
<Button variant="light" onClick={importNotes} leftIcon={<IconFileArrowLeft />}>Import</Button>
<Button variant="light" onClick={exportNotes} leftIcon={<IconFileArrowRight />}>Export</Button>
Here’s what the final App.tsx file should look like.
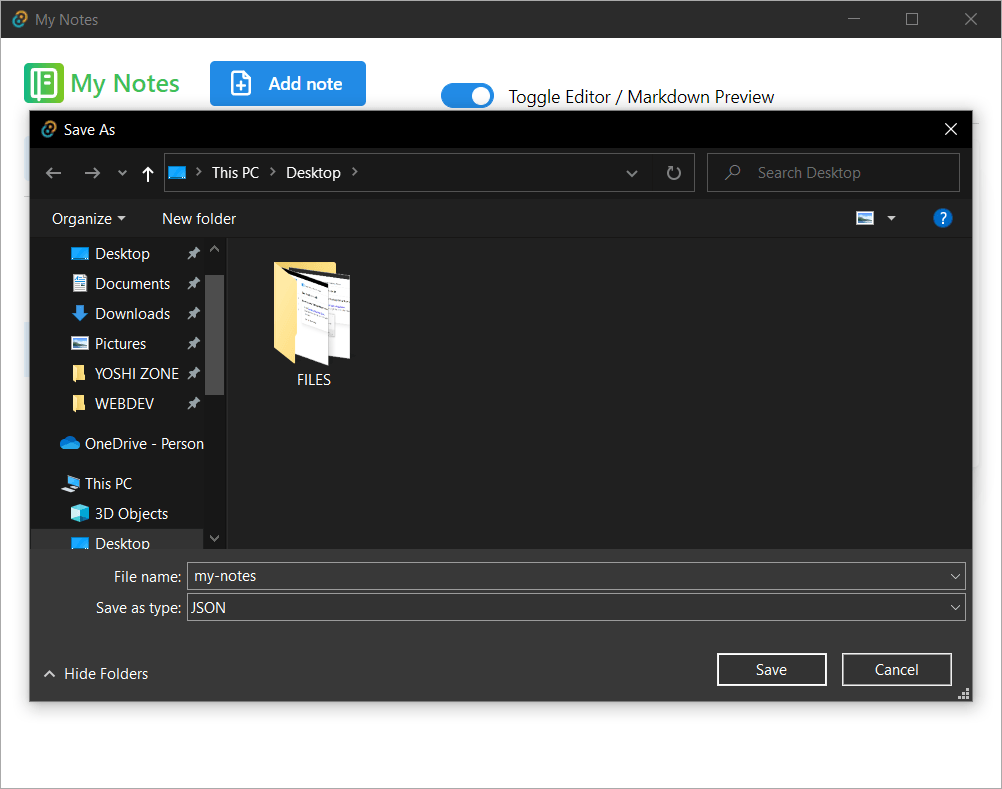
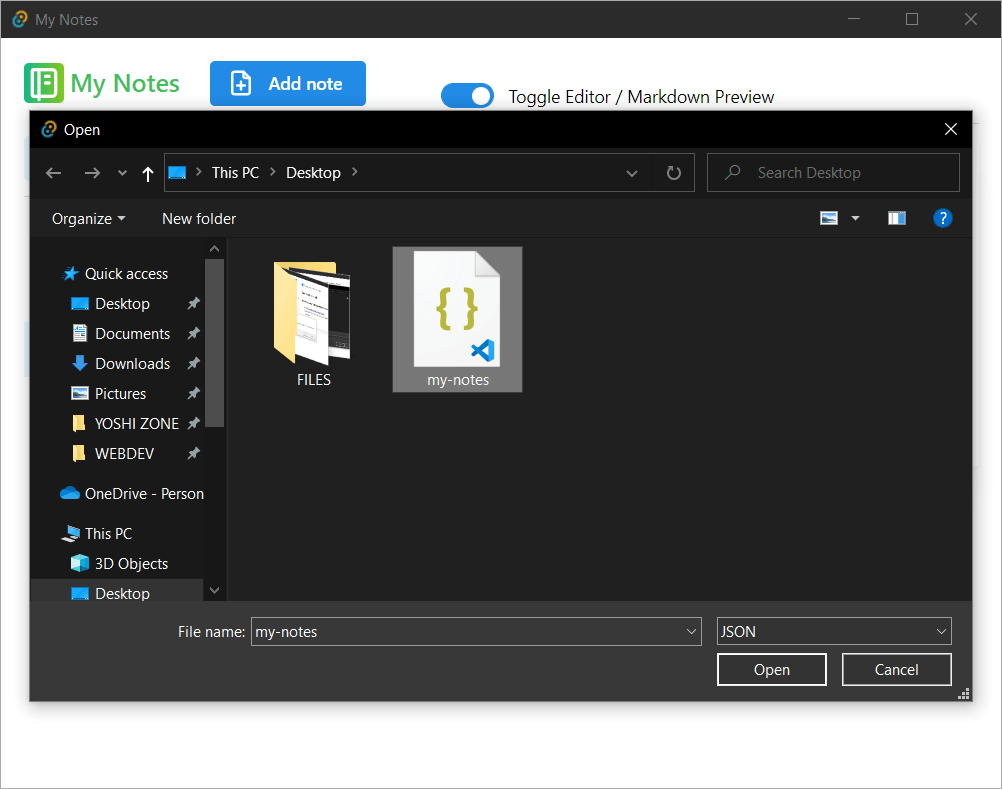
In the next screenshots you can see the Save As and Open dialogs, and the system notification appearing as notes are saved.
Congrats! You’ve just built a fully functional note-taking desktop app with the power of Tauri.
Build the app
Now, if everything works fine and you’re happy with the end result, you can build the app and get an installation package for your operating system. To do so, run the following command:
npm run tauri buildConclusion
In this tutorial, we explored what Tauri is, why it’s better choice for building native desktop apps compared to Electron, and finally how to build a simple but fully functional Tauri app.
I hope you’ve enjoyed this short journey as much as I have. To dive deeper into Tauri world, check out its documentation and keep experimenting with its powerful features.
Related reading:
- Build a Secure Desktop App with Electron Forge and React
- Build a Desktop Application with Electron and Angular
- What’s the Difference between Meteor and Electron?
- Create Cross-Platform Desktop Node Apps with Electron
FAQs About Tauri
Tauri is an open-source framework for building cross-platform desktop applications. It allows developers to create native, lightweight, and secure applications using web technologies like HTML, CSS, and JavaScript.
Tauri and Electron are both used for building desktop applications with web technologies. However, Tauri focuses on being smaller in size and more lightweight, making it suitable for resource-constrained environments.
Tauri primarily uses Rust for the core application logic. However, you can build the frontend of your Tauri app using web technologies like HTML, CSS, and JavaScript.
Tauri supports various platforms, including Windows, macOS, and Linux. It is designed to create cross-platform desktop applications.
Yes, Tauri exposes native APIs, allowing developers to access system resources and features of the host operating system.
 Ivaylo Gerchev
I am a web developer/designer from Bulgaria. My favorite web technologies include SVG, HTML, CSS, Tailwind, JavaScript, Node, Vue, and React. When I'm not programming the Web, I love to program my own reality ;)