How to Install urBackup Server and Client on Debian 11
urBackup is an open-source client/server backup system. It's a multi-platform backup software that is available on Linux, Windows, macOS, and BSD. urBackup supports both file and image backups to achieve both data safety and a fast restoration process.
urBackup also provides a web administration interface, which makes it users easier to set up and configure. It's space efficient because the urBackup will back up the file once. Also, urBackup provides consistent backup while in use, which means backups without any interruption in the background.
In this tutorial, you will install the urBackup server on a Debian 11 and install the urBackup client on the client machine. You'll run the urBackup server with Nginx as a reverse proxy, secured via SSL certificates, and also admin user authentication.
Prerequisites
Before you begin, you must have the following requirements to follow this tutorial:
- One Debian 11 server will be used as the urBackup server - This example uses a Debian server with the hostname 'urbackup-server'.
- Once client machine - This example uses Debian 11 as the client machine, and the hostname is 'client1'.
- A domain name pointed to the Debian server IP address - This example uses the domain urbackup.hwdomain.io for the urBackup server.
Installing UrBackup Server
urBackup - an open-source client/server backup system that is available on multiple operating systems, including Linux, Windows, macOS, and BSD. For Linux distributions, urBackup is available in the .deb package for Ubuntu/Debian-based systems, the .rpm package for RHEL/CentOS/Fedora/Rocky Linux/Alma Linux, and also the Docker image for the containerized environment.
For the Debian system, the urBackup server can be installed via the .deb package that is available on the urBackup download page.
First, run the apt command below to update the package lists on your Debian system.
sudo apt update
Now run the wget command below to download the urBackup server package. At the time of this writing, the latest version of the urBackup server is v2.5.27.
wget https://hndl.urbackup.org/Server/2.5.27/debian/bullseye/urbackup-server_2.5.27_amd64.deb
Now run the wget command below to download the urBackup server package. At the time of this writing, the latest version of the urBackup server is v2.5.27.
Install the urBackup server package via the dpkg command below. You'll then see the error message 'Error were countered while processing: urbackup-server' during the urBackup installation.
sudo dpkg -i urbackup-server_2.5.27_amd64.deb
To fix the urBackup installation, run the following apt command. This will download and install packages required by urBackup and your urBackup installation will be successful.
sudo apt install -f
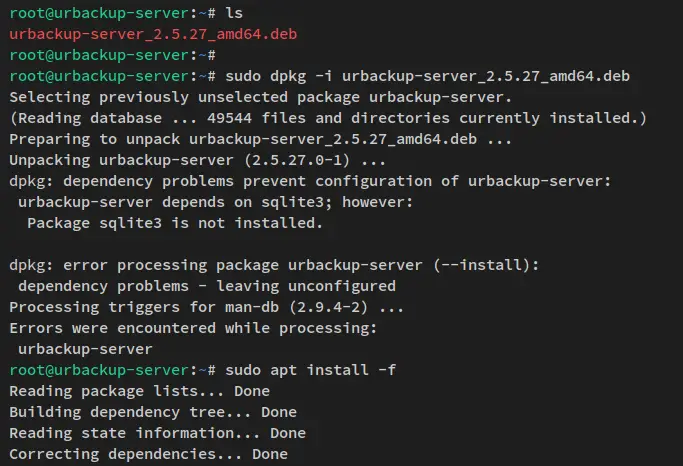
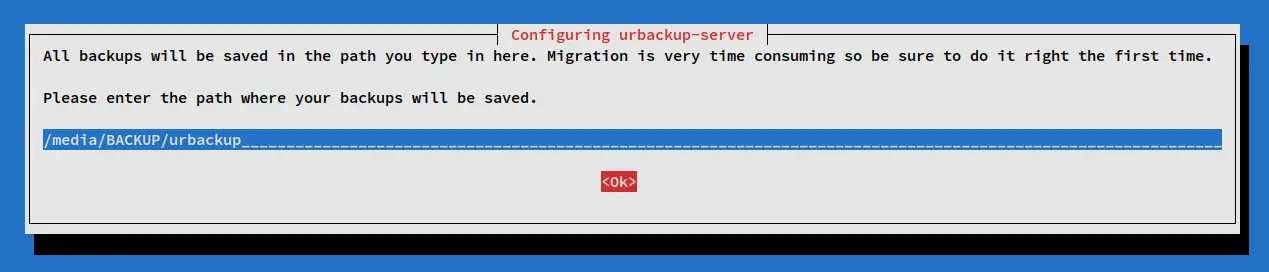
Also, you will be prompted to set up the backup directory for the urBackup. The default backup directory is '/media/BACKUP/urbackup' which will be created automatically during the installation.
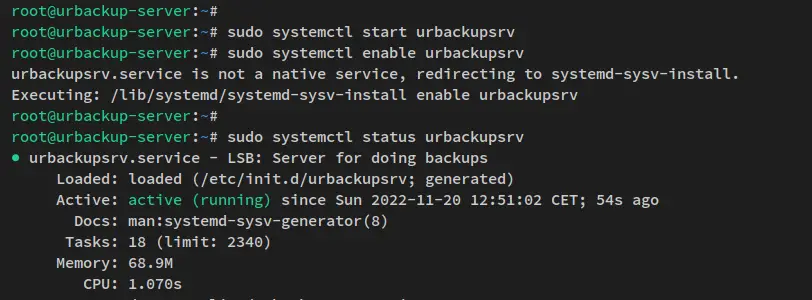
After urBackup is installed, run the following systemctl command to start and enable the urBackup service 'urbackupsrv'. The urBackup service should be run on the default TCP port '55414'.
sudo systemctl start urbackupsrv
sudo systemctl enable urbackupsrv
Lastly, verify the 'urbackupsrv' service to ensure that the service is running.
sudo systemctl status urbackupsrv
You will receive output similar to this - The urBackup service 'urbackupsrv' is running and enabled. The urBackup service will be run automatically upon the bootup.
At this point, you can access your urBackup server. But you'll add the Nginx web server on top of the urBackup server, which allows you easily secure urBackup with an HTTPS connection. Read on to set up Nginx reverse proxy for the urBackup server.
Installing and Configuring Nginx
The urBackup is running on the default TCP port '55414'. You will use the Nginx web server as a reverse proxy on top of your urBackup server. This also allows you to secure urBackup with SSL certificates.
Before start configuring Nginx, ensure that you have the domain name pointed to the urBackup server IP address. Also, be sure that you have generated SSL certificates.
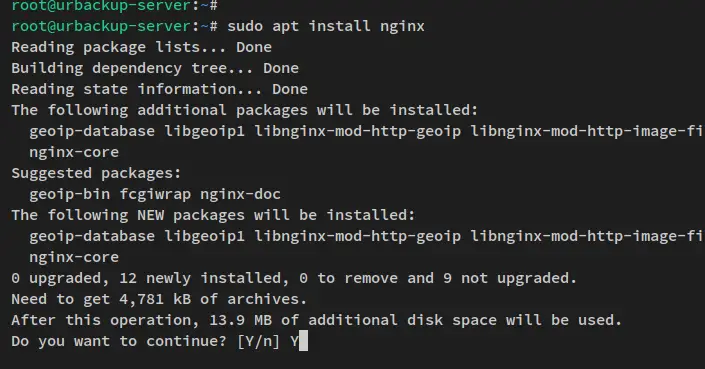
Run the following apt command to install the Nginx web server. This also will automatically start the Nginx web server when the installation is finished.
sudo apt install nginx
When prompted for confirmation, input y, and press ENTER.
After Nginx is installed, create a new server block configuration '/etc/nginx/sites-available/urbackup.conf' using the following nano editor.
sudo nano /etc/nginx/sites-available/urbackup.conf
Add the following configuration to the file and be sure to change the domain name and the path of SSL certificates. This demo uses the domain urbackup.hwdomain.io for the urBackup server and the SSL certificates from Letsencrypt.
server {
    listen       80;
    server_name  urbackup.hwdomain.io;
    rewrite ^ https://$http_host$request_uri? permanent;    # force redirect http to https
}
server {
    listen 443 ssl http2;
    server_name urbackup.hwdomain.io;

    ssl_certificate           /etc/letsencrypt/live/urbackup.hwdomain.io/fullchain.pem;
    ssl_certificate_key       /etc/letsencrypt/live/urbackup.hwdomain.io/privkey.pem;
    ssl_prefer_server_ciphers on;
    ssl_protocols TLSv1.2 TLSv1.3;
    ssl_ciphers ECDHE-ECDSA-AES128-GCM-SHA256:ECDHE-RSA-AES128-GCM-SHA256:ECDHE-ECDSA-AES256-GCM-SHA384:ECDHE-RSA-AES256-GCM-SHA384:ECDHE-ECDSA-CHACHA20-POLY1305:ECDHE-RSA-CHACHA20-POLY1305:DHE-RSA-AES128-GCM-SHA256:DHE-RSA-AES256-GCM-SHA384;

    location   / {
        proxy_set_header        Host $host;
        proxy_set_header        X-Real-IP $remote_addr;
        proxy_set_header        X-Forwarded-For $proxy_add_x_forwarded_for;
        proxy_set_header        X-Forwarded-Proto $scheme;

        # Fix the “It appears that your reverse proxy set up is broken" error.
        proxy_pass          http://localhost:55414;
        proxy_read_timeout  90;

        proxy_redirect      http://localhost:55414 https://urbackup.hwdomain.io;
    }
}
Save the file and exit the editor when you are finished.
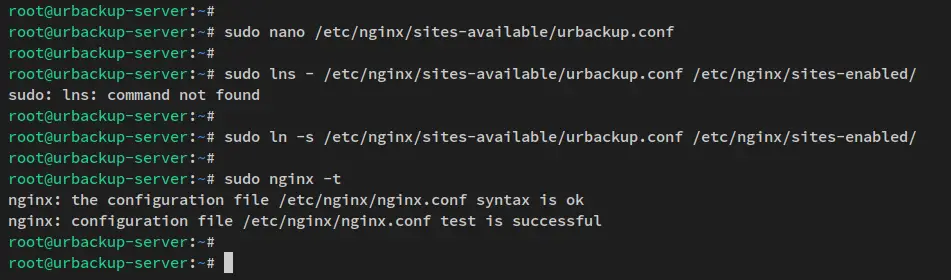
Next, run the below command to activate the new Nginx server block configuration '/etc/nginx/sites-available/urbackup.conf'. Then, verify the Nginx configuration to ensure that you have the proper configuration.
sudo ln -s /etc/nginx/sites-available/urbackup.conf /etc/nginx/sites-enabled/
sudo nginx -t
When you have the proper configuration, you should get the output message such as 'syntax is ok - test is successful'.
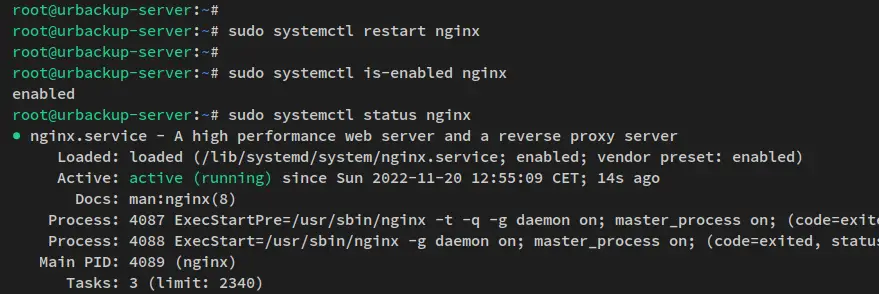
Now run the below systemctl command to restart the Nginx service and apply new changes.
sudo systemctl restart nginx
Lastly, verify the nginx service via the systemctl command below. This will ensure that the Nginx service is running and enabled.
sudo systemctl is-enabled nginx
sudo systemctl status nginx
The following output confirms that the Nginx service is running and enabled. And it will automatically run upon the bootup.
With the urBackup server installed and Nginx configured as a reverse proxy. You'll next start configuring the urBackup server installation via the web browser.
Configuring UrBackup Server Installation
At this point, the urBackup is running with Nginx reverse proxy and secured via HTTPS. In this step, you will configure the urBackup installation, which is the general configuration of the urBackup server and the configuration of the urBackup administrator user.
Open the web browser and visit the urBackup server domain name (i.e: https://urbackup.hwdomain.io/). You'll then see the urBackup administrator dashboard.
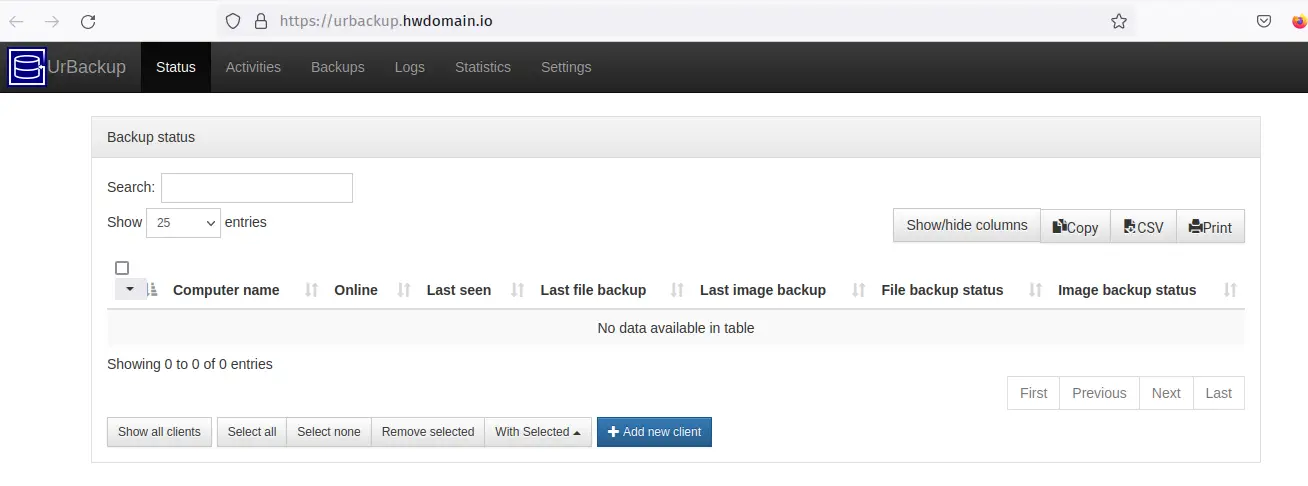
Click on the 'Settings' menu to start configuring urBackup server installation.
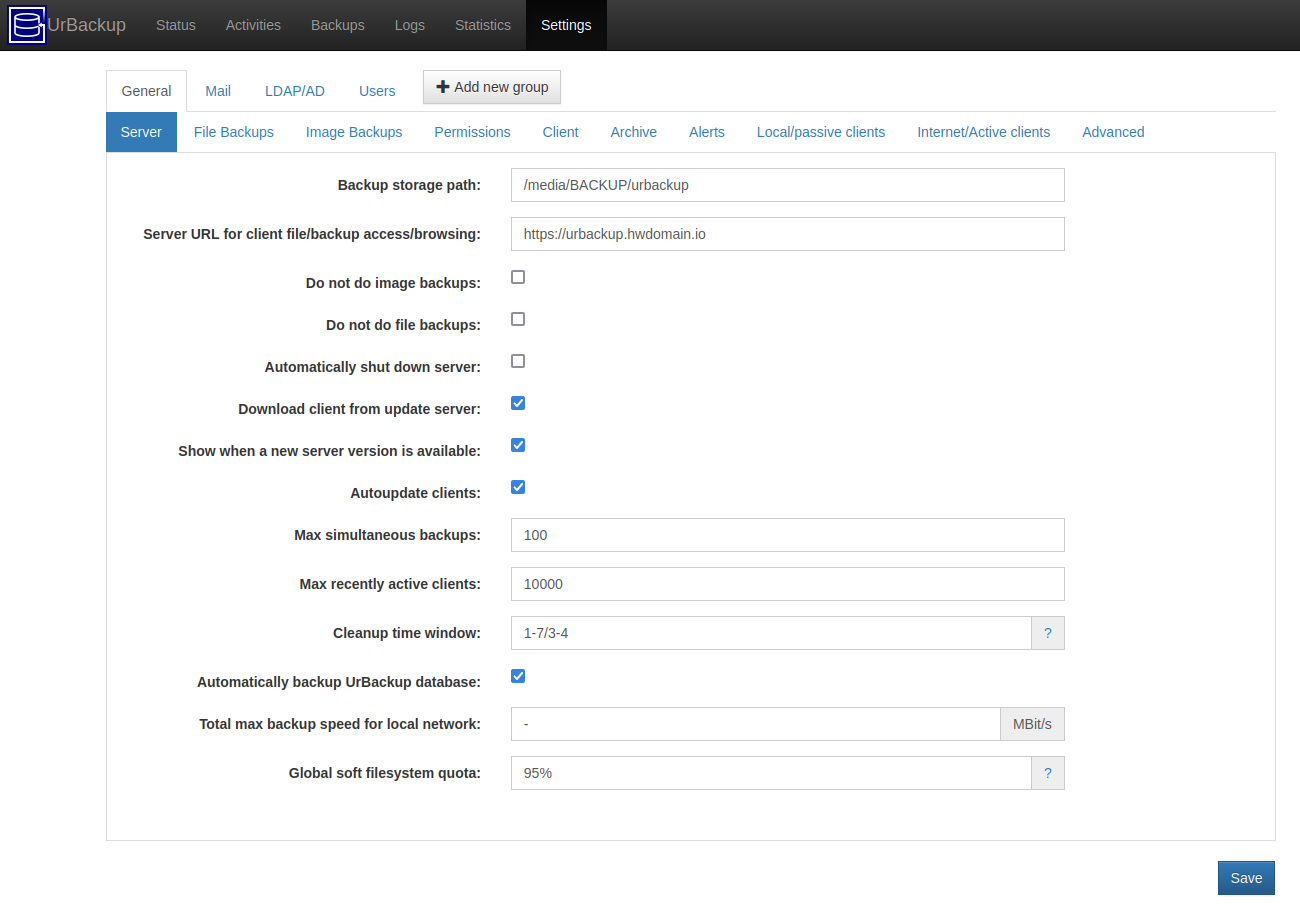
On the 'General > Server' section, input the domain name of your urBackup installation - In this example is 'https://urbackup.hwdomain.io'. Then click 'Save' to confirm.
Still on the 'General' section, but move to the tab 'Internet/Active clients'. Then, input the urBacup domain name to the option 'Connect via HTTP(S) proxy', and click 'Save' again.
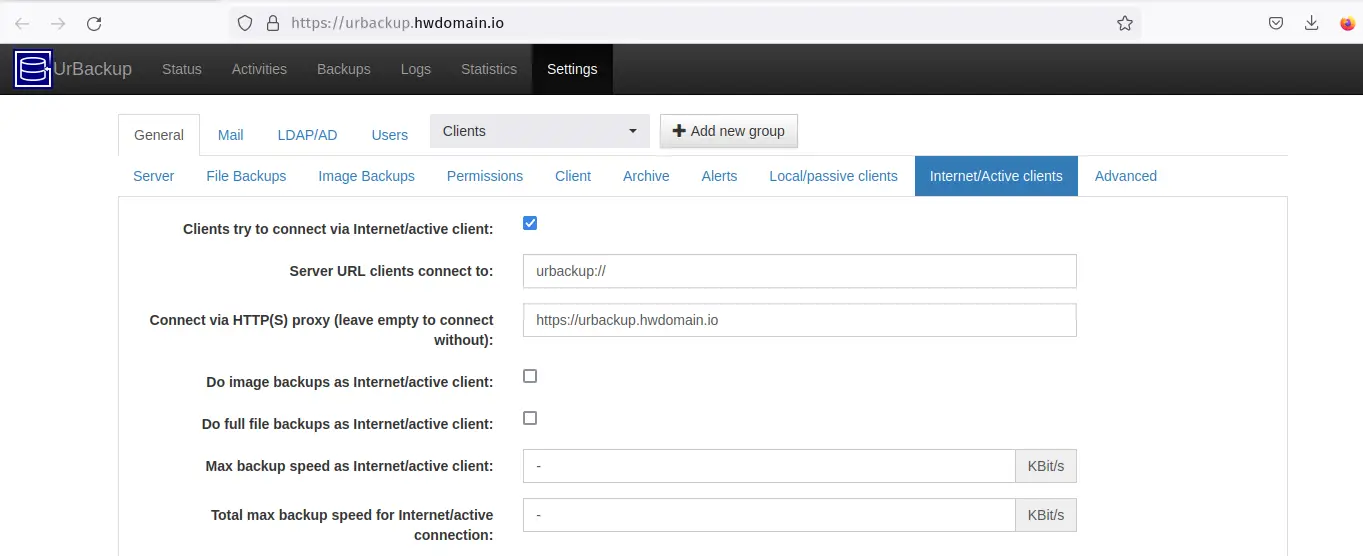
You now have configured the general configuration urBackup server.
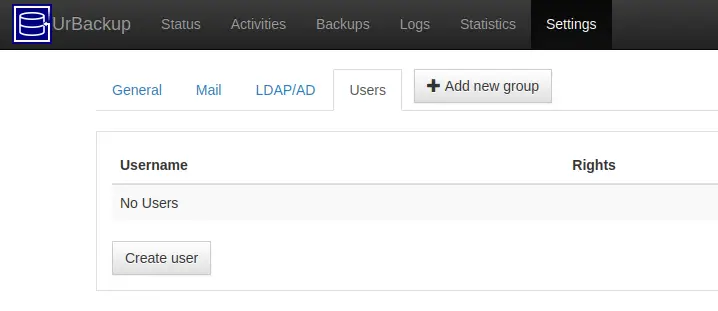
Next, click on the 'Users' setting and click 'Create user'.
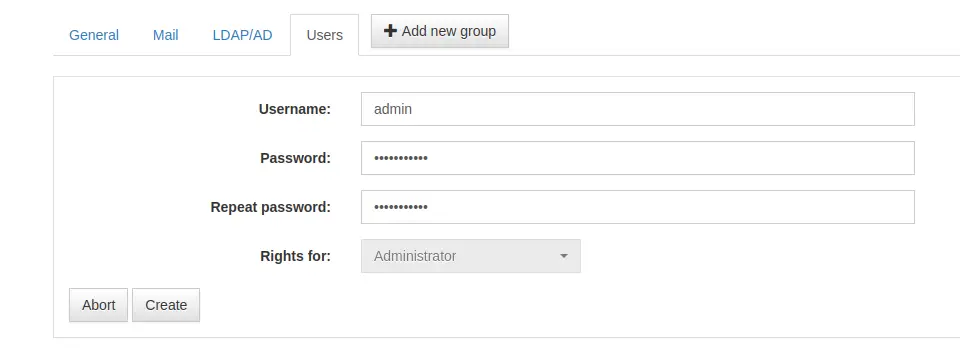
Input the new username and password for the urBackup administrator and click 'Create'.
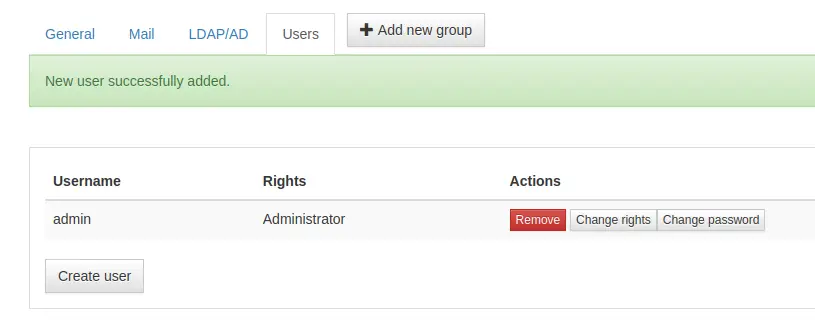
After the user is created, you'll then see the new user on the Users list.
Now, if you reload the urBackup dashboard, you should be prompted for password authentication. Input your password and click 'Login'.
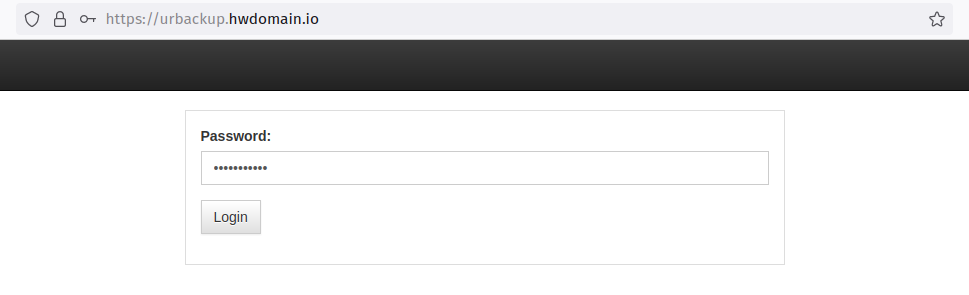
If the password is correct, you'll then see the urBackup administration dashboard.
Now that you have finished the general configuration of urBackup and configured the administrator user, you can now add a client machine and set up the backup directory.
Adding Client Machine to UrBackup Server
urBackup client is available for multiple operating systems, including Windows, Linux, macOS, and BSD. In this example, you will add another Debian machine to the urBackup server.
This example uses the Debian client machine with the hostname 'client1' and the IP address '192.168.5.60'.
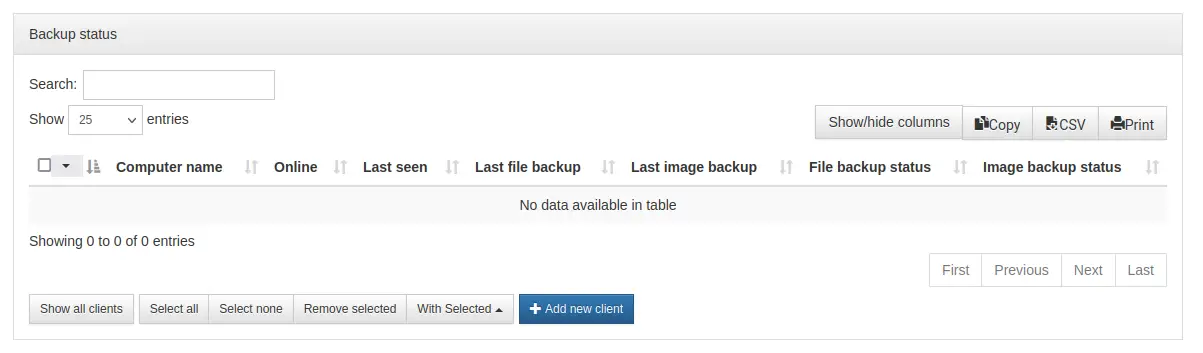
In the urBackup home dashboard, click the 'Add new client' button.
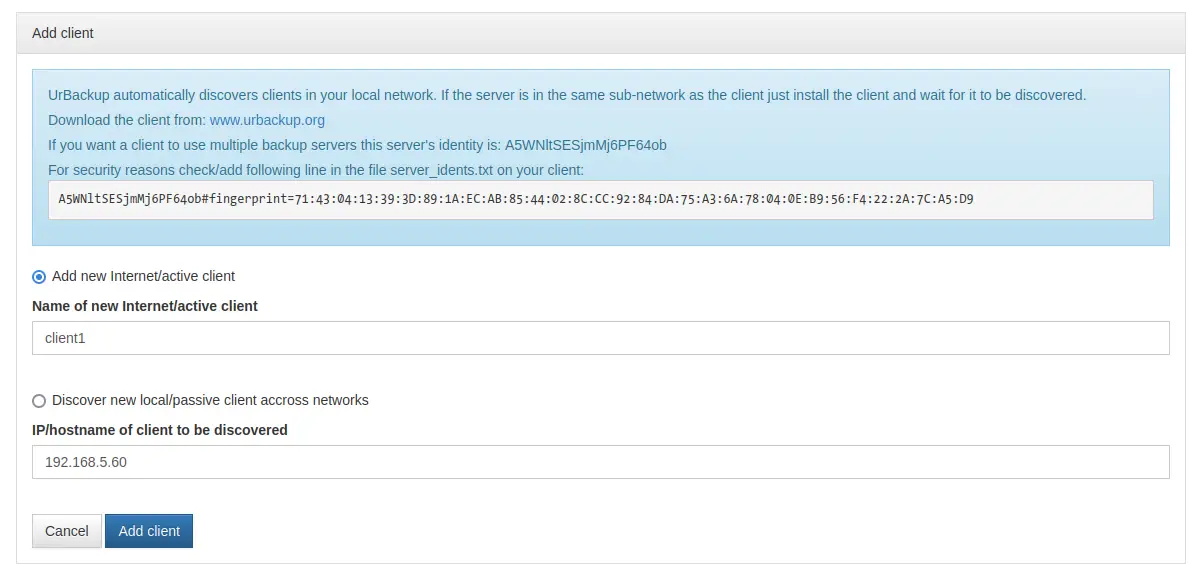
Now select the option of the target client to 'Add new internet/active client' and input the client hostname and IP address. Then, click 'Add client' to confirm.
This example uses the client machine with hostname 'client1' and the IP address '192.168.5.60'.
You'll now get a message such as 'Client added successfully'. Along with it, you will see the page instruction on how to set up the urBackup on the client machine.
There are multiple methods to install and set up the urBackup on the client machine. And because this example uses the Linux client machine, you will then install and set up the urBackup via the terminal.
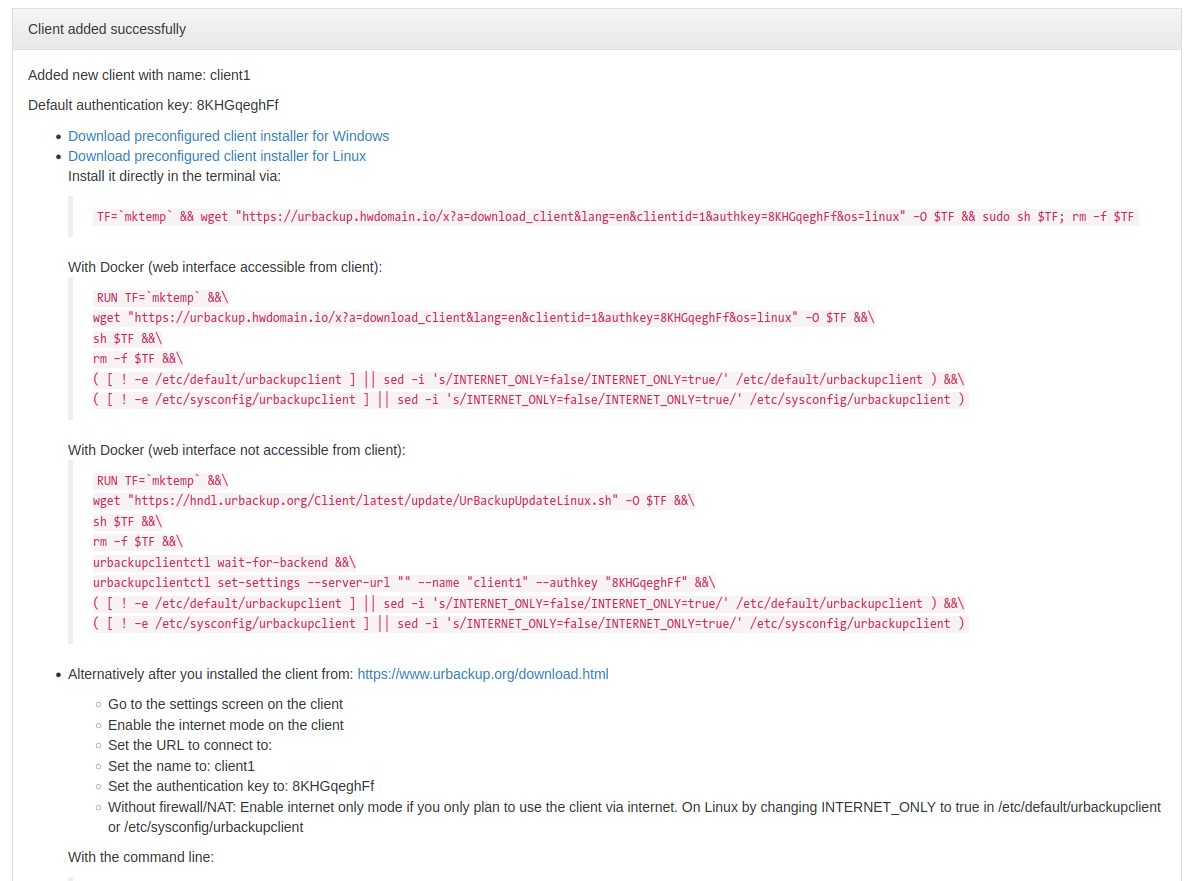
Connect to your client machine and run the bash script that you got from the urBackup instruction page.
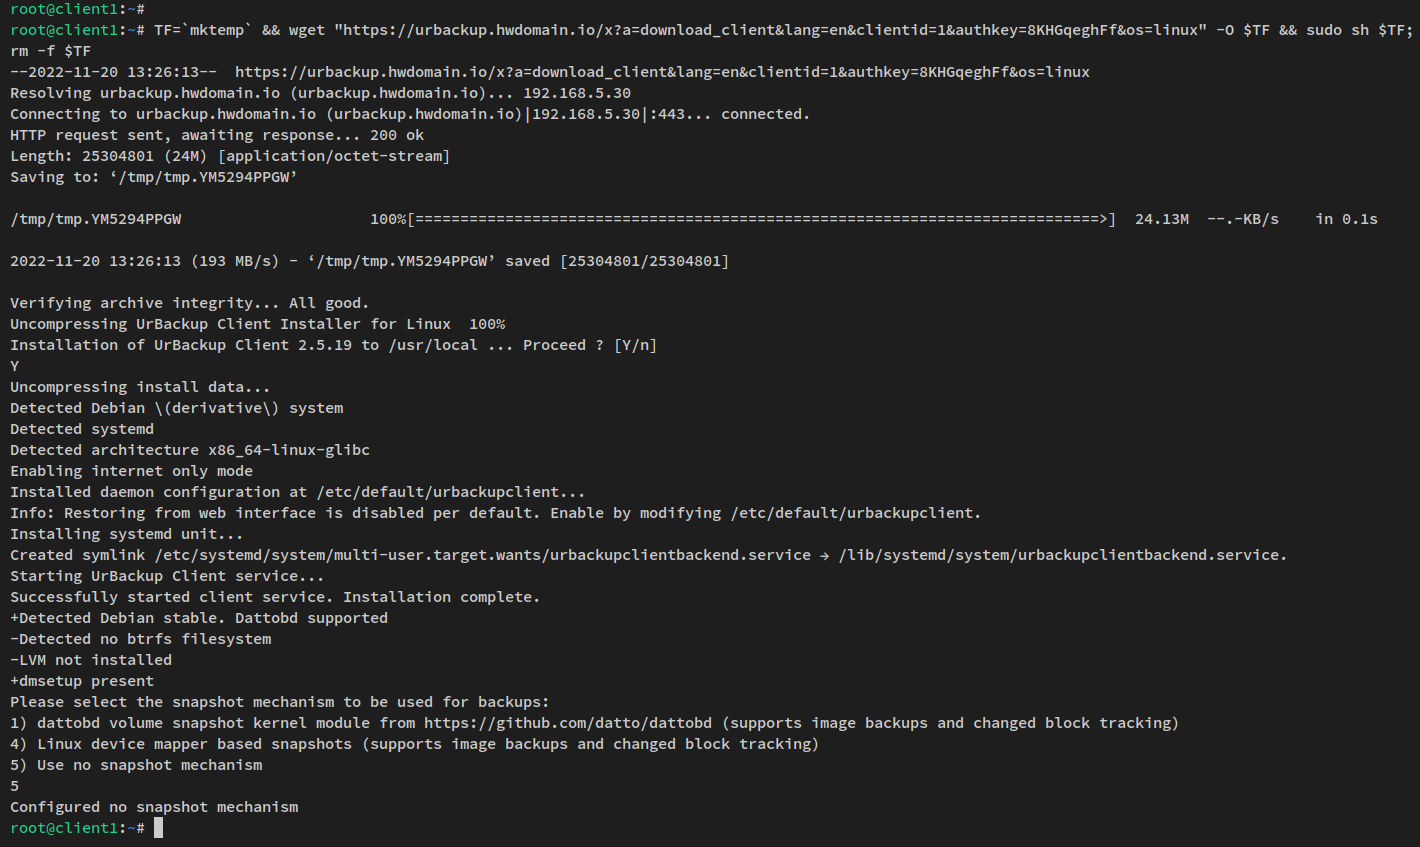
Below is the command generated by the urBackup server.
TF=`mktemp` && wget "https://urbackup.hwdomain.io/x?a=download_client&lang=en&clientid=1&authkey=8KHGqeghFf&os=linux" -O $TF && sudo sh $TF; rm -f $TF
Now input Y to confirm the urbackup client installation. After that, you will be asked for the snapshot configuration. It depends on your environment, if you dint have any snapshot drive, input option number 5 to disable the snapshot.
Below is the complete output when the urBackup client installation is finished.
If you're running the urBackup on the internal network, you will need to change the default configuration of the urBackup client '/etc/default/urbackupclient'.
Open the urBackup client configuration '/etc/default/urbackupclient' using the following nano editor command.
sudo nano /etc/default/urbackupclient
Change the 'INTERNET_ONLY' option to 'false'.
#If true client will not bind to any external network ports (either true or false)
INTERNET_ONLY=false
Save the file and exit the editor when you are finished.
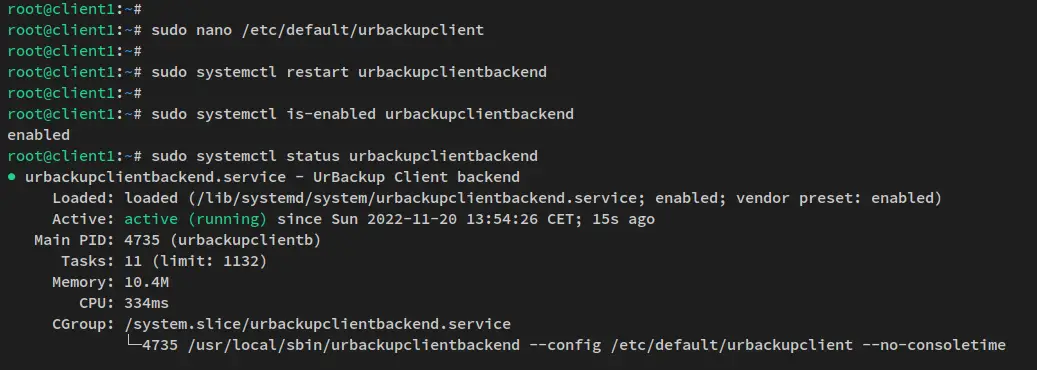
Next, run the following command to restart the urBackup client service 'urbackupclientbackend'. Then, verify the service to ensure that it is running.
sudo systemctl restart urbackupclientbackend
sudo systemctl status urbackupclientbackend
The output below confirms that the urBackup client is running and enabled. The urBackup client will be run automatically upon the bootup.
Lastly, back to the urBackup administration dashboard to verify that the 'client1' are available and added to the urBackup server.
The screenshot below confirms that the 'client1' machine was added to the urBackup server. The details status is 'Online - Yes', 'Status - Ok', and the 'File backup status - Ok'.

Backing up Data to the urBackup Server
Run the following command to the backup directory on the client machine to the urBackup server. In the following example, you will back up the entire '/home' directory to the 'urBackup server.
/usr/local/bin/urbackupclientctl add-backupdir -x -f -d /home
After invoking the command, the urBackup will automatically detect that the new backup directory should be created. Then, the urBackup server will download files from the client machine for backup. All of these processes are running in the background.
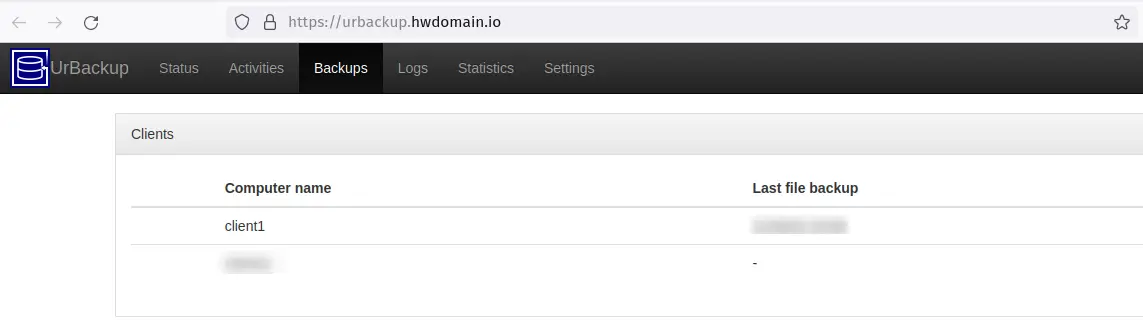
After the backup is finished, back to the urBackup server dashboard and click the 'Backups' menu. You should now see the new backup from the 'client1' machine.
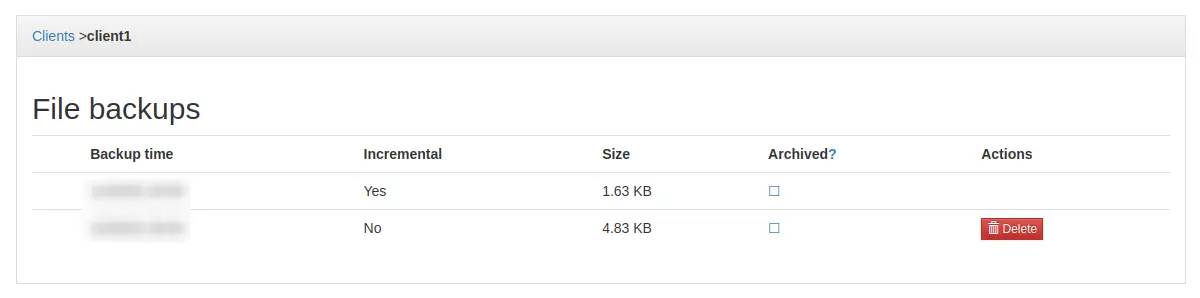
Click on the 'client1' backup and you should get the backup directory with the name such as 'YYMMDD-HHMM'. You also see the total size of the backup and whether the backup is incremental or not.
Now click on the backup directory name 'YYMMDD-HHMM' and you should see files and directories from the 'client1' machine copied to the urBackup server. This means that the backup is successful.

Conclusion
In the tutorial, you installed the urBackup server on Debian 11 server. You also installed the urBackup client on a Debian machine via the installer script generated by the urBackup server. The urBackup server is now running with Nginx as a reverse proxy and secured with SSL certificates and authentication.
In addition to that, you learned how to add the client to the urBackup server and how to backup directories from the client machine to the urBackup server.
Now that you have a fully operational urBackup server, you add more clients, set up automatic backup, add a security layer with a firewall, or set up specific file systems with formats like BTRFS or ZFS to store backup files and images and also enable the snapshot.

