How to Install Apache Hadoop on Ubuntu 22.04
This tutorial exists for these OS versions
- Ubuntu 22.04 (Jammy Jellyfish)
- Ubuntu 20.04 (Focal Fossa)
On this page
Apache Hadoop is an open-source framework for processing and storing big data. In today's industries, Hadoop become the standard framework for big data. Hadoop is designed to be run on distributed systems with hundreds or even thousands of clustered computers or dedicated servers. With this in mind, Hadoop can handle large datasets with high volume and complexity for both structured and unstructured data.
Every Hadoop deployment contains the following components:
- Hadoop Common: The common utilities that support the other Hadoop modules.
- Hadoop Distributed File System (HDFS): A distributed file system that provides high-throughput access to application data.
- Hadoop YARN: A framework for job scheduling and cluster resource management.
- Hadoop MapReduce: A YARN-based system for parallel processing of large data sets.
In this tutorial, we will install the latest version of Apache Hadoop on an Ubuntu 22.04 server. Hadoop gets installed on a single node server and we create a Pseudo-Distributed Mode of Hadoop deployment.
Prerequisites
To complete this guide, you will need the following requirements:
- An Ubuntu 22.04 server - This example uses an Ubuntu server with hostname 'hadoop' server and IP address '192.168.5.100'.
- A non-root user with sudo/root administrator privileges.
Installing Java OpenJDK
Hadoop is a huge project under the Apache Software Foundation, it's mainly written in Java. At the time of this writing, the latest version of hadoop is v3.3,4, which is fully compatible with Java v11.
The Java OpenJDK 11 is available by default on the Ubuntu repository, and you'll install it via APT.
To begin, run the below apt command to update and refresh package lists/repositories on your Ubuntu system.
sudo apt update
Now install the Java OpenJDK 11 via the apt command below. On Ubuntu 22.04 repository, the package 'default-jdk' refers to the Java OpenJDK v11.
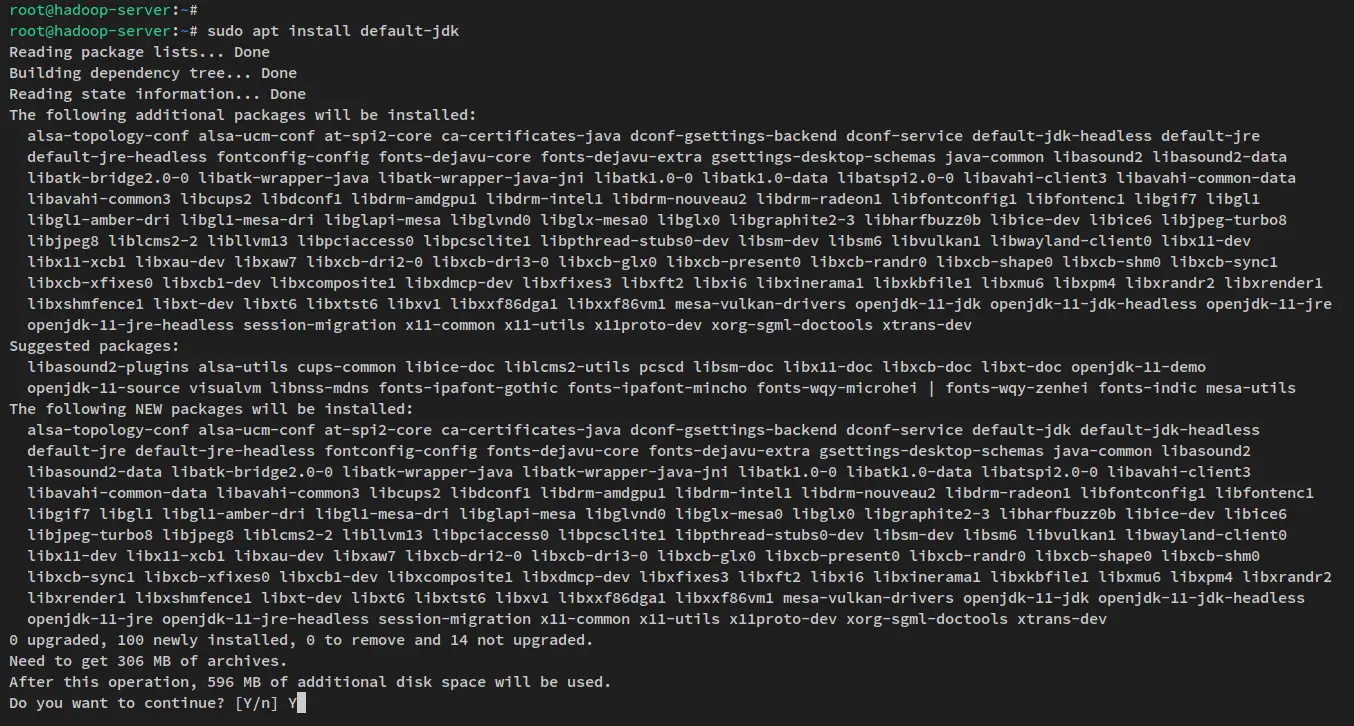
sudo apt install default-jdk
When prompted, input y to confirm and press ENTER to proceed. And the Java OpenJDK installation will begin.
After Java is installed, run the below command to verify the Java version. You should get the Java OpenJDK 11 installed on your Ubuntu system.
java -version

Now that the Java OpebnJDK is installed, you'll then set up a new user with password-less SSH authentication that will be used to run hadoop processes and services.
Setting up user and Password-less SSH Authentication
Apache Hadoop required SSH service to be running on the system. This will be used by hadoop scripts for managing the remote hadoop daemon on the remote server. In this step, you will create a new user that will be used to run hadoop processes and services and then set up the password-less SSH authentication.
In case you don't have SSH installed on your system, run the apt command below to install SSH. The package 'pdsh' is a multithread remote shell client that allows you to execute commands on multiple hosts in parallel mode.
sudo apt install openssh-server openssh-client pdsh
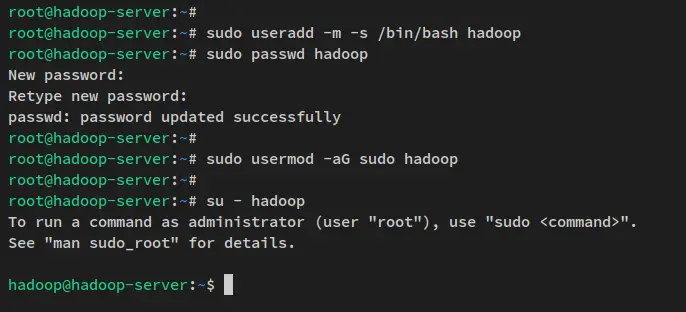
Now run the below command to create a new user 'hadoop' and set up the password for the 'hadoop' user.
sudo useradd -m -s /bin/bash hadoop
sudo passwd hadoop
Input the new password for the 'hadoop' user and repeat the password.
Next, add the 'hadoop' user to the 'sudo' group via the usermod command below. This allows the user 'hadoop' to execute the 'sudo' command.
sudo usermod -aG sudo hadoop
Now that the 'hadoop' user is created, log in to the 'hadoop' user via the below command.
su - hadoop
After logging in, your prompt will become like this: "hadoop@hostname..".
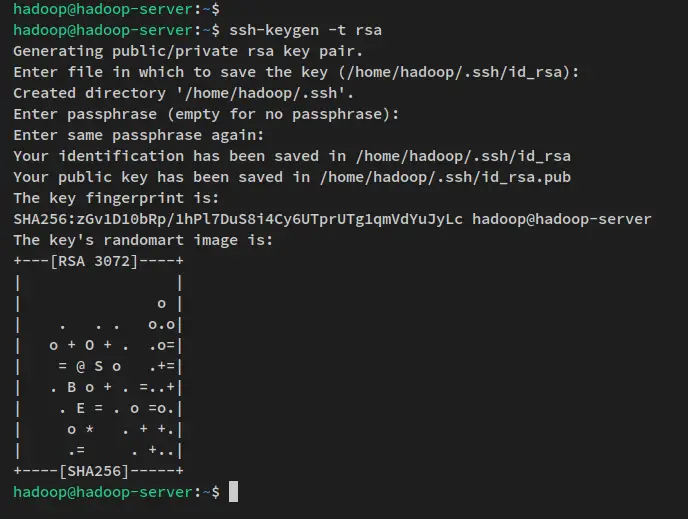
Next, run the below command to generate SSH public and private key. When prompted to set up the password for the key, press ENTER to skip.
ssh-keygen -t rsa
The SSH key is now generated to the ~/.ssh directory. The id_rsa.pub is the SSH public key and the 'id_rsa' file is the private key.
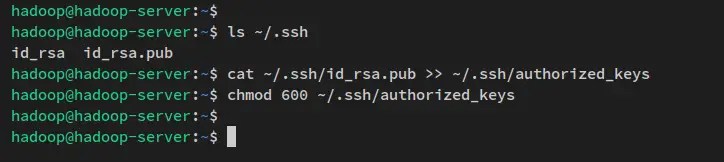
You can verify generated SSH key via the following command.
ls ~/.ssh/
Next, run the below command to copy the SSH public key 'id_rsa.pub' to the 'authorized_keys' file and change the default permission to 600.
In ssh, the 'authorized_keys" file is where you stored the ssh public key, which can be multiple public keys. Anyone with the public key stored in the file 'authorized_keys' and have the right private key will be able to connect to the server as a 'hadoop' user without a password.
cat ~/.ssh/id_rsa.pub >> ~/.ssh/authorized_keys
chmod 600 ~/.ssh/authorized_keys
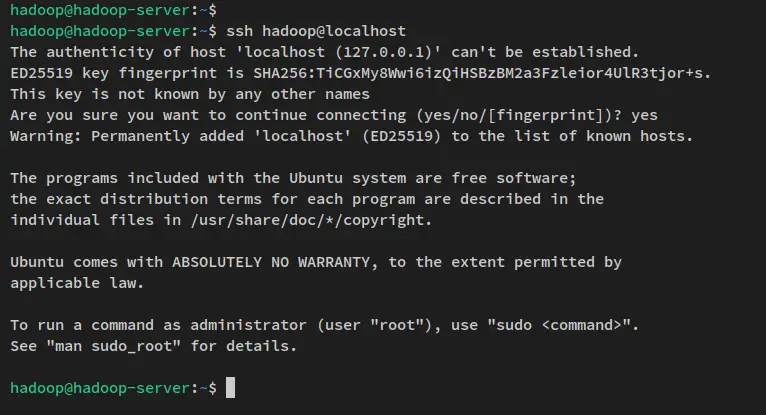
With the SSH password-less configuration finished, you can verify by connecting to the local machine via the ssh command below.
ssh localhost
Input yes to confirm and add the SSH fingerprint and you'll be connected to the server without password authentication.
Now that the 'hadoop' user is created and the password-less SSH authentication configured, you will then go over the hadoop installation by downloading the hadoop binary package.
Downloading Hadoop
After created a new user and configured password-less SSH authentication, you can now download the Apache Hadoop binary package and set up the installation directory for it. In this example, you will download hadoop v3.3.4 and the target installation directory will be the '/usr/local/hadoop' directory.
Run the below wget command to download the Apache Hadoop binary package to the current working directory. You should get the file 'hadoop-3.3.4.tar.gz' in your current working directory.
wget https://dlcdn.apache.org/hadoop/common/hadoop-3.3.4/hadoop-3.3.4.tar.gz
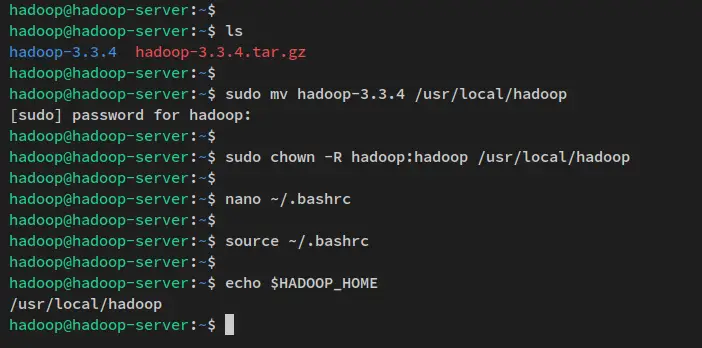
Next, extract the Apache Hadoop package 'hadoop-3.3.4.tar.gz' via the tar command below. Then, move the extracted directory to '/usr/local/hadoop'.
tar -xvzf hadoop-3.3.4.tar.gz
sudo mv hadoop-3.3.4 /usr/local/hadoop
Lastly, change the ownership of the hadoop installation directory '/usr/local/hadoop' to the user 'hadoop' and group 'hadoop'.
sudo chown -R hadoop:hadoop /usr/local/hadoop
In this step, you downloaded the Apache Hadoop binary package and configured the hadoop installation directory. With that in mind, you can now start configuring the hadoop installation.
Setting up Hadoop Environment Variables
Open the configuration file '~/.bashrc' via the nano editor command below.
nano ~/.bashrc
Add the following lines to the file. Be sure to place the following lines at the end of the line.
# Hadoop environment variables
export JAVA_HOME=/usr/lib/jvm/java-11-openjdk-amd64
export HADOOP_HOME=/usr/local/hadoop
export HADOOP_INSTALL=$HADOOP_HOME
export HADOOP_MAPRED_HOME=$HADOOP_HOME
export HADOOP_COMMON_HOME=$HADOOP_HOME
export HADOOP_HDFS_HOME=$HADOOP_HOME
export HADOOP_YARN_HOME=$HADOOP_HOME
export HADOOP_COMMON_LIB_NATIVE_DIR=$HADOOP_HOME/lib/native
export PATH=$PATH:$HADOOP_HOME/sbin:$HADOOP_HOME/bin
export HADOOP_OPTS="-Djava.library.path=$HADOOP_HOME/lib/native"
Save the file and exit the editor when you are finished.
Next, run the below command to apply new changes within the file '~/.bashrc'.
source ~/.bashrc
After the command is executed, the new environment variables will be applied. You can verify by checking each environment variable via the below command. And you should get the output of each environment variable.
echo $JAVA_HOME
echo $HADOOP_HOME
echo $HADOOP_OPTS
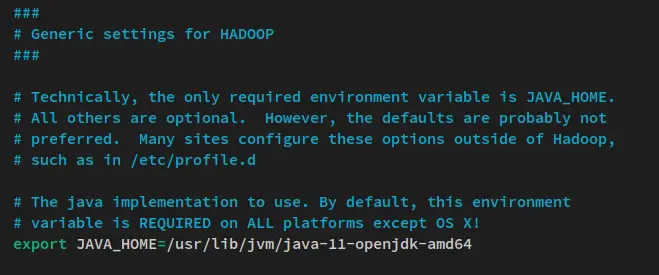
Next, you will also configure the JAVA_HOME environment variable in the 'hadoop-env.sh' script.
Open the file 'hadoop-env.sh' using the following nano editor command. The file 'hadoop-env.sh' is available in the '$HADOOP_HOME' directory, which is referred to the hadoop installation directory '/usr/local/hadoop'.
nano $HADOOP_HOME/etc/hadoop/hadoop-env.sh
Uncomment the JAVA_HOME environment line and change the value to the Java OpenJDK installation directory '/usr/lib/jvm/java-11-openjdk-amd64'.
export JAVA_HOME=/usr/lib/jvm/java-11-openjdk-amd64
Save the file and exit the editor when you are finished.
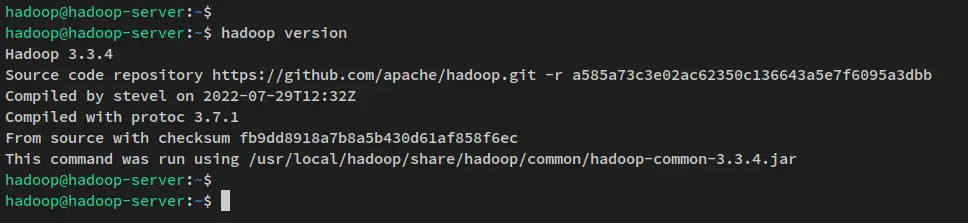
With environment variables configuration, run the below command to verify the hadoop version on your system. You should see Apache Hadoop 3.3.4 installed on your system.
hadoop version
At this point, you're ready to set up and configure the hadoop cluster, which can be deployed in multiple modes.
Setting up Apache Hadoop Cluster: Pseudo-Distributed Mode
In hadoop, you can create a cluster in three different modes:
- Local Mode (Standalone) - default hadoop installation, which is run as a single Java process and non-distributed mode. With this, you can easily debug the hadoop process.
- Pseudo-Distributed Mode - This allows you to run a hadoop cluster with distributed mode even with only a single node/server. In this mode, hadoop processes will be run in separate Java processes.
- Fully-Distributed Mode - large hadoop deployment with multiple or even thousands of nodes/servers. If you want to run hadoop in production, you should use the hadoop in fully-distributed mode.
In this example, you will set up an Apache Hadoop cluster with Pseudo-Distributed mode on a single Ubuntu server. To do that, you will make changes to some of the hadoop configurations:
- core-site.xml - This will be used to define NameNode for the hadoop cluster.
- hdfs-site.xml - This configuration will be sued to define the DataNode on the hadoop cluster.
- mapred-site.xml - The MapReduce configuration for the hadoop cluster.
- yarn-site.xml - ResourceManager and NodeManager configuration for hadoop cluster.
Setting up NameNode and DataNode
First, you will set up the NameNode and DataNode for the hadoop cluster.
Open the file '$HADOOP_HOME/etc/hadoop/core-site.xml' using the following nano editor.
sudo nano $HADOOP_HOME/etc/hadoop/core-site.xml
Add the below lines to the file. Be sure to change the NameNode IP address, or you can replace it with '0.0.0.0' so the NameNode will be run at all interfaces and IP addresses.
<configuration>
    <property>
        <name>fs.defaultFS</name>
        <value>hdfs://192.168.5.100:9000</value>
    </property>
</configuration>
Save the file and exit the editor when you are finished.
Next, run the following command to create new directories that will be used for the DataNode on the hadoop cluster. Then, change the ownership of DataNode directories to the 'hadoop' user.
sudo mkdir -p /home/hadoop/hdfs/{namenode,datanode}
sudo chown -R hadoop:hadoop /home/hadoop/hdfs
After that, open the file '$HADOOP_HOME/etc/hadoop/hdfs-site.xml' using the below nano editor command.
sudo nano $HADOOP_HOME/etc/hadoop/hdfs-site.xml
Add the following configuration to the file. In this example, you will set up the hadoop cluster in a single node, so you must change the 'dfs.replication' value to '1'. Also, you must specify the directory that will be used for the DataNode.
<configuration>

    <property>
        <name>dfs.replication</name>
        <value>1</value>
    </property>

   <property>
      <name>dfs.name.dir</name>
      <value>file:///home/hadoop/hdfs/namenode</value>
   </property>

   <property>
      <name>dfs.data.dir</name>
      <value>file:///home/hadoop/hdfs/datanode</value>
   </property>

</configuration>
Save the file and exit the editor when you are finished.
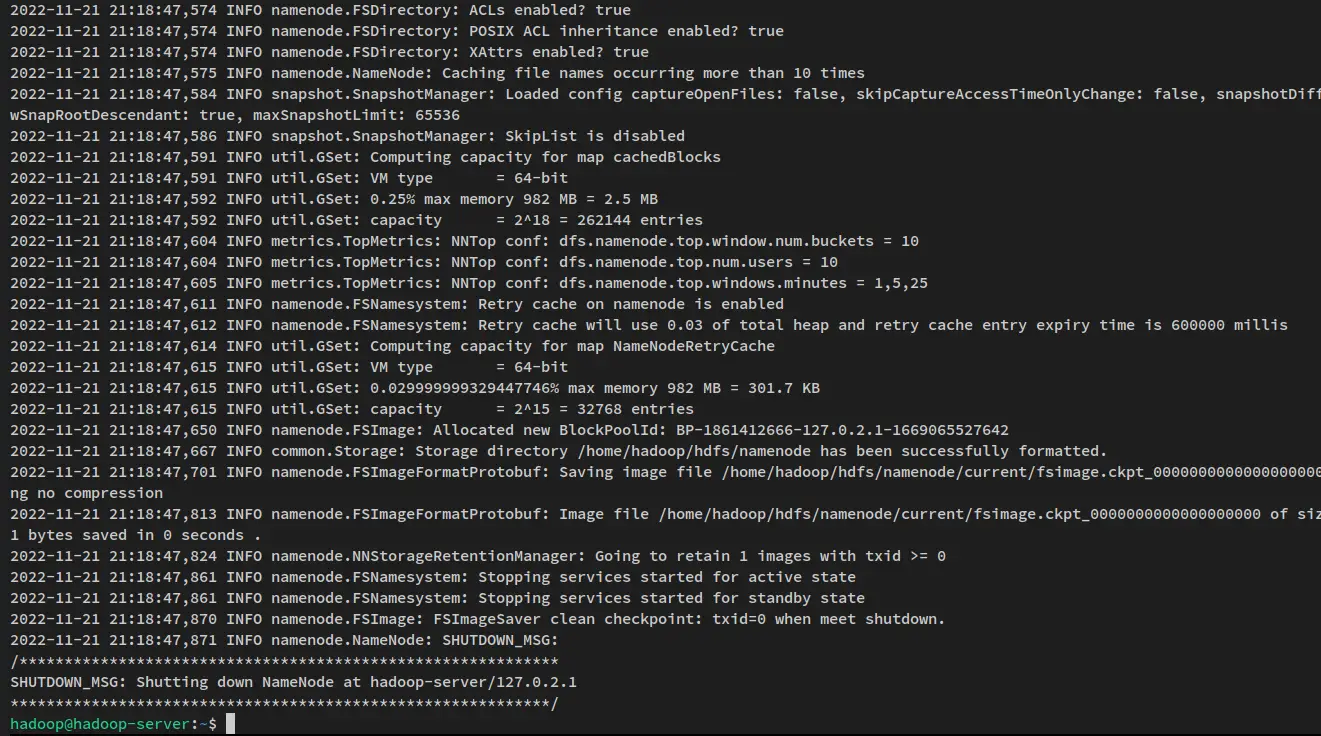
With the NameNode and DataNode configured, run the below command to format the hadoop filesystem.
hdfs namenode -format
You will receive an output like this:
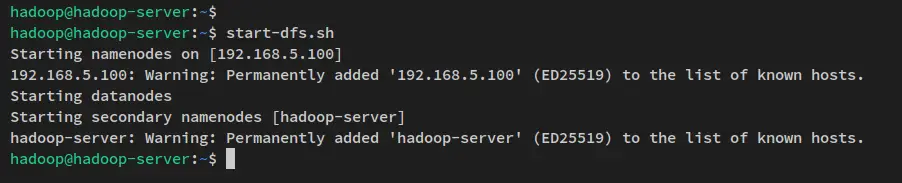
Next, start the NameNode and DataNode via the following command. The NameNode will be running on the server IP address that you have configured in the file 'core-site.xml'.
start-dfs.sh
You will see an output like this:
Now that the NameNode and DataNode are running, you will then verify both processes via the web interface.
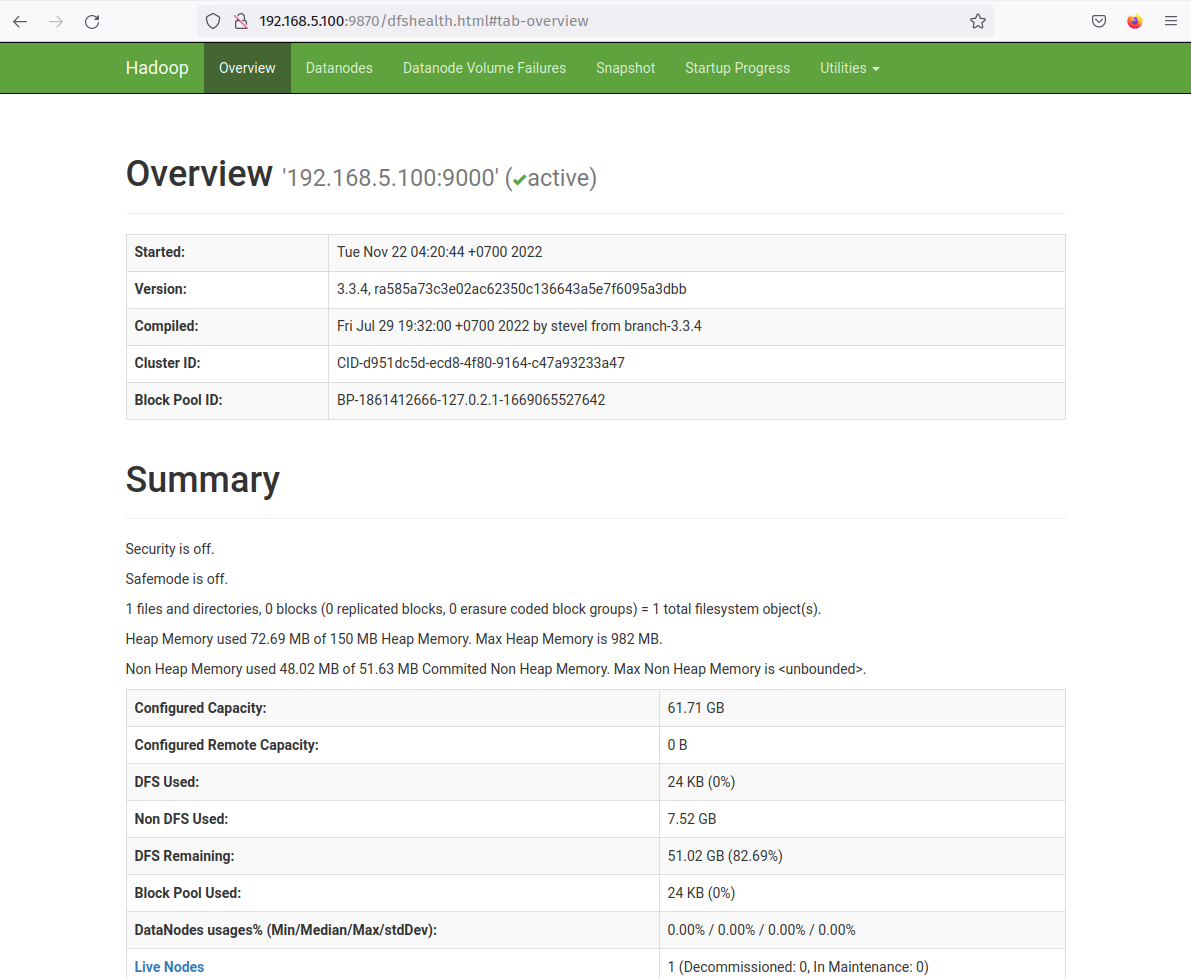
The hadoop NameNode web interface is running port '9870'. So, open your web browser and visit the server IP address followed by port 9870 (ie: http://192.168.5.100:9870/).
You should now get the page like the following screenshot - The NameNode is currently active.
Now click on the 'Datanodes' menu and you should get the current DataNode that is active on the hadoop cluster. The following screenshot confirms that the DataNode is running on port '9864' on the hadoop cluster.
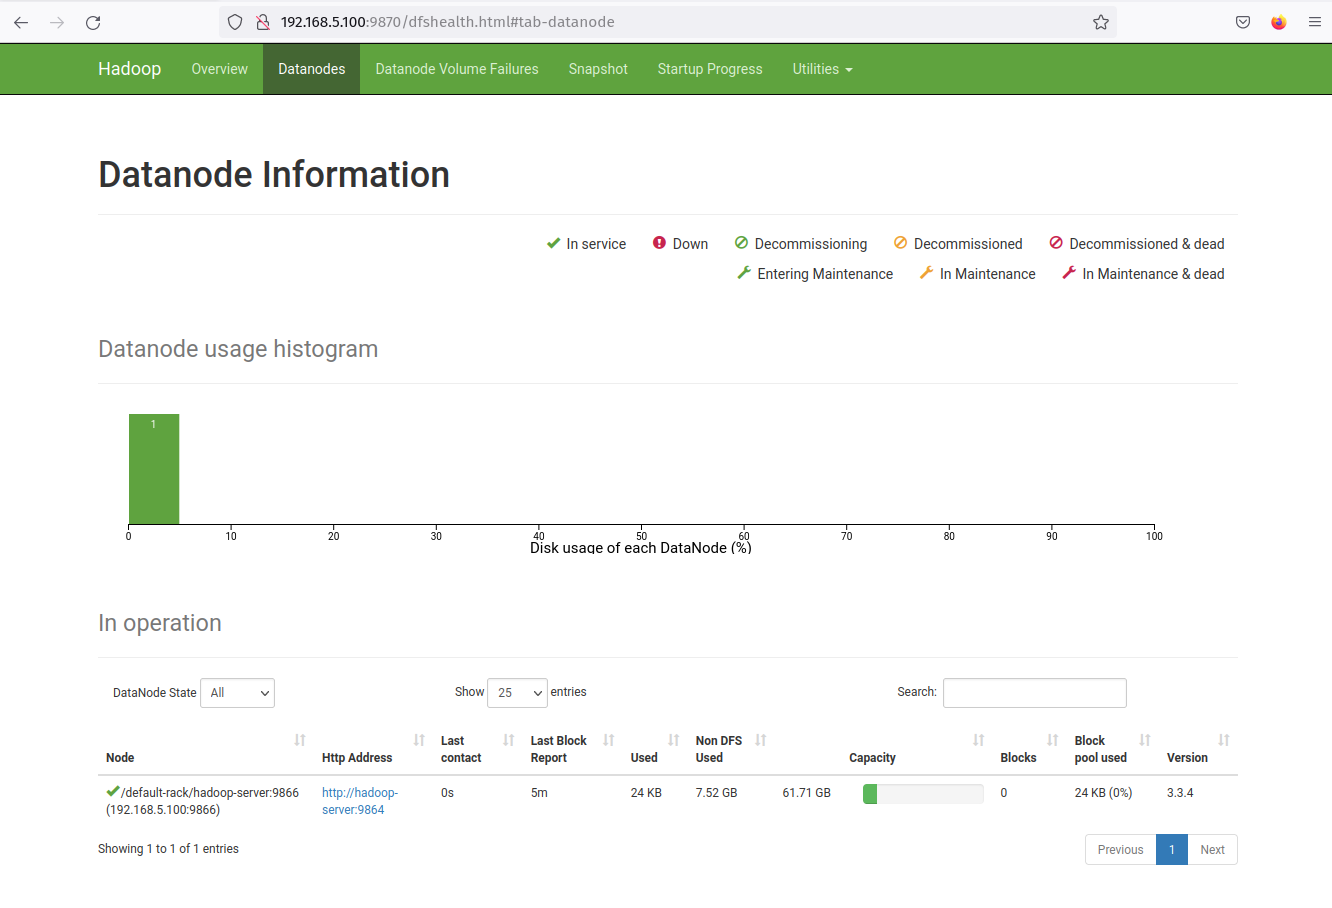
Click on the DataNode 'Http Address' and you should get a new page with details information about the DataNode. The following screenshot confirms that the DataNode is running with the volume directory '/home/hadoop/hdfs/datanode'.

With the NameNode and DataNode running, you'll next set up and run MapReduce on the Yarn manager (Yet Another ResourceManager and NodeManager).
Yarn Manager
To run a MapReduce on Yarn in the pseudo-distributed mode, you need to make a few changes to the configuration files.
Open the file '$HADOOP_HOME/etc/hadoop/mapred-site.xml' using the following nano editor command.
sudo nano $HADOOP_HOME/etc/hadoop/mapred-site.xml
Add the below lines to the file. Be sure to change the mapreduce.framework.name to 'yarn'.
<configuration>
    <property>
        <name>mapreduce.framework.name</name>
        <value>yarn</value>
    </property>
    <property>
        <name>mapreduce.application.classpath</name>
        <value>$HADOOP_MAPRED_HOME/share/hadoop/mapreduce/*:$HADOOP_MAPRED_HOME/share/hadoop/mapreduce/lib/*</value>
    </property>
</configuration>
Save the file and exit the editor when you are finished.
Next, open the Yarn configuration '$HADOOP_HOME/etc/hadoop/yarn-site.xml' using the following nanoe editor command.
sudo nano $HADOOP_HOME/etc/hadoop/yarn-site.xml
Change the default configuration with the following settings.
<configuration>
    <property>
        <name>yarn.nodemanager.aux-services</name>
        <value>mapreduce_shuffle</value>
    </property>
    <property>
        <name>yarn.nodemanager.env-whitelist</name>
        <value>JAVA_HOME,HADOOP_COMMON_HOME,HADOOP_HDFS_HOME,HADOOP_CONF_DIR,CLASSPATH_PREPEND_DISTCACHE,HADOOP_YARN_HOME,HADOOP_HOME,PATH,LANG,TZ,HADOOP_MAPRED_HOME</value>
    </property>
</configuration>
Save the file and exit the editor when you are finished.
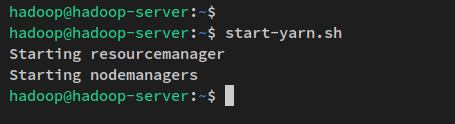
Now run the below command to start the Yarn daemons. And you should see both ResourceManager and NodeManager are starting.
start-yarn.sh
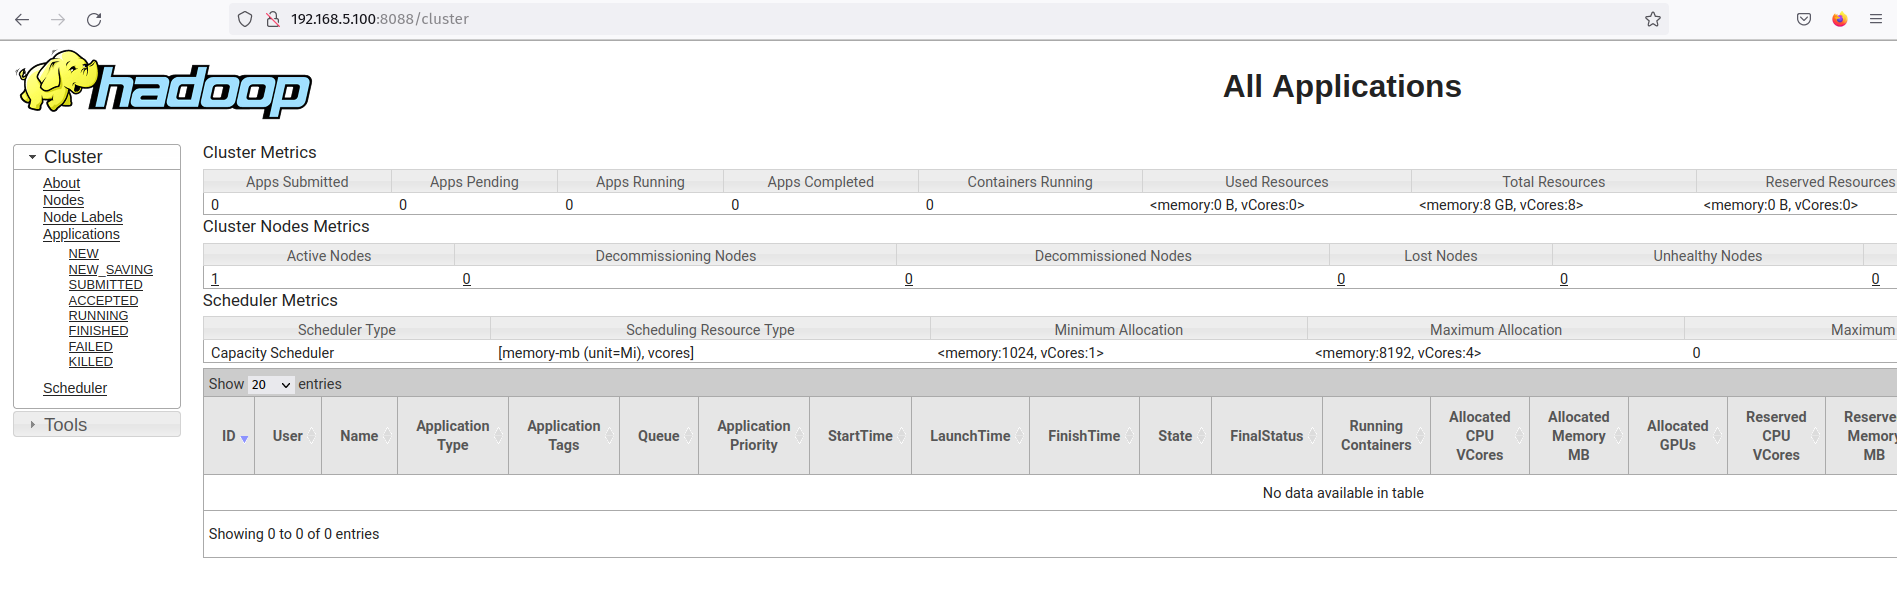
The ResourceManager should be running at the default pot 8088. back to your web browser and visit the server IP address followed by the ResourceManager port '8088' (i.e: http://192.168.5.100:8088/).
You should see the web interface of the hadoop ResourceManager. From here, you can monitor all running processes inside the hadoop cluster.
Click on the Nodes menu and you should get the current running node on the Hadoop cluster.
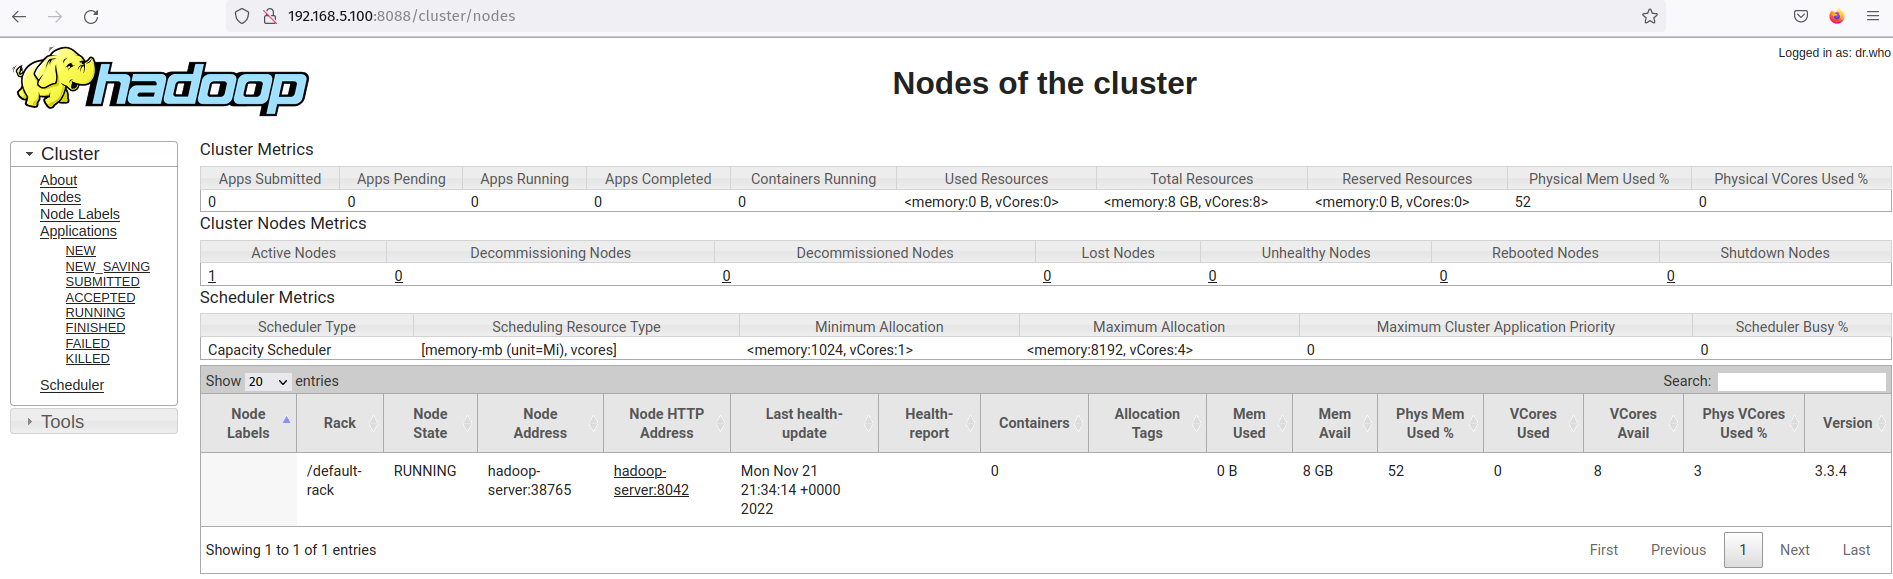
Now the Hadoop cluster is running in pseudo-distributed mode. This means each Hadoop process is running as a single process on a single node Ubuntu server 22.04, which includes the NameNode, DataNode, MapReduce, and Yarn.
Conclusion
In this guide, you installed Apache Hadoop on a single machine Ubuntu 22.04 server. You installed Hadoop with Pseudo-Distributed mode enabled, which means each Hadoop component is running as a single Java process on the system. In this guide, you also learned how to set up Java, set up system environment variables, and set up password-less SSH authentication via SSH public-private key.
This type of Hadoop deployment, Pseudo-Distributed mode, is recommended for testing only. If you want a distributed system that can handle medium or large datasets, you can deploy Hadoop in the Clustered mode, which is required more computing systems and provides high availability for your application.

