How to Install and Use MS SQL Server on Rocky Linux
MS SQL Server or Microsoft SQL Server is an RDBMS (Relational Database Management System) developed by Microsoft. As a database server, it is used to store data for your applications. The SQL Server is ideal for multiple purposes of applications, you can use MS SQL Server as the database for your desktop applications, use it for your web applications, or any small server applications.
In this tutorial, I will show you how to install MS SQL Server on a Rocky Linux server, set up SQL Tools for managing SQL Server, and also learn the basic operation of SQL Server for managing databases.
Prerequisites
Before you begin with this guide, ensure you have the following requirements:
- A Rocky Linux server - this example uses the Rocky Linux v8.x.
- A regular user or non-root user with sudo root privileges - but also you can use the root user.
- SELinux with permissive mode.
Adding Repository
MS SQL Server is one of the popular RDBMS (Relational Database Management Systems) created by Microsoft. To install SQL Server, you must add the official SQL Server repository to your system.
Now, you will add the SQL Server repository for the SQL Server 2019.
Before adding the SQL Server repository, run the following dnf command to install basic dependencies.
sudo dnf install dnf-plugins-core curl -y
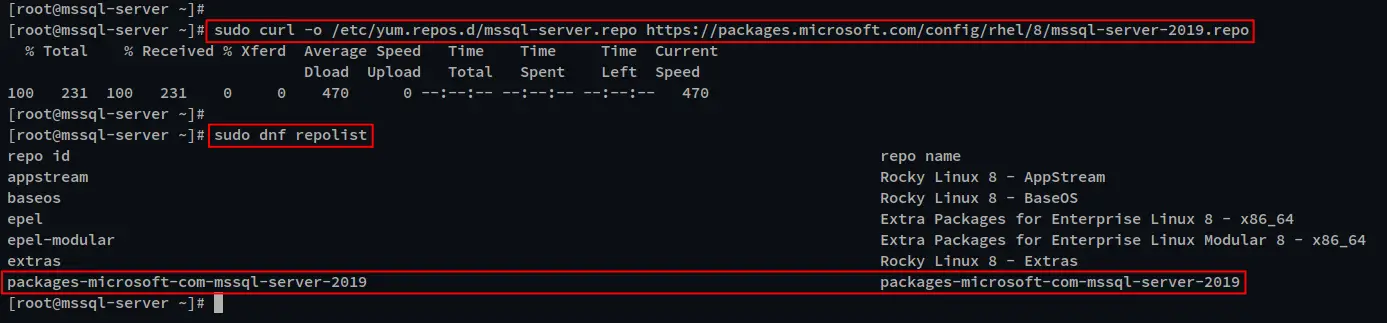
Next, run the following curl command to download the SQL Server repository to your Rocky Linux server. The new SQL Server repository will be saved to '/etc/yum.repos.d/mssql-server.repo'.
sudo curl -o /etc/yum.repos.d/mssql-server.repo https://packages.microsoft.com/config/rhel/8/mssql-server-2019.repo
Lastly, verify the list of available repositories on your system via the following dnf command. You should get the MS SQL Server 2019 repository added to your Rocky Linux server.
sudo dnf repolist
Now that the MS SQL Server repository is added, you will next install the MS SQL Server package and start configuring it.
Installing MSSQL Server
While the repository is added, you will now start the MS SQL Server installation and configuration. You can install it via the dnf command, and start configuring the SQL server via the 'mssql-conf' command provided by SQL Server packages.
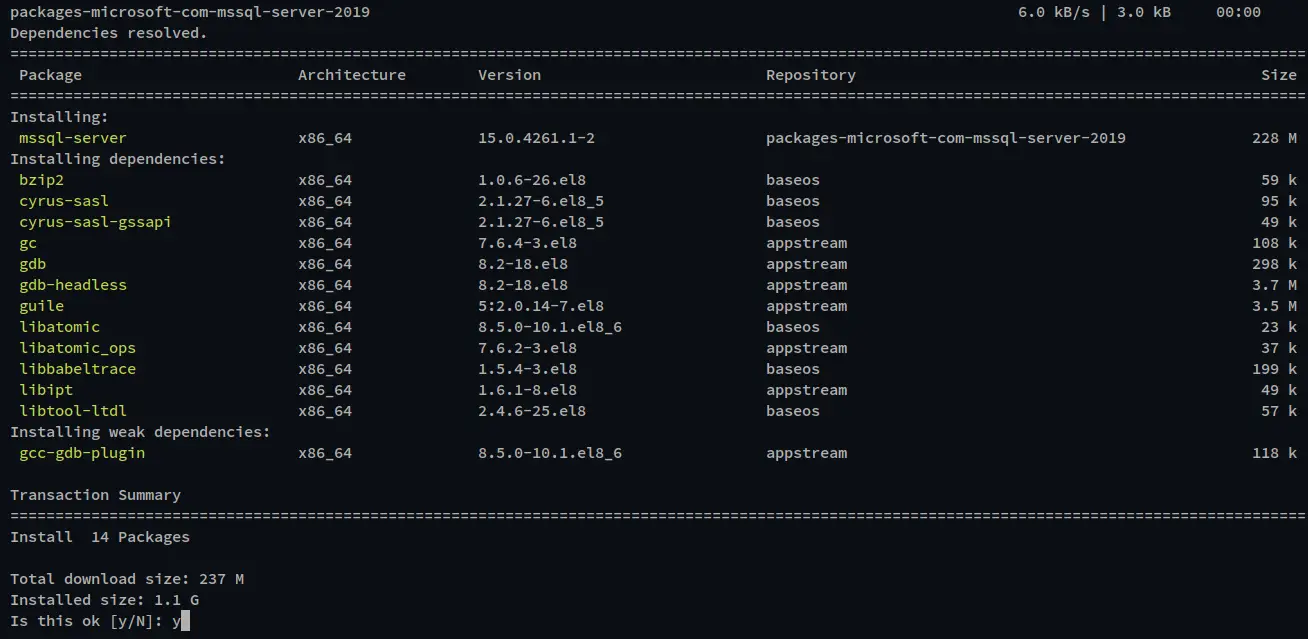
Run the following dnf command to install the SQL Server to the Rocky Linux server.
sudo dnf install mssql-server
When prompted for the configuration, input y and press ENTER to proceed.
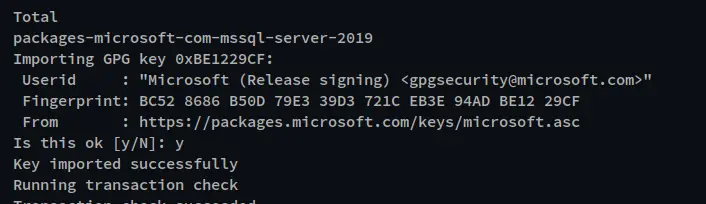
Also, you will be prompted to accept the GPG key of the MS SQL Server repository. Input y and press ENTER again to proceed, and the installation will begin.
After SQL Server is installed, start configuring it with the 'mssql-conf' tool.
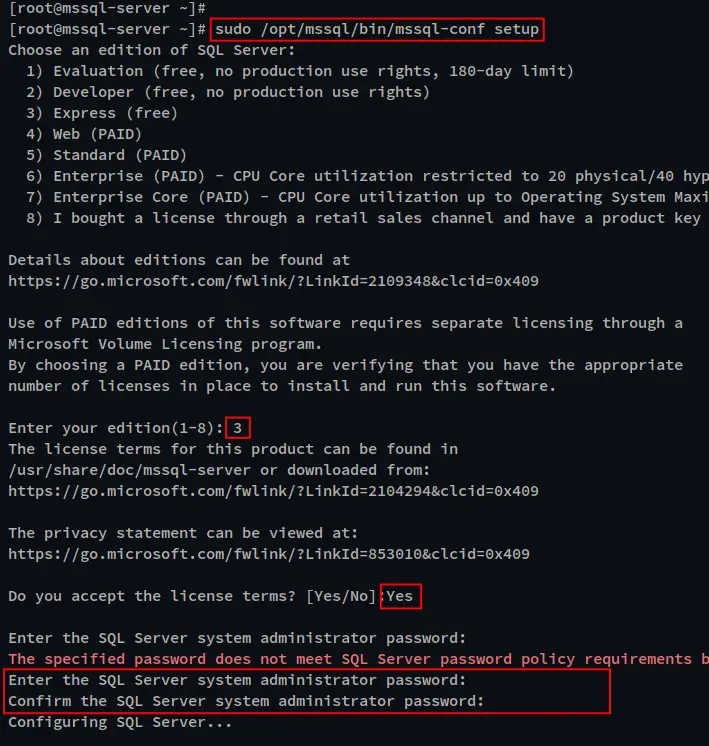
Run the following 'mssql-conf setup' command below to set up and configure the SQL Server installation.
sudo /opt/mssql/bin/mssql-conf setup
- Choose the MS SQL Server edition that you want to install. In this example, you will set up the MS SQL Server Express. So, input number 3 and press ENTER.
- For the License terms, input 'Yes' to agree.
- Lastly, input the new password for your MS SQL Server installation and repeat the password.
When SQL Server configuration is finished, you will see the output like the following. You can see the message on your terminal 'Setup has been completed successfully. SQL Server is now running'.

Next, verify the 'mssql-server' service via the systemctl command below to make sure the service is running.
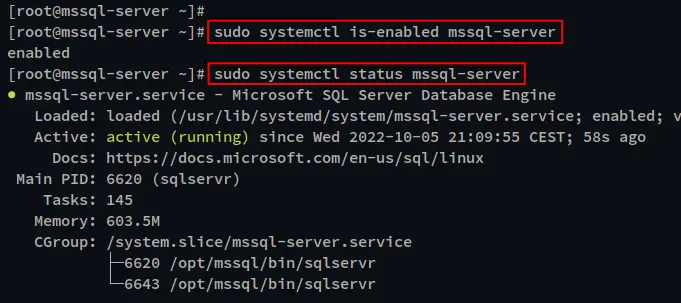
sudo systemctl is-enabled mssql-server
sudo systemctl status mssql-server
You will see the 'mssql-server' is enabled and will be running automatically at system boot. And the status of the current time is running.
If you want to allow remote login to your MS SQL Server on your local environment, you must add the MS SQL Server port to the firewalld.
The default SQL Server is running on TCP port 1433, run the following firewall-cmd command to add the SQL Server port, then reload to apply new changes.
sudo firewall-cmd --zone=public --add-port=1433/tcp --permanent
sudo firewall-cmd --reload
The MS SQL Server is now installed and configured. Next, you will install MS SQL Tools that will be used to connect and manage SQL Server.
Installing and Configuring SQL Tools
The MS SQL Tools is a command-line tool provided by Microsoft for managing SQL Server. it contains two different tools, the 'sqlcmd' is the SQL client for managing the SQL Server, and the 'bcp' tool is for import-export and backup utility.
SQL Tools has its repository package. So, you will now add the SQL Tools repository, then install and configure the SQL Tools on the ROcky Linux system.
Run the following command to add the SQL Tools repository to your Rocky Linux system.
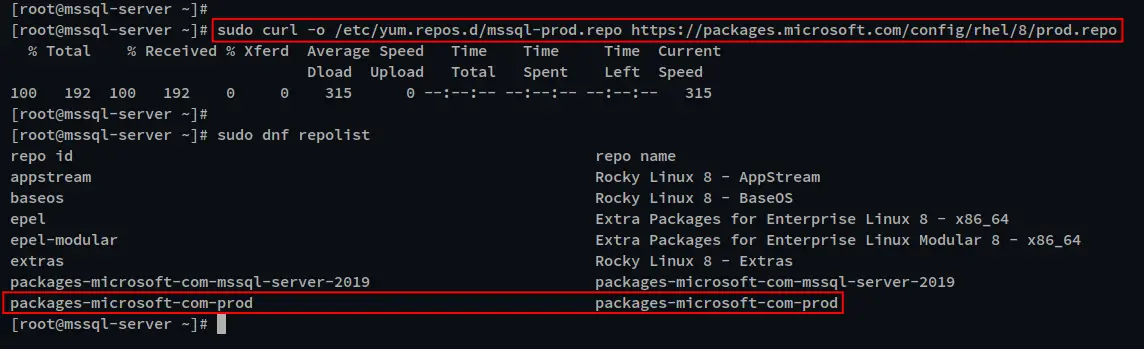
sudo curl -o /etc/yum.repos.d/mssql-prod.repo https://packages.microsoft.com/config/rhel/8/prod.repo
You can verify the list of repositories on your system via the following dnf command. You will see the SQL Tools repository is added.
sudo dnf repolist
Next, run the following command to install SQL Tools to your Rocky Linux server.
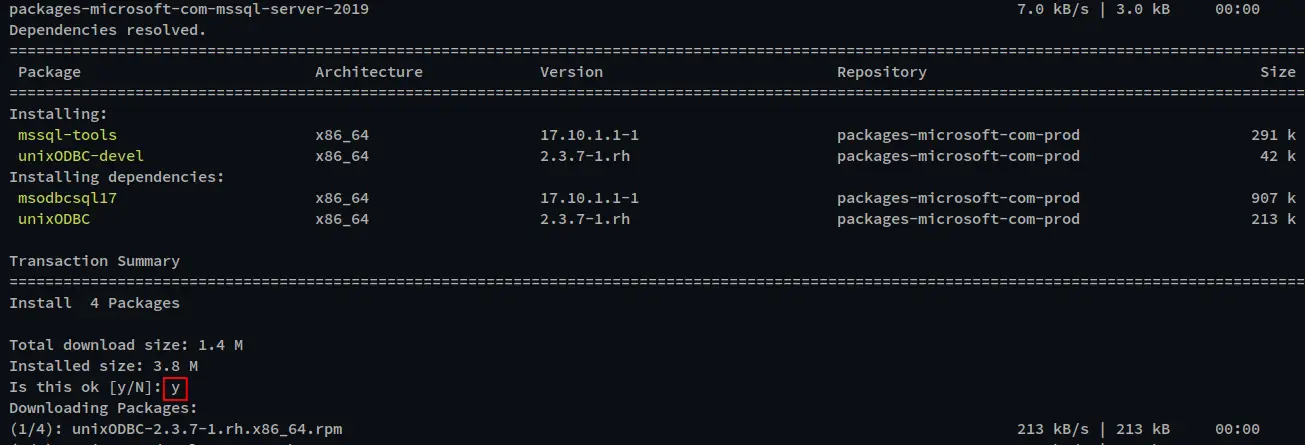
sudo dnf install mssql-tools unixODBC-devel
When prompted to confirm the installation, input y then press ENTER to proceed.
You will also be prompted to confirm the GPP key of the SQL Tools repository. Input y to add the GPG key and press ENTER to confirm.
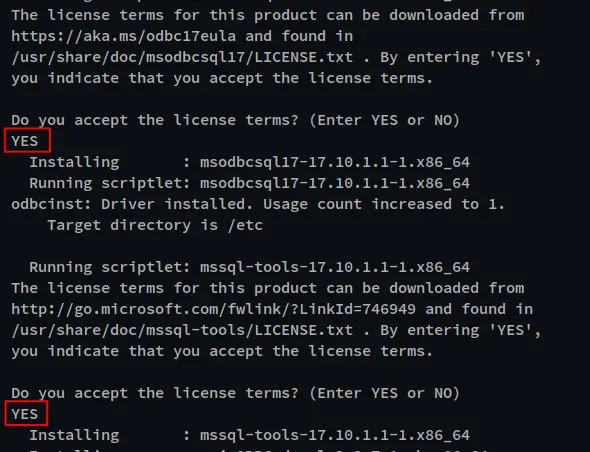
Additionally, you will also be prompted for two License terms for the SQL Tools. Input Yes to agree for both Licenses and the installation will begin.
After SQL Tools is installed, you can verify the SQL Tools installation directory at '/opt/mssql-tools'. You can see multiple directories for SQL Tools configurations and the bin directory where the main executable of SQL Tools is stored.
Next, you must add the SQL Tools bin directory '/opt/mssql-tools/bin' to the PATH Environment variable via the '~/.bashrc' file. This allows you to run SQL Tools without a full path to the binary executable files.
Run the following command to add the SQL Tools bin directory to the PATH environment variable.
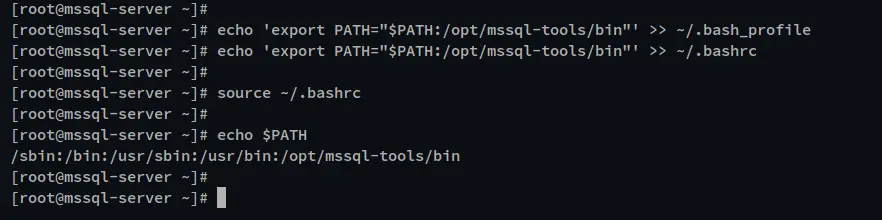
echo 'export PATH="$PATH:/opt/mssql-tools/bin"' >> ~/.bashrc
Now, reload the ~/.bashrc configuration and verify the PATH environment variable. You will see the SQL Tools bin directory '/opt/mssql-tools/bin' is added to the PATH environment variable.
source ~/.bashrc
echo $PATH
You can also verify using the following command. This will locate the binary file of SQL Tools 'sqlcmd' and 'bcp', which is stored in the directory '/opt/mssql-tools/bin' directory.
which sqlcmd
which bcp
Now that the SQL Tools is installed, you will now learn how to connect to the SQL Server via the 'sqlcmd' command.
Connecting to SQL Server using SQL Tools
At this point, you have installed and configured the MS SQL Server and the SQL Tools on the Rocky Linux server. Next, you will learn how to connect to the SQL Server via the 'sqlcmd' SQL Tools.
Run the following 'sqlcmd' command to connect to the SQL Server. Also, change the password with your SQL Server password that was configured during the installation stage.
sqlcmd -S localhost -U SA -P 'YourPassword'
After connecting to the SQL Server, run the following query to verify the current version of the SQL Server that you just installed.
select @@version
go
You will see the output like the following. The current version of the SQL Server that was installed is 'Microsoft SQL Server 2019'.

Next, you can also check and verify the default databases available on the SQL Server via the following queries. You will see four default databases on SQL Server, which is master, tempdb, model, and msdb.
select name from sys.databases;
go
Now you can press 'Ctrl+c' to exit from the 'sqlcmd' SQL Tools.
Basic Operations MS SQL Server
Now that you've learned how to connect to SQL Server via the 'sqlcmd' command. Next, you will learn the basic queries of SQL servers for managing databases.
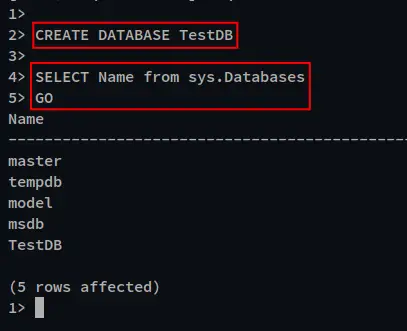
Run the following query to create a new SQL Server database 'TestDB'.
CREATE DATABASE TestDB
Now verify the list of the database on your SQL Server via the following query. And you should get the new database 'TestDB' is created.
SELECT Name from sys.Databases
GO
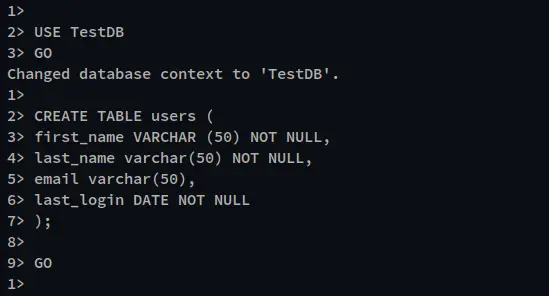
Next, switch the new database 'TestDB' using the following query. You should now see the output "Changed the database context to 'TestDB'". With this in mind, you can now create a new table and insert data into it.
USE TestDB
GO
Run the following query to create a new table. In this example, you will create a new table 'users' with some items inside id, first_name, last_name, email, and the last_login.
CREATE TABLE users (
    id INT PRIMARY KEY IDENTITY (1, 1),
    first_name VARCHAR (50) NOT NULL,
    last_name varchar(50) NOT NULL,
    email varchar(50),
    last_login DATE NOT NULL
);
GO
Now, run the following query to insert new data to the table 'users'. You can see the output such as "(1 rows affected)", which means you make changes to the table.
INSERT INTO users (first_name, last_name, email, last_login) VALUES ('Alice', 'Wonderland', '[email protected]', '20220901');
GO

Next, run the following query to retrieve the data from table 'users'. You should see the data that you just added.
SELECT * FROM users
GO

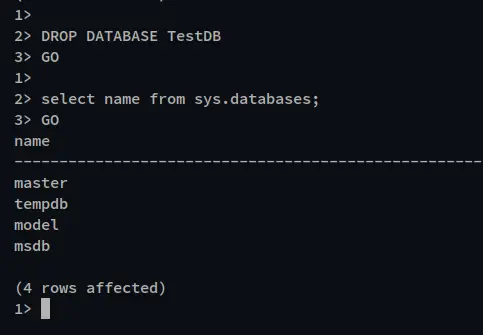
Lastly, to clean up your SQL Server environment installation, you can run the following query to delete the database 'TestDB'.
DROP DATABASE TestDB
GO
Now verify the list of available databases on your system using the following query. You will see the 'TestDB' database is deleted from your SQL Server.
SELECT Name from sys.Databases
GO
Conclusion
In this guide, you installed and configured MS SQL Server on the Rocky Linux system. You also learned how to install and configure SQL Tools on Rocky Linux for managing MS SQL Server.
in the end, you also learned the basic usage of SQL Tools 'sqlcmd' for connecting to the SQL Server and learned the basic operation of SQL Server for creating a database, and table, inserting data, and also retrieving data from the database.

