How to Install Django with Postgres, Nginx, and Gunicorn on Rocky Linux 9
On this page
- Prerequisites
- Step 1 - Configure Firewall
- Step 2 - Install PostgreSQL and Utilities
- Step 3 - Configure PostgreSQL
- Step 4 - Install Django
- Step 5 - Create a Sample Project
- Step 6 - Test the Development Server
- Step 7 - Install and Test Gunicorn
- Step 8 - Create a Socket and Service file for Gunicorn
- Step 9 - Install Nginx
- Step 10 - Install SSL
- Step 11 - Configure Nginx
- Conclusion
Django is a python framework used for developing dynamic websites and applications. It follows the MVC (Model-View-Controller) architecture. Using Django speeds up the process of developing applications as most of the underlying tasks are handled by it.
In this tutorial, you will learn how to install the Django framework on a Rocky Linux 9 server. You will also create a demo project and test it out.
Prerequisites
-
A server running Rocky Linux 9.
-
A non-root user with sudo privileges.
-
A fully qualified domain name (FQDN) pointing to your server. For our purposes, we will use
django.example.comas the domain name. -
Make sure everything is updated.
$ sudo dnf update
-
Install basic utility packages. Some of them may already be installed.
$ sudo dnf install wget curl nano unzip yum-utils -y
- SELinux is disabled.
Step 1 - Configure Firewall
The first step is to configure the firewall. Rocky Linux uses Firewalld Firewall. Check the firewall's status.
$ sudo firewall-cmd --state
running
The firewall works with different zones, and the public zone is the default one that we will use. List all the services and ports active on the firewall.
$ sudo firewall-cmd --permanent --list-services
It should show the following output.
cockpit dhcpv6-client ssh
Django needs HTTP and HTTPS ports to function. Open them.
$ sudo firewall-cmd --add-service=http --permanent
$ sudo firewall-cmd --add-service=https --permanent
Reload the firewall to apply the changes.
$ sudo firewall-cmd --reload
Step 2 - Install PostgreSQL and Utilities
Rocky Linux 9 ships with an older version of PostgreSQL. We will install Postgres 14 for our tutorial.
Install the repository RPM for PostgreSQL.
$ sudo dnf install -y https://download.postgresql.org/pub/repos/yum/reporpms/EL-9-x86_64/pgdg-redhat-repo-latest.noarch.rpm
Install PostgreSQL 14 server.
$ sudo dnf install -y postgresql14-server postgresql14-contrib postgresql14-devel python3-psycopg2
Initialize the database.
$ sudo /usr/pgsql-14/bin/postgresql-14-setup initdb
Enable and start the PostgreSQL service.
$ sudo systemctl enable postgresql-14 --now
Check the status of the service.
$ sudo systemctl status postgresql-14
? postgresql-14.service - PostgreSQL 14 database server
     Loaded: loaded (/usr/lib/systemd/system/postgresql-14.service; enabled; vendor preset: disabled)
     Active: active (running) since Mon 2022-09-12 01:17:24 UTC; 2s ago
       Docs: https://www.postgresql.org/docs/14/static/
    Process: 87995 ExecStartPre=/usr/pgsql-14/bin/postgresql-14-check-db-dir ${PGDATA} (code=exited, status=0/SUCCESS)
   Main PID: 88000 (postmaster)
      Tasks: 8 (limit: 5915)
     Memory: 16.5M
        CPU: 60ms
     CGroup: /system.slice/postgresql-14.service
             ??88000 /usr/pgsql-14/bin/postmaster -D /var/lib/pgsql/14/data/
             ??88001 "postgres: logger "
             ??88003 "postgres: checkpointer "
             ??88004 "postgres: background writer "
             ??88005 "postgres: walwriter "
             ??88006 "postgres: autovacuum launcher "
             ??88007 "postgres: stats collector "
             ??88008 "postgres: logical replication launcher "

Sep 12 01:17:24 board.example.com systemd[1]: Starting PostgreSQL 14 database server...
Let us install some additional utilities that we will require for Django to work.
$ sudo dnf install -y python3 python3-devel python3-pip gcc
To resolve any future errors regarding pg_config not being found, you need to add the path to the PostgreSQL bin folder. Open the .bashrc file for editing.
$ nano ~/.bashrc
Add the following line at the end of the file.
export PATH=$PATH:/usr/pgsql-14/bin
Save the file by pressing Ctrl + X and entering Y when prompted.
Step 3 - Configure PostgreSQL
Log in to the PostgreSQL shell.
$ sudo -i -u postgres psql
Create a new database for Django.
postgres=# CREATE DATABASE djangoapp;
Create a new database user with a strong password.
postgres=# CREATE USER djangouser WITH ENCRYPTED PASSWORD 'dbpassword';
Grant the rights to the user to use the database.
postgres=# GRANT ALL PRIVILEGES ON DATABASE djangoapp TO djangouser;
Exit the Postgres Shell.
postgres=# \q
Step 4 - Install Django
There are several methods by which you can install Django. Deciding which one works for you best depends on how you want to configure your development environment and on your needs. Each method has its own set of pros and cons. Let us go through all these methods.
Install using pip
This is the most common way to install Django. The recommended way to do it is by using creating a virtual Python environment. This allows you to install Python packages without affecting the system.
Let us create a demo project directory.
$ mkdir ~/sampleproject
$ cd ~/sampleproject
Create a virtual environment using the following command. Replace sample_env with the name, you want to call your virtual environment.
$ python3 -m venv sample_env
This installs a portable version of Python, pip within your project directory. To install any packages into the project, you need to activate the environment using the following command.
$ source sample_env/bin/activate
Your shell prompt will change to reflect the virtual environment.
(sample_env) navjot@django:~/sampleproject$
Now that the virtual environment is activated, use pip to install Django. Run the following command to install Django.
(sample_env) $ pip install django
Verify the installation.
(sample_env) $ django-admin --version
4.1.2
Depending upon your project requirements, you can install a different version of Django in the following way.
(sample_env) $ pip install django==3.2.1
Verify the installation.
(sample_env) $ django-admin --version
3.2.1
As you can see, this method installs a newer version of Django than the version obtained from the Rocky Linux repository.
To exit the virtual environment, run the following command.
(sample_env) $ deactivate
Install the development version
You can also use pip to install the development version of Django. For this, we will grab the development version from Django's Github repository.
Clone the repository to the ~/django-dev directory using the following command.
$ git clone https://github.com/django/django ~/django-dev
Switch to the newly created directory.
$ cd ~/django-dev
Create the virtual environment.
$ python3 -m venv dev_django_env
Activate the environment.
$ source dev_django_env/bin/activate
Install Django using pip. The -e flag installs it in an editable mode which is required if you are installing from version control.
(dev_django_dev) $ pip install -e ~/django-dev
Verify the installation.
(dev_django_dev) $ django-admin --version
4.2.dev20221012095013
As you can see, the version here is the latest development version. The development version of Django is not useful for production environments.
Step 5 - Create a Sample Project
Let us build a sample Django project. Create a directory for the sample project.
$ mkdir ~/dj-sample
$ cd ~/dj-sample
Create a Python virtual environment.
$ python3 -m venv sample_proj
Activate the environment.
$ source sample_proj/bin/activate
Install the Wheel package.
(sample_proj) $ pip install wheel
Install Django and the required packages.
(sample_proj) $ pip install django psycopg2 psycopg2-binary
To build the project, we need to use the startproject command. This command creates another directory that includes:
- A management script,
manage.py, used to administer Django-specific tasks. - A directory with the same name as the project that includes the project code.
We will create the project directory in our current working directory. To do that, use the dot(.) character at the end of the following command.
(sample_proj) $ django-admin startproject demoproject .
Django uses SECRET_KEY variable to provide cryptographic signing. It generates a default value during installation. You should replace it with a secure value. Run the following command to generate the key and copy it for later.
(sample_proj) $ python3 -c 'from django.core.management.utils import get_random_secret_key; print(get_random_secret_key())'
You will get the following output with a key.
wm#dzb^ymuo3s3tza=f5cx^kan!$4sch1!b-q=v%)=d0pb(jqf
The first step is to adjust the project settings. Open the settings file for editing.
(sample_proj) $ nano demoproject/settings.py
Replace the current value of the SECRET_KEY variable with the key you generated.
SECRET_KEY = 's)3m=4s&!a=p#brttcqu@1s$8(z6e+u8(^tkpw28qyj0t#8ku2'
Change the settings for the DATABASES section as follows.
DATABASES = {
    'default': {
		'ENGINE': 'django.db.backends.postgresql_psycopg2',
		'NAME': 'DATABASE_DB',
		'USER': 'DATABASE_USER',
		'PASSWORD': 'DATABASE_PASSWORD',
		'HOST': 'DATABASE_HOST',
		'PORT': 'DATABASE_PORT',
	},
}
Next, move to the bottom of the file and add a setting for the location of static files. This is important for Nginx to work and handle requests for these files. Add the following line above the STATIC_URL variable.
STATIC_ROOT = os.path.join(BASE_DIR, "static/")
Since the STATIC_ROOT variable uses the os module, we need to import it since it is not imported by default. Add the following line above the from pathlib import Path line.
import os
Save the file by pressing Ctrl + X and entering Y when prompted.
Verify the database settings.
(sample_proj) $ python manage.py check --database default
You should get the following output.
System check identified no issues (0 silenced).
Next, we need to migrate the database using the migrate command. Migrations in Django propagate changes you make to your models into your database schema.
(sample_proj) $ python manage.py makemigrations
(sample_proj) $ python manage.py migrate
You will get the following output.
Operations to perform:
  Apply all migrations: admin, auth, contenttypes, sessions
Running migrations:
  Applying contenttypes.0001_initial... OK
  Applying auth.0001_initial... OK
  Applying admin.0001_initial... OK
  Applying admin.0002_logentry_remove_auto_add... OK
  Applying admin.0003_logentry_add_action_flag_choices... OK
  Applying contenttypes.0002_remove_content_type_name... OK
  Applying auth.0002_alter_permission_name_max_length... OK
  Applying auth.0003_alter_user_email_max_length... OK
  Applying auth.0004_alter_user_username_opts... OK
  Applying auth.0005_alter_user_last_login_null... OK
  Applying auth.0006_require_contenttypes_0002... OK
  Applying auth.0007_alter_validators_add_error_messages... OK
  Applying auth.0008_alter_user_username_max_length... OK
  Applying auth.0009_alter_user_last_name_max_length... OK
  Applying auth.0010_alter_group_name_max_length... OK
  Applying auth.0011_update_proxy_permissions... OK
  Applying auth.0012_alter_user_first_name_max_length... OK
  Applying sessions.0001_initial... OK
Next, create an administrative user to access Django's admin interface.
(sample_proj) $ python manage.py createsuperuser
You will be prompted for a username, email, and password.
Username (leave blank to use 'navjot'):
Email address: [email protected]
Password:
Password (again):
Superuser created successfully.
Copy the static files into the static directory. Enter yes when prompted.
(sample_proj) $ python manage.py collectstatic
130 static files copied to '/home/navjot/dj-sample/static'.
Step 6 - Test the Development Server
It is time to test the application. For that, you need to modify the ALLOWED_HOSTS directive in the Django settings. This directive defines the list of IP addresses and domain names that are given access to the Django application.
Open the settings file using the following command.
(sample_proj) $ nano demoproject/settings.py
Find the following entry.
ALLOWED_HOSTS = []
Enter your server IP address in the square brackets. Each entry should be enclosed within quotations and multiple entries need to be separated via commas. Entering www.example.com will be matched exactly. However, .example.com will match example.com and www.example.com, and any other subdomain of example.com. Therefore, it is recommended to use the period sign to prefix a domain name to match it and its subdomains.
ALLOWED_HOSTS = ['<yourserver_ip_address>']
We have used the IP address to match our server. Save the file by pressing Ctrl + X and entering Y when prompted.
Before you test the development server, you need to configure the firewall to allow Django to work. Django uses port 8000 by default. Open the port using the Uncomplicated Firewall(UFW).
(sample_proj) $ sudo firewall-cmd --add-port=8000/tcp --permanent
(sample_proj) $ sudo firewall-cmd --reload
Start the development server.
(sample_proj) $ python manage.py runserver 0.0.0.0:8000
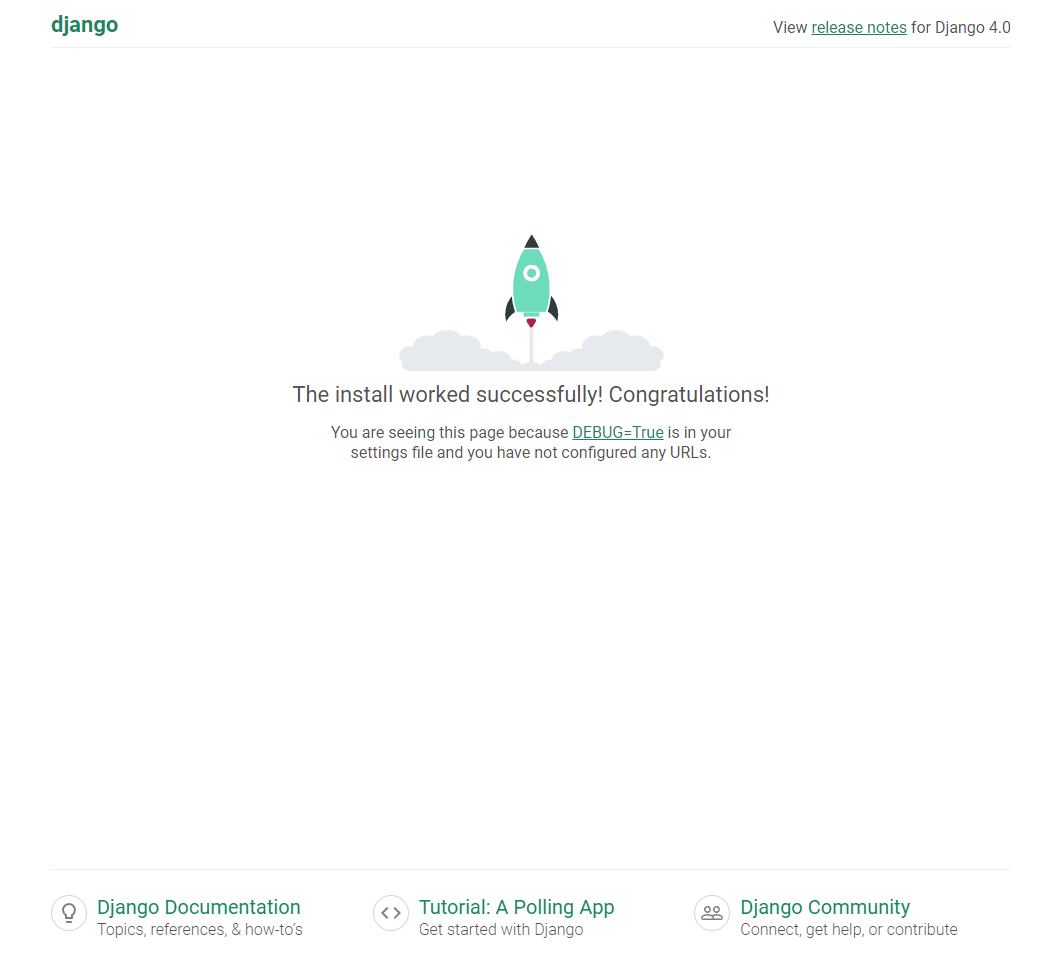
Launch the URL http://<yourserver_ip_address>:8000 in your browser and you will get the following screen.
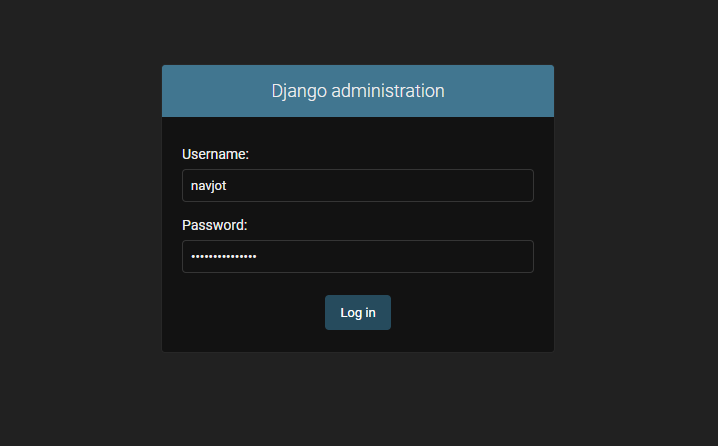
You can access the admin interface by following the URL http://<yourserver_ip_address>:8000/admin/ and you will see the following login screen.
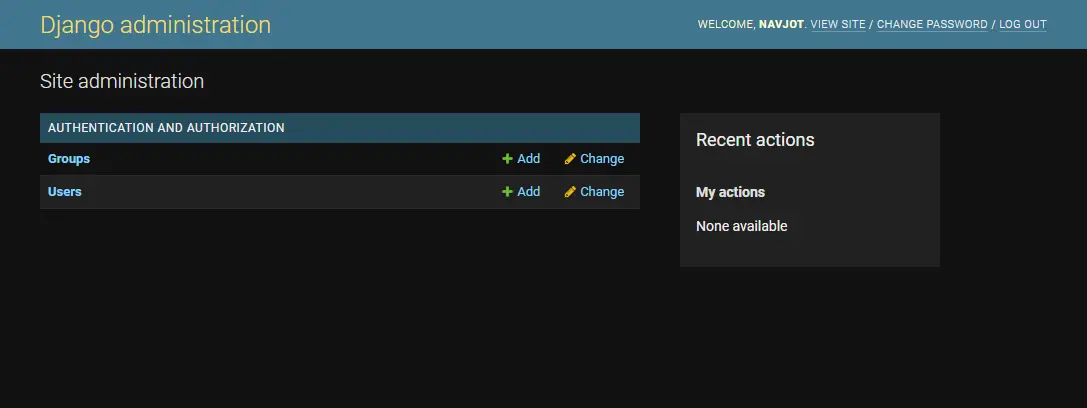
Enter the credentials created earlier to log in to the admin panel shown below.
Once you are finished with your demo project, you can close the server by pressing Ctrl + C in your terminal.
Step 7 - Install and Test Gunicorn
Run persistent Django server using nohup
So far, Django's service is not persistent. To make the service persistent, there are two methods. The first method involves using the nohup utility. The nohup is a POSIX command which means no hang up. It is used to execute commands in a way that does not stop even when a user logs out.
Make sure you have exited the server from the terminal by pressing Ctrl + C.
Run the following command to run Django's development server.
(sample_proj) $ nohup python manage.py runserver 0.0.0.0:8000 &
Now, your Django server will keep running until you kill it manually. The command will give you the process ID and output another command.
[1] 42595
(sample_proj) $ nohup: ignoring input and appending output to 'nohup.out'
^C
Press Ctrl + C to exit. The original Django server will keep running. You can verify by opening the URL in your browser.
Once you are finished, you need to kill the process. The nohup command gives you one process ID. But in reality, two processes are being run. To find the IDs for both processes, run the following command.
(sample_proj) $ ps aux | grep manage.py
navjot    153474  1.6  3.9  46264 39016 pts/0    S    04:15   0:00 python manage.py runserver 0.0.0.0:8000
navjot    153475  3.0  4.4 196060 43500 pts/0    Sl   04:15   0:00 /home/navjot/dj-sample/sample_proj/bin/python manage.py runserver 0.0.0.0:8000
navjot    153483  0.0  0.2   6420  2248 pts/0    S+   04:15   0:00 grep --color=auto manage.py
As you can see, two processes are being run, one with ID 153474 and the other one with ID 153475.
Run the following command to shut the server using the process IDs you obtained above.
(sample_proj) $ sudo kill -9 153474 153475
Install Gunicorn
The second method to run a persistent Django server requires you to install Gunicorn and Nginx web servers. Gunicorn is a Python WSGI HTTP server. It will interface with the Django application and then Nginx will act as a reverse proxy to Gunicorn. This method has the added benefit of providing you with the security and performance that comes with using Nginx.
Install Gunicorn.
(sample_proj) $ pip install gunicorn
Before proceeding, we need to test Gunicorn's ability to serve the project. Run the following command to run Gunicorn.
(sample_proj) $ gunicorn --bind 0.0.0.0:8000 demoproject.wsgi:application
This will start Gunicorn on the same interface Django was running on. To verify, open the URL http://<yourserver_ip_address>:8000 in your browser and you will get the same Django homepage. This means that Gunicorn is running perfectly.
When you are finished testing, press Ctrl + C on the terminal to exit Gunicorn.
Deactivate the virtual environment to go back to your regular shell.
(sample_proj) $ deactivate
Step 8 - Create a Socket and Service file for Gunicorn
The first step is to create a Gunicorn socket file. The Gunicorn socket will be created at boot time and listen for connections. When a connection occurs, the systemd will automatically start the Gunicorn process to handle it.
Create and open the Gunicorn socket file for editing.
$ sudo nano /etc/systemd/system/gunicorn.socket
Paste the following code in it.
[Unit]
Description=gunicorn socket

[Socket]
ListenStream=/run/gunicorn.sock

[Install]
WantedBy=sockets.target
Save the file by pressing Ctrl + X and entering Y when prompted.
Next, create and open the Gunicorn service file for editing.
$ sudo nano /etc/systemd/system/gunicorn.service
Paste the following code in it.
[Unit]
Description=django gunicorn daemon
Requires=gunicorn.socket
After=network.target

[Service]
User=navjot
Group=nginx
WorkingDirectory=/home/navjot/dj-sample
ExecStart=/home/navjot/dj-sample/sample_proj/bin/gunicorn \
          -t 3000 \
          --access-logfile - \
          --workers 3 \
          --bind unix:/run/gunicorn.sock \
          demoproject.wsgi:application -w 2

[Install]
WantedBy=multi-user.target
Save the file by pressing Ctrl + X and entering Y when prompted. Replace navjot with your system username. The nginx group will allow the Nginx server to communicate with Django.
Reload the system daemon to refresh the systemd files.
$ sudo systemctl daemon-reload
Enable and start the Gunicorn socket file.
$ sudo systemctl start gunicorn.socket
$ sudo systemctl enable gunicorn.socket
Check the status of the Gunicorn socket.
$ sudo systemctl status gunicorn.socket
You will receive a similar output.
? gunicorn.socket - gunicorn socket
     Loaded: loaded (/etc/systemd/system/gunicorn.socket; enabled; vendor preset: disabled)
     Active: active (listening) since Thu 2022-10-13 04:19:28 UTC; 14s ago
      Until: Thu 2022-10-13 04:19:28 UTC; 14s ago
   Triggers: ? gunicorn.service
     Listen: /run/gunicorn.sock (Stream)
     CGroup: /system.slice/gunicorn.socket

Oct 13 04:19:28 django.nspeaks.xyz systemd[1]: Listening on gunicorn socket.
The Gunicorn service is still not running as you can check.
$ sudo systemctl status gunicorn.service
? gunicorn.service - django gunicorn daemon
     Loaded: loaded (/etc/systemd/system/gunicorn.service; disabled; vendor preset: enabled)
     Active: inactive (dead)
TriggeredBy: ? gunicorn.socket
To test the socket activation mechanism, run the following command.
$ curl --unix-socket /run/gunicorn.sock localhost
You will receive the HTML output of the Django homepage in your terminal. This also starts Gunicorn to serve the application. Check the status of the service again and you will see that it is running now.
$ sudo systemctl status gunicorn.service
? gunicorn.service - django gunicorn daemon
     Loaded: loaded (/etc/systemd/system/gunicorn.service; disabled; vendor preset: disabled)
     Active: active (running) since Thu 2022-10-13 06:13:55 UTC; 1min 34s ago
TriggeredBy: ? gunicorn.socket
   Main PID: 157742 (gunicorn)
      Tasks: 4 (limit: 5915)
     Memory: 96.2M
        CPU: 1.198s
     CGroup: /system.slice/gunicorn.service
             ??157742 /home/navjot/dj-sample/sample_proj/bin/python3 /home/navjot/dj-sample/sample_proj/bin/gunicorn --access-logfile - --workers 3 --bind unix:/run/gunicorn.sock demoproject.wsgi:application -w 2
             ??157746 /home/navjot/dj-sample/sample_proj/bin/python3 /home/navjot/dj-sample/sample_proj/bin/gunicorn --access-logfile - --workers 3 --bind unix:/run/gunicorn.sock demoproject.wsgi:application -w 2
             ??157747 /home/navjot/dj-sample/sample_proj/bin/python3 /home/navjot/dj-sample/sample_proj/bin/gunicorn --access-logfile - --workers 3 --bind unix:/run/gunicorn.sock demoproject.wsgi:application -w 2
             ??157748 /home/navjot/dj-sample/sample_proj/bin/python3 /home/navjot/dj-sample/sample_proj/bin/gunicorn --access-logfile - --workers 3 --bind unix:/run/gunicorn.sock demoproject.wsgi:application -w 2
.......
Step 9 - Install Nginx
The last step is to install and configure Nginx. Rocky Linux ships with an older version of Nginx. You need to download the official Nginx repository to install the latest version.
Create and open the /etc/yum.repos.d/nginx.repo file for creating the official Nginx repository.
$ sudo nano /etc/yum.repos.d/nginx.repo
Paste the following code in it.
[nginx-stable]
name=nginx stable repo
baseurl=http://nginx.org/packages/centos/$releasever/$basearch/
gpgcheck=1
enabled=1
gpgkey=https://nginx.org/keys/nginx_signing.key
module_hotfixes=true

[nginx-mainline]
name=nginx mainline repo
baseurl=http://nginx.org/packages/mainline/centos/$releasever/$basearch/
gpgcheck=1
enabled=0
gpgkey=https://nginx.org/keys/nginx_signing.key
module_hotfixes=true
Save the file by pressing Ctrl + X and entering Y when prompted.
Install the Nginx server.
$ sudo dnf install nginx -y
Verify the installation.
$ nginx -v
nginx version: nginx/1.22.1
Enable and start the Nginx server.
$ sudo systemctl enable nginx --now
Check the status of the server.
$ sudo systemctl status nginx
? nginx.service - nginx - high performance web server
     Loaded: loaded (/usr/lib/systemd/system/nginx.service; enabled; vendor preset: disabled)
     Active: active (running) since Thu 2022-10-13 06:17:24 UTC; 1s ago
       Docs: http://nginx.org/en/docs/
    Process: 157900 ExecStart=/usr/sbin/nginx -c /etc/nginx/nginx.conf (code=exited, status=0/SUCCESS)
   Main PID: 157901 (nginx)
      Tasks: 2 (limit: 5915)
     Memory: 1.9M
        CPU: 18ms
     CGroup: /system.slice/nginx.service
             ??157901 "nginx: master process /usr/sbin/nginx -c /etc/nginx/nginx.conf"
             ??157902 "nginx: worker process"

Oct 13 06:17:24 django.example.com systemd[1]: Starting nginx - high performance web server...
Step 10 - Install SSL
So far, your Django application is being served over a plaintext HTTP connection. It is highly recommended that you protect it via an SSL certificate. For this, use the Certbot tool using the Snapd tool. It requires the EPEL repository to work.
$ sudo dnf install epel-release
We will use Snapd to install Certbot. Install Snapd.
$ sudo dnf install snapd
Enable and Start the Snap service.
$ sudo systemctl enable snapd.socket --now
Create necessary links for Snapd to work.
$ sudo ln -s /var/lib/snapd/snap /snap
$ echo 'export PATH=$PATH:/var/lib/snapd/snap/bin' | sudo tee -a /etc/profile.d/snapd.sh
Install the core Snapd repository.
$ sudo snap install core
$ sudo snap refresh core
Install Certbot.
$ sudo snap install --classic certbot
$ sudo ln -s /snap/bin/certbot /usr/bin/certbot
Generate the certificate. The following command will also automatically configure Nginx.
$ sudo certbot certonly --nginx --agree-tos --no-eff-email --staple-ocsp --preferred-challenges http -m [email protected] -d django.example.com
The above command will download a certificate to the /etc/letsencrypt/live/django.example.com directory on your server.
Generate a Diffie-Hellman group certificate.
$ sudo openssl dhparam -dsaparam -out /etc/ssl/certs/dhparam.pem 4096
To check whether the SSL renewal is working fine, do a dry run of the process.
$ sudo certbot renew --dry-run
If you see no errors, you are all set. Your certificate will renew automatically.
Step 11 - Configure Nginx
Create and open the file /etc/nginx/conf.d/django-gunicorn.conf for editing.
$ sudo nano /etc/nginx/conf.d/django-gunicorn.conf
Paste the following code in it.
# enforce HTTPS
server {
  listen 80 default_server;
  server_name django.example.com;
  return 301 https://$server_name$request_uri;
}

server {
    listen 443 ssl http2;
    server_name django.example.com;

    access_log  /var/log/nginx/django.access.log;
    error_log   /var/log/nginx/django.error.log;

    http2_push_preload on; # Enable HTTP/2 Server Push

    ssl_certificate /etc/letsencrypt/live/django.example.com/fullchain.pem;
    ssl_certificate_key /etc/letsencrypt/live/django.example.com/privkey.pem;
    ssl_trusted_certificate /etc/letsencrypt/live/django.example.com/chain.pem;
    ssl_session_timeout 1d;

    # Enable TLS versions (TLSv1.3 is required upcoming HTTP/3 QUIC).
    ssl_protocols TLSv1.2 TLSv1.3;

    # Enable TLSv1.3's 0-RTT. Use $ssl_early_data when reverse proxying to
    # prevent replay attacks.
    #
    # @see: https://nginx.org/en/docs/http/ngx_http_ssl_module.html#ssl_early_data
    ssl_early_data on;

    ssl_ciphers 'ECDHE-ECDSA-AES256-GCM-SHA384:ECDHE-RSA-AES256-GCM-SHA384:ECDHE-ECDSA-CHACHA20-POLY1305:ECDHE-RSA-CHACHA20-POLY1305:ECDHE-ECDSA-AES256-SHA384:ECDHE-RSA-AES256-SHA384';
    ssl_prefer_server_ciphers on;
    ssl_session_cache shared:SSL:50m;

    # OCSP Stapling ---
    # fetch OCSP records from URL in ssl_certificate and cache them
    ssl_stapling on;
    ssl_stapling_verify on;
    ssl_dhparam /etc/ssl/certs/dhparam.pem;

    add_header X-Early-Data $tls1_3_early_data;

    location = /favicon.ico { access_log off; log_not_found off; }
    location /static/ {
        root /home/navjot/dj-sample;
    }

    location / {
        proxy_set_header Host $http_host;
        proxy_set_header X-Real-IP $remote_addr;
        proxy_set_header X-Forwarded-For $proxy_add_x_forwarded_for;
        proxy_set_header X-Forwarded-Proto $scheme;
        proxy_pass http://unix:/run/gunicorn.sock;
    }
}

# This block is useful for debugging TLS v1.3. Please feel free to remove this
# and use the `$ssl_early_data` variable exposed by NGINX directly should you
# wish to do so.
map $ssl_early_data $tls1_3_early_data {
  "~." $ssl_early_data;
  default "";
}
Replace the root location in the above file with the directory on your server.
Save the file by pressing Ctrl + X and entering Y when prompted.
Open the file /etc/nginx/nginx.conf for editing.
$ sudo nano /etc/nginx/nginx.conf
Add the following line before the line include /etc/nginx/conf.d/*.conf;.
server_names_hash_bucket_size 64;
Save the file by pressing Ctrl + X and entering Y when prompted.
Verify your Nginx configuration.
$ sudo nginx -t
If you see no errors, it means you are good to go.
You will also need to add the domain name to your ALLOWED_HOSTS directive. Open the settings.py file.
$ nano ~/dj-sample/demoproject/settings.py
Change the value for ALLOWED_HOSTS variable.
ALLOWED_HOSTS = ['<yourserver_ip_address>','django.example.com']
Save the file by pressing Ctrl + X and entering Y when prompted.
Restart Gunicorn Socket and Service.
$ sudo systemctl restart gunicorn.socket
$ sudo systemctl restart gunicorn.service
Reload the Nginx server.
$ sudo systemctl reload nginx
Open the HTTP port. You can also delete the 8000 port if you are not going to use it anymore.
$ sudo firewall-cmd --remove-port=8000/tcp --permanent
$ sudo firewall-cmd --reload
Verify by opening the URL http://django.example.com and the Django homepage will load up.
Conclusion
This concludes our tutorial where you learned how to install Django along with Gunicorn and Nginx on a Rocky Linux 9 server. You also installed an SSL certificate to enhance the security of your Django project. If you have any questions, post them in the comments below.

