How to Install Docker Swarm on Rocky Linux
Docker Swarm is a container orchestration built on top of Docker Engine. It allows you to create and deploy a cluster of Docker nodes with multiple servers. Docker Swarm simplifies your containerized application deployment into a service. Provides a simple and easiest way to manage and orchestrate containers.
Docker Swarm offers a high level of availability for applications. In Docker Swarm, you can run a single application or service on multiple nodes, which are called 'Worker Nodes". And there is also a node called "Swarm Manager", which is the central management and orchestration of the Docker Swarm.
This tutorial will show you how to set up Docker Swarm using Rocky Linux servers. You will install Docker on each server, set up firewalld, initialize the Swarm Manager, and add Nodes, and lastly, you will also learn the basic usage of Docker Swarm for deploying containerized applications.
Prerequisites
To complete this guide, you will need at least three Rocky Linux servers and a non-root user with sudo/administrator privileges.
For this demonstration, we will use three Rocky Linux servers with the details below:
Hostname            IP Address        Used as
---------------------------------------------------
swarm-manager1     192.168.5.100     Swarm Manager
worker1            192.168.5.120     Node
worker2            192.168.5.121     Node
With all of these requirements in place, you are ready to start the Docker Swarm deployments.
Installing Docker
To set up Docker Swarm, you must install Docker Engine on every machine/server. For Rocky Linux distribution, you can install Docker via the official Docker repository.
Now you will install Docker Engine on every of your Rocky Linux servers.
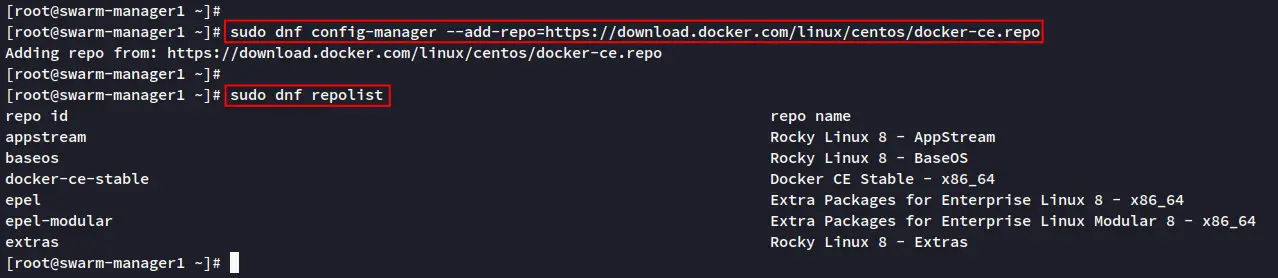
Add the Docker repository for the Rocky Linux system via the dnf command below.
sudo dnf config-manager --add-repo=https://download.docker.com/linux/centos/docker-ce.repo
Once the repository is added, run the dnf command below to verify the repository list and update all packages.
sudo dnf repo list
sudo dnf update
If the Docker repository is added, you will see the output below:
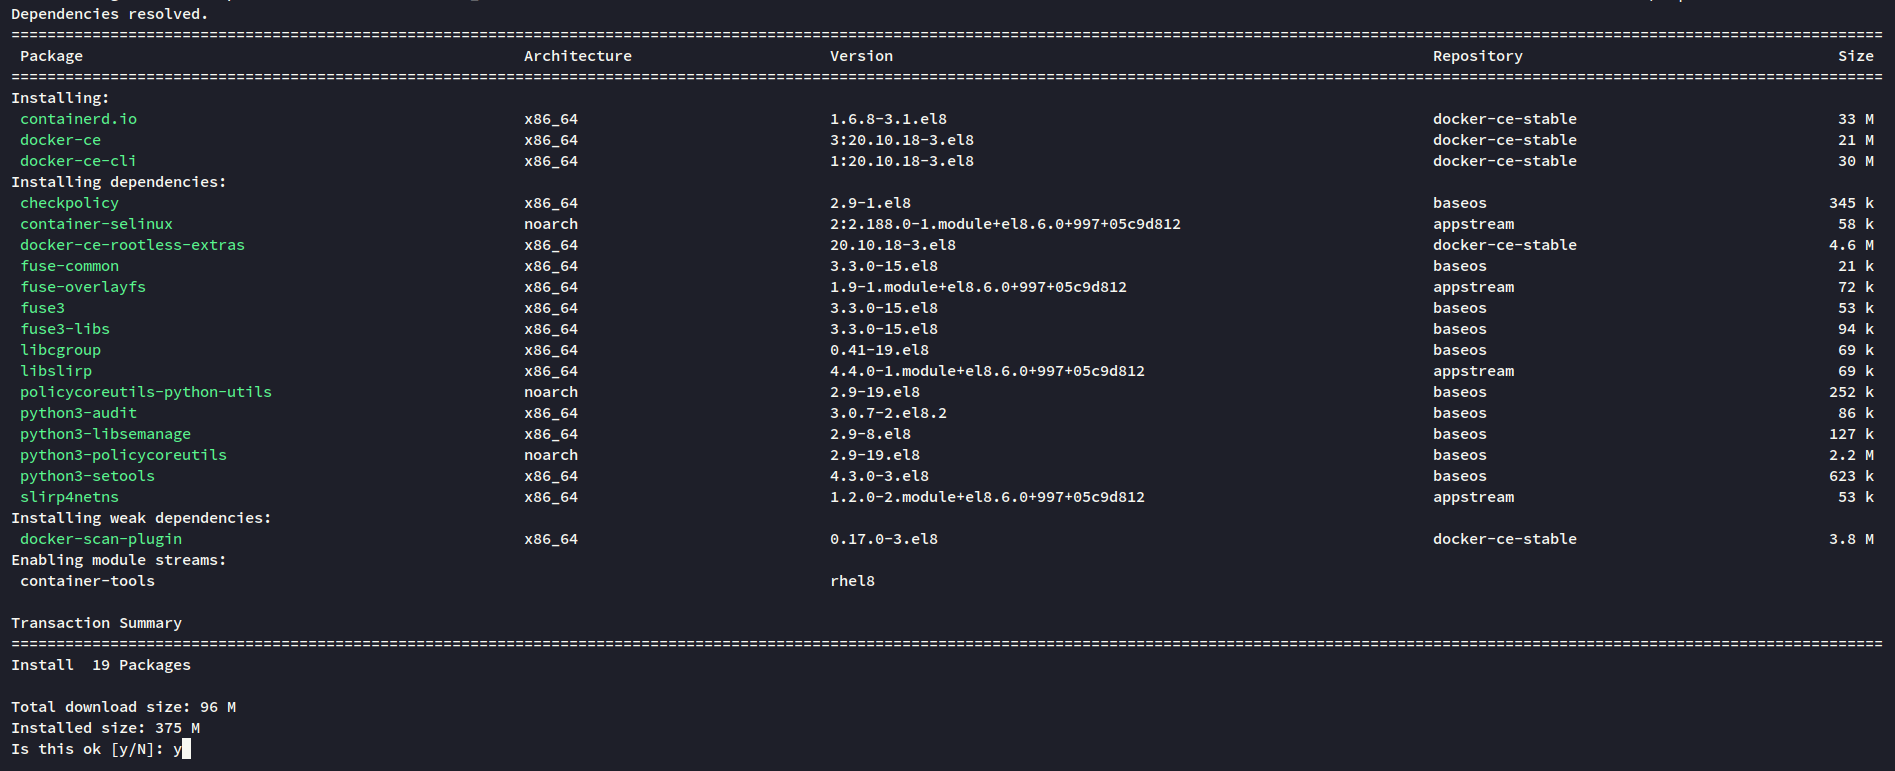
Next, install Docker via the dnf command below. When prompted to confirm the installation, input y and press ENTER to proceed.
sudo dnf install docker-ce docker-ce-cli containerd.io
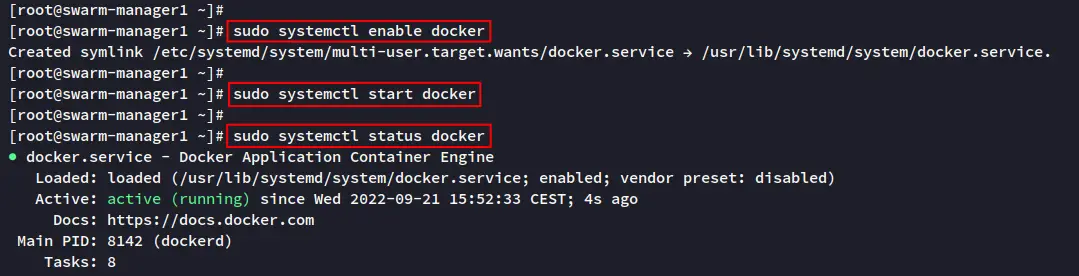
Once Docker is installed, start and enable the 'docker' service via the systemctl command below. The 'docker' service should be running and will automatically run at system boot.
sudo systemctl enable docker
sudo systemctl start docker
Lastly, verify the 'docker' service using the command below to make sure the service is running.
sudo systemctl status docker
If the 'docker' service is running, you should get the output like below.
Additionally, if you want to run Docker with a non-root user, you must add the user to the 'docker' group via the command below.
sudo usermod -aG docker user
Setting up Firewalld
For the production environment, you should enable the firewall on every server. On the default Rocky Linux system, the firewalld is enabled by default. So you just need to add some TCP and UDP ports for the Docker Swarm deployment.
Below are some of the TCP and UDP ports that you must open on each server for deploying Docker Swarm and make it run properly:
- TCP port 2377 for cluster management communications - this is if you have multiple Swarm Managers.
- TCP and UDP port 7946 for communication among nodes - for all nodes on the Swarm environment.
- UDP port 4789 for overlay network traffic
Add Docker Swarm ports to the firewalld via the firewall-cmd command below.
sudo firewall-cmd --add-port=2377/tcp --permanent
sudo firewall-cmd --add-port=7946/tcp --permanent
sudo firewall-cmd --add-port=7946/udp --permanent
sudo firewall-cmd --add-port=4789/udp --permanent
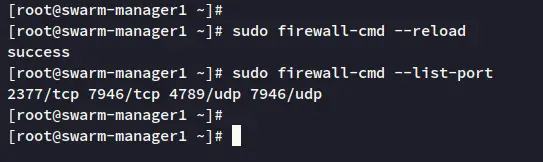
Next, reload firewalld rules and verify the list of ports on the firewalld using the command below.
sudo firewall-cmd --reload
sudo firewall-cmd --list-port
You should see some TCP and UDP ports for the Docker Swarm deployment is added to the firewalld.
With the Docker engine installed on every server and the Firewalld configuration, you can now set up the Docker Swarm deployment by initializing the first node as the "Swarm manager".
Initializing Swarm Manager
Swarm Manager is the brain of your Docker Swarm environment. For large deployments, you can add multiple servers as the Swarm manager, which enables the high availability and fault tolerance of your Swarm Manager.
The Swarm Manager is the cluster manager for your Docker Swarm, it's managing the state of your application deployments and is also integrated with Docker Engine. Swarm Manager provides a declarative service model and service scaling, the desired state of service, and also provides rolling updates.
In this example, we will initialize the server "swarm-manager1" with IP address "192.168.5.100" as the Swarm Manager.
Run the following command "docker swarm init" on the "swarm-manager1" server to start initializing the Swarm Manager on your deployment.
For this example, the Swarm Manager is running on IP address "192.168.5.100" and the default network for services on the Docker Swarm will be "10.10.0.0/16".
docker swarm init --advertise-addr 192.168.5.100 --default-addr-pool 10.10.0.0/16
Now you should see output similar to the following screenshot when the Swarm Manager is initialized. Also, you can see the instruction that you need to add worker nodes to your Docker Swarm deployment including the generated token that you must use.

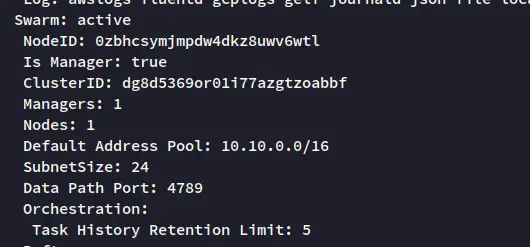
Next, run the following docker command to verify that the Swarm mode is activated and enabled.
docker info
You will see the Swarm mode is "active" with the network IP address for services is "10.10.0.0/16", which is the same as the configuration during the initialization process. Also, you can see the current node available on the Docker Swarm is "1" only.
Verify the list of available nodes on your Docker Swarm via the "docker node" command below. And you will see there are only one node on your Docker Swarm deployment.
docker node ls

Adding Worker Nodes to Swarm
In Docker Swarm, the worker node has the same concept as in other container orchestration which is where containers are executed and running. The Docker Engine must be installed on each worker node, and also the worker can be promoted as the "Swarm Manager".
At the same time, the Swarm Manager is also can be used as the worker node, which means your application can also be running on the Swarm Manager.
Run the following "docker swarm join" command to add the "worker1" and "worker2" servers to the Docker Swarm. Also, be sure to replace the token with the generated token in your environment.
docker swarm join \
--token SWMTKN-1-4qxedy87gygenejrw06hlqpuwfm6erulccfj1jhnmsn0kehbnb-2ld4g3zo36bzu8d8ss4115rhq 192.168.5.100:2377
When you get the output message such as "This node joined a swarm as a worker", this means the worker node is added.
You can see the similar output when "worker1" and "worker2" is joined to the Docker Swarm.

Next, go to the Swarm Manager again and run the docker command below to verify the list of nodes on your Docker Swarm.
docker node ls
You should see three nodes on your Docker Swarm environment. In this example, the 'swarm-manager1" is used as the Swarm Manager, and both "worker1" and "worker2" servers is used as the worker node.

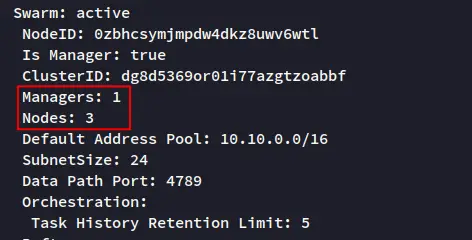
Additionally, you can also verify the list of nodes using the docker command below.
docker info
On the Swarm Manager server, you can see the output in the following screenshot. There are 1 manager and 3 nodes (the swarm-manager is also used as a worker).
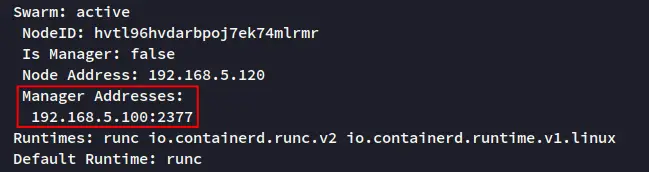
But, on the "worker1" and "worker2" servers, you will see the output like the following. You can see the Swarm Manager IP address with the default TCP port 2377.
At this point, you have completed the Docker Swarm deployment using Rocky Linux. Next, you will deploy the application/service to your Swarm environment.
Managing Services on Docker Swarm
When you deploy an application to the Docker Swarm environment, that application will be called a "service". It's an image of your microservice application, and it could be an HTTP server, database server, or other applications.
To deploy a service on Docker Swarm, you should specify the base image that you will be using, the ports, the specific name of your service, and also the number of replicas for your service.
You will now learn the basic deployment of your services to Docker Swarm.
In this example, you will create a new service "test-httpd" with the 1 replica and expose port "8000" on the Swarm node. The image that you will be using is "httpd:alpine".
Run the following "docker service" command to create a new service.
docker service create --replicas 1 --name test-httpd -p 8000:80 httpd:alpine

Now verify the services on your Docker Swarm via the docker command below. You should see the service "test-httpd" is running and also exposed the TCP port 8000 with only 1 replica.
docker service ls

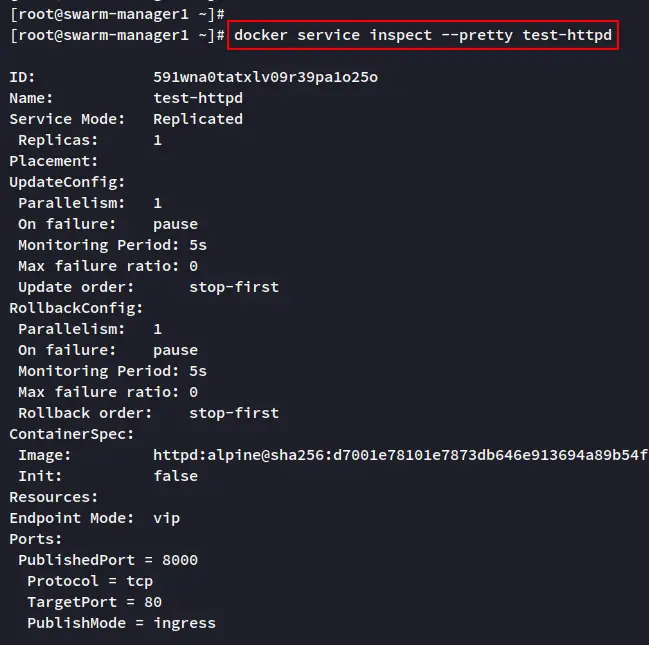
Next, check the details of your "test-httpd" service via the command below.
docker service inspect test-httpd
docker service inspect --pretty test-httpd
Below you can see the detailed service of "test-httpd".
Also, you can check the container that runs on the "test-httpd" service via the "docker service" command as below.
docker service ps test-httpd
You can see the "test-httpd.1" container is running on the "swarm-manager1" server.

Now open the port "8000" on all servers using the following firewall-cmd command.
sudo firewall-cmd --add-port=8000/tcp
After that, verify the "test-httpd" service using the curl command as below. In this example, the "swarm-manager1" IP address is "192.168.5.100".
curl 192.168.5.30:8000
curl -I 192.168.5.30:8000
You will see the default index.html page of the "test-httpd" service.

Scaling Services on Docker Swarm
After you have deployed the service on Docker Swarm, now you will learn how to scale your services and applications.
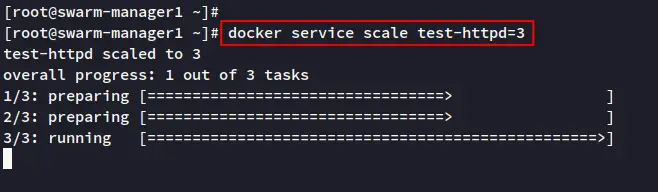
Run the following command to scale the "test-httpd" service to 3 replicas. This command will create another two services of "test-httpd" on worker nodes.
docker service scale test-httpd=3
Now, verify the list of running services using the following command. You should see another "test-httpd" service is running on both "worker1" and "worker2" servers.
docker service ps test-httpd

Lastly, verify the service via the curl command as below on both "worker1" and "worker2" servers. If the service is running, you should see the default index.html page on your screen.
Checking service on worker1.
docker ps
curl worker1:8000

Checking service on worker2.
docker ps
curl worker2:8000

Deleting Services on Docker Swarm
You have learned the basic deployment and scaling services on Docker Swarm. Next, you will be cleaning up your Docker Swarm environment by deleting the "test-httpd" service.
Run the following command to remove the service "test-httpd" from the Docker Swarm.
docker service rm test-httpd
After that, verify the "test-httpd" service via the "docker service inspect" command below. You should see the service is deleted.
docker service inspect test-httpd
Additionally, you can also verify via the docker command below to check the list of running containers and images on your Swarm.
You should see the container is removed and the httpd:alpine image is available on all of the servers.
docker ps
docker images
Conclusion
In this guide, you have deployed the Docker Swarm with three Rocky Linux servers. You have also learned the installation of Docker Engine on a Linux server and the configuration of Firewalld on the Rocky Linux system. And lastly, you have also learned the basic application deployment to Docker Swarm via the "docker service" command.
From here, you can now deploy your containerized applications with all of the dependencies to the Docker Swarm. You can also add more Swarm Manager to set up the high availability of your Docker Swarm environment.

