How to Install vTiger CRM Open Source Edition on Debian 11
vTiger is an all-in-one open source CRM (Customer Relationship Management) solution for your business. It is suitable for small and medium businesses. OpenSource vTiger CRM (also known as tiger CRM) provides various tools for customers and users as a business management suite, which increases your business operation.
The vTiger CRM provides two different solutions, the vTiger CRM cloud solution where you can pay for all management and additional features like sales force automation, and the vTiger CRM open-source version that you can self-hosted on your server.
In this tutorial, we will show you how to install vTiger CRM on the Debian 11 server with the LAMP Stack. This guide will be using the open-source version vTiger CRM.
Prerequisites
- A Linux server Debian 11 Bullseye.
- A root user or non-root user with root privileges.
- A domain name pointed to your server.
Installing LAMP Stack
First, you will be installing the LAMP Stack with some additional packages on your Debian server.
But, before installing any packages, run the following command to update your Debian repository.
sudo apt update
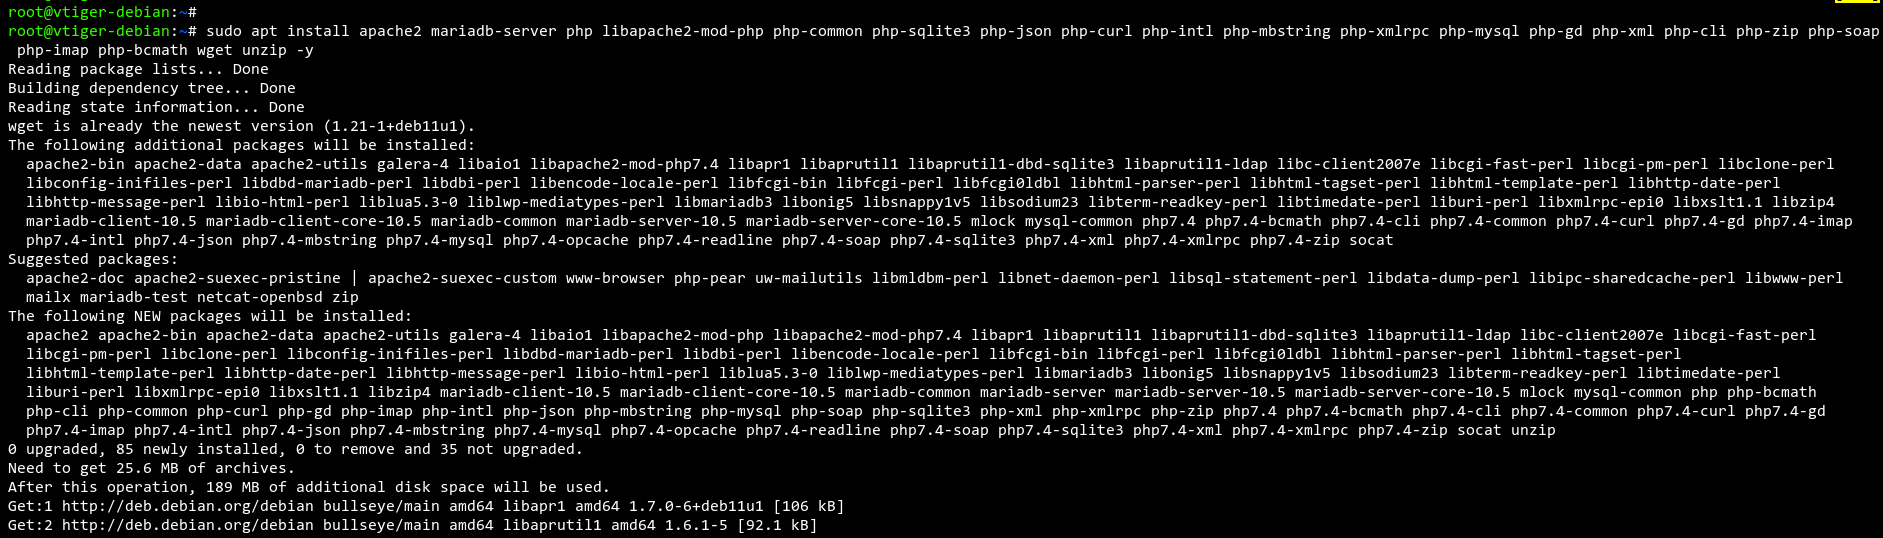
Next, install the LAMP Stack and some additional packages using the following command.
sudo apt install apache2 mariadb-server php libapache2-mod-php php-common php-sqlite3 php-json php-curl php-intl php-mbstring php-xmlrpc php-mysql php-gd php-xml php-cli php-zip php-soap php-imap php-bcmath wget unzip -y
Below you can see the output:
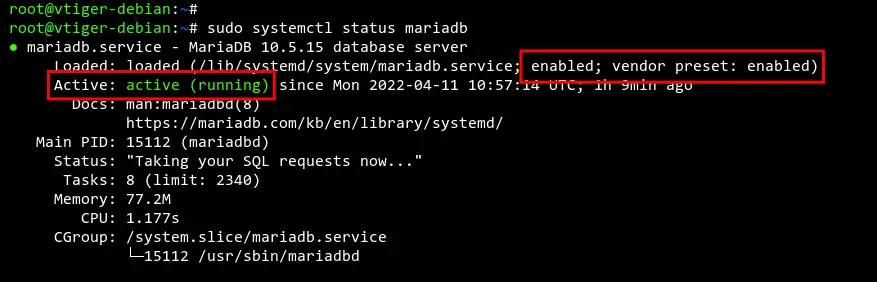
Now after installation is completed, check the Apache2 and MariaDB service status using the below command.
sudo systemctl status apache2
sudo systemctl status mariadb
Below is the output of the Apache2 service status.

Below is the output of the MariaDB service status.
Setting up MariaDB Server
Now you will be setting up the mariaDb server for the vTiger installation.
Edit the MariaDB configuration /etc/mysql/mariadb.conf.d/50-server.conf using nano editor.
sudo nano /etc/mysql/mariadb.conf.d/50-server.cnf
Under the [mysqld] section, add the following configuration.
sql_mode = ""
Save the file by pressing the CTRL+X button and entering Y to confirm.
Next, restart the mariaDB service to apply the new configuration.
sudo systemctl restart mariadb
After that, run the below command to set up the MariaDB root password.
sudo mysql_secure_installation
Now you will be asked some questions regarding the mariaDB deployment.
- Press enter to confirm and set up the MariaDB deployment.
- Input Y to change the authentication method to unix_socket.
- Input Y to set up the root password for MariaDB and type the new strong password.
- Input Y to remove the default anonymous user from the MariaDB server.
- For the disable remote login for the root user, input Y again to confirm.
- Now remove the default database test from the MariaDB server.
- Lastly, input Y again to reload all tables privileges.
Setting Up PHP
In the next step, you will be configuring the PHP on your Debian server for the vTiger installation.
Edit the /etc/php/7.4/apache2/php.ini file using nano editor.
sudo nano /etc/php/7.4/apache2/php.ini
Change the default PHP configuration as follows.
memory_limit = 512M
upload_max_file_size = 100M
log_errors = Off
max_execution_time = 100
date.timezone = Europe/Paris
Save the file using CTRL+X and enter Y when you are done.
Now restart the Apache2 service with the below command.
sudo systemctl restart apache2
Creating a New Database and User
Before start downloading and installing vTiger, you will need to create a new MariaDB database and user.
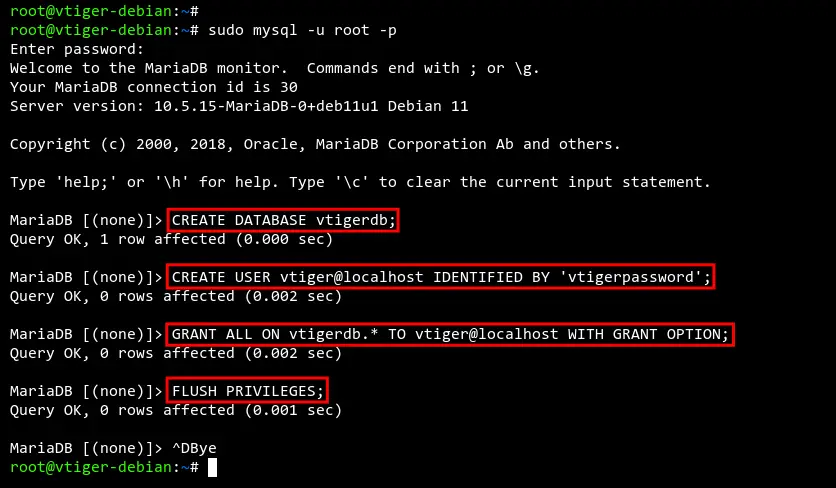
Login to the MariaDB shell as user root using the below command. You will be asked for the MariaDB root password, so input the correct MAriaDB root password.
mysql -u root -p
Now run the following queries to create a new database vtigerdb with the user vtiger and password vtigerpassword.
CREATE DATABASE vtigerdb;
CREATE USER vtiger@localhost IDENTIFIED BY 'vtigerpassword';
GRANT ALL ON vtigerdb.* TO vtiger@localhost WITH GRANT OPTION;
FLUSH PRIVILEGES;
Now type exit or press CTRL+D to exit from the MariaDB shell.
Download vTiger CRM
The vTIger CRM provides an open-source core CRM that can be downloaded for users. And this allows you to self-hosted the vTiger CRM on your server.
Now go to the /var/www/ directory and download the vTiger source code using the wget command. At the time of this writing, the latest version of the vTiger CRM open-source version is v7.4.0.
cd /var/www/
wget https://onboardcloud.dl.sourceforge.net/project/vtigercrm/vtiger%20CRM%207.4.0/Core%20Product/vtigercrm7.4.0.tar.gz
After the download process is completed, extract the vTiger CRM source using the below command.
tar -xzvf vtigercrm7.4.0.tar.gz
Now you will see a new directory vtigercrm under the /var/www/ directory.
Change the ownership of the vtigercrm directory to the www-data user and group. This will ensure the Apache2 web server can read all source codes of the vTiger CRM.
sudo chown -R www-data:www-data vtigercrm
At this point, the DocumentRoot directory for the vTiger CRM installation is /var/www/vtigercrm. You will need to include the DocumentRoot directory for vTiger CRM on your virtual host configuration.
Setup Apache virtual host
Now it's time to create a new virtual host configuration for the vTiger CRM installation.
Before starting configuring the Apache2 virtual host, run the below command to enable some modules that are needed for the vTiger CRM.
sudo a2enmod ssl rewrite headers
You will see the following output:

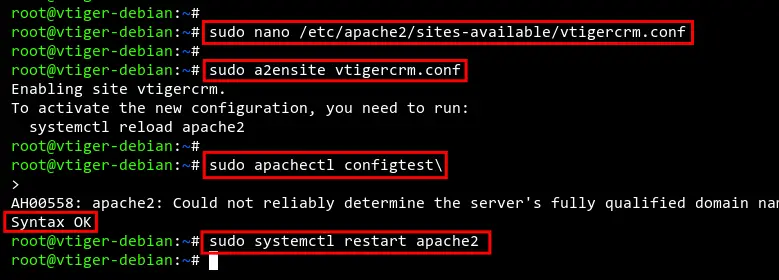
Next, create a new virtual host configuration /etc/apache2/sites-available/vtigercrm.conf using nano editor.
sudo nano /etc/apache2/sites-available/vtigercrm.conf
Input the following configuration and don't forget to change the domain name and the path of SSL certificates.
<VirtualHost *:80>
    ServerName example.io
    Redirect permanent / https://example.io/
</VirtualHost>

<VirtualHost *:443>
    ServerAdmin [email protected]
    DocumentRoot /var/www/vtigercrm
    ServerName example.io

    Protocols h2 http/1.1

    SSLEngine On
    SSLCertificateFile /etc/letsencrypt/live/example.io/fullchain.pem
    SSLCertificateKeyFile /etc/letsencrypt/live/example.io/privkey.pem

     <Directory /var/www/vtigercrm/>
        Options +FollowSymlinks
        AllowOverride All
        Require all granted
     </Directory>

     ErrorLog /var/log/apache2/vtigercrm_error.log
     CustomLog /var/log/apache2/vtigercrm_access.log combined
</VirtualHost>
Save the configuration by pressing the CTRL+X button and entering Y to confirm.
Now activate the vtigercrm.conf virtual host configuration using the below command. Then verify Apache2 configurations to make sure you don't have an error.
sudo a2ensite vtigercrm.conf
sudo apachectl configtest
You will see the output Syntax OK, which means Apache2 configurations are valid. If there is an error, you will see a different output message.
Lastly, restart the Apache2 service to apply new changes on the Apache2 webserver.
sudo systemctl restart apache2
Start vTiger CRM Installation
Now your vTiger CRM installation is accessible from the domain URL https://youdomain.com.
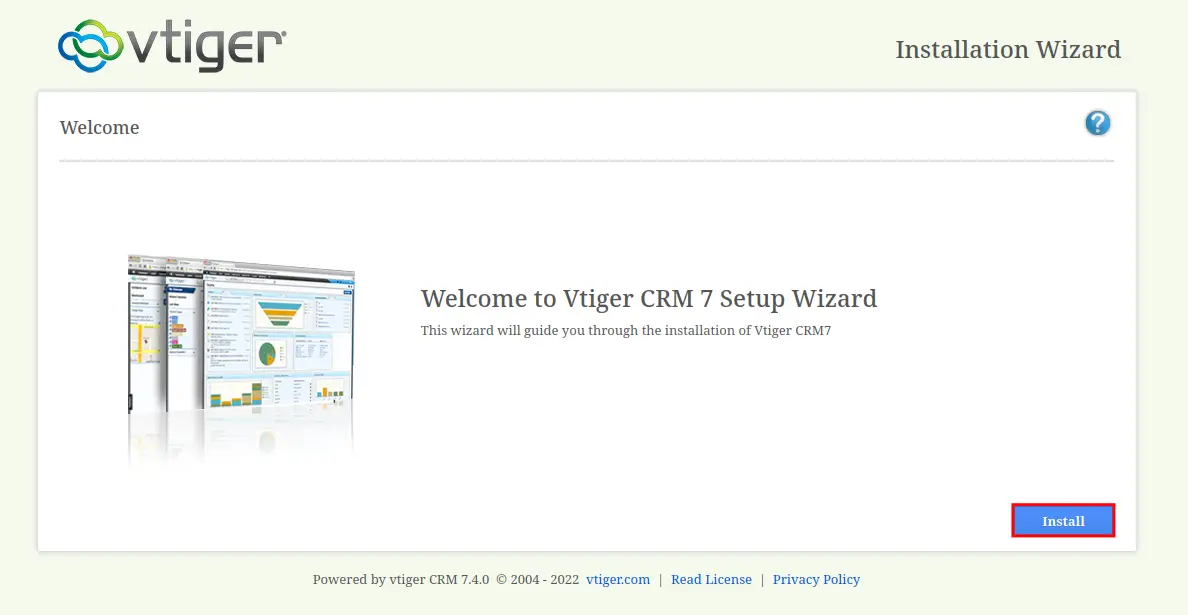
Below you can see the installation wizards of the vTiger CRM, click the Install button to start the installation.
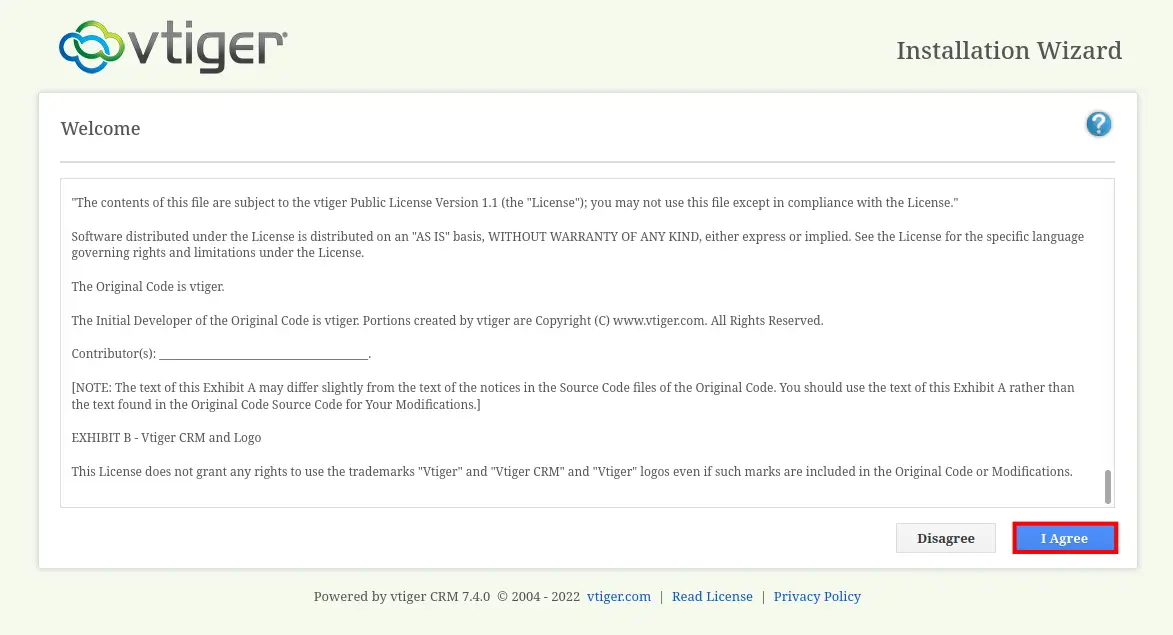
You will get the page about the License details of vTiger CRM. Click I Agree to confirm.
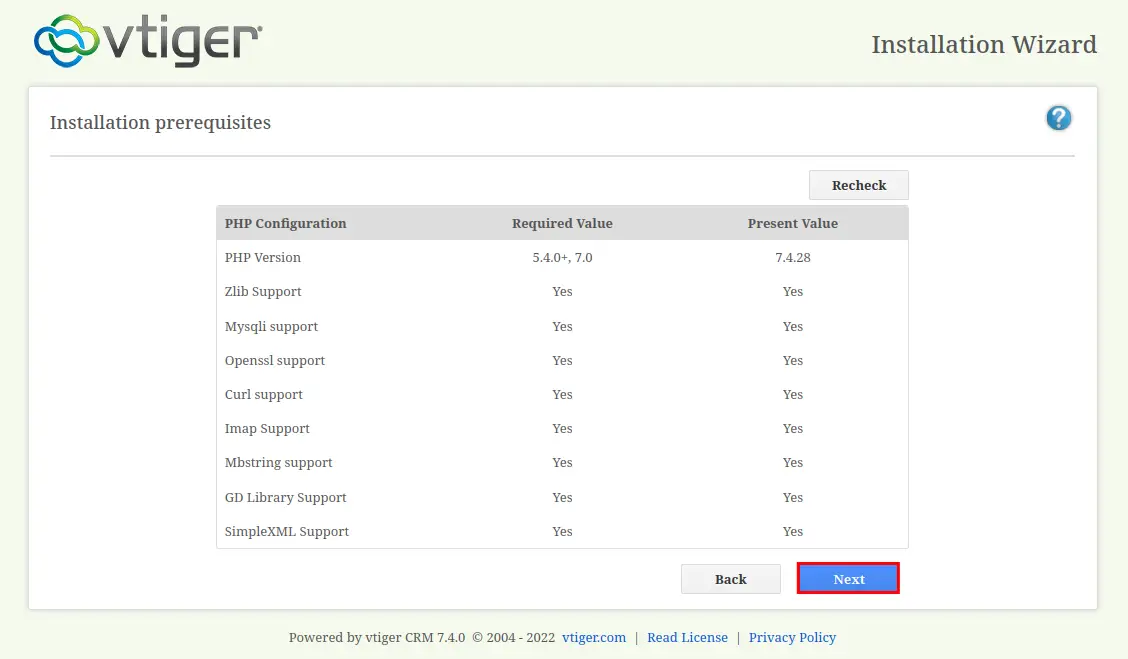
Now the vTiger CRM will be checking your system for installation. In the Present Value section, make sure all status is Yes. Then click the Next button to continue.
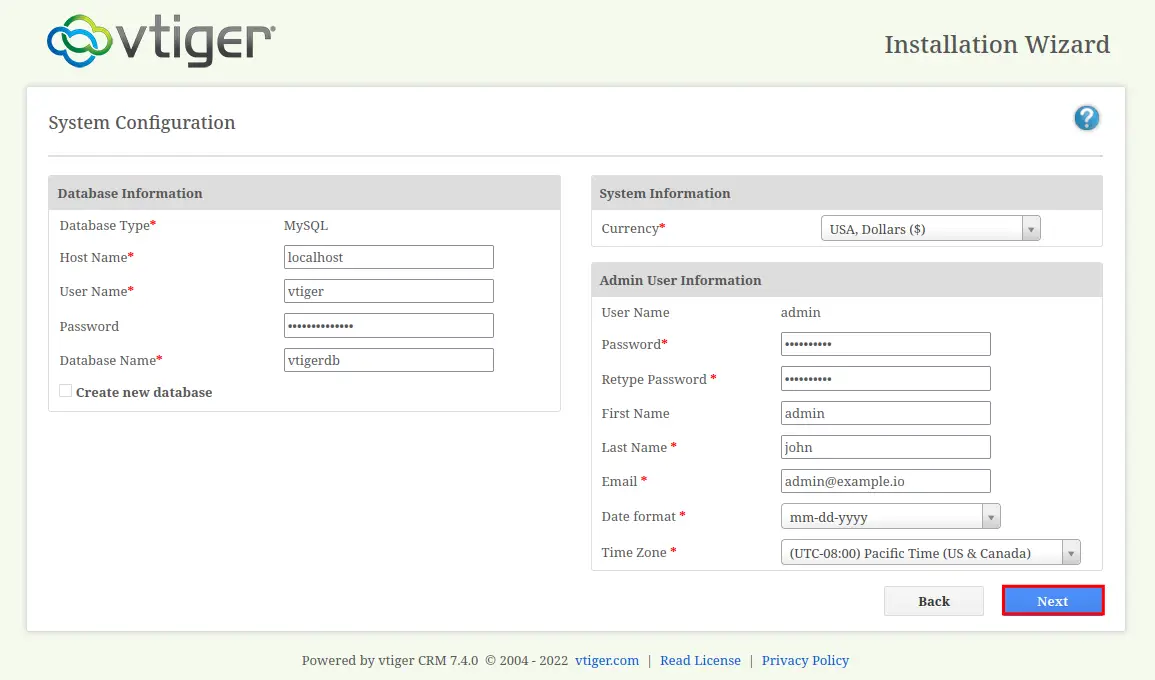
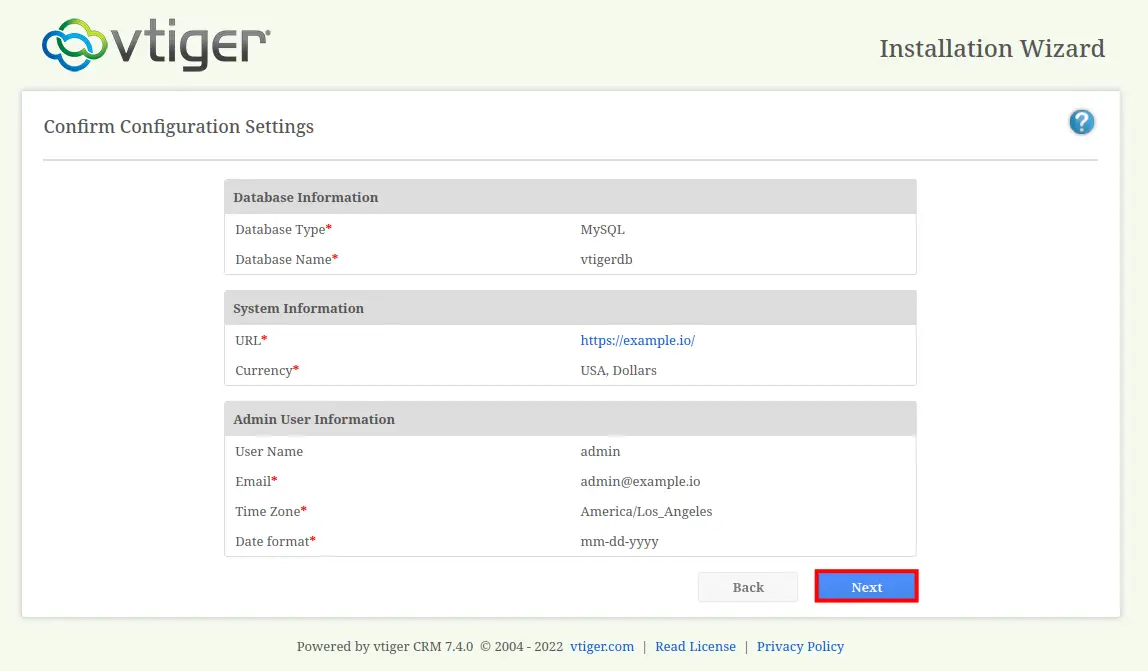
Input details database for the vTiger CRM installation, then input details information for your new admin user for vTiger CRM. Then click Next again to continue.
Double about your vTIger CRM installation and configuration, then click Next.
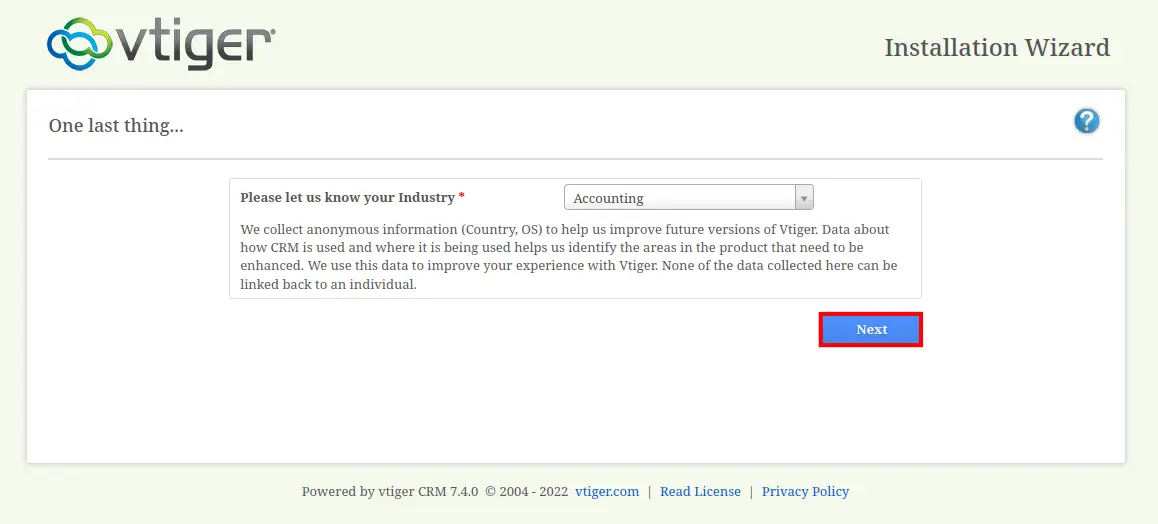
For the anonymous data collection, leave it as default and click Next.
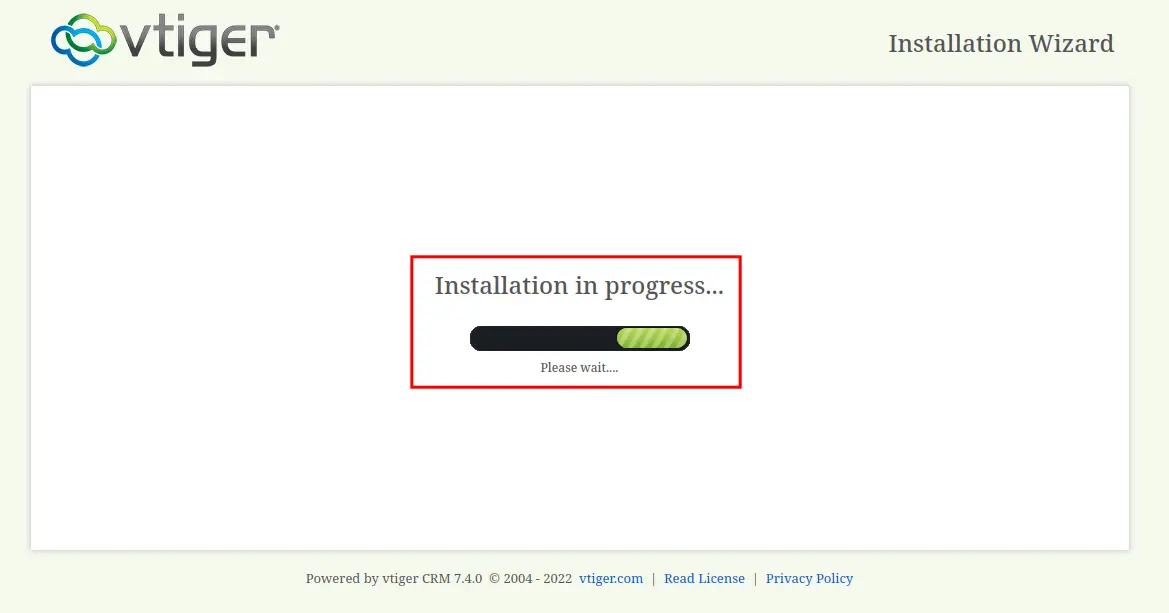
The vTiger CRM installation will begin.
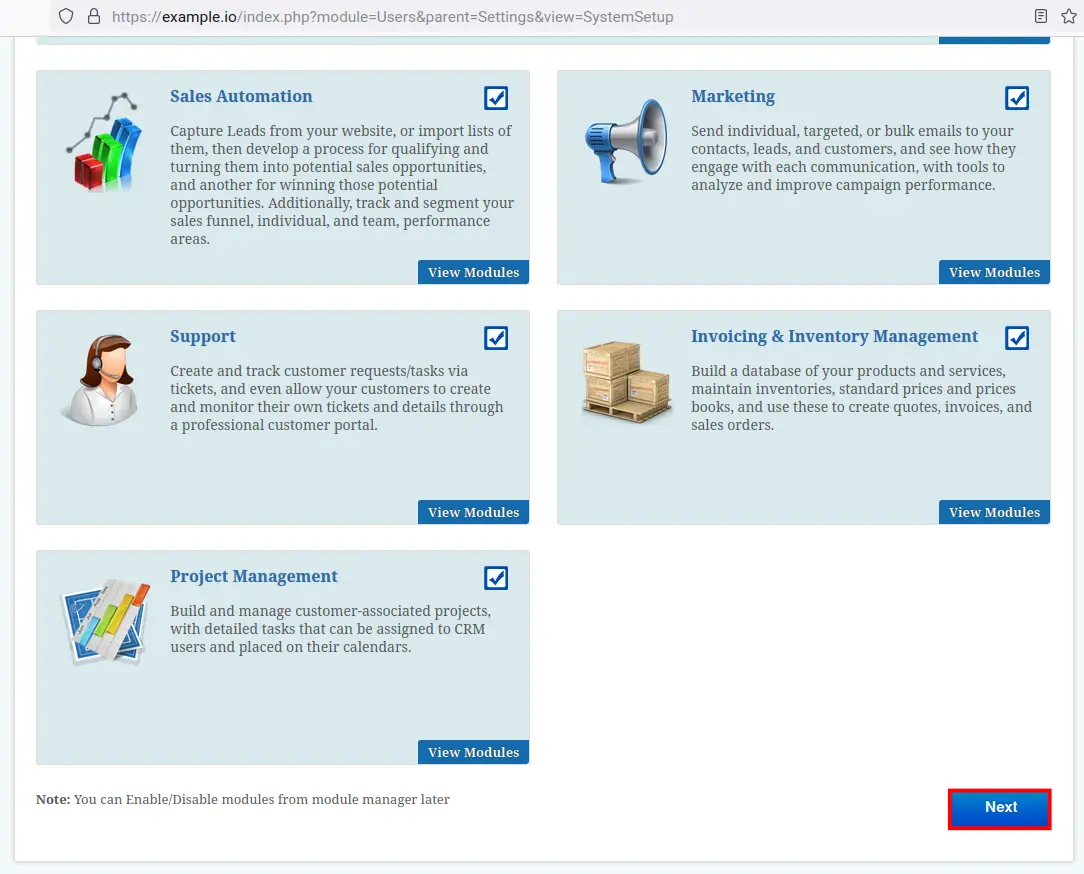
After installation is completed, select the default modules that you want to use and click Next again.
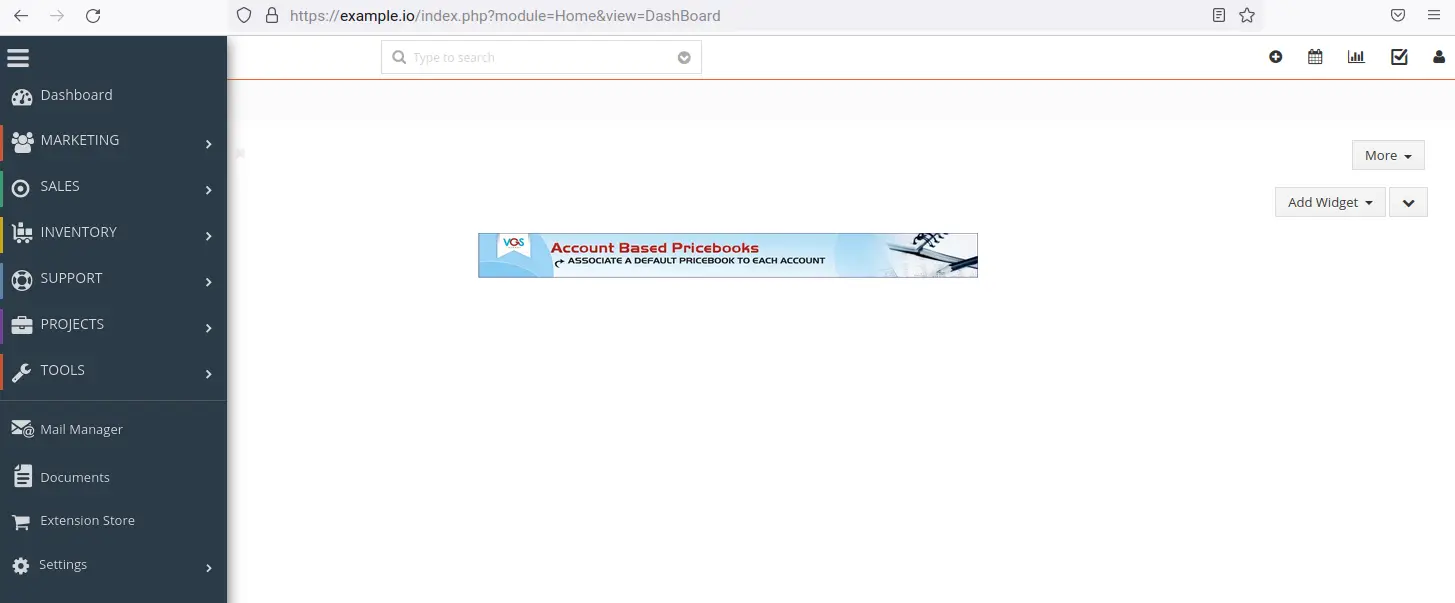
Now the installation is completed and you will get a black dashboard of vTiger CRM.
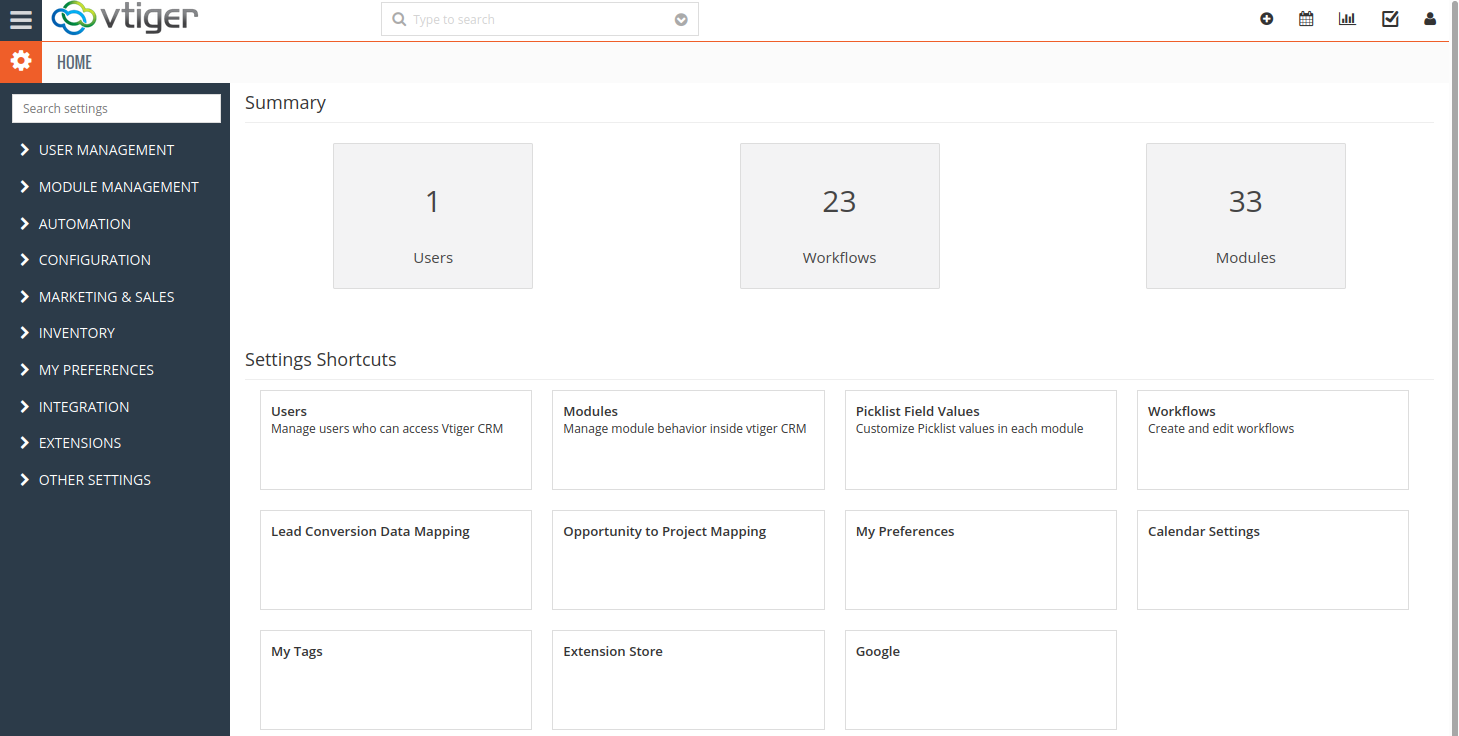
On the vTiger administration settings, you will see details information about your vTiger CRM installation and configurations.
Conclusion
Congratulation! You have now successfully installed the vTiger CRM with the LAMP Stack on the latest Debian 11 Bullseye.

