Hi all! In this QGIS tips and tricks series, I will show you how to digitize a perfect rectangular building footprints as shown in figure 1.
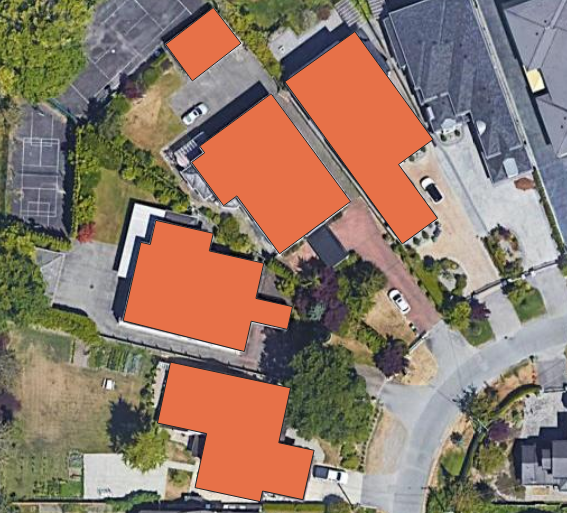 |
| Figure 1. Some Digitized Building Footprints |
Add your building polygon layer into QGIS and turn on editing mode by pushing Pencil icon on the top toolbar menu. In this tutorial I had a layer which is called buildings.
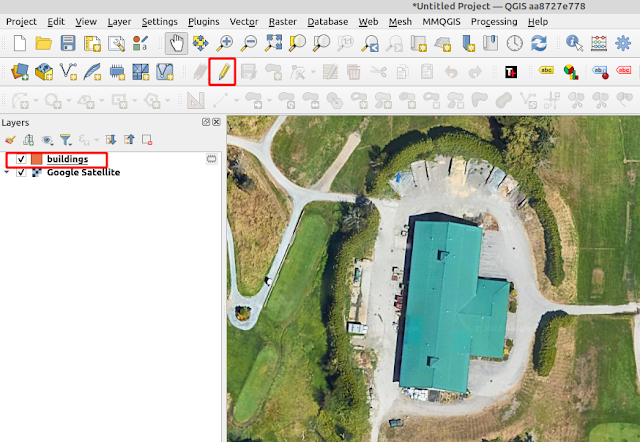 |
| Figure 2. Building Layer |
Next, click Add Polygon Feature icon and you should see an Advanced Digitizing window as seen in figure 3.
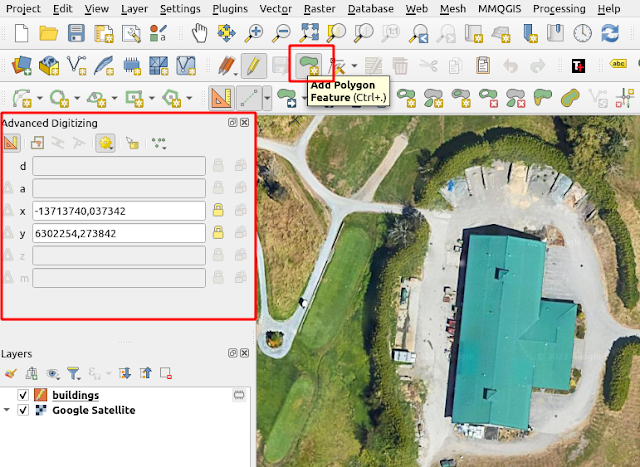 |
| Figure 3. Add Polygon Feature |
If the Advanced Digitizing window is not showing. On the top toolbar menu, select View > Panels > Advanced Digitizing Panel as shown in figure 4.
 |
| Figure 4. Enabled Advance Digitizing Menu |
In the Advanced Digitizing panel window select Enable Advance Digitizing Tools, with clicking the rulers icon as shown in figure 5.
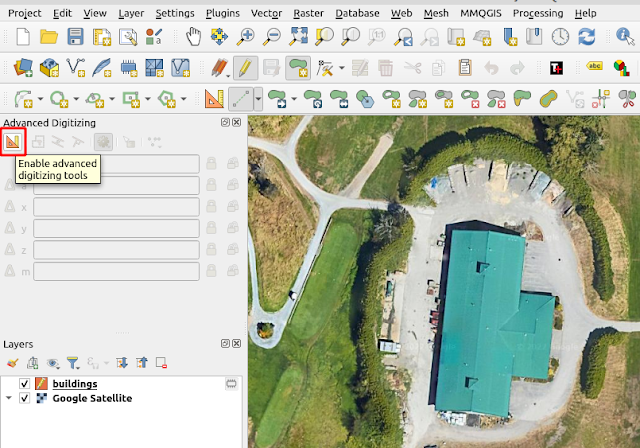 |
| Figure 5. Enable Advance Digitizing Tools |
A corner of a building is commonly in perpendicular (90 degree). To help us getting this angle, select Snap to common angles and choose one of common angle options as seen in figure 6.
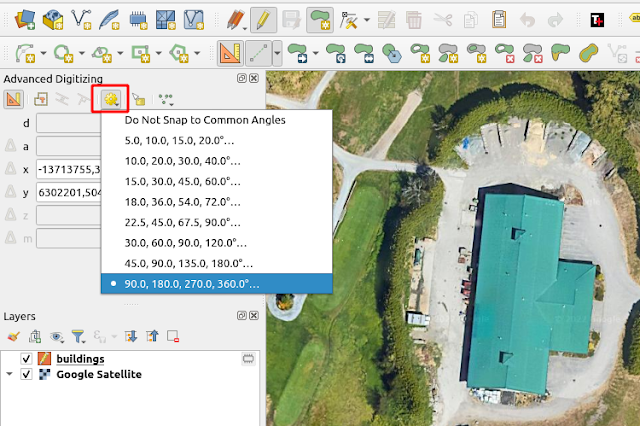 |
| FIgure 6. Snap to Common Angles |
Now you can start to digitize a building. As you can see in the figure 7 below, the angle of a line segment will be be snapped to the common angles as specified in the previous step in order to get perpendicular corners.
 |
| FIgure 7. Digitizing a Building |
That's all tips how to digitize a perfect building shape in QGIS. For other interesting QGIS tips and tricks, please visit QGIS Tips and Tricks series. Anyway there is a possibility you get a messy buildings data, if you curious how to fix it check this tutorial How to Adjust Imprecise Building Footprint in Python. Thanks!
