


Introduction to AWS Privatelink
To enable a private connection to services hosted in different VPC within the same AWS account or in different AWS accounts, we use AWS PrivateLink. It enables us to connect our VPC privately to supported AWS services, services hosted by other AWS accounts (VPC endpoint services), and supported AWS Marketplace partner services. We need not to use an Internet Gateway, NAT device, public IP address, AWS Direct Connect connection, or AWS Site-to-Site VPN connection to communicate with the service.
There are two main concepts in AWS Privatelink connection:
- VPC Endpoint
This is created in the consumers account to have an endpoint for VPC to enable a private connection to a service. - VPC Endpoint Service
This is created in the producers account where you have your service up and running. Other AWS principals can access this service using VPC endpoints.
Implementation of AWS Privatelink
Create a VPC endpoint service
We will create a VPC endpoint service in the producer account. In this account we have a service up and running. We can have any type of service which is exposed with a network loadbalancer. I have deployed an nginx application in my EKS cluster. The ingress is mapped with the loadbalancer service and is accessible at mynginx.knoldus.it.
1. Go to VPC console
2. Select VPC Endpoint services
3. Click on Create Endpoint Service

(a) Provide a name to the endpoint service and select Network.

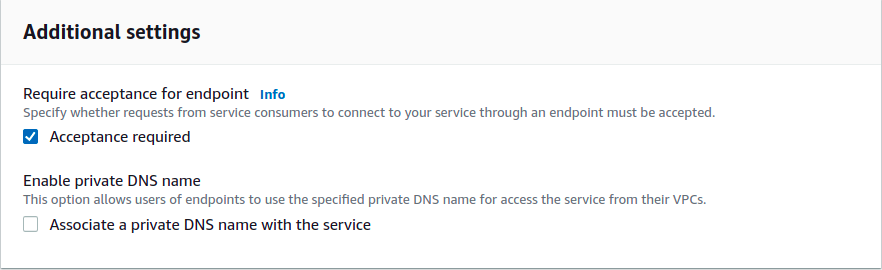
(c) In Additional Settings, enable the Acceptance required field. This will notify you whenever a consumer will try to access your service. If you disable it, your consumer will automatically start accessing your service as soon as a VPC endpoint is created.
(d) Specify the Tags if needed and click Create.

Now your Endpoint service will be created. You can now see that AWS provided you with Service ID, Service name and DNS names.
4. Add the Principal ARN to authorize the access/visibility of the service.
(a) Select your endpoint service. Go to Allow Principals. Click on Allow Prinicpals
(b) In the Principals to Add section, add:
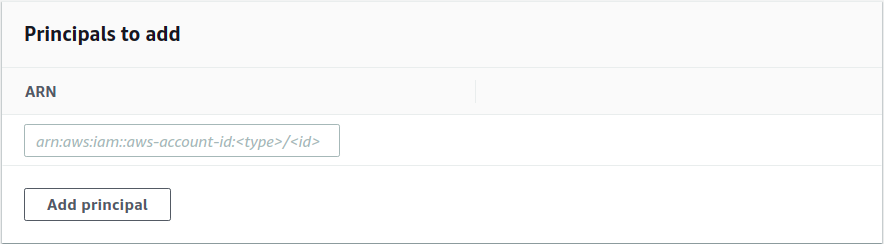
arn:aws:iam::<Account-ID>:root
Replace Account-ID with the consumer’s AWS Account ID, and select Add principal.
(c) Click on Allow Principals.
Now your principal has been added and you are ready to create a VPC endpoint connection in a different AWS account.
Create a VPC Endpoint
We can create a VPC Endpoint in the same aws account for different VPC, or in a different AWS account. Both these setups are similar. Here I am describing about creating a VPC Endpoint in a different AWS account.
Creating a VPC Endpoint in a different AWS account
Login to the AWS account where you need to setup this private connection.
1. Go to VPC console
2. Select Endpoints from the left menubar
3. Click on Create Endpoints
(a) In the Endpoints Settings, select Other endpoint services

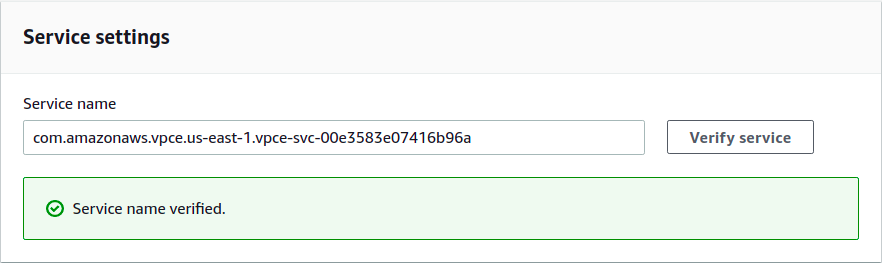
(b) Paste the service name in Service settings

(c) Click on Verify service
(d) Under VPC, select the VPC you want to have a connection for

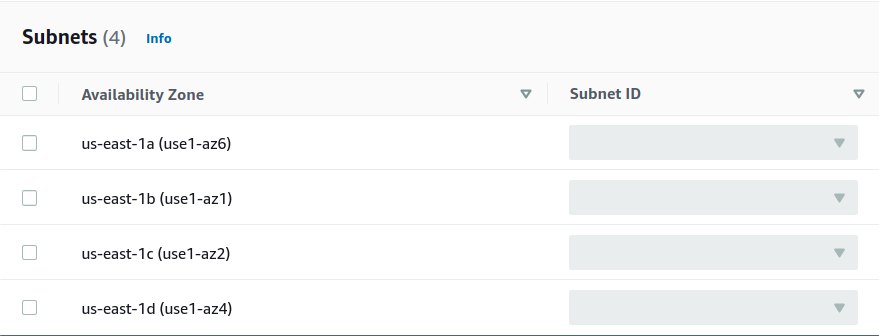
(e) Choose from a list of subnets in different availability zones
(f) Select the Security Groups and specify Tags
(g) Create Endpoint.
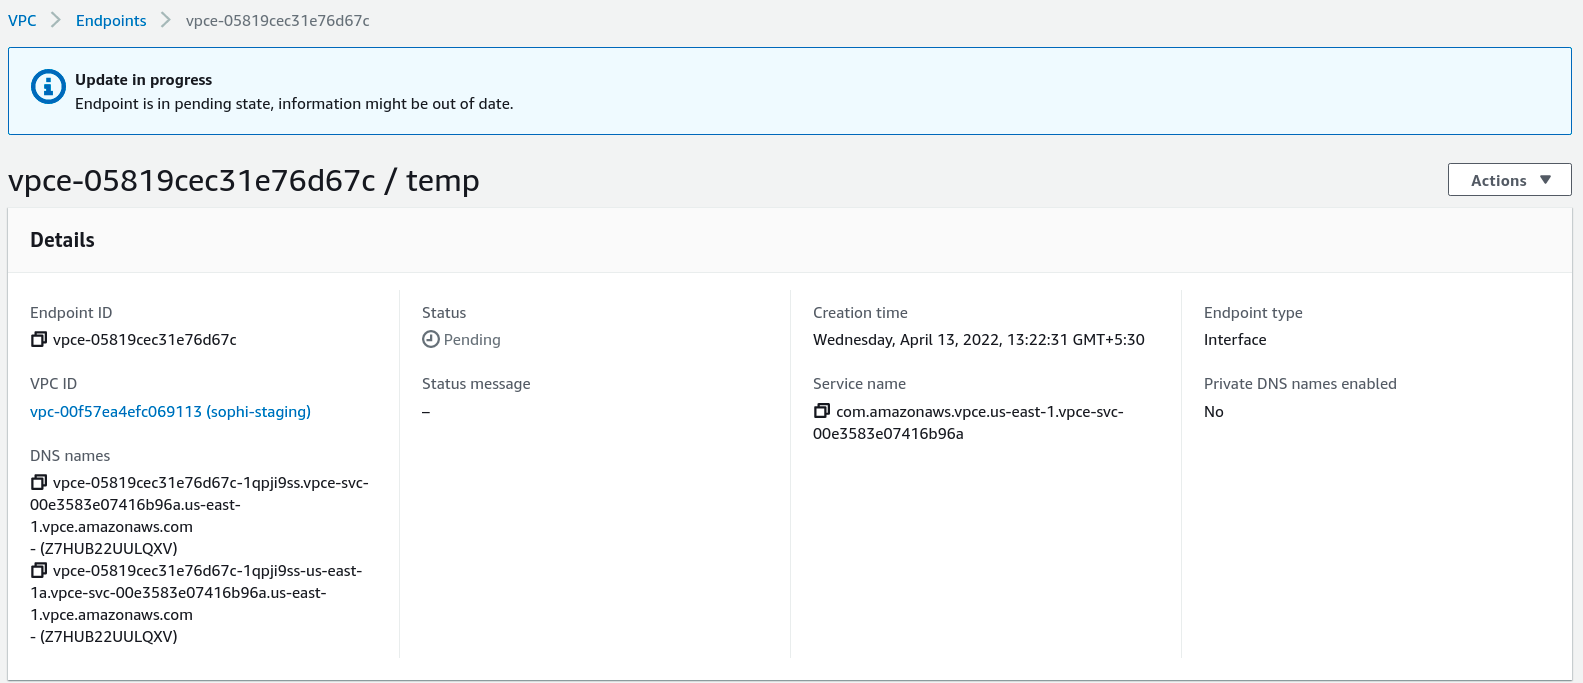
The status is pending, which means you will have to accept the connection request in the producer’s aws account. Once your endpoint is created, it will send a notification to the producer’s aws account for authenticating the connection request.
Accept the Endpoint connection
(a) Select your Endpoint service and click on Endpoint Connections


(c) Under Actions, select Accept endpoint connection request

(d) Type accept to accept the connection and click on Accept.

Once its done, you will see the State as Available. You can confirm the same in consumer’s aws account.

Now you have successfully established an endpoint connection.
Conclusion
To test the flow, you can create an instance under the similar network configuration and try to ping the DNS names mentioned above. You can also enable private DNS to have the same endpoint DNS name as you have in producer’s aws account.
If you don’t have the access to aws console or if you wish to do the same with cli commands in hand, follow my next blog.
Thank you readers, for sicking up till the end. In case of any queries/suggestions, feel free to reach out to me at vidushi.bansal@knoldus.com