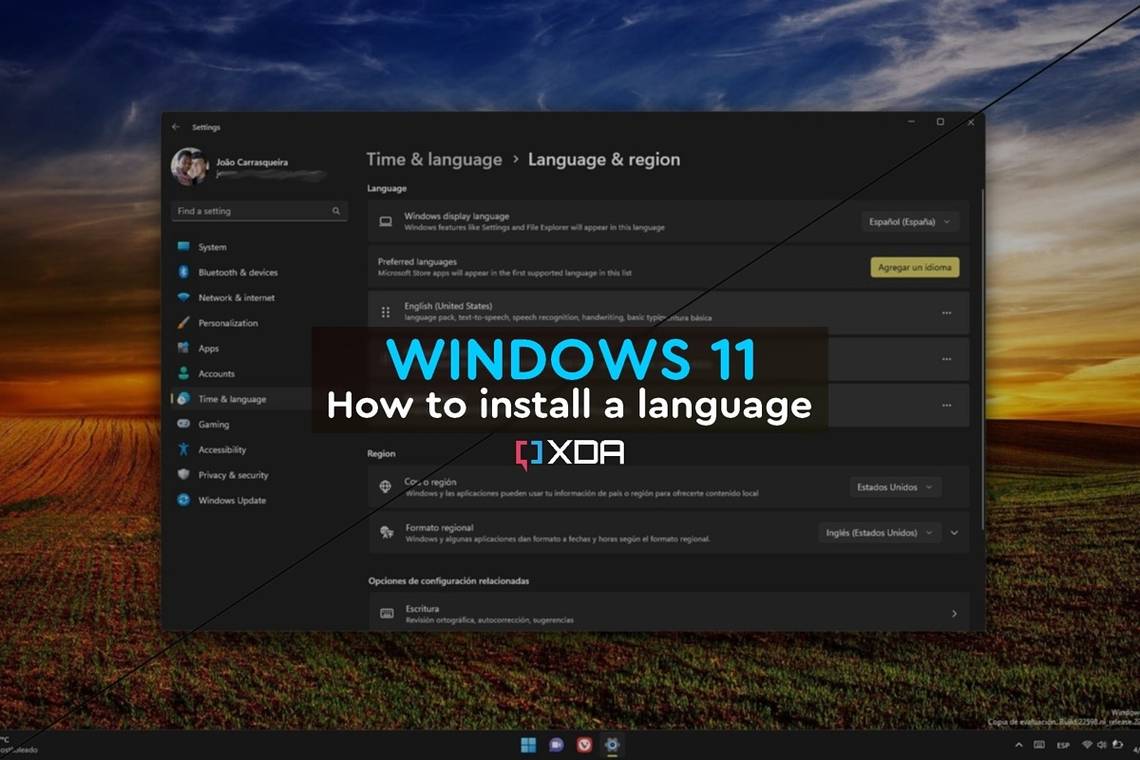
Windows 11 - like previous versions of Windows before it - is available in a wide range of languages to cater to people all over the world. And while your PC will likely come in the language you already speak, sometimes you may want to check out other languages for one reason or another. For example, maybe you're trying to learn a new language yourself and you want to practice it, so installing that language on your Windows 11 PC can greatly help. I have personally done this for many years while learning English.
If you're doing a clean install of Windows 11, you're given a few options for the default language you want it to be in, but you can also install new languages later, and you can have multiple installed at once. Installing a language does more than just change the language it's displayed in - you can use it for grammar corrections and suggestions using the touch keyboard, or you can practice using speech-to-text in that language, too.
In this guide, we'll show you how to install a new language on Windows 11 and how to manage the language features available for it.
How to install a language in Windows 11
If you want to add a new language to your Windows 11 PC, here's what you need to do:
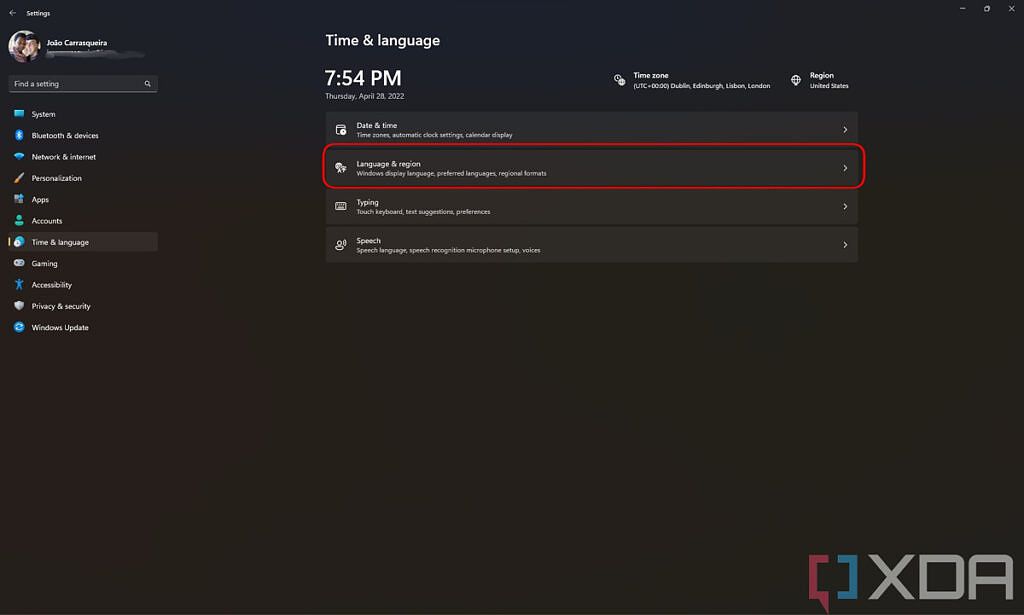
- Open the Settings app (you can find it in the Start menu).
- From the left-side menu, choose Time & Language.
-
Here, click Language & region.
-
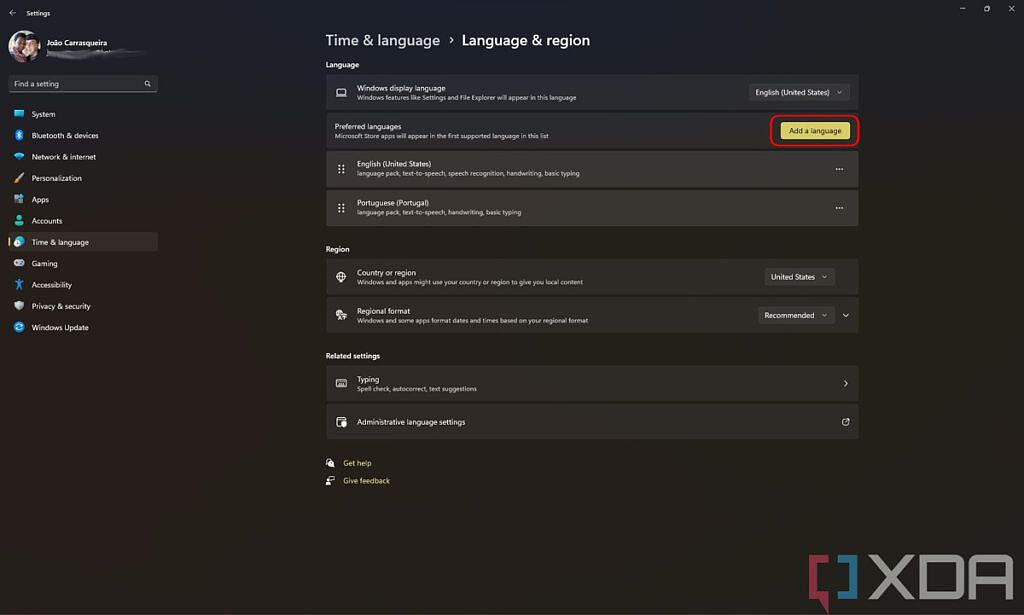
You'll see your current language settings, including your current display language and any languages you have installed. To install a new language, click Add language.
-
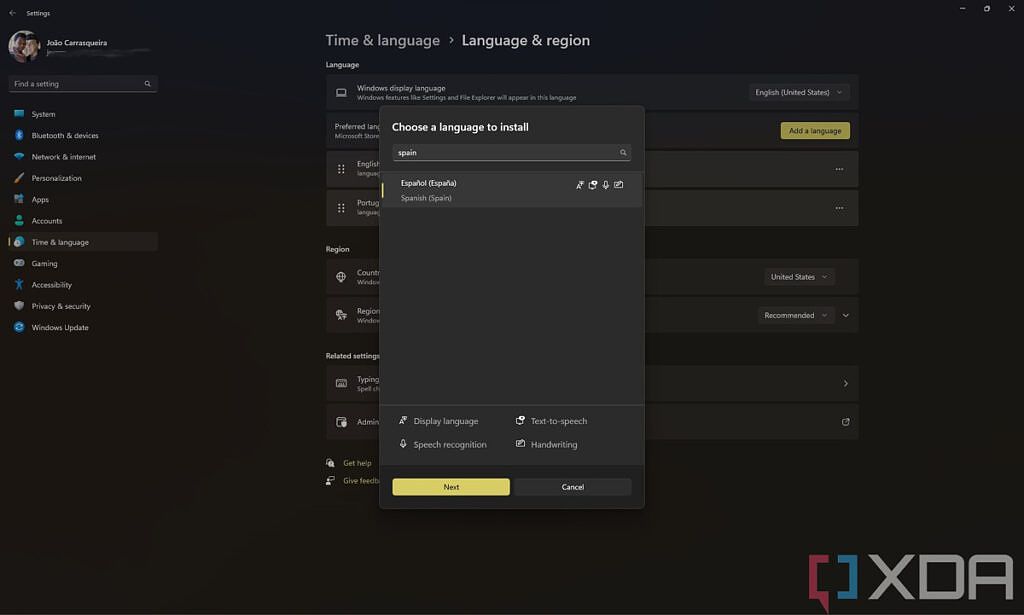
Find the language you want to install, either by scrolling or searching for it with the search bar at the top. Below the language list, you can also see a legend with icons, so you can tell which features are supported in which languages. Most languages can be used as a display language, and many of them also support handwriting recognition. The languages that support speech-to-text and voice recognition are a bit more sparse, but the most common ones are supported
In this case, we'll install Spanish (Spain). Select the language you want and click Next.
-
You'll then be able to choose the features you want to install for that language. For example, if your computer doesn't support pen input, you might not care about handwriting recognition, so you can save some space by deselecting it.
The most noteworthy part here is whether you want to set the language you're installing as your display language. If you do, you'll have to sign out of your PC for the language to change. Select the features you want and click Next.
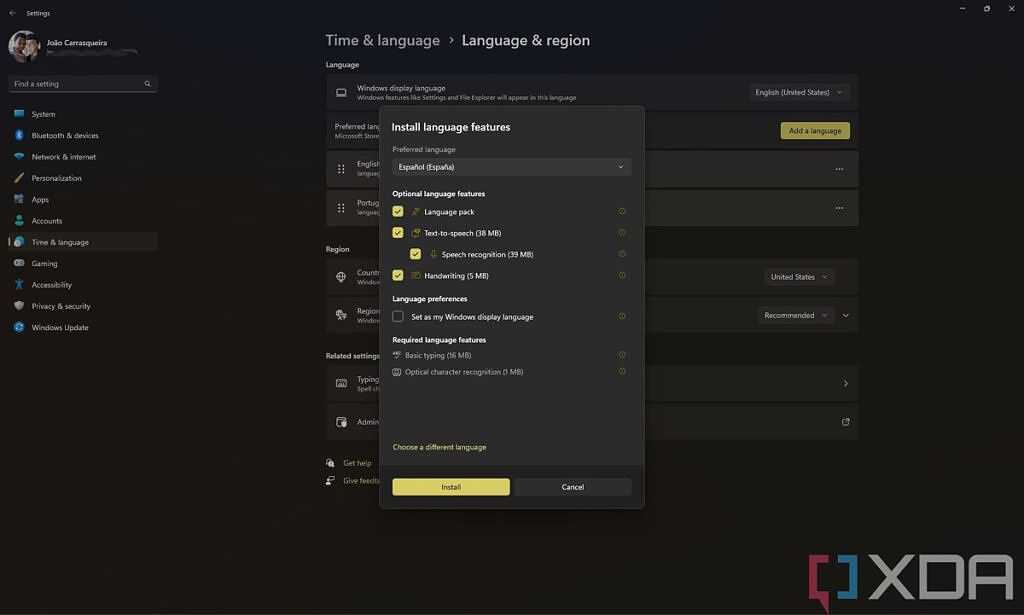
- The language is now installed and you can make use of the features you chose to install. Again, if you chose to make it your new display language, you'll see a message prompting you to sign out of your PC, which will close all your apps.
-
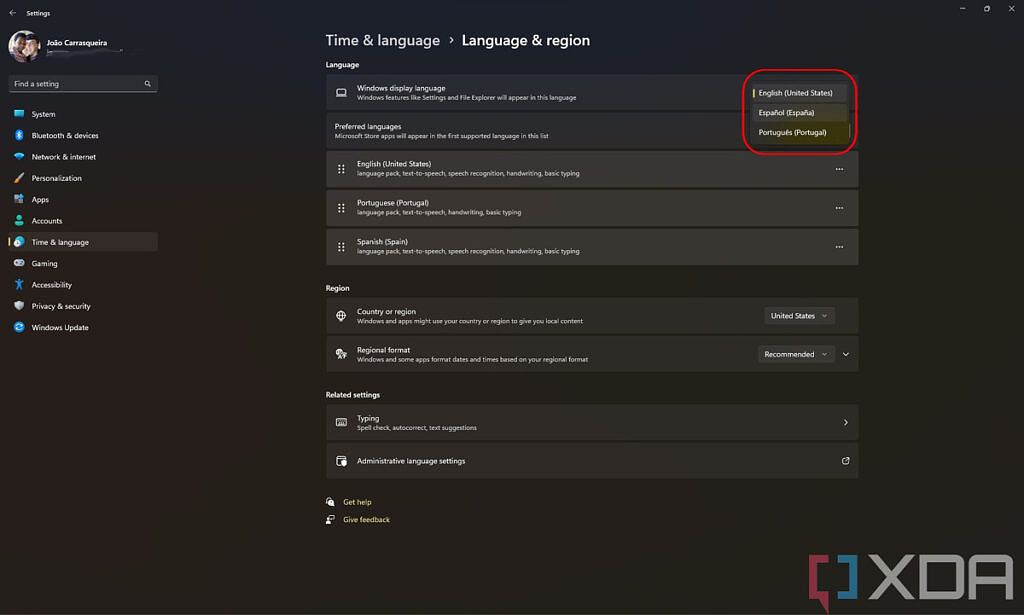
If you want to switch between your installed display languages, you can always use the option at the top of this page.


So now you've installed the new language, but you may have another problem - the keyboard. Each language usually has a different keyboard layout, and when you install a new language, it will be using that language's default layout, and it may not match the keyboard you're using. That means some of the keys may have different features from what's on their label. In this case, you might want to add a keyboard layout to your newly-installed language. Do note that this isn't a perfect solution in every language, but it can greatly help. Here's how to do it:
How to add a keyboard layout to a language
To add a new keyboard layout to a language, follow these steps:
- Go to the Settings app, then choose Time & Language and then Language & region just as we did above.
-
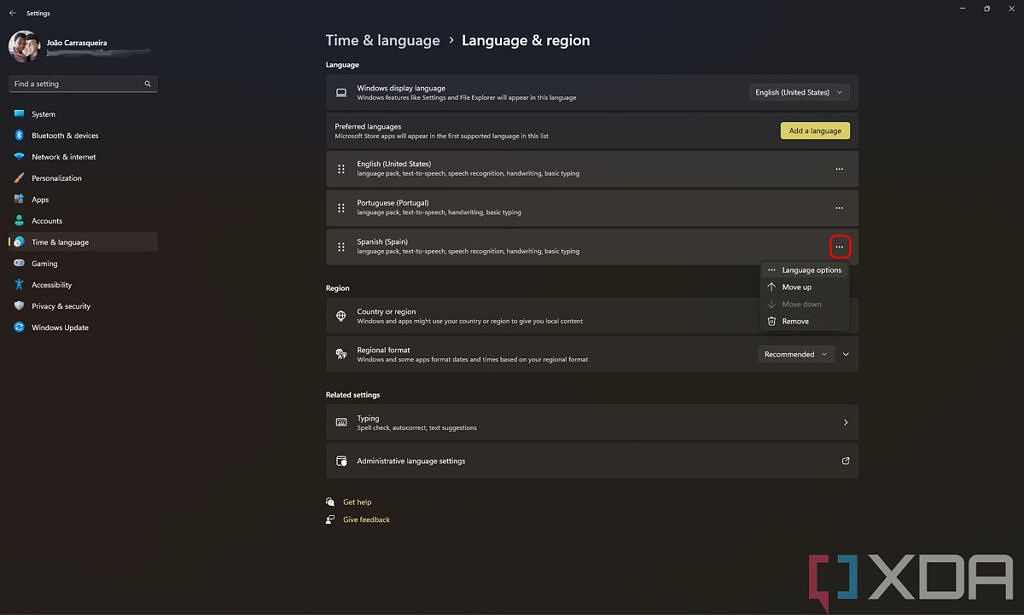
Click the three dots next to the language you just installed, then choose Language options.
Note: This page is also where you can add or remove language features if you want to change them after installing the language pack.
-
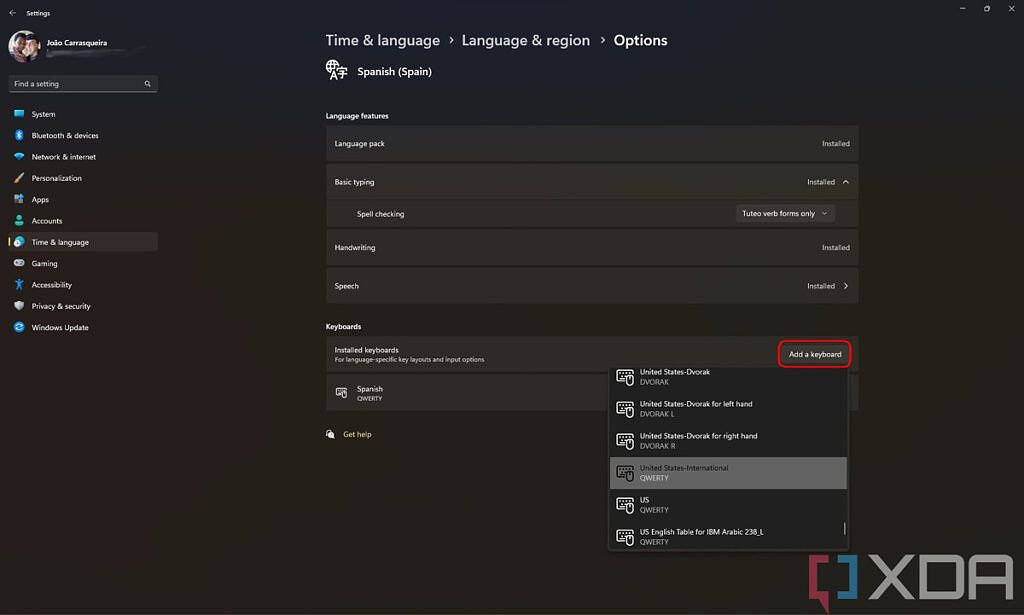
Under Keyboards, click Add keyboard. The first few recommendations are based on the language itself, but you can scroll down to find the right layout for your country.
If you're in the US, you might want to use the United States-International option, which will let you add accents that are more common in languages like Spanish and Portuguese.
- If you want, you can delete the other keyboard layout by clicking the three dots next to it and clicking Remove, which should help reduce confusion.


Now that you've added multiple languages, you can switch between input languages by pressing the Windows key + Spacebar simultaneously on your keyboard. This will allow you to get automatic corrections and suggestions based on the language you're using.
Changing regional settings
When you change the display language on your PC, it will also change the way dates and times are displayed. For example, if you're using Spanish (Spain) as we did above, you'll now see a 24-hour clock, instead of the 12-hour clock used in the US. The date format will also change to DD/MM/YYYY. If you want to change these settings, follow these steps:
- Open the Settings app and head to Time & Language, then Language & region, just as before.
-
The regional settings options appear below the language list. By default, the Regional format option is set to Recommended so it follows your display language, but you might want to change it to the format you're more used to. In this case, We're going with English (United States).
The format will change on your taskbar as soon as you click the right option.
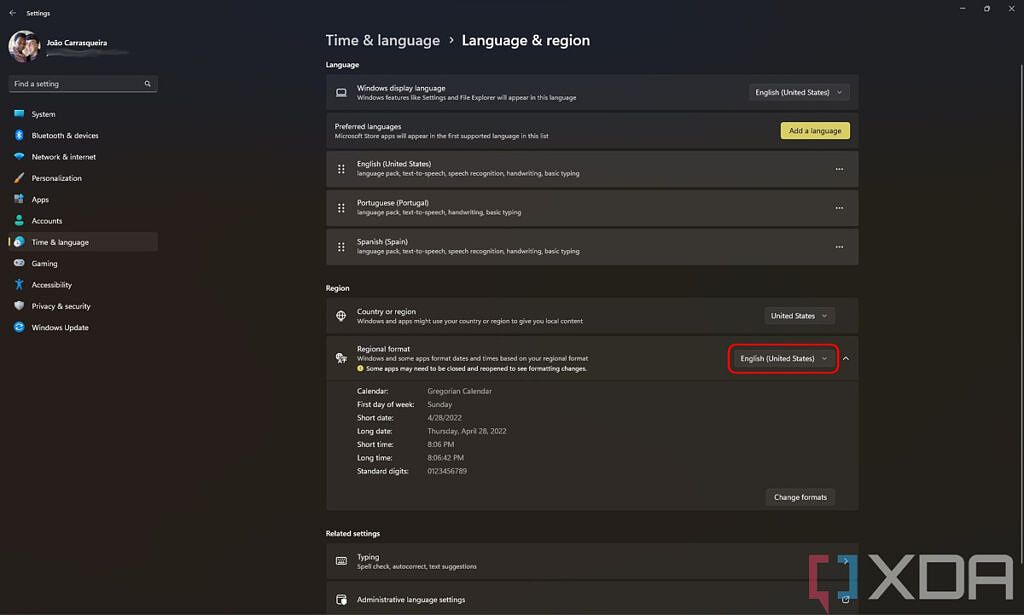
- You may also want to change the Country or region setting to the country whose language you're using. This is mostly used to display content in places like the Microsoft Store, so you get more locally-relevant content. That might only make sense if you're actually living in a different country, though.

And that's all you need to know about installing a new language on Windows 11. As we said at the top, this could be a great help if you're trying to learn a new language, or if you're sharing your PC with someone who prefers a different language.
If you're looking for other Windows 11 guides, we also have one on how to turn off recommended content on the Start menu, which is something many users might want to do.