Table of Contents
Introduction
In this example I am going to show you how to create photo gallery in Angular application. Photo gallery also known as image gallery or media gallery or photo album and it is used to manage your multiple photos. You can view the images or photographs one by one from a list of images in a gallery. You can navigate to another photo in the gallery using next or previous arrow link. You can click on a particular image or photo to see the larger size of the thumbnail which is, by default, displayed in the gallery.
In this example I will use some sample images to create photo gallery using Angular and ngx-lightbox module. For each thumbnail, I have kept the larger size of the same image. The thumbnail images will be shown on the web page in a photo gallery and when you click on a thumbnail then the corresponding bigger size of image will be displayed.
Related Posts:
Prerequisites
Angular 13.3.1, Npm 8.1.0, Node 16.12.0, ngx-lightbox
Project Setup
How to create a new Angular project
The name of the project is angular-photo-gallery.
Once the project gets created successfully, create folder images under src/assets folder and thumbs under src/assets/images folder.
Now you can keep all images under images folder and all thumbnails under thumbs folder.
Setup ngx-lightbox
Once your Angular application gets created successfully, you can install ngx-lightbox package using the command npm i ngx-lightbox by navigating to the project root folder angular-photo-gallery in the CLI tool.
Once the ngx-lightbox is installed successfully, you need to include the lightbox.css file in the angular.json file which can be found in the root folder of the app. Makes sure you find the "styles": [...] section under "build": {...} section and add the following lighbox.css file into it.
"styles": [
  "./node_modules/ngx-lightbox/lightbox.css",
  "src/styles.css"
]
The whole content of the angular.json file is given below:
{
  "$schema": "./node_modules/@angular/cli/lib/config/schema.json",
  "version": 1,
  "newProjectRoot": "projects",
  "projects": {
    "angular-photo-gallery": {
      "projectType": "application",
      "schematics": {
        "@schematics/angular:application": {
          "strict": true
        }
      },
      "root": "",
      "sourceRoot": "src",
      "prefix": "app",
      "architect": {
        "build": {
          "builder": "@angular-devkit/build-angular:browser",
          "options": {
            "outputPath": "dist/angular-photo-gallery",
            "index": "src/index.html",
            "main": "src/main.ts",
            "polyfills": "src/polyfills.ts",
            "tsConfig": "tsconfig.app.json",
            "assets": [
              "src/favicon.ico",
              "src/assets"
            ],
            "styles": [
	      "./node_modules/ngx-lightbox/lightbox.css",
              "src/styles.css"
            ],
            "scripts": []
          },
          "configurations": {
            "production": {
              "budgets": [
                {
                  "type": "initial",
                  "maximumWarning": "500kb",
                  "maximumError": "1mb"
                },
                {
                  "type": "anyComponentStyle",
                  "maximumWarning": "2kb",
                  "maximumError": "4kb"
                }
              ],
              "fileReplacements": [
                {
                  "replace": "src/environments/environment.ts",
                  "with": "src/environments/environment.prod.ts"
                }
              ],
              "outputHashing": "all"
            },
            "development": {
              "buildOptimizer": false,
              "optimization": false,
              "vendorChunk": true,
              "extractLicenses": false,
              "sourceMap": true,
              "namedChunks": true
            }
          },
          "defaultConfiguration": "production"
        },
        "serve": {
          "builder": "@angular-devkit/build-angular:dev-server",
          "configurations": {
            "production": {
              "browserTarget": "angular-photo-gallery:build:production"
            },
            "development": {
              "browserTarget": "angular-photo-gallery:build:development"
            }
          },
          "defaultConfiguration": "development"
        },
        "extract-i18n": {
          "builder": "@angular-devkit/build-angular:extract-i18n",
          "options": {
            "browserTarget": "angular-photo-gallery:build"
          }
        },
        "test": {
          "builder": "@angular-devkit/build-angular:karma",
          "options": {
            "main": "src/test.ts",
            "polyfills": "src/polyfills.ts",
            "tsConfig": "tsconfig.spec.json",
            "karmaConfig": "karma.conf.js",
            "assets": [
              "src/favicon.ico",
              "src/assets"
            ],
            "styles": [
              "src/styles.css"
            ],
            "scripts": []
          }
        }
      }
    }
  },
  "defaultProject": "angular-photo-gallery"
}
App Module Configuration
As I have installed ngx-lightbox, so I also need to add this module for the application to make it available in the app for use. Therefore, I need to edit the file src/app/app.module.ts and import the ngx-lightbox module.
import { LightboxModule } from 'ngx-lightbox';

@NgModule({
  declarations: [
    ...
  ],
  imports: [
    ...
    LightboxModule
  ],
  providers: [],
  bootstrap: [...]
})
The whole content of the file app.module.ts is given below:
import { NgModule } from '@angular/core';
import { BrowserModule } from '@angular/platform-browser';

import { AppRoutingModule } from './app-routing.module';
import { AppComponent } from './app.component';

import { LightboxModule } from 'ngx-lightbox';

@NgModule({
  declarations: [
    AppComponent
  ],
  imports: [
    BrowserModule,
    AppRoutingModule,
	LightboxModule
  ],
  providers: [],
  bootstrap: [AppComponent]
})
export class AppModule { }
Update Title
The default title appears for the app is AngularPhotoGallery when run using the CLI command ng serve --open and accessed the URL http://localhost:4200 in the browser.
To update the title of the application, edit the index.html file under src folder and make the title tag as follows:
<title>Angular Photo Gallery</title>The whole content of the index.html file is given below:
<!doctype html>
<html lang="en">
<head>
  <meta charset="utf-8">
  <title>Angular Photo Gallery</title>
  <base href="/">
  <meta name="viewport" content="width=device-width, initial-scale=1">
  <link rel="icon" type="image/x-icon" href="favicon.ico">
</head>
<body>
  <app-root></app-root>
</body>
</html>
App Component
Here is the src/app/app.component.ts file that retrieves images and thumbs from the given folder and builds an array of images for displaying on the UI (User Interface) page.
import { Component } from '@angular/core';

import { Lightbox } from 'ngx-lightbox';

@Component({
  selector: 'app-root',
  templateUrl: './app.component.html',
  styleUrls: ['./app.component.css']
})
export class AppComponent {

  _albums: any = [];

  constructor(private _lightbox: Lightbox) {
    for (let i = 1; i <= 12; i++) {
      const src = './assets/images/image' + i + '.jpg';
      const caption = 'Image ' + i + ' caption';
      const thumb = './assets/images/thumbs/image' + i + '.jpg';
      const album = {
         src: src,
         caption: caption,
         thumb: thumb
      };

      this._albums.push(album);
    }
  }

  open(index: number): void {
    // open lightbox
    this._lightbox.open(this._albums, index);
  }

  close(): void {
    // close lightbox programmatically
    this._lightbox.close();
  }

}
You can modify according to the location of images and thumbnails.
App HTML
The app HTML file that displays the thumbs to the UI. The following code is written into the file src/app/app.component.html file.
<div class="imgcontainer">
	<div class="gallery" *ngFor="let image of _albums; let i=index">
	  <img src="{{image.thumb}}" (click)="open(i)" />
	</div>
</div>
I am iterating through the array and displaying the thumb images.
App Styles
The thumbnails will be displayed one by one vertically but to give a little layout of the thumb images I am going to apply some basic styles. You can either use inline css or you can write the CSS code in the external stylesheet.
You can write the following styles in the src/app/app.component.css file.
.imgcontainer {
  max-width: 1170px;
  width: 100%;
  padding-right: 15px;
  padding-left: 15px;
  margin-right: auto;
  margin-left: auto;
}

.imgcontainer .gallery img {
  float: left;
  width: 20%;
  height: auto;
  border: 2px solid #fff;
  -webkit-transition: -webkit-transform .15s ease;
  -moz-transition: -moz-transform .15s ease;
  -o-transition: -o-transform .15s ease;
  -ms-transition: -ms-transform .15s ease;
  transition: transform .15s ease;
  position: relative;
}
If you want to use inline styles, then you can remove the line styleUrls: ['./app.component.css'] from the file src/app/app.component.ts and add the following source code.
styles: [`
	.imgcontainer {
	  max-width: 1170px;
	  width: 100%;
	  padding-right: 15px;
	  padding-left: 15px;
	  margin-right: auto;
	  margin-left: auto;
	}

	.imgcontainer .gallery img {
	  float: left;
	  width: 20%;
	  height: auto;
	  border: 2px solid #fff;
	  -webkit-transition: -webkit-transform .15s ease;
	  -moz-transition: -moz-transform .15s ease;
	  -o-transition: -o-transform .15s ease;
	  -ms-transition: -ms-transform .15s ease;
	  transition: transform .15s ease;
	  position: relative;
	}
  `]
Testing Angular Photo Gallery
Now you can execute the command ng serve to open app manually in the browser or ng serve --open to open app automatically in the browser.
The browser will show you the following page when accessed via http://localhost:4200.

When you click on the thumbnail (note that you can click on any thumbnail to see the bigger picture):
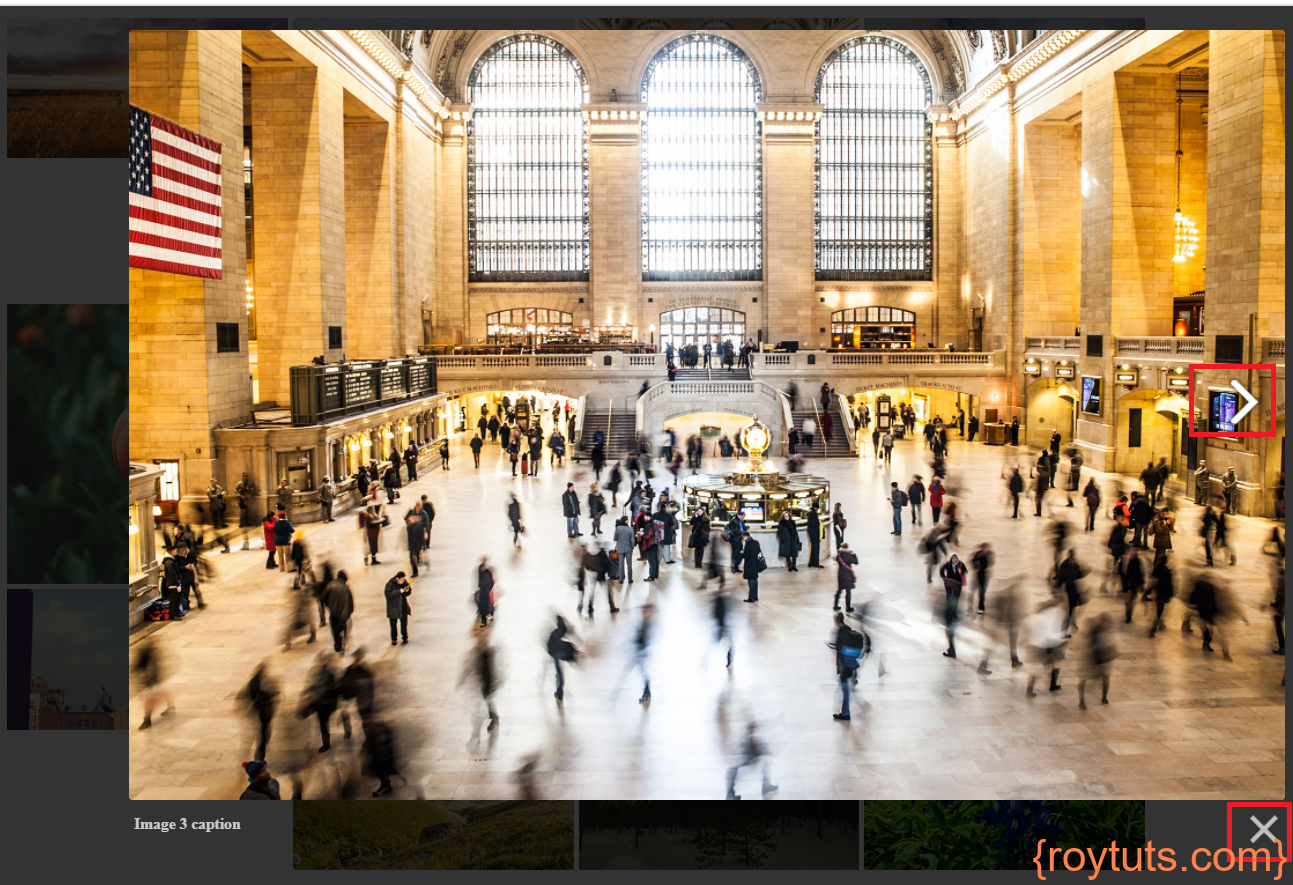
You can navigate to the right or left by clicking on the right or left arrow provided that the image on the right or left side is available.
You can also close the image by clicking on the cross sign (X) link at the bottom of the image.
Hope you got an idea how to build a photo gallery using Angular and ngx-lightbox package.