How to Install Apache Solr on Rocky Linux
Apache Solr or Solr is a free and open-source search platform based on the Apache Lucene library. Solr is stands for Searching On Lucene with Replication, it is an enterprise-grade search platform written in Java.
Solr is a highly scalable and reliable search platform with fault-tolerant and distributed indexing. Also, it comes with replication and automated failover and recovery.
In most cases, Solr is used to build enterprise-grade applications that deliver high performance. Solr is used by some internet large sites like Adobe, Bloomberg, AT&T, Magento, Netflix, Instagram, etc.
In this guide, you will learn how to install Apache Solr on the Rocky Linux system, enable Solr basic authentication, set up max open files limit and max processes limit for Solr deployment, and how to create the first Solr core from the command line.
Prerequisites
Before you start, ensure you have got the following requirements:
- Operating System: Rocky Linux 8.5 (Green Obsidian)
- Memory: 2 GB for testing
- CPUs: 2
- Root privileges
Now let's get started.
Installing Java OpenJDK
To install Solr on the Linux system, you need at least Java OpenJDK 1.8 or higher. Rocky Linux provides multiple versions of Java OpenJDK, and in this example, you will be installing the Java OpenJDK 1.11 for the Solr installation.
1. Execute the DNF command below to install Java OpenJDK 1.11 on the Rocky Linux system.
sudo dnf install java-11-openjdk java-11-openjdk-devel
Type 'y' to confirm the installation and press 'Enter' to continue.
2. If java installation completes, verify your installation using the following command.
java --version
Below is the similar output you will get.
openjdk 11.0.13 2021-10-19 LTS
OpenJDK Runtime Environment 18.9 (build 11.0.13+8-LTS)
OpenJDK 64-Bit Server VM 18.9 (build 11.0.13+8-LTS, mixed mode, sharing)
You've completed the Java OpenJDK 1.11 installation on the Rocky Linux system, and you're ready to download and install Solr to your system.
Installing Solr on Rocky Linux
In this step, you will be installing the latest version of Solr (the current version is 8.11) to the Rocky Linux system. You will be installing Solr using the installer script that includes in the Solr package.
1. Change your current working directory to '/opt' and download the Solr binary code using the following command.
cd /opt/
wget https://downloads.apache.org/lucene/solr/8.11.0/solr-8.11.0.tgz
2. After the download process completes, extract the installer script from the Solr package.
tar xzf solr-8.11.0.tgz solr-8.11.0/bin/install_solr_service.sh --strip-components=2
Now you will see the Solr installer script 'install_solr_service.sh'.
3. Execute the installer script as below to install Solr.
sudo bash ./install_solr_service.sh solr-8.11.0.tgz -i /opt -d /var/solr -u solr -s solr -p 8983
Now the installer script will install Solr in the following details:
- Installation directory is '/opt/solr'.
- Solr data directory will be available at the '/var/solr' directory.
- Solr will be running as a system user 'solr'.
- Define the systemd script for Solr with the script 'solr'.
- Solr is now running on the default port '8083'.
And you will see a similar output as below when the Solr installation completes.
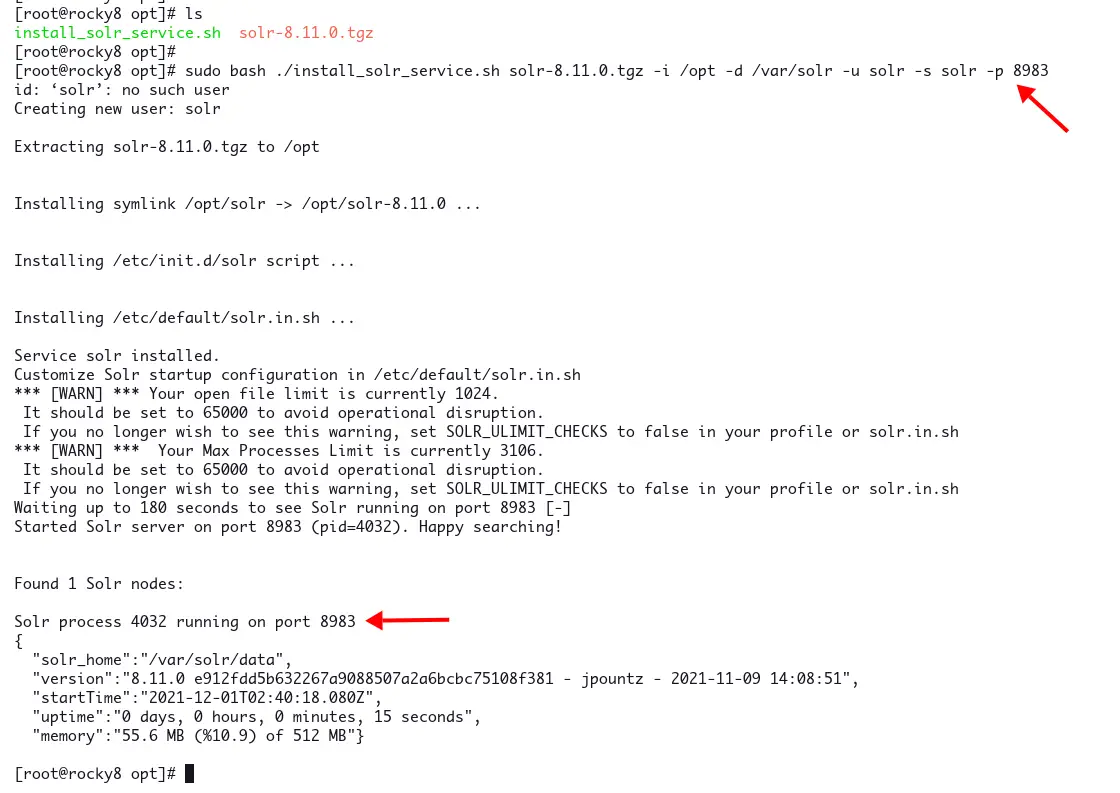
You will see a warning message about file limit and process limit for Solr, you will fix it on the next step. And the Solr is now up and running on port '8983'.
4. Verify the 'LISTEN' port on your system using the following command.
ss -aplnt | grep java
If Solr installation is correct, you will see the port '8983' is now being used by the Java application.
LISTEN 0      50     [::ffff:127.0.0.1]:7983            *:*    users:(("java",pid=4512,fd=48))
LISTEN 0      50                      *:8983            *:*    users:(("java",pid=4512,fd=157))
Now kill the Solr process using the following command.
pkill java
kill -9 PID
PID is the process id of the Solr application. You can see the PID of the Solr application from the ss command on top.
5. Next, reload the system manager to apply the new systemd service file.
sudo systemctl daemon-reload
6. After that, start and enable the service 'solr' using the following command.
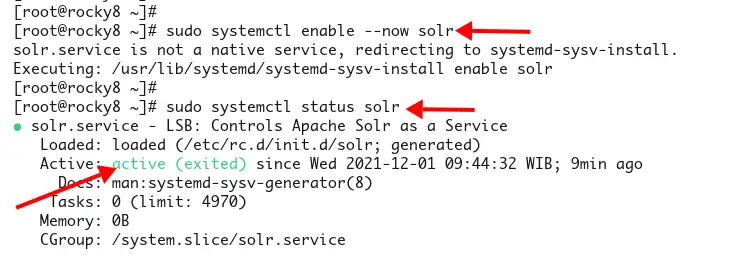
sudo systemctl enable --now solr
Verify the 'solr' service using the command below.
sudo systemctl status solr
Now you will see the 'solr' service is 'active (exited)'. The 'solr' service is running, but the systemd cannot find any daemon to monitor.
And you've finished the basic Solr installation on the Rocky Linux system.
Setup Limits Open Files and Max Process for Solr User
As you can see on top, during the Solr installation you got a warning message about the open file limit and process limit. Solr required the minimum open files limit and max processes limit to '65000'.
To solve these warning messages, you must edit the configuration '/etc/security/limits.conf' and define the max open file limit and max processes limit for the user 'solr'.
1. Edit configuration '/etc/security/limits.conf' using nano editor.
sudo nano /etc/security/limits.conf
Copy and paste the following configuration to the bottom of the line.
solr   soft   nofile   65000
solr   hard   nofile   65000
solr   soft   nproc    65000
solr   hard   nproc    65000
Save the configuration and exit.
2. Next, verify limits open file and max user processed using the following.
sudo -u solr ulimit -a
And you will see the open files limit and max user processes limit to '65000' as below.

3. Now restart the 'solr' service using the following command.
sudo systemctl restart solr
Now you've completed the configuration of max open files limit and max processes limits for the Solr application.
Verify Solr Installation
To verify Solr installation, you need to add the port '8983' to the firewalld, then you can access the Solr web application dashboard.
1. Execute the firewall-cmd command below to add port '8983' to firewalld and reload.
sudo firewall-cmd --add-port=8983/tcp --permanent
sudo firewall-cmd --reload
2. Now open your web browser and type the server IP address with port '8983' as below.
http://192.168.1.10:8983/
And you will see the Solr dashboard as below.
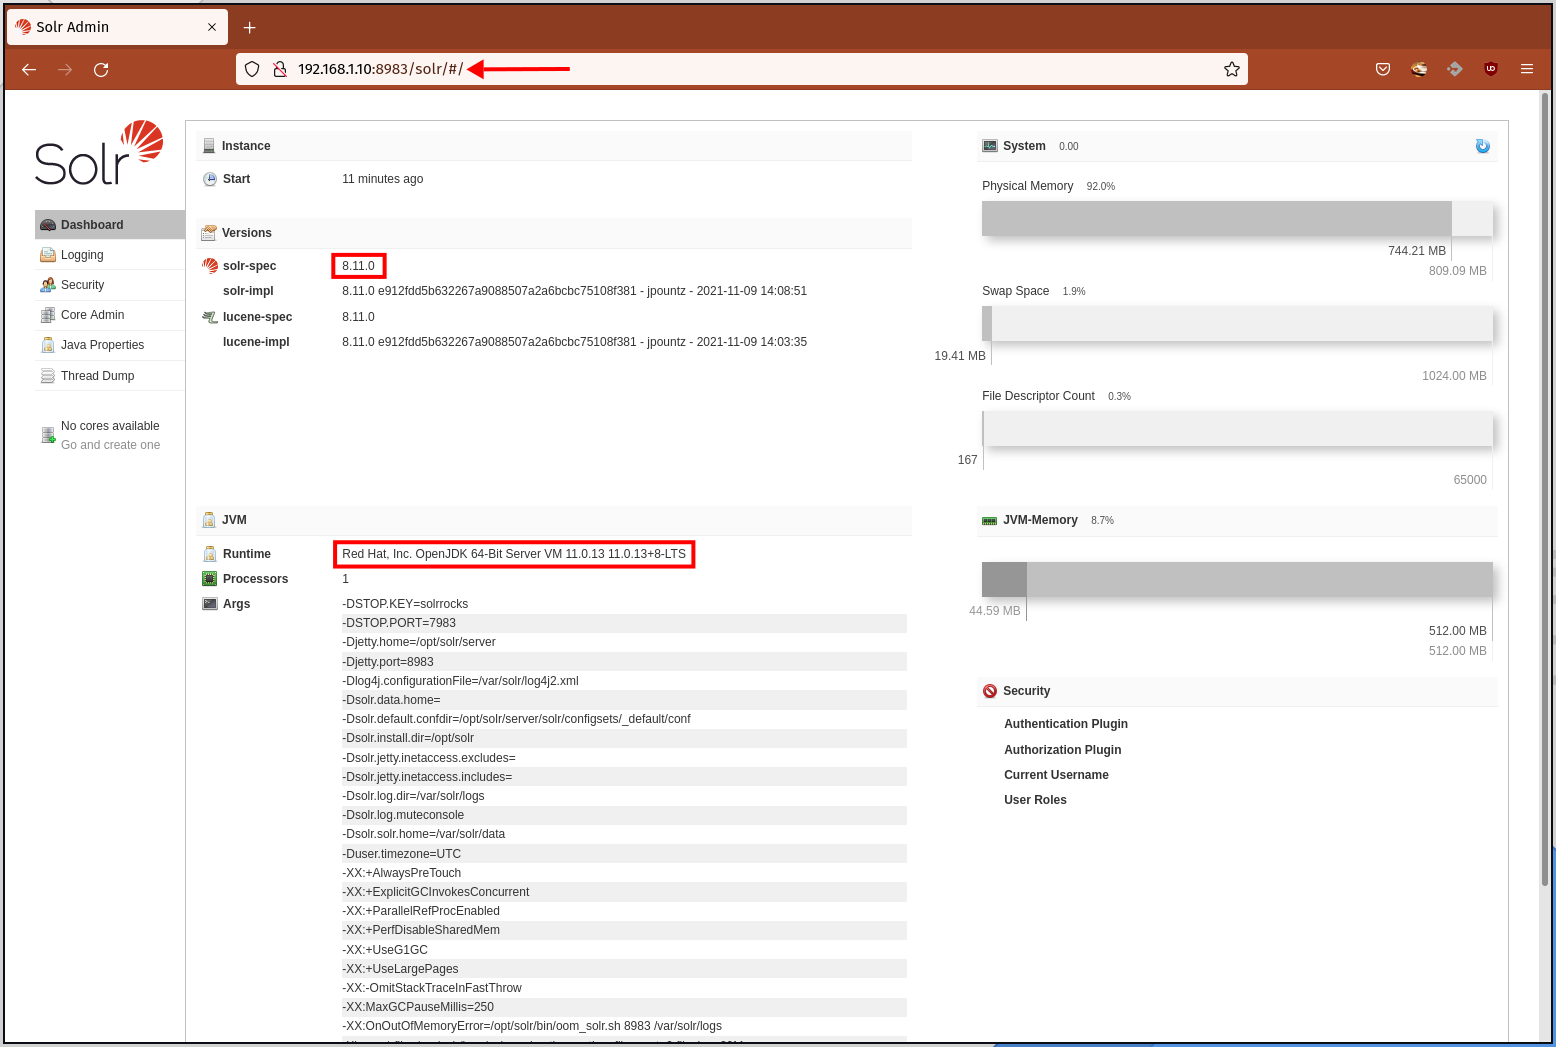
There is no authentication and authorization enabled on the default Solr installation. Move to the next stage to secure Solr deployment with authentication and authorization.
Securing Solr with Basic Authentication
In this step, you will learn how to enable the 'Basic Authentication for Solr.
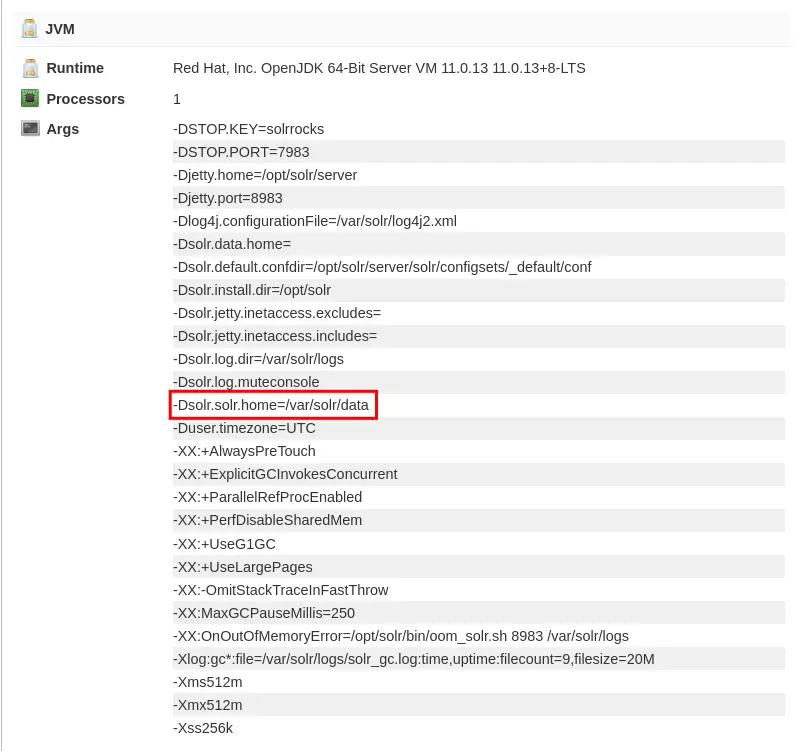
To enable Solr Basic Authentication, you must create a new configuration file 'security.json', and define the authentication and authorization module. The configuration 'security.json' must be located at the Solr data directory '/var/solr/data'.
Additionally, you can check the Solr data directory from the Solr dashboard as below.
1. Change your working directory to '/var/solr/data' and create a new configuration file 'security.json' using nano editor.
cd /var/solr/data/
sudo -u solr nano security.json
Copy and paste the following configuration.
{
  "authentication":{
    "blockUnknown": true,
    "class":"solr.BasicAuthPlugin",
    "credentials":{"solr":"IV0EHq1OnNrj6gvRCwvFwTrZ1+z1oBbnQdiVC3otuq0= Ndd7LKvVBAaZIF0QAVi1ekCfAJXr1GGfLtRUXhgrF8c="},
    "realm":"My Solr users",
    "forwardCredentials": false
  },
  "authorization":{
    "class":"solr.RuleBasedAuthorizationPlugin",
    "permissions":[{"name":"all", "role":"admin"}],
    "user-role":{"solr":"admin"}
  }
}
Save the configuration and exit.
This will create a new admin user 'solr' with the password 'SolrRocks'
2. Next, restart the 'solr' service to apply a new configuration using the systemctl command below.
sudo systemctl restart solr
3. To verify Solr authentication, back to your web browser and type the server IP address with Solr port '8983'.
http://192.168.1.10:8983/
Now you will be redirected to the Solr login page as below.
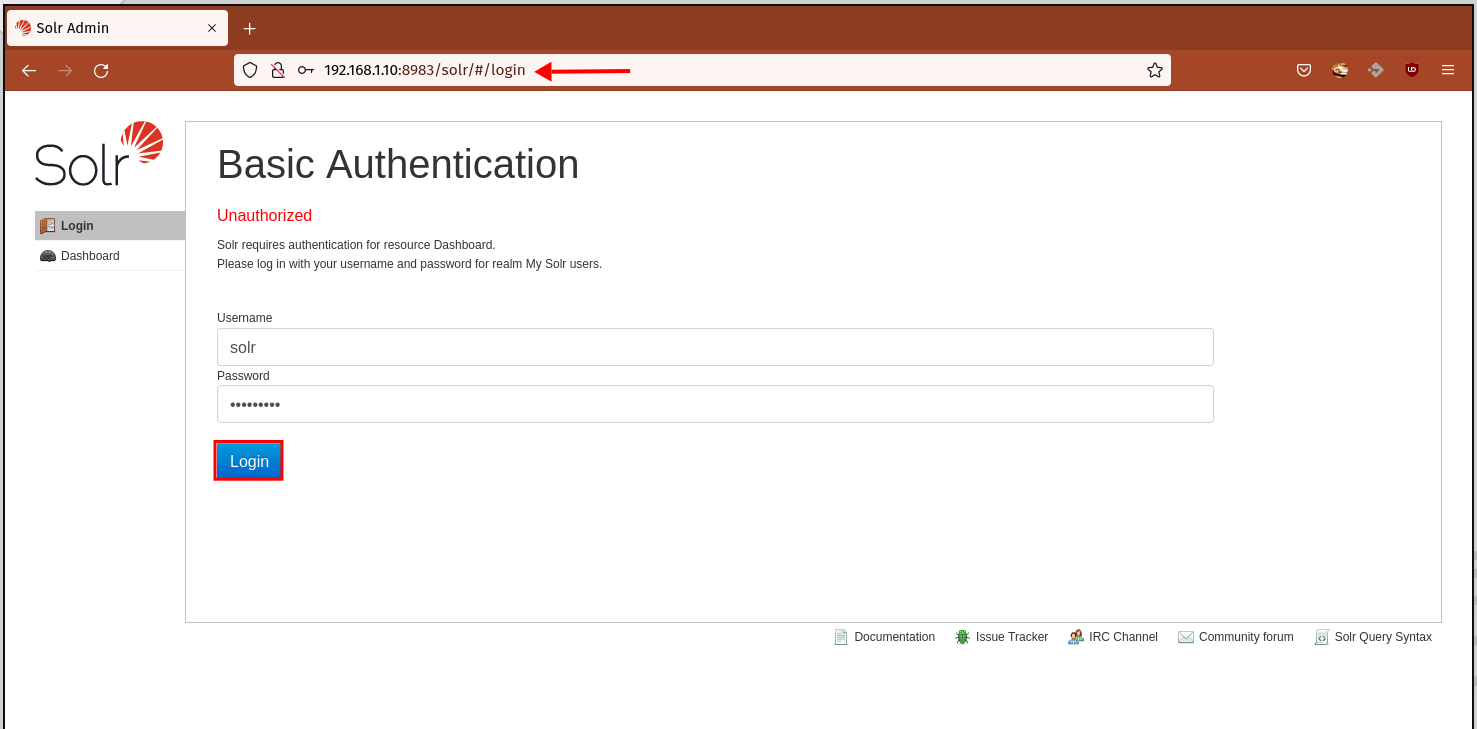
Type the username 'solr' and password 'SolrRocks', then click the 'Login' button.
And you will see the Solr dashboard.
In the 'Security' section, you will see a detailed authentication and authorization plugin with the username and roles that you're currently in use.
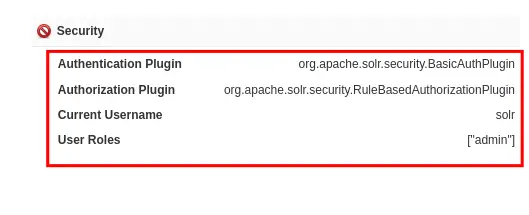
Now you've secured the Solr installation with the Basic Authentication plugin.
Create First a Solr Core
In Solr, the term core is referred to a single Lucene index, and you can create multiple cores in a single Solr deployment.
Each core contains transaction logs and configuration files such as solrconfig.xml, schema files, etc. Also, you can index data with different structures on each core and can be presented to different applications/audiences.
You can create core using the 'solr' command-line or using the Solr admin dashboard.
In this step, you will learn how to create a core using the 'solr' command line.
1. Before creating a core, you must configure the Solr credentials.
Change your working directory to '/opt/solr/bin' and copy the default configuration 'solr.in.sh.orig' to 'solr.in.sh'.
cd /opt/solr/bin/
cp solr.in.sh.orig solr.in.sh
Edit the configuration 'solr.in.sh' using nano editor.
sudo nano solr.in.sh
Uncomment the option 'SOLR_AUTH_TYPE' and change the value to 'basic'. This will tell the command 'solr' to use the Basic Authentication plugin
SOLR_AUTH_TYPE="basic"
Uncomment the option 'SOLR_AUTHENTICATION_OPTS' and change the value with the Solr user and password as below.
SOLR_AUTHENTICATION_OPTS="-Dbasicauth=solr:SolrRocks"
Save the configuration and exit.
2. Next, create a new core using the solr command below. In this example, you will be creating a new core with the name 'new_core' and the config name 'ConfigName'.
su - solr -c "/opt/solr/bin/solr create -c new_core -n ConfigName"
3. Now back to the Solr administration dashboard to verify the Solr core.
You will see details core as below.
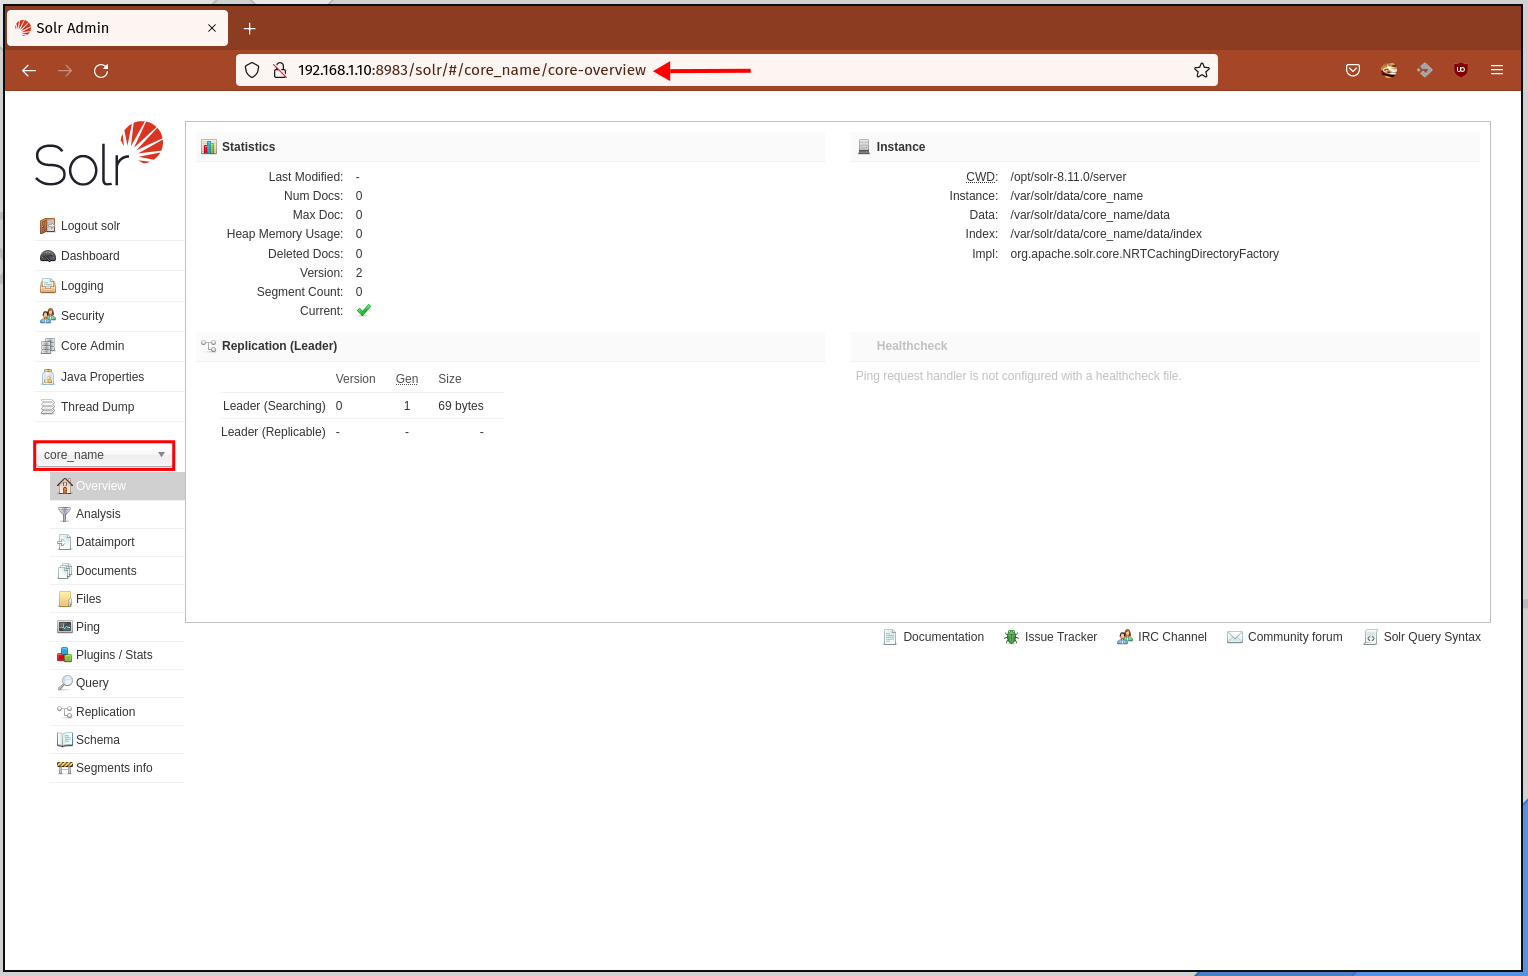
And you've created a Solr core using the 'solr' command-line.
Conclusion
Congratulation! You've learned the Solr installation on the Rocky Linux system. Also, you've learned how to secure Solr deployment with the Basic Authentication plugin and learned how to create core from the 'solr' command-line.

