Table of Contents
- Introduction
- Prerequisites
- Project Setup
- Install okta-auth-js
- Service
- Auth Guard
- Components
- Implementing Okta Auth Role Based Access
- Environment Variables
- App Modules
- Routing Module
- Token Service
- Auth Service
- Auth Guard
- Expired Component
- Unauthorized Component
- Login Component
- App Component
- Dashboard Component
- Protected Component
- Update Page
- Testing Okta SSO Role Based Access
- Source Code
Introduction
In this tutorial I am going to build an example how to authenticate and authorize a user to allow him/her to access a particular area of the application. I am going to use okta-auth-js library for this example about Angular Okta SSO Role Based Access. I am also going to implement CanActivate and CanActivateChild interfaces for building roles based access using Okta SSO.
In my other tutorial about Angular Okta SSO with PKCE where I did not use any library, but I had shown how to authenticate a user to access an application. This example also uses PKCE which is an acronym and stands for Proof Key for Code Exchange.
In this example I am not using any login link or button where user will click and Okta login page will be displayed, instead a user will be redirected to the Okta login page directly if the user is not already logged in to the application.
Prerequisites
This example has been tested with Angular versions 10.2.5/13.0.1/13.0.3, Node 16.12.0, Npm 8.1.0
Project Setup
You can check how to create a new Angular project. The following image shows which command (ng new <project name>) to use in CLI to create an Angular application. For this example, the application root directory (project name) is angular-okta-sso-role-based-access.

Install okta-auth-js
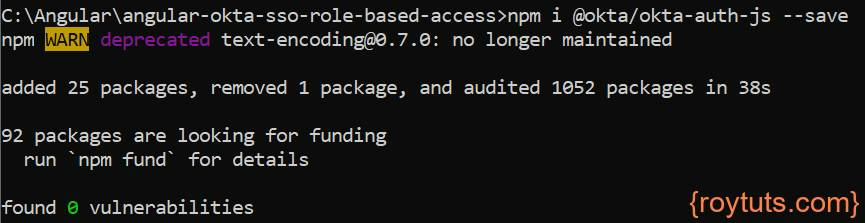
As I said earlier that I am using okta-auth-js library to authenticate and authorize a user, so I am going to install okta-auth-js library. To install simply execute the command npm i @okta/okta-authjs --save or npm install @okta/okta-authjs –save.
Service
The service class is a class which is accessible to any component in an application and provides uniform functionality.
Auth Service
The auth service will provide functionality for authenticating a user, for example, signin, signout and provides user information, token, etc.

Token Service
The token service class will provide functionalities for signing out a user, storing token, storing user information, clearing session, etc.

Auth Guard
The auth guard is actually how a user would be able to access to certain area of your application. For example, your application has some navigations or menu links and these navigations or links may not be accessible to everyone who visits your application. So, you want to put a guard before these links or navigations and hence, you want to implement CanActivate/CanActivateChild interface on your routes.
Press space key to select and finally press enter key from your keyborad to generate the file.

Components
Next I am going to create some components and few of them are accessible to the authorized users based on roles they are assigned to.
The login component is accessible to everyone because every user needs to login before he/she can access to the application.
The dashboard is accessible to every logged in user.
The protected and updatepage are accessible based on users’ roles.
If user is not authorized to view a particular page then he/she will see unauthorized page.

Apart from the above components I have also created few components – expired and unauthorized – without having external template and css files.
The expired component will be used when user logs out of the application or session expires.
The unauthorized component is used when a user is not authorized to access a page or does not have access to a particular page of the application.
Implementing Okta Auth Role Based Access
Environment Variables
I have defined some environment variables which will be used according to the application environments, such as, dev (development), uat (User Acceptance Test), prod (Production), etc. The following constants are written into the file src/environments/environment.ts file for dev environment. Please make sure you update the corresponding values according to yours.
export const environment = {
  production: false,
  oauthClientId: '0oa1382uj9nDywFZ10h8',
  oauthIssuerUrl: 'https://dev.oktapreview.com',
  oauthLoginUrl: 'https://dev.oktapreview.com/oauth2/v1/authorize',
  oauthTokenUrl: 'https://dev.oktapreview.com/oauth2/v1/token',
  oauthUserInfoUrl: 'https://dev.oktapreview.com/oauth2/v1/userinfo',
  oauthCallbackUrl: 'http://localhost:4200/',
  oauthPostLogoutUrl: 'http://localhost:4200/expired'
};
App Modules
Let’s configure which modules are there for this application and if any module/component is missing then that module needs to be added here. Edit the file src/app/app.module.ts and make sure you have the following configuration.
import { NgModule } from '@angular/core';
import { BrowserModule } from '@angular/platform-browser';

import { AppRoutingModule } from './app-routing.module';
import { AppComponent } from './app.component';
import { DashboardComponent } from './dashboard/dashboard.component';
import { LoginComponent } from './login/login.component';
import { ProtectedComponent } from './protected/protected.component';
import { UpdatepageComponent } from './updatepage/updatepage.component';
import { ExpiredComponent } from './expired.component';
import { UnauthorizedComponent } from './unauthorized.component';

@NgModule({
  declarations: [
    AppComponent,
    DashboardComponent,
    LoginComponent,
    ProtectedComponent,
    UpdatepageComponent,
	ExpiredComponent,
    UnauthorizedComponent
  ],
  imports: [
    BrowserModule,
    AppRoutingModule
  ],
  providers: [],
  bootstrap: [AppComponent]
})
export class AppModule { }
When you create a new component using a command from CLI, then that component gets added in the above file automatically. But I had created two more components – expired and unauthorized, so I have added them in the above typescript file.
Routing Module
The routing module defines the routes for your application’s navigations. Here, I have also put canActivate, canActivateChild to guard some routes. The following code is written in a file called src/app/app-routing.module.ts.
import { NgModule } from '@angular/core';
import { RouterModule, Routes } from '@angular/router';

import { AuthGuard } from './auth.guard';

import { AppComponent } from './app.component';
import { DashboardComponent } from './dashboard/dashboard.component';
import { LoginComponent } from './login/login.component';
import { ProtectedComponent } from './protected/protected.component';
import { UpdatepageComponent } from './updatepage/updatepage.component';
import { ExpiredComponent } from './expired.component';
import { UnauthorizedComponent } from './unauthorized.component';

const routes: Routes = [
  {
	path: '',
	component: AppComponent,
	canActivate: [AuthGuard],
	canActivateChild: [AuthGuard],
	children: [
	  { path: '', component: DashboardComponent },
	  { path: 'protected', component: ProtectedComponent },
	  { path: 'updatepage', component: UpdatepageComponent }
	]
  },
  { path: 'login', component: LoginComponent },
  { path: 'expired', component: ExpiredComponent },
  { path: 'unauthorized', component: UnauthorizedComponent },
  { path: '**', redirectTo: '', pathMatch: 'full' }
];

@NgModule({
  imports: [RouterModule.forRoot(routes)],
  exports: [RouterModule]
})
export class AppRoutingModule { }
Token Service
The token service does some miscellaneous jobs for storing and retrieving information, such as, toke, user, expiry, roles, etc. The service code is written into a src/app/token.service.ts file.
import { Injectable } from '@angular/core';

const TOKEN_KEY = 'AuthToken';
const TOKEN_EXPIRY_KEY = 'AuthTokenExpiry';
const AUTH_INFO_KEY = 'AuthInfo';

@Injectable({
  providedIn: 'root'
})
export class TokenService {

  constructor() { }

  public saveUserDetails(token: any, user: any) {
	window.sessionStorage.setItem(TOKEN_KEY, token.accessToken);
	window.sessionStorage.setItem(TOKEN_EXPIRY_KEY, token.expiresAt);

	let userInfo = {username: '', email: '', roles: ''};
	userInfo.username = user['name'];
	userInfo.email = user['email'];
	userInfo.roles = user['groups'];

	window.sessionStorage.setItem(AUTH_INFO_KEY, JSON.stringify(userInfo));
  }

  public getToken(): string {
	return window.sessionStorage.getItem(TOKEN_KEY) || '';
  }

  public getSessionUserName(): string {
	const userInfo = JSON.parse(window.sessionStorage.getItem(AUTH_INFO_KEY) || '""');

	if(userInfo) {
	   return userInfo.username;
	}

	return '';
  }

  public getSessionAuthInfo(): string {
	return window.sessionStorage.getItem(AUTH_INFO_KEY) || '';
  }

  public getSessionAuthRoles(): string[] {
	const userInfo = JSON.parse(window.sessionStorage.getItem(AUTH_INFO_KEY) || '""');

	return userInfo.roles || [];
  }

  public isSessionExpired(): boolean {
	let time: any = window.sessionStorage.getItem(TOKEN_EXPIRY_KEY);

	if(time) {
	   return Date.now() > time;
	}

	return false;
  }

  public isRoleExist(roles: string[]): boolean {
	let isRoleExist: boolean = false;
	roles.forEach(r => {
	   if(this.getSessionAuthRoles().includes(r)) {
		 isRoleExist = true;
	   }
	});

	return isRoleExist;
  }

  public signOut() {
	window.sessionStorage.removeItem(TOKEN_KEY);
	window.sessionStorage.removeItem(AUTH_INFO_KEY);
	window.sessionStorage.removeItem(TOKEN_EXPIRY_KEY);
	window.sessionStorage.clear();
  }

}
Auth Service
The auth service class is used to authenticate a user using a Okat login page. The following code is written into a src/app/auth.service.ts file.
import { Injectable } from '@angular/core';

import { Observable, Observer } from 'rxjs';
import { Router } from '@angular/router';
import { OktaAuth, OktaAuthOptions, TokenManager, IDToken, AccessToken, UserClaims, TokenParams } from '@okta/okta-auth-js';

import { TokenService } from './token.service';
import { environment } from 'src/environments/environment';

const config: OktaAuthOptions = {
  issuer: environment.oauthIssuerUrl,
  authorizeUrl: environment.oauthLoginUrl,
  userinfoUrl: environment.oauthUserInfoUrl,
  tokenUrl: environment.oauthTokenUrl,
  clientId: environment.oauthClientId,
  redirectUri: environment.oauthCallbackUrl,
  responseMode: 'fragment',
  scopes: ['openid', 'email', 'profile', 'groups'],
  tokenManager: {
    storage: 'sessionStorage'
  },
  devMode: true
};

const authClient: OktaAuth = new OktaAuth(config);
const tokenManager: TokenManager = authClient.tokenManager;

@Injectable({
  providedIn: 'root'
})
export class AuthService {

  constructor(private router: Router, private tokenService: TokenService) { }

  async signout() {
	await authClient.signOut({
	   postLogoutRedirectUri: environment.oauthPostLogoutUrl
	});
  }

  async signin() {
	if(authClient.isLoginRedirect()) {
	   try {
		 await authClient.handleLoginRedirect();
	   } catch(e) {
		 console.log(e);
	   }
	} else if(!await authClient.isAuthenticated()) {
	   authClient.signInWithRedirect();
	} else {
	   const accessToken: AccessToken = await tokenManager.get('accessToken') as AccessToken;

	   const idToken: IDToken = await tokenManager.get('idToken') as IDToken;

	   let userInfo: UserClaims = await authClient.getUser();

	   if(!userInfo) {
		 const tokenParams: TokenParams = {
			scopes: ['openid', 'email', 'profile', 'groups']
		 }

		 authClient.token.getWithRedirect(tokenParams);
	   }

	   this.tokenService.saveUserDetails(accessToken, userInfo);

	   this.router.navigate(['']);
	}
  }

}
Auth Guard
The auth guard is used for every request and determines how the request should be handled from the end user and what to display. The following content is written in a file called src/app/auth.guard.ts.
import { Injectable } from '@angular/core';
import { ActivatedRouteSnapshot, CanActivate, CanActivateChild, RouterStateSnapshot, UrlTree } from '@angular/router';
import { Observable } from 'rxjs';
import { Router } from '@angular/router';
import { TokenService } from './token.service';
import { AuthService } from './auth.service';
@Injectable({
providedIn: 'root'
})
export class AuthGuard implements CanActivate, CanActivateChild {
constructor(private router: Router, private tokenService: TokenService, private authService: AuthService) {}
async canActivate(
route: ActivatedRouteSnapshot,
state: RouterStateSnapshot)/*: Observable<boolean | UrlTree> | Promise<boolean | UrlTree> | boolean | UrlTree*/ {
let menu: any[] = [
{
routerLink: '/protected',
label: 'Protected Page',
isAuthorized: false,
accessibleTo: ['BUSINESS', 'BUSINESS_ADMIN']
},
{
routerLink: '/updatepage',
label: 'Update Page',
isAuthorized: false,
accessibleTo: ['SUPPORT', 'BUSINESS', 'BUSINESS_ADMIN']
},
];
if(this.tokenService.getToken()) {
let roles: string[] = [
'SUPPORT', 'BUSINESS', 'BUSINESS_ADMIN'
];
let isRoleExist = false;
for(let i = 0; i < roles.length; i++) {
if(this.tokenService.getSessionAuthRoles().includes(roles[i])) {
isRoleExist = true;
break;
}
}
if(!isRoleExist) {
this.router.navigate(['unauthorized']);
return false;
}
if(state != undefined) {
var routeUrl = state.url;
if(routeUrl.indexOf('/', 1) > 0) {
routeUrl = routeUrl.slice(0, routeUrl.indexOf('/', 1));
}
for(var i = 0; i < menu.length; i++) {
if(menu[i].routeUrl == routeUrl) {
let roles = menu[i].accessibleTo;
let isRoleExist = false;
for(let i = 0; i < roles.length; i++) {
if(this.tokenService.getSessionAuthRoles().includes(roles[i])) {
isRoleExist = true;
break;
}
}
if(!isRoleExist) {
this.router.navigate(['unauthorized']);
return false;
}
break;
}
}
}
return true;
}
this.authService.signin();
return false;
}
async canActivateChild(
childRoute: ActivatedRouteSnapshot,
state: RouterStateSnapshot)/*: Observable<boolean | UrlTree> | Promise<boolean | UrlTree> | boolean | UrlTree*/ {
return this.canActivate(childRoute, state);
}
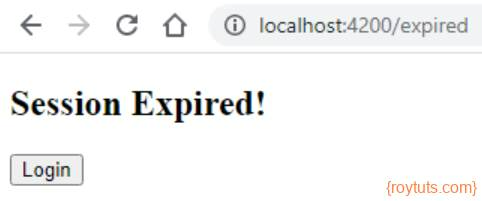
}Expired Component
The expired component is displayed upon logout completion. The following code is written into a file src/app/expired.component.ts file. Notice there is no external template and css files used for this component. Only template tag is used to provide the content to be displayed.
import { Component } from '@angular/core';

@Component({
  selector: 'app-root',
  template: `<h2>Session Expired!</h2><button routerLink="/login">Login</button>`
})
export class ExpiredComponent {

}
Unauthorized Component
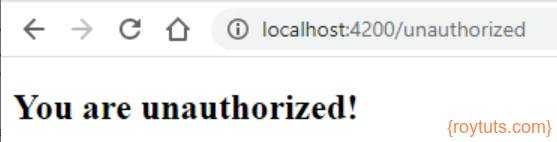
The unauthorized component is used to display unauthorized message to the user. This is written in a file called src/app/unauthorized.component.ts file. This is similar to the expired component where no external template file is used.
import { Component } from '@angular/core';

@Component({
  selector: 'app-root',
  template: `<h2>You are unauthorized!</h2>`
})
export class UnauthorizedComponent {

}
Login Component
The login component is used to redirect a user to the Okta login page. The src/app/login/login.component.ts has the following content.
import { Component, OnInit } from '@angular/core';

import { AuthService } from './../auth.service';

@Component({
  selector: 'app-login',
  templateUrl: './login.component.html',
  styleUrls: ['./login.component.css']
})
export class LoginComponent implements OnInit {

  constructor(private authService: AuthService) { }

  ngOnInit(): void {
    this.authService.signin();
  }

}
The src/app/login/login.component.html has the following content.
<p>login works!</p>
<p>Redirecting... Please wait!</p>
App Component
The main component of the application and is used during bootstrap of the application. The src/app/app.component.ts file has just the default generated content.
import { Component } from '@angular/core';

@Component({
  selector: 'app-root',
  templateUrl: './app.component.html',
  styleUrls: ['./app.component.css']
})
export class AppComponent {
  title = 'angular-okta-sso-role-based-access';
}
The src/app/app.component.html template file just has the following content to display content from a particular route when requested.
<router-outlet></router-outlet>Dashboard Component
The dashboard component is displayed upon successful login. The src/app/dashboard/dashboard.component.ts file contains the following code.
import { Component, OnInit } from '@angular/core';

import { AuthService } from './../auth.service';
import { TokenService } from './../token.service';

@Component({
  selector: 'app-dashboard',
  templateUrl: './dashboard.component.html',
  styleUrls: ['./dashboard.component.css']
})
export class DashboardComponent implements OnInit {

  constructor(private authService: AuthService, private tokenService: TokenService) { }

  ngOnInit(): void {
  }

  logout() {
	this.tokenService.signOut();
	this.authService.signout();
  }

}
The template file src/app/dashboard/dashboard.component.html has the following content.
<p>dashboard works!</p>
<button routerLink="/protected">Protected</button>
<button routerLink="/updatepage">Update Page</button>
<button (click)="logout()">Logout</button>
Protected Component
The protected component is accessible based on roles assigned to a user. The src/app/protected/protected.component.html has the following content.
<p>protected works!</p>
<p>Role Based Access</p>
<button (click)="logout()">Logout</button>
The src/app/protected/protected.component.ts has the following content.
import { Component, OnInit } from '@angular/core';

import { AuthService } from './../auth.service';
import { TokenService } from './../token.service';

@Component({
  selector: 'app-protected',
  templateUrl: './protected.component.html',
  styleUrls: ['./protected.component.css']
})
export class ProtectedComponent implements OnInit {

  constructor(private authService: AuthService, private tokenService: TokenService) { }

  ngOnInit(): void {
  }

  logout() {
	this.tokenService.signOut();
	this.authService.signout();
  }

}
Update Page
This is similar to the protected component but with more roles assigned to a user. The src/app/updatepage/updatepage.component.ts has the following content.
import { Component, OnInit } from '@angular/core';

import { AuthService } from './../auth.service';
import { TokenService } from './../token.service';

@Component({
  selector: 'app-updatepage',
  templateUrl: './updatepage.component.html',
  styleUrls: ['./updatepage.component.css']
})
export class UpdatepageComponent implements OnInit {

  constructor(private authService: AuthService, private tokenService: TokenService) { }

  ngOnInit(): void {
  }

  logout() {
	this.tokenService.signOut();
	this.authService.signout();
  }

}
The src/app/updatepage/updatepage.component.html has the following content.
<p>updatepage works!</p>
<p>Role Based Access</p>
<button (click)="logout()">Logout</button>
Testing Application – Okta SSO Role Based Access
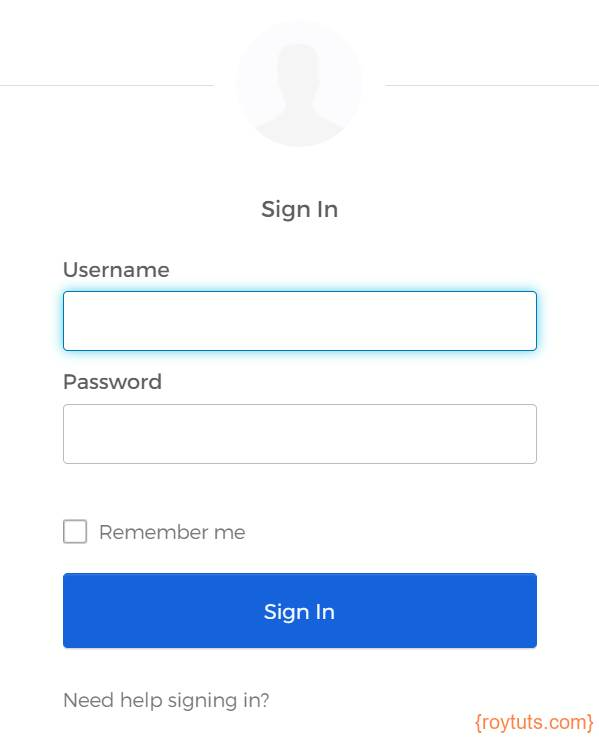
The user will be redirected to the following Okta sign in page when user hits the URL http://localhost:4200 in the browser.
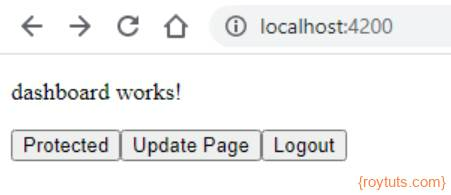
Once user successfully logs in using his/her credentials, he/she will be redirected to the application dashboard.
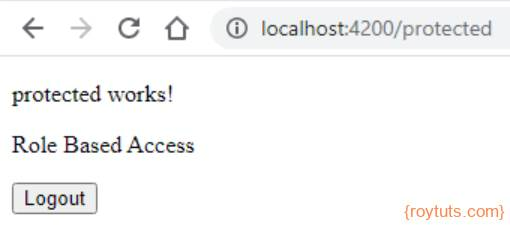
Clicking on the Protected button will take user to the following page.
Clicking on the Update Page button will take user to the following page. So, the user is not assigned to the role which is required to see this page.
Once user clicks on Logout button from any page, he/she will be taken to the session expire page.
That’s all about how to build Angular application to have role based access using Okta SSO.
In this example, I have not shown how to integrate with backend application (Spring Boot), but you can search my Spring Boot Angular applications and check how to integrate Angular with backend application.
Why store your own token when you can use okta to logout?