Introduction
In this example, I am going to discuss about how to work with Python flask caching. Flask is a Python based light-weight web frameworks. Flask framework provides an extension called Flask-Caching that adds caching supports for various backends to any flask applications. You can also develop your own caching system by extending the flask_caching.backends.base.BaseCache class.
Caching is used to store copies of frequently accessed data in several places for the request-response path. In other words, it stores a copy of a given resource and serves it back when requested.
The performance of web sites and applications can be significantly improved by reusing previously fetched resources. Caching in web applications reduce latency and network traffic and thus lessen the time needed to display a representation of a resource. By making use of HTTP caching, web applications become more responsive.

There are several kinds of caches but these can be grouped into two main categories – private or shared caches. A shared cache is a cache that stores responses for reuse by more than one user. A private cache is dedicated to a single user.
Prerequisites
Python 3.9.7, Flask 2.0.2, Flask-Caching-1.10.1, Flask-MySQL 1.5.2, pymysql 1.0.2, MySQL 8.0.26
To install any Python based module, use command pip install <module name>, for example, pip install Flask-Caching.
Project Directory
Create a project root directory called flask-cache as per your chosen location.
I may not mention the project’s root directory name in the subsequent sections, but I will assume that I am creating files with respect to the project’s root directory.
MySQL Table
The following user table under roytuts database will be used for this tutorial’s example.
CREATE TABLE user (
    id INT unsigned COLLATE utf8mb4_unicode_ci AUTO_INCREMENT PRIMARY KEY,
    name VARCHAR(50) COLLATE utf8mb4_unicode_ci NOT NULL,
    email VARCHAR(255) COLLATE utf8mb4_unicode_ci NOT NULL,
    phone VARCHAR(15) COLLATE utf8mb4_unicode_ci NOT NULL,
    address VARCHAR(255) COLLATE utf8mb4_unicode_ci NOT NULL,
) ENGINE=InnoDB AUTO_INCREMENT=1 DEFAULT CHARSET=utf8mb4 COLLATE=utf8mb4_unicode_ci;
I am inserting a row in the table so that I can test the application right away.
insert into user values(1, 'Soumitra', 'soumitra@roytuts.com', '43256789', 'Earth');Configure Flask and Cache
The following configuration is written into a file app.py:
from flask import Flask
from flask_caching import Cache

config = {
    "CACHE_TYPE": "SimpleCache",  # caching type
    "CACHE_DEFAULT_TIMEOUT": 300 # default Cache Timeout
}

app = Flask(__name__)

# Flask to use the above defined config
app.config.from_mapping(config)

cache = Cache(app)
In the above code I have imported the required modules for flask and flask caching.
You may also set up your Cache instance later at configuration time using init_app() function:
cache = Cache(config={'CACHE_TYPE': 'SimpleCache'})

app = Flask(__name__)
cache.init_app(app)
You may also provide an alternate configuration dictionary, useful if there will be multiple Cache instances each with a different backend.
During instantiation of class:
cache = Cache(config={'CACHE_TYPE': 'SimpleCache'})During init_app call:
cache.init_app(app, config={'CACHE_TYPE': 'SimpleCache'})Database Configuration
I have created the below db.py Python script to setup the MySQL database configuration for connecting to database and fetching user information from user table under roytuts database.
As I need to configure database connection with flask module and that’s why I have imported app module and setup the MySQL configuration with flask module.
Make sure to change the database configuration values according to your database setup.
from app import app
from flaskext.mysql import MySQL

mysql = MySQL()

# MySQL configurations
app.config['MYSQL_DATABASE_USER'] = 'root'
app.config['MYSQL_DATABASE_PASSWORD'] = 'root'
app.config['MYSQL_DATABASE_DB'] = 'roytuts'
app.config['MYSQL_DATABASE_HOST'] = 'localhost'

mysql.init_app(app)
Cache Data in Web App
Now I am going to create a main.py file that will have the required function defined for fetching data from MySQL database. In this function I will use the cache decorator to cache data so that next request onward the data will be fetched from the cache instead of hitting the database if timeout for the cache does not occur.
@app.route('/')
@cache.cached()
#@cache.cached(timeout=50)
def users():
    conn = None
    cursor = None
    try:
        conn = mysql.connect()
        cursor = conn.cursor(pymysql.cursors.DictCursor)
        cursor.execute("SELECT * FROM user")
        rows = cursor.fetchall()
        print(rows)
        return render_template('index.html', rows=rows)
    except Exception as e:
        print(e)
    finally:
        if cursor:
            cursor.close()
        if conn:
            conn.close()
The path for the above function is defined with @app.route() decorator. The cache decorator @cache.cached() has been used for the user() function to cache data.
If you don’t specify any timeout in the cache decorator then the default timeout from the cache configuration will be used, for this example, the default timeout is 300 as specified in the app.py.
The timeout can be specified using timeout parameter in the cache decorator.
This decorator will use request.path by default for the cache_key. The above example shows view related cache.
Using the same @cached decorator you would be able to cache the result of other non-view related functions. The only stipulation is that you replace the key_prefix, otherwise it will use the request.path cache_key. Keys control what should be fetched from the cache. If, for example, a key does not exist in the cache, a new key-value entry will be created in the cache. Otherwise, the value (i.e. the cached result) of the key will be returned:
@cache.cached(timeout=50, key_prefix='all_comments')
def get_all_comments():
    comments = do_serious_dbio()
    return [x.author for x in comments]

cached_comments = get_all_comments()
For more information on flask caching, you can read documentation.
Template or View File
Now you need a template page for displaying user records fetched from MySQL database to the end users. This is index.html page kept under directory – templates, which is the standard directory for storing template or view file in flask applications.
<!doctype html>
<title>Python Flask -Deal with Caching</title>
<h2>Deal with Caching in Flask</h2>

<div>
	{% for row in rows %}
		<p>Id: {{ row['id']|safe }}</p>
		<p>Name: {{ row['name']|safe }}</p>
		<p>Email: {{ row['email']|safe }}</p>
		<p>Phone: {{ row['phone']|safe }}</p>
		<p>Address: {{ row['address']|safe }}</p>
	{% endfor %}
	<p/>
</div>
I have used |safe so that it won’t translate “dangerous” symbols into html entities (that Jinja2 does by default to escape “dangerous” ones). Use this option if you trust variable’s content because in opposite case there can be vulnerabilities for example XSS.
Deploying the Cache Application
Now navigate to the project’s root directory using command line tool and execute the command python main.py or if your Python is on the classpath then just execute main.py, your server will be started on default port 5000.
If you want to change the port then you can change the line app.run() to app.run(port=5001), where 5001 is the new port.
Testing the Cache Application
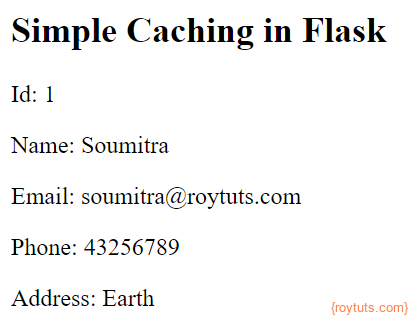
When you hit the URL http://localhost:5000 in the browser to get the below page where user record is shown.
Verifying Flask Cache
There are few ways to verify whether flask cache is working or not.
First option is, you can check in the Network tab of your Chrome development tool or in any other browser’s development tool. The first request will finish in around 400 ms whereas subsequent requests for the same URL will finish in around 4 to 7 ms.
The second option is you can see the print() function which I have used in the users() function that fetches data from MySQL and renders the template or view file.
The print function will print the user record in the console for the first time only, for the next subsequent calls for the same URL, it will not print in the console.
The console output for the first hit is shown below:
[{'id': 1, 'name': 'Soumitra', 'email': 'soumitra@roytuts.com', 'phone': 43256789, 'address': 'Earth'}]Hope you got an idea how to work with flask caching.