How to Install Jenkins on AlmaLinux 8
Jenkins is an open-source automation software for continuous integration and deployment of applications.
In a nutshell, Jenkins is a server that makes sure your project does all the complicated stuff automatically. You can concentrate on writing code. It's a continuous integration tool, which means it runs automated tests every time you check some code into a version control system.
What does Jenkins do?
Jenkins is able to do many, many things. The most common use of Jenkins is probably checking out your project from the version control system, building it, and running automated tests against the built application. However, this is just the tip of the iceberg. Jenkins is capable of much more. It can run deployment tasks, pull from the version control system, monitor file system for changes, and many other things.
Jenkins is open source and primarily written in the Java language. It is an automation server that we might use because we want to be able to automatically do all of the complicated things more than once, so each time Jenkins does them for us, this removes human errors.
Jenkins can also help us by automating tasks so that more work is done with less effort on our part. Depending on what type of task it is, some people might choose to automate tests, while others may choose to automate deployments.
In this guide, we will walk you through how to install Jenkins on an AlmaLinux 8 system and go over some basic configuration ideas.
Prerequisites
- This guide assumes that you already have AlmaLinux 8 installed on your server. You should also have SSH access to your server.
- Root access is needed in order to install Jenkins and perform some other tasks.
- Minimum hardware requirements: 1 GB of RAM, 10GB free of disk space, and a decent processor.
Updating the System
Before we begin, you should make sure your server is up to date by running the following command. It's always a good idea to start with a fresh, updated system.
sudo dnf update -y
sudo dnf upgrade -y
sudo dnf install epel-release
Installing Java
In order to install Jenkins on AlmaLinux 8, we need Java installed. As Jenkin's is mainly written in the Java language, we need to have Java installed for this tool to work.
We will use OpenJDK in this tutorial. OpenJDK is a free and open-source implementation of the Java Platform, Standard Edition (Java SE). You can also use Oracle JDK if you like, but the AlmaLinux 8 repositories don't currently provide it.
Run the following command to install OpenJDK on your server.
sudo dnf install java-1.8.0-openjdk -y
Once the installation is complete, verify the version of Java you have installed. The following command should display the java version.
java -version
Sample output:

Adding Jenkins Repository
The Jenkins repository is a specific location on the internet where you can download Jenkins. There are many repositories like this. We will use the one that is most popular, the one referenced by the Jenkins official site.
First, import the public PGP key that the Jenkins official site uses to sign their files.
rpm --import https://pkg.jenkins.io/redhat-stable/jenkins.io.key
Next, we will create a new source list /etc/yum.repos.d/jenkins.repo with the following content.
sudo tee /etc/yum.repos.d/jenkins.repo<<EOF

[jenkins]
name=Jenkins-stable
baseurl=http://pkg.jenkins.io/redhat-stable
gpgcheck=1

EOF
Now run the makecache command to download metadata for all the packages available in this list.
sudo dnf makecache
Next, run the command below to verify that this new source list was added correctly. You should see a line containing jenkins in the output.
sudo dnf repolist
Sample output:
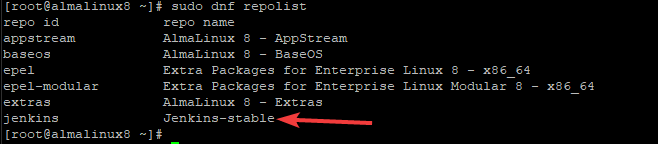
Run the command below to verify that the jenkins repo is enabled.
sudo dnf repolist Jenkins-stable
Sample output:

If the Jenkins repo is not enabled, run the command below to enable it.
dnf config-manager --set-enabled Jenkins-stable
Installing Jenkins
Now that we have added the Jenkins repo, we can install Jenkins using the command below.
sudo dnf -y install jenkins
Once installed, start and enable Jenkins to run automatically at boot time using the commands below.
sudo systemctl start jenkins
sudo systemctl enable jenkin
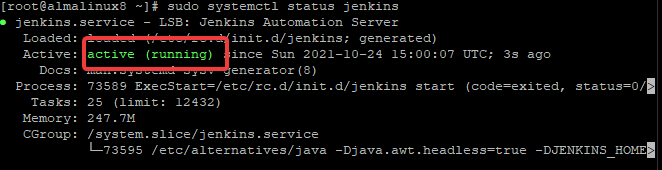
To check the status of Jenkins service by running the following command. You will get a green active (running) status if everything is fine.
sudo systemctl status jenkins
Sample output:
Stopping Jenkins is as easy as starting it with the command below.
sudo systemctl stop jenkins
Configuring the Firewall
Jenkins runs on port 8080 by default. To allow access to this service from external computers, it's necessary to open the port. We will also allow remote connections and allow TCP traffic on port 8080 with the following commands.
sudo firewall-cmd --permanent --zone=public --add-port=8080/tcp
As a rule of thumb, reload the firewall configuration to apply any new rule you added with the command below.
sudo firewall-cmd --reload
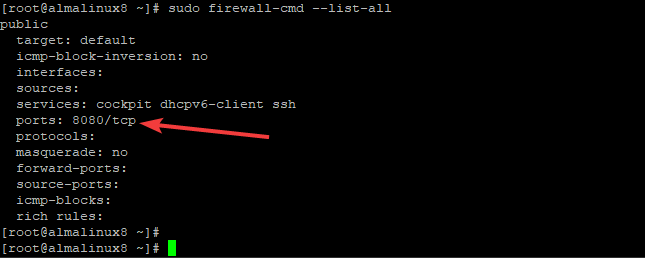
Run the command below to list all the firewall rules and verify that there is a rule for port 8080.
sudo firewall-cmd --list-all
Sample output:
Accessing Jenkins Web UI
Now that you have installed Jenkins and configured the firewall, you can access it using your web browser by typing the server's IP address or domain name followed by port 8080. For example, if Jenkins is installed on a server with IP address 192.168.0.1, the URL would be http://192.168.0.1:8080.
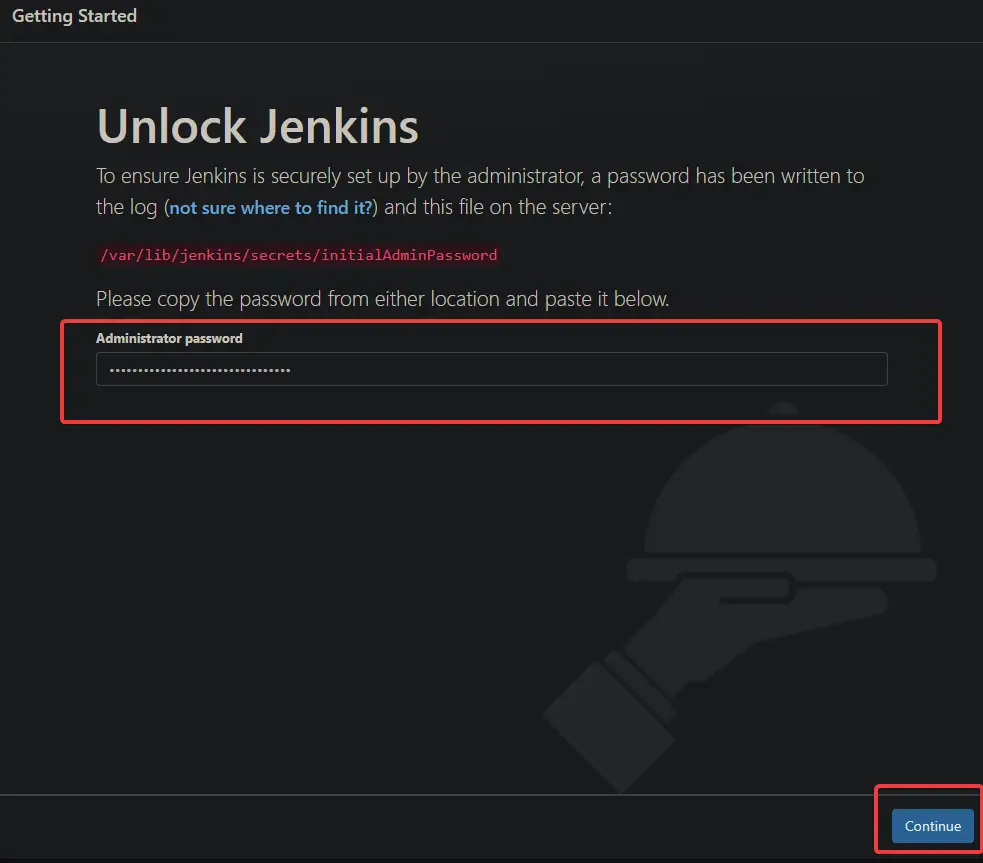
You will be taken to the Getting Started page with an Administrator password field like the screenshot below. Jenkins uses the initialAdminPassword file to prevent unauthorized installations. This password is created automatically during the Jenkins installation but not shown in the terminal.
To get this password, go back to your terminal and run the command below. The password is highlighted in red.
cat /var/lib/jenkins/secrets/initialAdminPassword
![]()
Copy this password value and use it to complete the Administrator password field in the Jenkins web UI. Fill in the password you copied and click the Continue button.
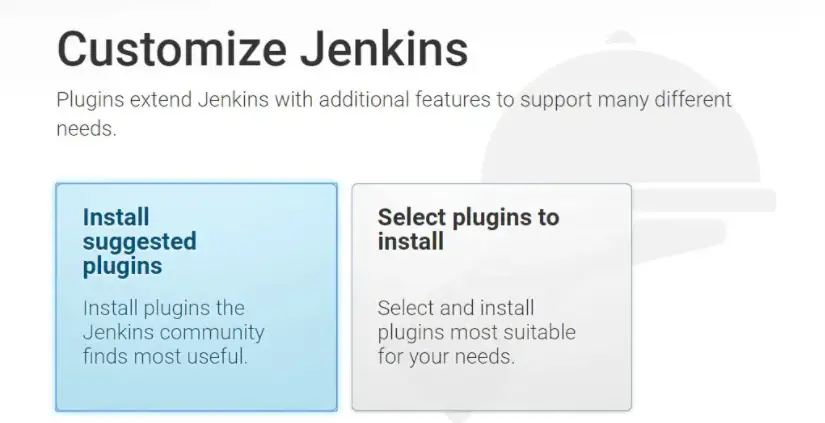
You will be taken to the Customize Jenkins page, where Plugins can be installed and configured. The first, "Install Suggested Plugins," is the more recommended route for newcomers, but advanced users should go with "Select Plugin to install." Eventually, you can even add or remove plugins later from the Jenkins web interface.
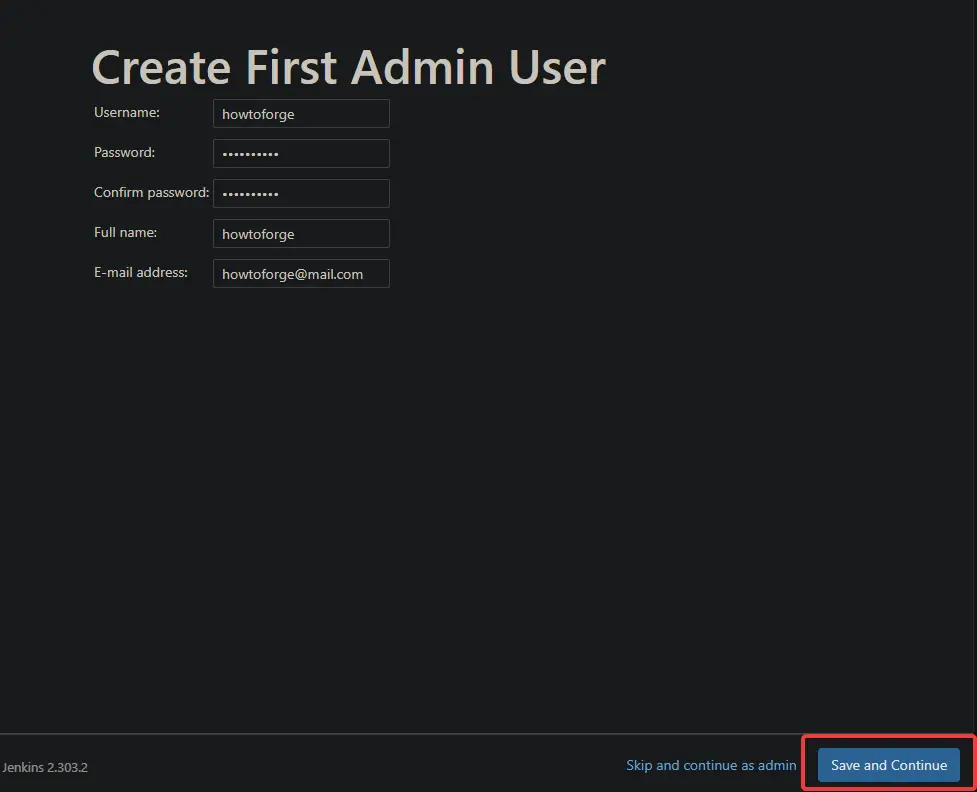
Once the Plugin installation is complete, you will be taken to the Create First Admin User page. Provide a username, password, and email for this admin user. It's recommended to choose a strong password for this account. Once you've entered your credentials, click the Save and Finish button.
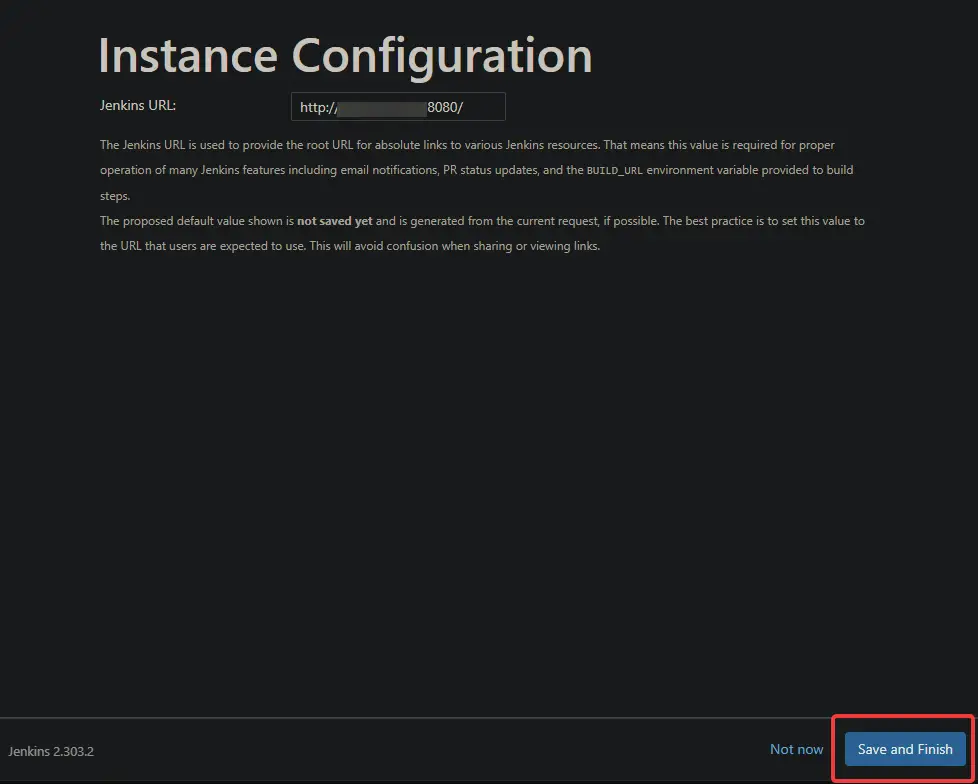
On the next Instance Configuration page, keep the default and click the Save and continue button.
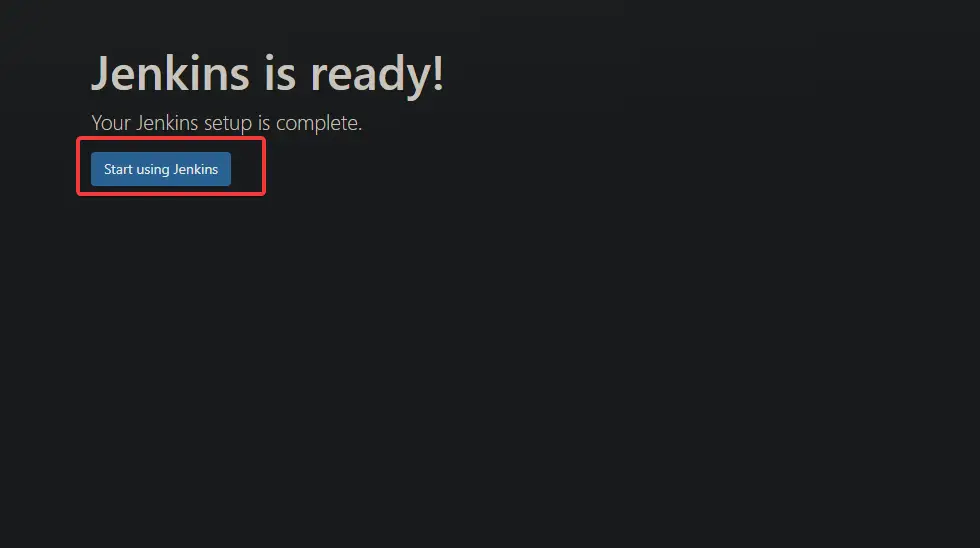
Finally, click on Start using Jenkins on the last page to start using Jenkins.
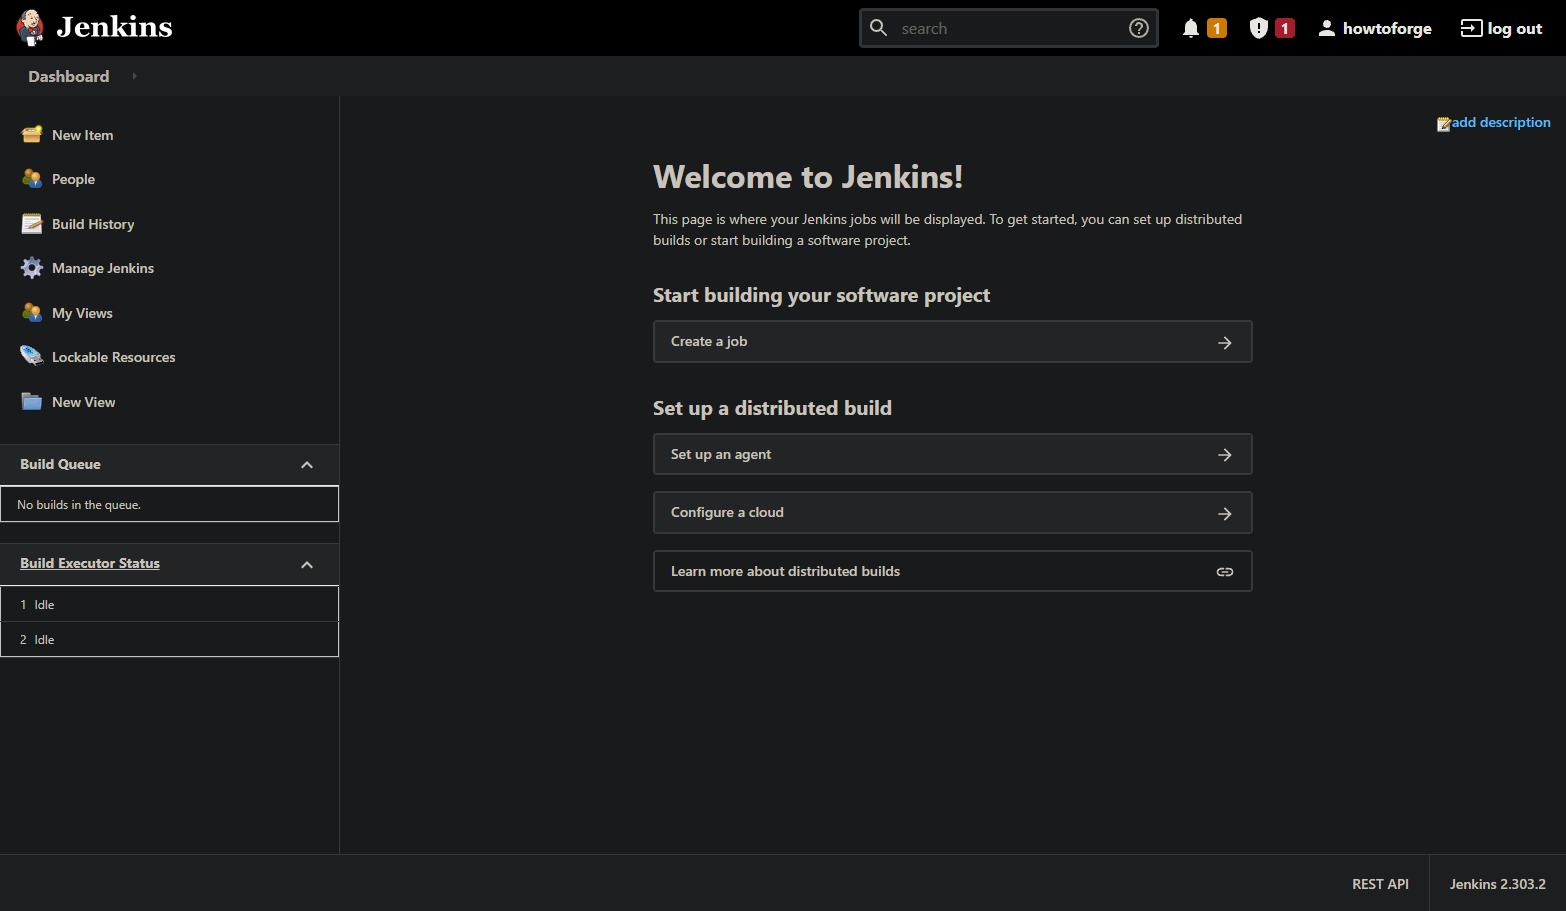
You will be taken to the Jenkins Dashboard, where job creation can begin.
Conclusion
In this tutorial, you have learned how to install and configure Jenkins on an AlmaLinux 8 server. You can now begin adding jobs to your Jenkins server as well as updating and monitoring their status. You may also add plugins to enhance Jenkins functionality or configure it further from the web UI.

