Windows Subsystem for Android is undoubtedly an excellent feature of Windows 11 for running Android apps on your PC as natively as possible. Whether you are an app developer looking for a seamless debugging environment, or just a regular user trying to run their favorite Android apps alongside regular Windows programs — the integrated Android layer of Windows comes in really handy.
You don’t need to be a Windows Insider to get Android apps on Windows 11
When it comes to the interface, Microsoft borrowed design cues from its own Linux Subsystem, which means an Android app is rendered in the same way as a modern Windows app. While Windows 11 somewhat streamlines the Android app management process by automatically creating the relevant shortcuts in the Start menu as soon as you download them from the Amazon Appstore or sideload using ADB, the Windows Subsystem for Android doesn't offer a dedicated home screen to access the installed apps.
Hands on with Android apps on Windows 11
The philosophy behind this design is quite obvious: Microsoft wants you to treat the Android apps no different than the traditional Windows programs. The problem is, not everyone is okay with the proposition. In case Windows fails to create the app shortcut, you have to tinker with the WsaClient executable to create it from scratch, or invoke it directly from the ADB shell. You may even want to have a centralized space for all your Android apps like the desktop environment in Linux, where you have the freedom to access the core settings module and customize every nook and corner of it. Well, that's not entirely impossible for the Windows Subsystem for Android. All you need to do is sideload a launcher app (H/T @MishaalRahman).
How to install a launcher app in the Windows Subsystem for Android
- Grab the APK file of your desired launcher app. Since there exist a hundreds of them, be sure to check out our comprehensive list of the best Android launchers beforehand.
-
Once you have the APK file in hand, sideload it with the help of ADB. The command should be:
adb install <full_path_to_the_APK_file> - Run the shortcut of the launcher you just installed from the Start menu.
- Voila!

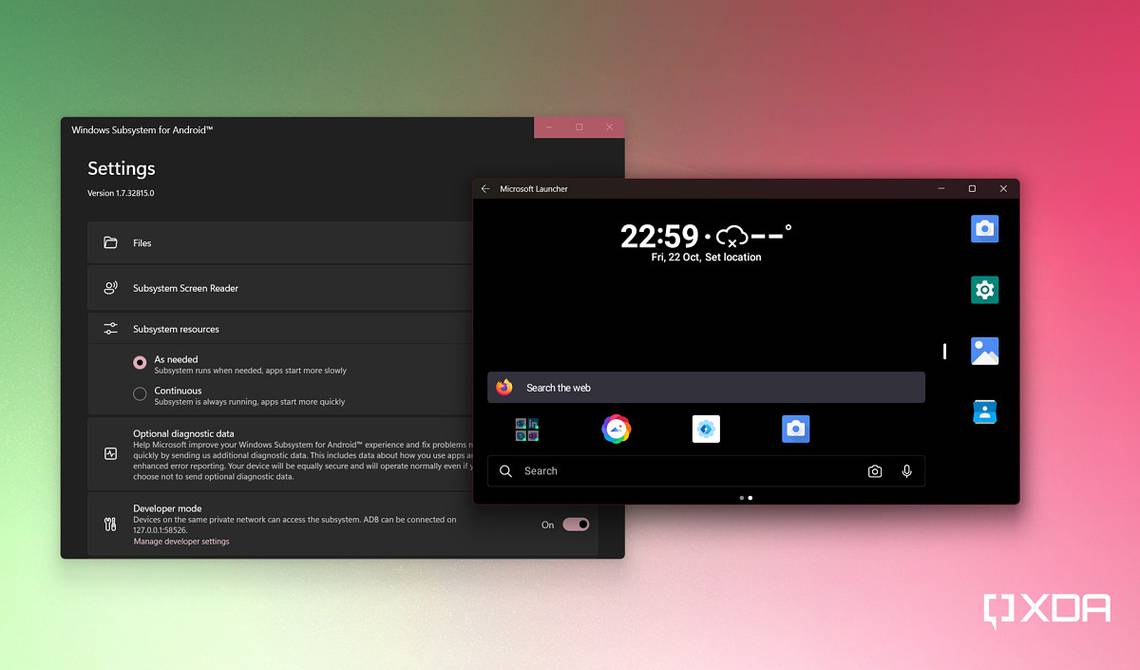
The first thing you'll notice after installing an Android launcher is the availability of a home screen. From there, you can access the app drawer as well as the underlying Settings app of the Android instance. Want to organize the installed apps? Create some folders and stack the similar ones together. Fix a malfunctioning app by clearing its data from Settings? Go on. Heck, you could even add some cool widgets on the Android home screen and use them in conjunction with Windows 11's own Widgets pane.
Keep in mind that Microsoft replaced a number of Android settings app intent links with the Windows equivalent ones. This means you might be redirected to the Windows 11's Settings app after clicking on some sections of the Android layer's Settings app. This is perfectly normal and nothing to worry about.
Which launcher app are you planning to use for the Windows Subsystem for Android? Let us know in the comments section below.