Angular Basics: Data Binding Part 7—Output Decorator

Data binding can be confusing when you’re getting started in Angular. Let’s break it down! This post covers one-way data binding from a child component to a parent component with the output decorator and event emitters.
In this post, we will look into how data can be passed from a child component to a parent component safely in Angular with the output decorator. We have already seen how to pass data from parent to child component—read about input decorators here.
Before We Start
This post is suited for all levels of frontend developers who use Angular, so being conversant with beginner concepts and installation processes is not assumed. Here are a few prerequisites you should have before you start to use Angular 12 and follow along through this article’s demonstration:
- VS Code for your integrated development environment
- Node version 11.0 installed on your machine
- Node Package Manager version 6.7 (it usually ships with Node installation)
- Angular CLI version 8.0 or above
- The latest version of Angular (version 12)
// run the command in a terminal
ng version
Confirm that you are using version 12, and update to 12 if you are not.
Other nice-to-haves include:
- Working knowledge of the Angular framework at a beginner level
What Is the Output Decorator?
The output decorator is used to pass data from the child component upward to the parent in the component tree. Calling the output decorator does binding of the property to the event emitter class, as we will see below.
What We Are Building
We are going to use the Kendo UI Wizard to scaffold a new Angular app inside VS Code. Then with that app, we’ll create child components and show how we can pass data from the child component to the parent component with ease.
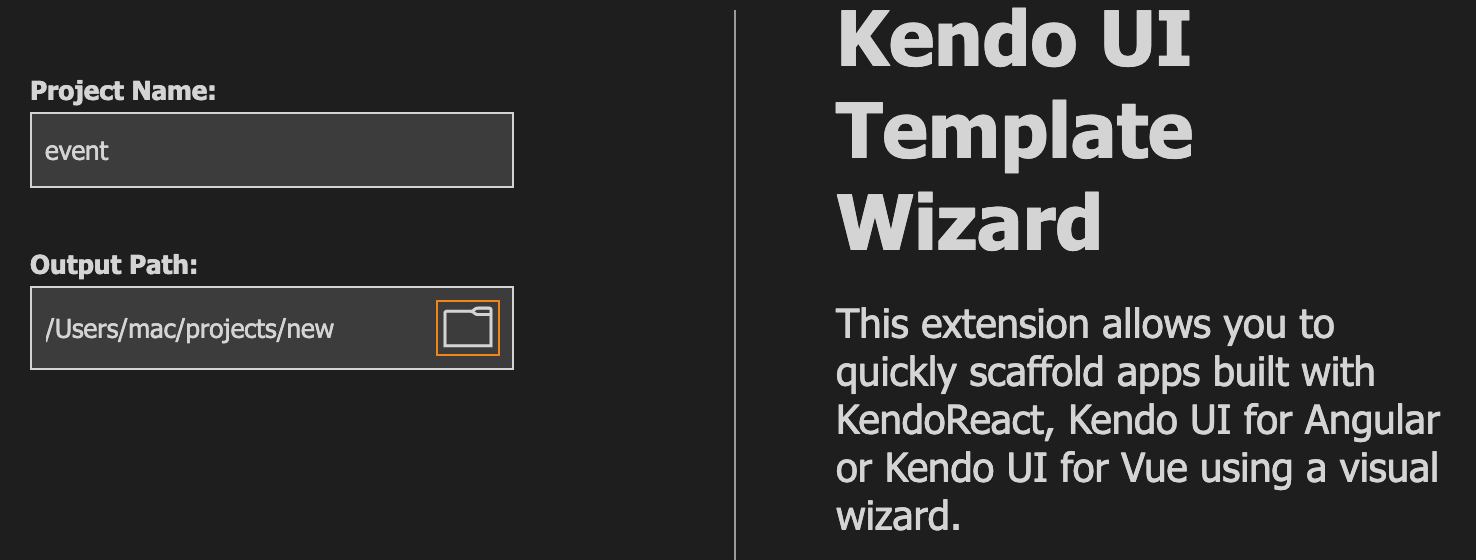
Open up your VS Code application and go to the Command Palette (type Command + Shift + P on Mac or Ctrl + Shift + P on PC) to open the Kendo UI Wizard. If you do not have the Kendo UI Wizard installed already, then go to the Extensions tab, search for Kendo UI Template Wizard and install it. Restart the VS Code app and then go back to the Command Palette to open the Kendo UI Wizard.

Choose a project name and a location on your machine where you want it to be saved, and click “Next.”
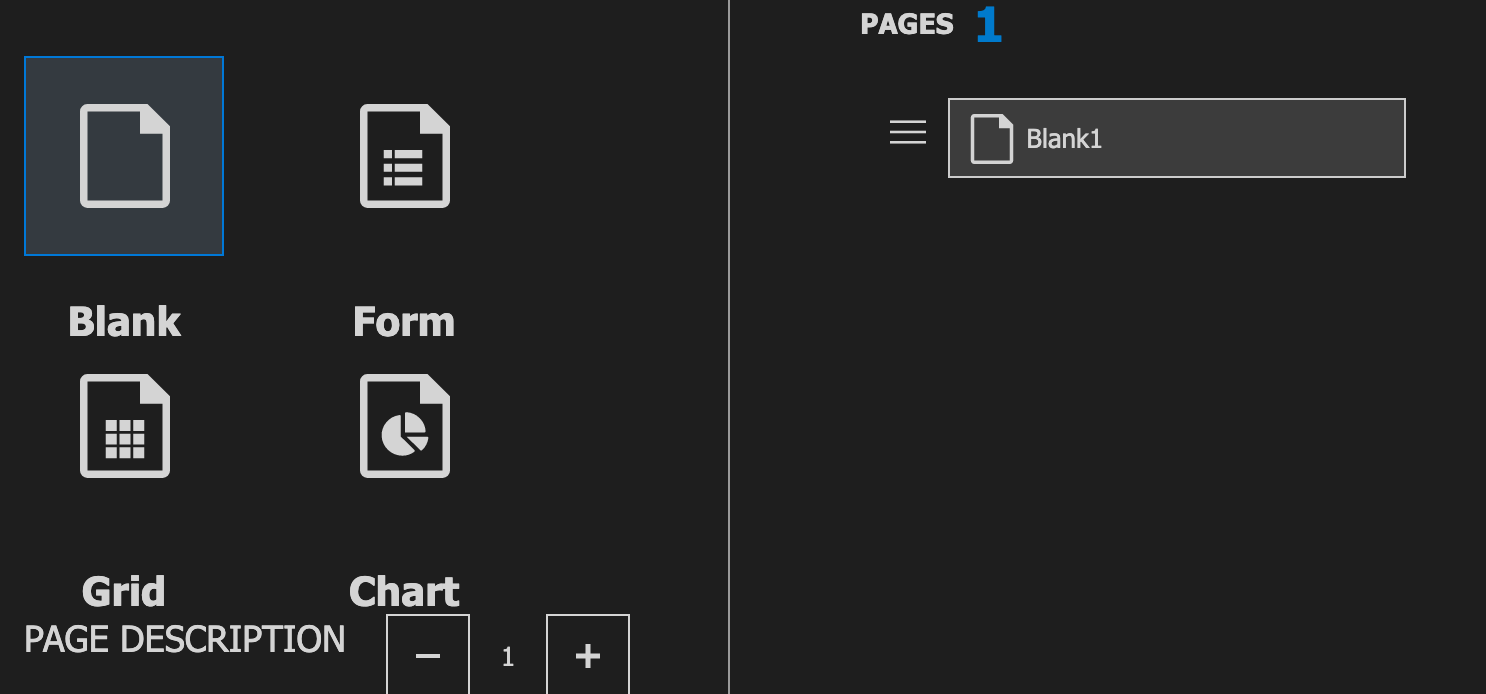
Choose Angular and then choose blank with 1 page and click “Next.”

Choose default CSS as your style choice and click “Create.” Once it finishes, click on “Open new project.” Open the terminal and download all the Node dependencies with this command:
npm install
After that, you can run the application on the dev server with this command:
ng serve
The application should look like this if you visit localhost:4200 in your browser.

If you take a look at the file structure, you will see that the app folder is the root folder. Let’s take it as the parent component for the purpose of today’s session. Now to create a child component, we can generate one in the terminal using the Angular CLI like this:
ng generate component components/child
This generates a new component which we are going to make the child component in our project today.
Your app.component.html file should be exactly like this:
<div style="text-align: center; padding: 30px;">
    <h1>This is the parent component</h1>
    <p>In this app, we shall learn about relationships between parent and child components</p>
    <hr>
    <app-child></app-child>
    </div>
If you check your browser at localhost:4200 it should now look like this:

We have the horizontal line to separate the two components. Inside your child component HTML file, replace the content with this one:
<h2>This is the child component</h2>
<p>Click around the heading to display "a new message" inside the parent component</p>
Just like in the last post about the input decorators, let us look at the output decorator.
Using the Output Decorator
While building Angular applications, you might want to ensure that you can pass data from a child component to a parent component. Angular makes this really easy by creating a doorway called the output decorator, which you can use to achieve this. Your child component can use the output decorator to raise an event and notify the parent component of a change with the help of an event emitter and that is how they go hand in hand.
Let us start by showing how the output decorator is used.
Start With the Child Component
Inside your child component.ts file replace the content with the code block below:
import { Component, OnInit,Output, EventEmitter } from '@angular/core';
@Component({
  selector: 'app-child',
  templateUrl: './child.component.html',
  styleUrls: ['./child.component.scss']
})
export class ChildComponent implements OnInit {
message: string = 'A new message';
  @Output() messageData: EventEmitter<string> = new EventEmitter()
constructor() { }
ngOnInit(): void {
  }
sendMessage(){
    this.messageData.emit(this.message);
  }
}
In the import statement, we brought in the output and event emitter before using it, we declared a new variable called message and created our doorway, and associated it with an event emitter. The next thing we did was create a method called sendMessage to actually trigger the emit action.
Now that we are done with setting up, we have to create an event that triggers the data to be passed from the child to the parent component. Inside the child component template file, add the event below:
<div (click)="sendMessage()">
    <h2>This is the child component</h2>
<p>Click around the heading to display "a new message" inside the parent component</p>
</div>
So whenever the child component is clicked, the message should be sent to the parent component.
Receiving Data From Child Component
Now we have set up output, associated it with a click event, and have sent the data to the parent component. To receive this data, we have to create a variable that stores the string in our parent component. Inside your app component.ts file should look like this:
import { Component } from '@angular/core';
@Component({
  selector: 'app-root',
  templateUrl: './app.component.html'
})
export class AppComponent {
  recievedMessage: string = '';
getData(event: any){
    this.recievedMessage = event;
  }
}
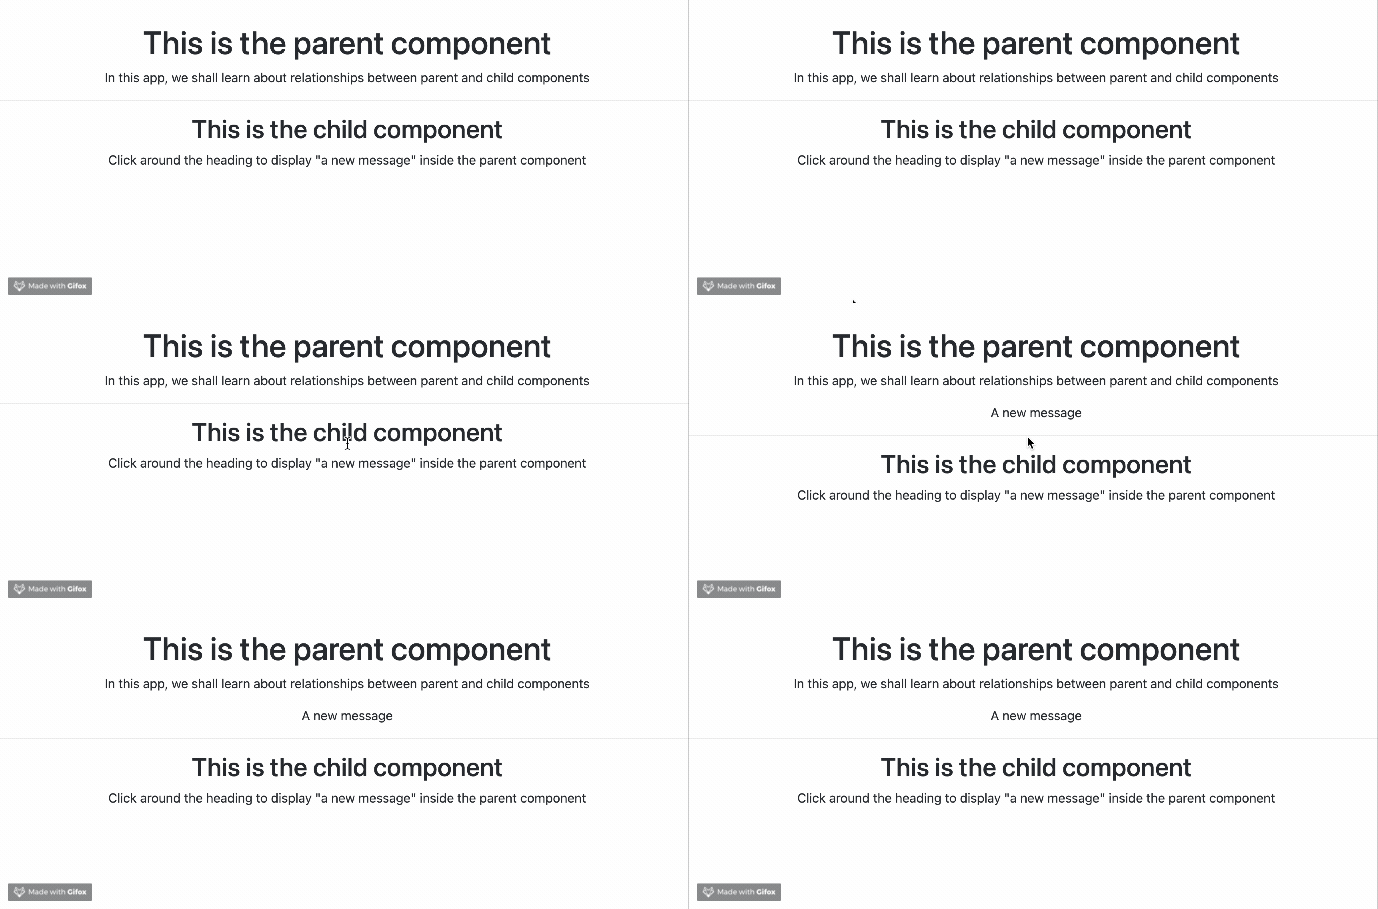
We call the string received message and simply assign the event data we get, which is the “a new message” to the new variable. Just like that, we have passed data from the child component to the parent component in a scalable way. Your browser should look like this:

Conclusion
This has been a fun way to learn about the output decorator Angular provides to pass data from the child component to the parent component. In this post, you have seen how it is used and why it can be useful. Happy hacking!
Quick Links to Our Angular Basics Data Binding Series
- Angular Basics: Data Binding Part 1—Interpolation
- Angular Basics: Data Binding Part 2—Event Binding
- Angular Basics: Data Binding Part 3—Property Binding
- Angular Basics: Data Binding Part 4—Attribute Binding
- Angular Basics: Data Binding Part 5—Style Binding
- Angular Basics: Data Binding Part 6—Input Decorator
- Angular Basics: Data Binding Part 7—Output Decorator (this post)
- Angular Basics: Data Binding Part 8—Two-Way Data Binding

Nwose Lotanna Victor
Nwose Lotanna Victor is a web technology enthusiast who documents his learning process with technical articles and tutorials. He is a freelance frontend web developer based in Lagos, Nigeria. Passionate about inclusion, community-building and movies in Africa, he enjoys learning new things and traveling.
