How to Install PHP Composer on Debian 11
PHP Composer is a dependency manager for PHP. It uses a composer.json file placed in your project root which contains a description of the project, including its dependencies and other information such as author, license, and so on. With PHP Composer, you can install all necessary libraries to build a PHP application with just one command from your terminal.
PHP Composer easily manages dependencies, libraries of your project. It also allows you to make a release of your application to other people or for yourself. You can think about PHP Composer as npm, bower, and bundler on JavaScript.
In this tutorial, we will show you how to install Composer on Debian 11. All the steps should work on other Debian-based distributions as well.
Let's begin the tutorial now!
Prerequisites
To install PHP Composer on Debian 11, you'll need a Linux shell and root access. You have already completed this step if you use Linux as your main operating system or if you have installed VirtualBox that runs inside a Debian host.
Step 1. Updating the System
Open your terminal by pressing Ctrl+Alt+T or searching for terminal from the application menu. When it opens, run these commands in sequence to update the system package repository cache.
sudo apt-get update
sudo apt-get upgrade
Once the update finishes, we will install PHP and some additional PHP modules.
We will install some additional PHP modules to enable the Composer to work properly. You can skip this step if you've already installed all the required modules on your system.
sudo apt install php -y
sudo apt install curl git unzip wget php-common php-zip php-cli php-xml php-gd php-mysql php-bcmath php-imap php-curl php-intl php-mbstring -y
Step 2. Install PHP Composer
Now that your system is up to date let's install PHP Composer.
First, we will download the PHP script using curl or wget command-line utility. You can also use the PHP script if you want.
php -r "copy('https://getcomposer.org/installer', 'composer-setup.php');"'
Or
wget -O composer-setup.php https://getcomposer.org/installer
These commands download and compile the composer-setup.php file for us and put it in the current directory. Now we can run this setup script to install the composer. There are two ways to install the composer: globally accessible for all users or per PHP application basis. We will use the --install-dir option to specify the installer's directory. We will use the --filename option to specify the installer's filename.
Run the following line to install Composer globally on your system. This installation will allow any user to run the composer command from any directory in the terminal. You can skip this step if you want to install it locally.
php composer-setup.php --install-dir=/usr/local/bin --filename=composer
chmod +x /usr/local/bin/composer
The command above will put the PHP executable file under the /usr/bin directory, which is included in our PATH environmental variable so that we can easily launch it from anywhere without specifying its full path. Usually, this should be the preferred way to install PHP Composer. However, you can specify a custom directory if you want.
To install the PHP Composer per application or per specific project, run the following commands. This approach can be helpful for shared hosting environments, or if you want to make some modifications on the Composer or if you don't want to install it globally.
cd /path/to/the/specific/project/php-application && mkdir -p bin
php composer-setup.php --install-dir=bin --filename=composer
chmod +x bin/composer
Remember to replace /path/to/the/specific/project/ with the real/actual project directory.
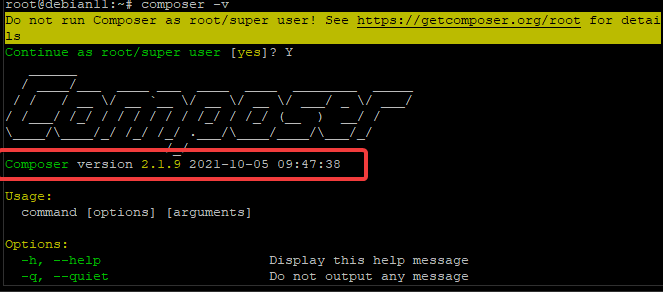
After running one of the two installation commands, we will test whether our PHP Composer has been installed correctly or not. We will run the composer command with the -v flag to show some version information.
composer -v
You will be prompted not to continue to run composer as root. You can ignore this warning, type Y, and hit Enter to make the PHP Composer run.
If you get a similar output to the one below, you have successfully installed PHP Composer on your system. You should see a version number or an error message depending on whether it works or not.
Step 3. Updating PHP Compose
After some time, you may want to upgrade PHP composer to the latest version. PHP Compose has a handy feature is self-update, which you can access via the composer self-update command.
composer self-update
If you already have the latest version PHP composer, you will get the following message.

Otherwise, if your system still needs an update. You will get a message indicating the latest version and asking if you would like to continue making the update.
Step 4. Testing the PHP Composer Installation
Now that we have the latest version of Composer on our system let's test it by creating a simple project.
We will create an example project directory and move in the newly created project directory.
mkdir example-project && cd example-project
Now, find a package you would like to use from Packagist.org, the Composer's default public repository. We will use the sebastian/comparator in our example project.
composer require sebastian/comparator
PHP Composer recognizes, downloads, and installs the sebastian/comparator package and all of its dependencies in our example project directory.
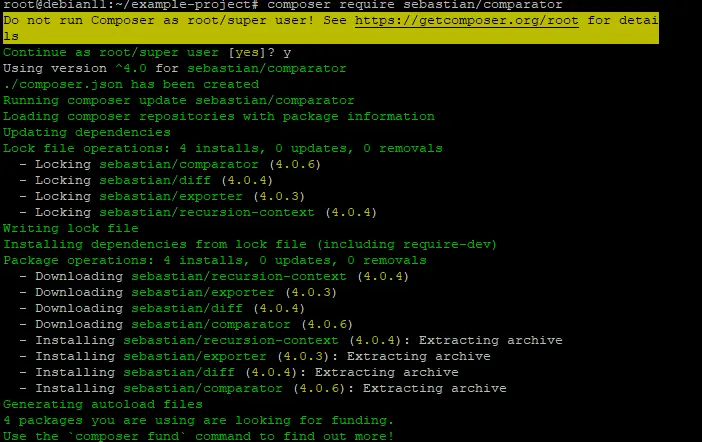
As shown in the screenshot above, the PHP composer will automatically add the entry of your project to a file named composer.json in our example project directory and update its metadata.
It will also add a new folder named vendor, which contains the downloaded package from Packagist.org.
In the project directory, you can use the ls command to list all of the files.
ls
You should see these files listed: composer.json, vendor, and composer.lock.
- composer.json - This is the file that contains all of our project's metadata.
- vendor - Contains the downloaded packages from Packagist.org and their dependencies.
- composer.lock - This file contains the versions of all packages so that we can lock down our project to those versions.
Sample output:

Conclusion
In this post, you have learned how to install PHP Composer on a Debian 11 system. You have also learned how to update the PHP Compose. If you have any questions or suggestions, leave a comment down below.

