How to Install Nodejs on Rocky Linux 8.4
Node.js is a cross-platform java-script runtime for server-side programing language. It's built on top of Chrome's V8 JavaScript engine, allows you to execute JavaScript code on the server-side. As for developers, Node.js allows developers to create scalable backend applications using JavaScript. Also, it's one of the most popular JavaScript runtimes among full-stack and front-end developers.
Node.js has become more popular and become an essential part of building server-side and networking applications, also became an industry standard. It can be used to create applications for different platforms, including backend/server applications, desktop applications, web applications/front-end, and mobile applications.
In this tutorial, you will learn how to install Node.js on Rocky Linux using two different methods.
- Installing Node.js from AppStream repository: this method is recommended for anyone who wants to install Node.js application for long term production and rarely need to switch different version of Node.js.
- Installing Node.js using NVM (Node Version Manager): this method is recommended for developers who need to switch between the Node.js version frequently. NVM is a tool for managing multiple Node.js versions.
Prerequisites
- A Rocky Linux system. Make sure all packages and repositories updated to the latest version
- A root user or a user with root privileges. You will be using this user for installing new packages and editing system configurations.
Method 1 - Installing Nodejs from AppStream Repository
By default, Rocky Linux provides a repository module for Node.js. They provide 3 different versions of Node.js, and all of those are LTS (Long Term Supports) versions. If you want to install Node.js-based applications on the server for long-term usage and not for development, then this is recommended way. But if your applications need a specific version of Node.js, then you go to the second method.
Setting up Repository
1. First, execute the following command to check all available repository modules for Node.js on your Rocky Linux system.
sudo dnf module list | grep nodejs
You will see similar output like the screenshot below.
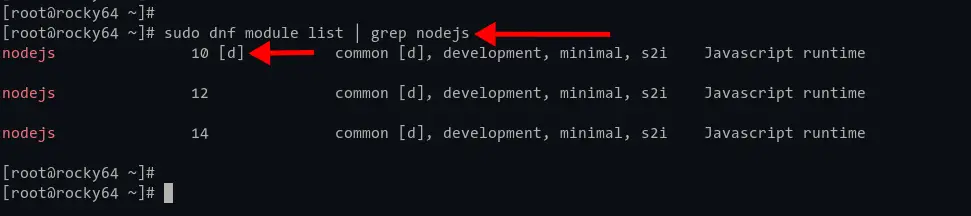
As you can see, the nodejs version 10 are selected as the default repository module, with the default profile 'common'.
2. At this time, the latest stable version of Node.js LTS is version 14, which is available on the repository.
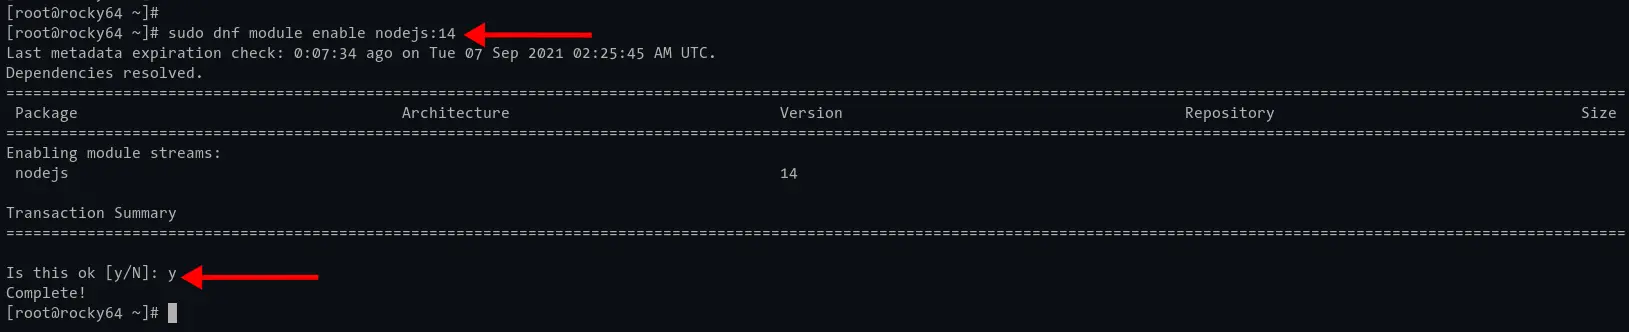
Execute the following command to enable 'nodejs' module version 14.
sudo dnf module enable nodejs:14
Type 'y' to confirm and enable.
Optionally, if you want to install with different profiles (development, minimal, s2i), you can specify the profile as below.
sudo dnf module enable nodejs:14/minimal
3. After that, verify the repository module 'nodejs' using the command below.
sudo dnf module list nodejs
If your installation is correct, you will see the 'nodejs' module version 14 mark as enabled with '[e]', and the default profile selected as 'common' with '[d]'.

Installing Nodejs and npm on Rocky Linux
1. Now install Node.js and npm by executing the DNF command below.
sudo dnf install nodejs npm
Type 'y' and press 'Enter' to confirm and install Node.js and npm packages.
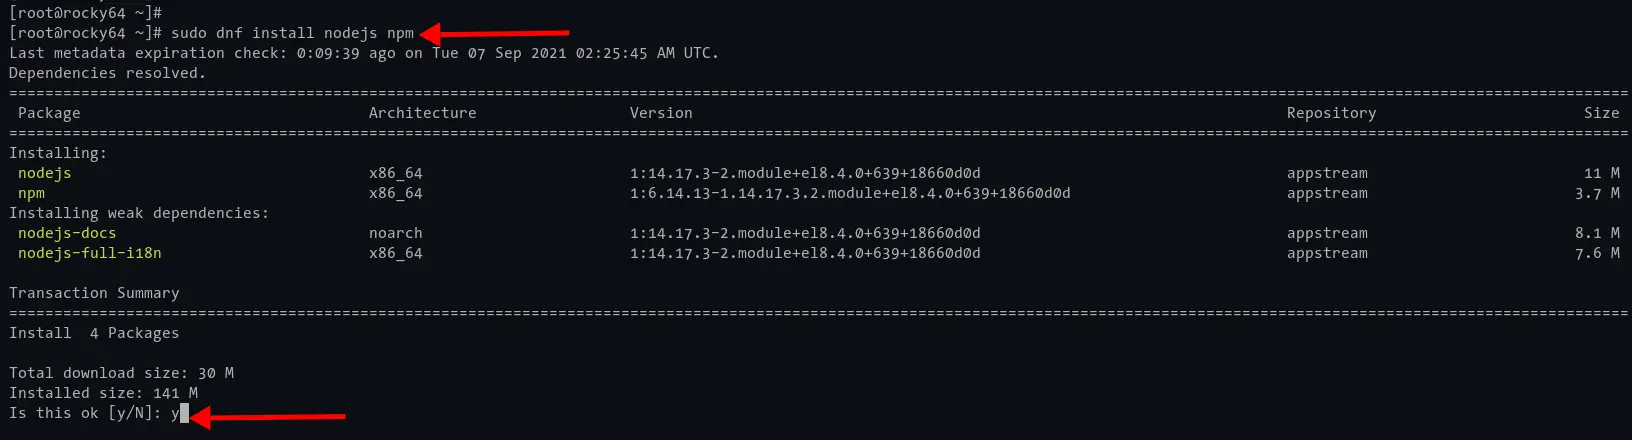
As seen, the command will select Nodejs 14.x from the AppStream repository.
2. If the installation is complete, verify your Node.js installation using the following command.
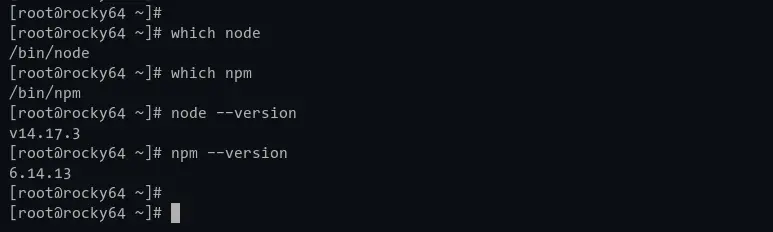
Check the binary path of Node.js and npm using the command below.
which node
which npm
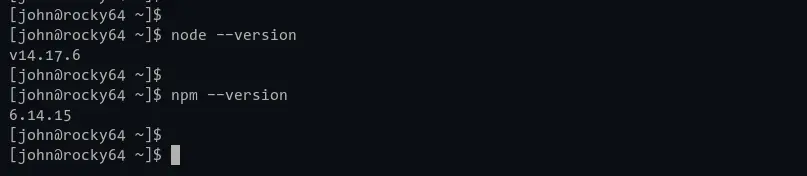
Check the Node.js and npm versions using the following command.
node --version
npm --version
If your installation is successful, you will see similar output as seen below.
Method 2 - Installing Nodejs with NVM (Node Version Manager)
Nvm (Node Version Manager) is a tool written in bash with POSIX compliant for managing Node.js versions. The main advantage of using nvm is that you can install multiple versions of Node.js on a single machine.
Using this tool, developers can switch between multiple Node.js versions regularly. Or in a different scenario, developers can use a different version of Node.js for each project that they're working on.
Installing NVM (Node Version Manager)
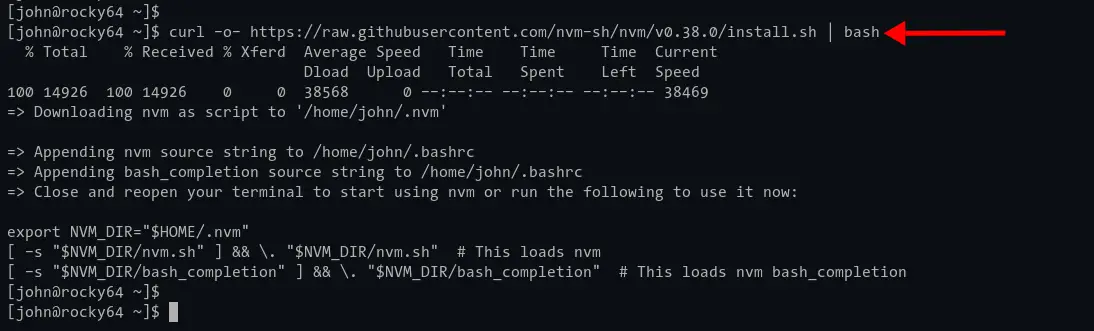
1. To install nvm, execute the command below.
curl -o- https://raw.githubusercontent.com/nvm-sh/nvm/v0.38.0/install.sh | bash
The installer script will be running and adding a new configuration to the '~/.bashrc' file.
2. Reload the ~/.bashrc configuration using the command below.
source ~/.bashrc
3. After that, verify the nvm installation using the following command.
Check if the 'nvm' command is available or not.
command -v nvm
If the 'nvm' command is available, you will see the output as 'nvm'.
Next, check the nvm version and nvm help page.
nvm --version
nvm --help
Below is the similar output you will get.

NVM Basic Usage: Check Available Nodejs Versions on Remote Repository
First, you will be checking all available versions of Node.js on the remote repository using the nvm command.
1. Execute the following command below to check all available versions of Node.js on the remote repository.
nvm ls-remote
Now you will see a list of Node.js versions as below.
v0.1.14
v0.1.15
...
....
....
v16.7.0
v16.8.0
2. Next, filter the output to only show the LTS version of Node.js using the option '--lts' as below.
nvm ls-remote --lts
And you will be shown the list of Nods.js LTS version only.
v4.2.0   (LTS: Argon)
v4.2.1   (LTS: Argon)
v4.9.1   (Latest LTS: Argon)
...
....
v14.17.5   (LTS: Fermium)
v14.17.6   (Latest LTS: Fermium)
NVM Basic Usage: Installing Nodejs with NVM
After checking available Node.js versions, you will be installing the Node.js as you need.
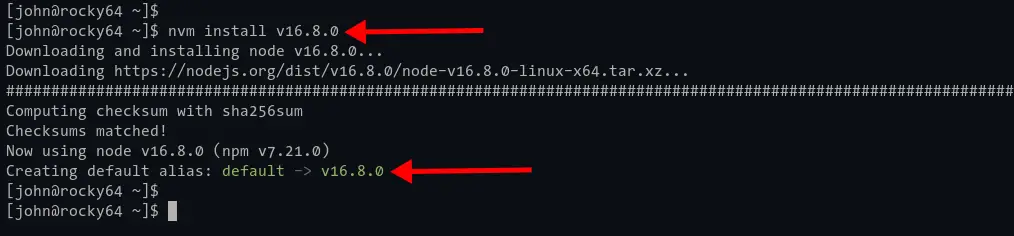
1. Execute the following command to install the specific version of Node.js.
nvm install v16.8.0
The nvm tool will be downloading the Node.js version as you wish (as for now, v16.8.0 is the latest version of Node.js) and make it a default version of the Node.js on your environment.
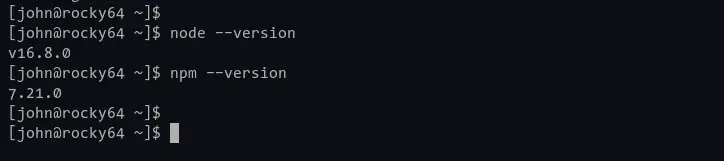
You can verify using the following command.
node --version
npm --version
Below is the similar output you will see.
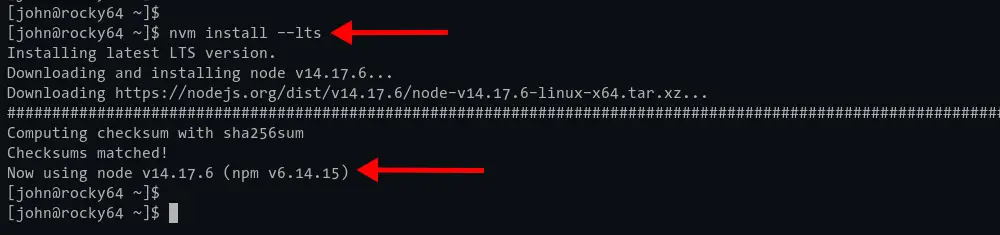
2. Next, you can use the option '--lts' option for installing the LTS version of Node.js. Execute the nvm command below.
nvm install --lts
The command will be downloading the latest LTS version of Node.js. As for this time is Node.js v14.17.6.
After the installation is complete, execute the following command to verify the installation.
node --version
npm --version
The default version of Node.js has changed to the latest LTS version v14.x.
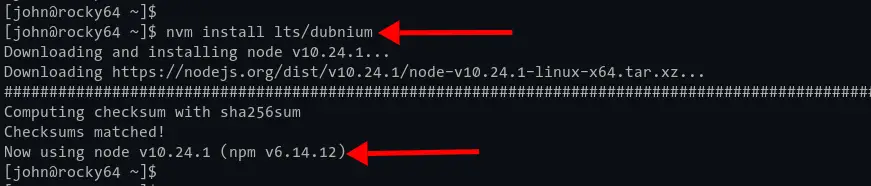
3. Additionally, you can also install Node.js using its codename. For this example, run the following command to install the Node.js 'dubnium', which is the codename for Node.js v10.x.
nvm install lts/dubnium
The nvm tool will be downloading Node.js dubnium to your system.
NVM Basic Usage: Managing Multiple Node.js Versions
At this stage, you've installed multiple versions of Node.js. Now you will be managing multiple versions of Node.js on your system.
1. To check all installed versions of Node.js, execute the nvm command below.
nvm ls
Below is the output you will get.
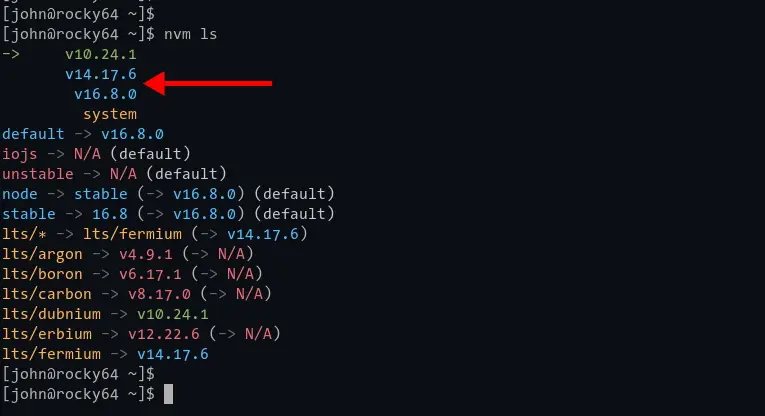
At the top, you see all installed versions of Node.js, and currently, you're used Node.js v10.24.1 as default.
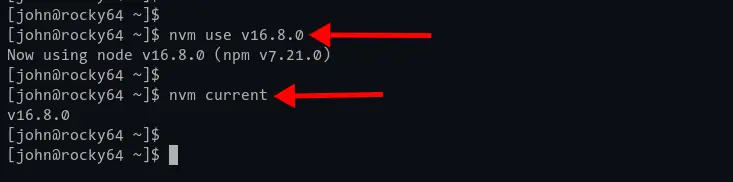
2. To change the default version of Node.js you're currently used to, execute the nvm command following the 'use' option as below.
Set up a specific version of Node.js as default using the following command.
nvm use v16.8.0
After that, verify the current used Node.js version using the command below.
nvm current
And you will see the default Node.js you're currently used are v16.8.0.
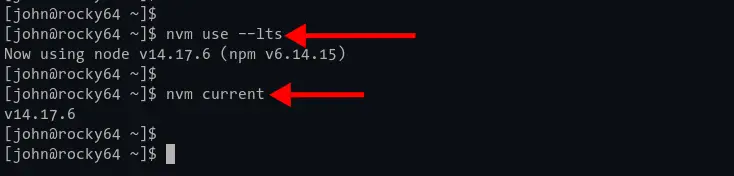
Next, to set up the Node.js LTS version as default, you can use the following command.
nvm use --lts
After that, check again the version of Node.js you're currently used.
nvm current
You will the default version of Node.js has changed to the LTS version v14.x.
Conclusion
Congratulations! Now you've learned the installation of Node.js on Rocky Linux. The first method of installing Node.js from the AppStream repository can be applied to other RHEL distros like CentOS etc. And the second method of the Node.js installation with NVM (Node Version Manager), can be applied on most Linux distro, because it's written as POSIX compliant with bash, and can affect only the user environment.
For the next step, you can choose these two methods of Node.js installation as you need and depending on your current system status and environment.

