How to Install PostgreSQL and phpPgAdmin on Fedora 34
On this page
- Prerequisites
- Step 1 - Install PostgreSQL
- Step 2 - Create a new PostgreSQL Database Cluster
- Step 3 - PostgreSQL Roles and Authentication Methods
- Step 4 - Creating new roles and databases.
- Step 5 - Enable remote access to PostgreSQL server
- Step 6 - Install phpPgAdmin, Nginx, and PHP
- Step 7 - Install SSL (Optional)
- Conclusion
PostgreSQL or Postgres is a powerful, open-source, relational database management system that uses and extends the SQL language. It has many advanced features that safely store and scale complicated data workloads. phpPgAdmin is a PHP-based application to manage and edit PostgreSQL databases.
This tutorial will demonstrate how to install PostgreSQL and phpPgAdmin on a Fedora 34 based server.
Prerequisites
-
A Fedora 34 based server.
-
Keep your systems updated.
$ sudo dnf update -
A non-root user with sudo privileges.
Step 1 - Install PostgreSQL
Fedora 34 comes with different versions of PostgreSQL available from their repository. You can choose between these versions by enabling the appropriate module, which is a collection of packages and dependencies.
First, check the available streams for the postgresql module using the dnf command.
$ dnf module list postgresql
Name                        Stream                  Profiles                           Summary
postgresql                  9.6                     client, server [d]                 PostgreSQL module
postgresql                  10                      client, server [d]                 PostgreSQL module
postgresql                  11                      client, server [d]                 PostgreSQL module
postgresql                  12                      client, server                     PostgreSQL module
postgresql                  13                      client, server                     PostgreSQL module
To install PostgreSQL, we need to enable the corresponding module stream.
$ sudo dnf module enable postgresql:13
When prompted, enter Y to enable the stream.
Next, install the PostgreSQL server.
$ sudo dnf install postgresql-server
You may want to install the contrib package, which adds several additional features to the PostgreSQL database system.
$ sudo dnf install postgresql-contrib
Now that the server is installed, we need to create a new user.
Step 2 - Create a new PostgreSQL Database Cluster
First, you need to create a new PostgreSQL database cluster. A database cluster is a collection of databases that are managed by a single server instance. Creating a cluster will create directories in which the database will be placed. This whole process is also akin to initializing PostgreSQL.
This process creates template1 and postgres databases. The template1 database is a template used by PostgreSQL to create new databases. The postgres database is the default database for use by users, utilities, and third-party applications.
To create the database cluster to initialize PostgreSQL, use the following command.
$ sudo postgresql-setup --initdb
Now, start the PostgreSQL service.
$ sudo systemctl start postgresql
Enable the PostgreSQL service.
$ sudo systemctl enable postgresql
Now that PostgreSQL is up and running, we can create new users and databases and start using them.
Step 3 - PostgreSQL Roles and Authentication Methods
Postgres uses the concept of "roles" to handle authentication and permissions. PostgreSQL supports multiple authentication methods. The most commonly used methods are:
- Trust - A role that can connect without a password, as long as the conditions defined in
/var/lib/pgsql/pg_hba.confare met. - Password - A role that uses the password to connect. Passwords can be stored as
md5,scram-sha-256and clear-text. - Ident - It requires the client's OS username and is only supported on TCP/IP connections.
- Peer - Same as Ident but supported only on localhost connections.
Postgres uses peer authentication by default, which means it associates Postgres roles with matching a Linux user account. If a role exists inside Postgres, a Linux username with the same name can sign in as that role. The details of the client authentication are stored in the /var/lib/pgsql/pg_hba.conf file.
The installation process of Postgres creates a user account called postgres that is associated with the default Postgres role.
Switch to the postgres account.
$ sudo -i -u postgres
You can access the Postgres prompt using the following command.
$ psql
This will log you into the PostgreSQL prompt, where you can access and use databases via various commands. You can exit the prompt by typing:
postgres-# \q
It will bring you back to the Postgres account's Linux account. To exit back to your own user account, type exit at the prompt.
You can also access Postgres prompt without switching accounts by typing the following command.
$ sudo -u postgres psql
To exit the prompt, type:
postgres-# \q
Step 4 - Creating new roles and databases.
You can create roles and databases directly from the bash shell or the psql shell. For our purposes, we will use the psql shell since it does the job faster.
First, connect to the psql shell.
$ sudo -u postgres psql
Create a new PostgreSQL role with permissions like Superuser, Create database, Create role, and Login. This user will be used further in the tutorial for logging into phpPgAdmin.
postgres-# CREATE ROLE username WITH SUPERUSER CREATEDB CREATEROLE LOGIN ENCRYPTED PASSWORD 'yourpassword';
You can check all the available users with the following command.
postgres-# \du
                                   List of roles
 Role name |                         Attributes                         | Member of
-----------+------------------------------------------------------------+-----------
 username  | Superuser, Create role, Create DB                          | {}
 postgres  | Superuser, Create role, Create DB, Replication, Bypass RLS | {}
Create a new database.
postgres-# CREATE DATABASE userdb;
Grant privileges to the user on the database we just created by running the following query.
postgres-# GRANT ALL PRIVILEGES ON DATABASE userdb TO username;
You can check all the available databases with the following command.
postgres-# \l
                                  List of databases
   Name    |  Owner   | Encoding |   Collate   |    Ctype    |   Access privileges
-----------+----------+----------+-------------+-------------+-----------------------
 userdb    | postgres | UTF8     | en_US.UTF-8 | en_US.UTF-8 | =Tc/postgres         +
           |          |          |             |             | postgres=CTc/postgres+
           |          |          |             |             | navjot=CTc/postgres
 postgres  | postgres | UTF8     | en_US.UTF-8 | en_US.UTF-8 |
 template0 | postgres | UTF8     | en_US.UTF-8 | en_US.UTF-8 | =c/postgres          +
           |          |          |             |             | postgres=CTc/postgres
 template1 | postgres | UTF8     | en_US.UTF-8 | en_US.UTF-8 | =c/postgres          +
           |          |          |             |             | postgres=CTc/postgres
(4 rows)
Step 5 - Enable remote access to PostgreSQL server
By default, the PostgreSQL server only listens on the localhost interface. To enable remote access to your PostgreSQL server, open the postgresql.conf file.
$ sudo nano /var/lib/pgsql/data/postgresql.conf
Scroll down to the CONNECTIONS AND AUTHENTICATION section and change/edit the following line by removing the hash symbol.
#listen_addresses = 'localhost' # what IP address(es) to listen on;
Change the line to the following.
listen_addresses = '*' # what IP address(es) to listen on;
Save the file by pressing Ctrl + X and entering Y when prompted.
The next step is to configure the server to accept remote connections by editing the pg_hba.conf file.
$ sudo nano /var/lib/pgsql/data/pg_hba.conf
There are various ways you can give access to remote connections. You can either restrict remote connections to a single user or a single database or all of them and restrict the connections to either every IP address or a trusted location.
# TYPE  DATABASE        USER            ADDRESS                 METHOD

# The user jane can access all databases from all locations using an md5 password
host    all             john            0.0.0.0/0                md5

# The user jane can access only the janedb database from all locations using an md5 password
host    johndb          john            0.0.0.0/0                md5

# The user jane can access all databases from a trusted location (192.168.1.110) without a password
host    all             john            192.168.1.110            trust
There are other entries in the file as well, and the authentication method listed for them is ident. You will need to change the value of ident to md5 if you want to log in via the web interface.
Add the required configuration and then save the file by pressing Ctrl + X and entering Y when prompted.
Restart the PostgreSQL server for the change to take effect.
$ sudo systemctl restart postgresql
Verify the changes with the ss utility.
$ ss -nlt | grep 5432
LISTEN   0    128    0.0.0.0:5432    0.0.0.0:*
LISTEN   0    128    [::]:5432      [::]:*
This shows that the PostgreSQL server is listening on the default port on all interfaces.
Step 6 - Install phpPgAdmin, Nginx, and PHP
phpPgAdmin usually ships with PostgreSQL's or Fedora's repository but not in Fedora 34. Therefore, you will need to install it manually. Along with phpPgAdmin, you also need to install the Nginx web server and PHP software.
. At the time of writing this tutorial, the latest version available is 7.13.0.
$ wget https://github.com/phppgadmin/phppgadmin/releases/download/REL_7-13-0/phpPgAdmin-7.13.0.tar.gz
Extract the downloaded archive.
$ tar -zxvf phpPgAdmin-7.13.0.tar.gz
Create the directory where your site will live.
$ sudo mkdir /var/www/phppgadmin/html -p
Move the extracted files to /var/www/phppgadmin/html directory.
$ sudo mv phpPgAdmin-7.13.0/ /var/www/phppgadmin/html
Install Nginx server and PHP along with appropriate PHP modules.
$ sudo dnf install nginx php-fpm php-cli php-pgsql php-mbstring
Configure the Fedora firewall.
$ sudo firewall-cmd --permanent --add-service=http
$ sudo firewall-cmd --permanent --add-service=https
Reload the firewall to activate the rules.
$ sudo firewall-cmd --reload
Configure PHP
Open the file /etc/php-fpm.d/www.conf for editing using nano editor.
$ sudo nano /etc/php-fpm.d/www.conf
We need to set the Unix user/group of PHP processes to nginx. Find the user=apache and group=apache lines in the file and change them to nginx.
...
; Unix user/group of processes
; Note: The user is mandatory. If the group is not set, the default user's group
;       will be used.
; RPM: apache user chosen to provide access to the same directories as httpd
user = nginx
; RPM: Keep a group allowed to write in log dir.
group = nginx
...
Save the file by pressing Ctrl + X and entering Y when prompted.
Restart the PHP-fpm process.
$ sudo systemctl restart php-fpm
Configure Nginx
Run the following command to add a configuration file for your site.
$ sudo nano /etc/nginx/conf.d/phppgadmin.conf
Paste the following code in the editor.
server {
  listen          *:80;
  server_name     phppgadmin.example.com;
  root            /var/www/phppgadmin/html;
  index           index.php;

  location / {
    try_files   $uri $uri/ =404;
  }

  access_log /var/log/nginx/phppgadmin.access.log;
  error_log /var/log/nginx/phppgadmin.error.log;

  location ~ \.php$ {
    try_files $uri =404;
    fastcgi_pass  unix:/run/php-fpm/www.sock;
    fastcgi_param SCRIPT_FILENAME $document_root$fastcgi_script_name;
    fastcgi_index index.php;
    include  fastcgi_params;
  }
}
Press Ctrl + X to close the editor and press Y when prompted to save the file.
This file assumes that we will be hosting phppgadmin.example.com in the directory /var/www/html/phppgadmin.
Test the Nginx configuration.
$ sudo nginx -t
You should see the following output indicating your configuration is correct.
nginx: the configuration file /etc/nginx/nginx.conf syntax is ok
nginx: configuration file /etc/nginx/nginx.conf test is successful
Start and enable the Nginx service.
$ sudo systemctl start nginx
$ sudo systemctl enable nginx
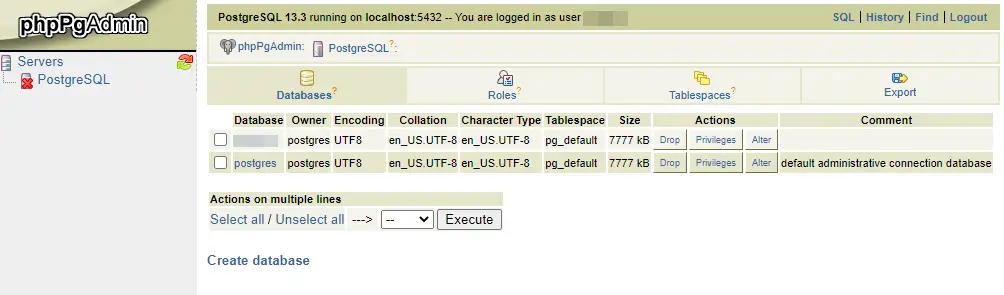
Launch http://phppgadmin.example.com in your browser, and you should see the default phpPgAdmin page in your browser.

Click on the PostgreSQL link on the left sidebar and enter the user and password you created earlier to log in and access the portal.
Step 7 - Install SSL (Optional)
We can enable SSL using the Let's Encrypt SSL service. For that, install the Certbot tool.
$ sudo dnf install certbot-nginx
Generate the SSL certificate.
$ sudo certbot --nginx -d phppgadmin.example.com
You will be asked for your email address and to agree to the terms of service. When asked for HTTPS access, choose the Secure method to redirect all requests from HTTP to HTTPS.
You should be able to access phpPgAdmin by typing https://phppgadmin.example.com in your browser.
Configure SSL for Auto-Renewal
Open the Crontab editor.
$ EDITOR=nano sudo crontab -e
Paste the following line at the bottom.
. . .
25 2 * * * /usr/bin/certbot renew --quiet
The 25 2 * * * part of this line means “run the following command at 2:25 am, every day”. You may choose any time.
Save the file by pressing Ctrl + X and entering Y when prompted.
Your SSL certificate will be automatically renewed.
Conclusion
This concludes our tutorial on how to install PostgreSQL and phpPgAdmin on a Fedora 34 based server. If you have any questions, post them in the comments below.

