Introduction
Here I am going to build a system to log online user activity in Spring Boot applications using HandlerInterceptor interface. As an application owner you may want to track your user activities, such as, which page they are accessing, from where requests were made to your application, from which pages to which pages they are moving, etc. If your application is e-commerce based, then these historical data will help you build a better system. This kind of system could also be called online visitor tracking system.
The applications’ analytical measurements will help you to improve the page experience of your site’s users. Based on the historical data you can show the related products, recommended products and trending products, etc.
The application which I am going to build here is very simple and it does not consider the actual scenarios that may occur in real life, but it will give you an idea how to track online visitors who are accessing, doing some activities, etc. The user activities will be logged into the in-memory database H2. H2 is a very good inmemory database for PoC (Proof of Concept) purpose.
The important data which I am going to capture for the clients are given below:
- IP address of the client
- HTTP Request Method
- Full URL of the application
- Page or URI or Path of the URL
- Query String of the URL or Page
- Referer Page
- User Agent
- Logged Time or visiting date time of a particular page

Related Posts
- Build Visitor Tracking System using CodeIgniter 4 and MySQL
- Build Visitor Tracking System using CodeIgniter 3 and MySQL
- Build Visitor Tracking System using Python Flask and MySQL
Prerequisites
Java at least 8, Maven 3.8.2, Spring Boot 2.5.4
Project Setup
You can create a maven based project in your favorite IDE or tool. The name of the project is spring-online-visitor-tracker.
The following pom.xml file is shown with the required dependencies:
<project xmlns="http://maven.apache.org/POM/4.0.0" xmlns:xsi="http://www.w3.org/2001/XMLSchema-instance"
	xsi:schemaLocation="http://maven.apache.org/POM/4.0.0 http://maven.apache.org/xsd/maven-4.0.0.xsd">
	<modelVersion>4.0.0</modelVersion>

	<groupId>com.roytuts</groupId>
	<artifactId>spring-online-visitor-tracker</artifactId>
	<version>0.0.1-SNAPSHOT</version>
	<packaging>jar</packaging>

	<properties>
		<project.build.sourceEncoding>UTF-8</project.build.sourceEncoding>
		<maven.compiler.source>8</maven.compiler.source>
		<maven.compiler.target>8</maven.compiler.target>
	</properties>

	<parent>
		<groupId>org.springframework.boot</groupId>
		<artifactId>spring-boot-starter-parent</artifactId>
		<version>2.5.4</version>
	</parent>

	<dependencies>
		<dependency>
			<groupId>org.springframework.boot</groupId>
			<artifactId>spring-boot-starter-web</artifactId>
		</dependency>

		<dependency>
			<groupId>org.springframework.boot</groupId>
			<artifactId>spring-boot-starter-security</artifactId>
		</dependency>

		<dependency>
			<groupId>org.springframework.boot</groupId>
			<artifactId>spring-boot-starter-data-jpa</artifactId>
		</dependency>

		<dependency>
			<groupId>com.h2database</groupId>
			<artifactId>h2</artifactId>
		</dependency>
	</dependencies>

	<build>
		<plugins>
			<plugin>
				<groupId>org.springframework.boot</groupId>
				<artifactId>spring-boot-maven-plugin</artifactId>
			</plugin>
		</plugins>
	</build>
</project>
Database Setup
The first thing I am going to setup is database configurations. Here I am using H2 database and H2 is in-memory database, so it does not have persistence capability once your Spring Boot application is closed. But you can check data in H2 database by accessing the console in the browser as long as your Spring Boot application is running.
The following datasource configuration is done in the src/main/resources/application.properties file:
spring.datasource.url=jdbc:h2:mem:roytuts
spring.datasource.driverClassName=org.h2.Driver
spring.datasource.username=sa
spring.datasource.password=

spring.jpa.show-sql = true

spring.h2.console.enabled = true
spring.h2.console.path=/h2console/

spring.jpa.hibernate.ddl-auto = create
In the above configuration, in the datasource URL, notice that I have put mem because it is an in-memory database.
The default username is sa and there is no need to input password for connecting to the database.
spring.jpa.show-sql = true tells to log the executed query in the console.
spring.h2.console.enabled = true tells to enable the H2 console so that you can access it through browser. If this value is false you won’t be able to access the H2 console.
spring.jpa.hibernate.ddl-auto = create tells to create the table in the in-memory roytuts database.
spring.h2.console.path=/h2console/ tells that your H2 database console is accessible at path /h2console. So if your Spring Boot application is running at port 8080 then your H2 console is accessible at http://localhost:8080/h2console. If you are using Spring Security then make sure to exclude this path from your security configuration.
Entity Class
Here is the entity class and I think it is straight forward.
@Entity
@Table(name = "visitor")
public class Visitor {

	@Id
	@GeneratedValue // (strategy = GenerationType.IDENTITY)
	private int id;
	private String user;
	private String ip;
	private String method;
	private String url;
	private String page;
	private String queryString;
	private String refererPage;
	private String userAgent;
	private LocalDateTime loggedTime;
	private boolean uniqueVisit;

}
Though I would not check whether it is a unique visit or not from the same user. You can check it based on the URL and session.
The user field basically store the user details found in logged in session.
JPA Repository
The JPA repository interface is simple and it provides built-in methods to perform basic CRUD operations.
public interface VisitorRepository extends JpaRepository<Visitor, Integer> {

}
Service Class
The service class invokes the repository method to perform the appropriate actions. For this example, it just saves the user activity records in the database.
@Service
public class VisitorService {

	@Autowired
	private VisitorRepository repository;

	public Visitor saveVisitorInfo(Visitor visitor) {
		return repository.save(visitor);
	}

}
Handler Interceptor
Workflow interface that allows for customized handler execution chains. Applications can register any number of existing or custom interceptors for certain groups of handlers, to add common preprocessing behavior without needing to modify each handler implementation.
A HandlerInterceptor gets called before the appropriate HandlerAdapter triggers the execution of the handler itself. This mechanism can be used for a large field of preprocessing aspects, e.g. for authorization checks, or common handler behavior like locale or theme changes. Its main purpose is to allow for factoring out repetitive handler code.
I am creating a class that will implement the HandlerInterceptor interface. The important method which I am going to override from HandlerInterface is preHandle().
preHandle():
Interception point before the execution of a handler. Called after HandlerMapping determined an appropriate handler object, but before HandlerAdapter invokes the handler.
DispatcherServlet processes a handler in an execution chain, consisting of any number of interceptors, with the handler itself at the end. With this method, each interceptor can decide to abort the execution chain, typically sending an HTTP error or writing a custom response.
In this method I am going to get the required information for the user and saving into the database table. I am also unique visit as true but ideally you should make this field true based on some conditions, such as, page URL, session period, etc.
@Component
public class VisitorLogger implements HandlerInterceptor {

	@Autowired
	private VisitorService visitorService;

	@Override
	public boolean preHandle(HttpServletRequest request, HttpServletResponse response, Object handler)
			throws Exception {

		final String ip = HttpRequestResponseUtils.getClientIpAddress();
		final String url = HttpRequestResponseUtils.getRequestUrl();
		final String page = HttpRequestResponseUtils.getRequestUri();
		final String refererPage = HttpRequestResponseUtils.getRefererPage();
		final String queryString = HttpRequestResponseUtils.getPageQueryString();
		final String userAgent = HttpRequestResponseUtils.getUserAgent();
		final String requestMethod = HttpRequestResponseUtils.getRequestMethod();
		final LocalDateTime timestamp = LocalDateTime.now();

		Visitor visitor = new Visitor();
		visitor.setUser(HttpRequestResponseUtils.getLoggedInUser());
		visitor.setIp(ip);
		visitor.setMethod(requestMethod);
		visitor.setUrl(url);
		visitor.setPage(page);
		visitor.setQueryString(queryString);
		visitor.setRefererPage(refererPage);
		visitor.setUserAgent(userAgent);
		visitor.setLoggedTime(timestamp);
		visitor.setUniqueVisit(true);

		visitorService.saveVisitorInfo(visitor);

		return true;
	}

}
The corresponding HttpRequestResponseUtils class is given below. This is a utility class that basically checks various parameters in the header, whether a user is logged in or not, etc. and extracts the required information for logging purpose.
public final class HttpRequestResponseUtils {

	private HttpRequestResponseUtils() {
	}

	private static final String[] IP_HEADER_CANDIDATES = { "X-Forwarded-For", "Proxy-Client-IP", "WL-Proxy-Client-IP",
			"HTTP_X_FORWARDED_FOR", "HTTP_X_FORWARDED", "HTTP_X_CLUSTER_CLIENT_IP", "HTTP_CLIENT_IP",
			"HTTP_FORWARDED_FOR", "HTTP_FORWARDED", "HTTP_VIA", "REMOTE_ADDR" };

	public static String getClientIpAddress() {

		if (RequestContextHolder.getRequestAttributes() == null) {
			return "0.0.0.0";
		}

		HttpServletRequest request = ((ServletRequestAttributes) RequestContextHolder.getRequestAttributes())
				.getRequest();

		for (String header : IP_HEADER_CANDIDATES) {
			String ipList = request.getHeader(header);
			if (ipList != null && ipList.length() != 0 && !"unknown".equalsIgnoreCase(ipList)) {
				String ip = ipList.split(",")[0];
				return ip;
			}
		}

		return request.getRemoteAddr();
	}

	public static String getRequestUrl() {

		if (RequestContextHolder.getRequestAttributes() == null) {
			return "";
		}

		HttpServletRequest request = ((ServletRequestAttributes) RequestContextHolder.getRequestAttributes())
				.getRequest();

		return request.getRequestURL().toString();
	}

	public static String getRequestUri() {

		if (RequestContextHolder.getRequestAttributes() == null) {
			return "";
		}

		HttpServletRequest request = ((ServletRequestAttributes) RequestContextHolder.getRequestAttributes())
				.getRequest();

		return request.getRequestURI();
	}

	public static String getRefererPage() {

		if (RequestContextHolder.getRequestAttributes() == null) {
			return "";
		}

		HttpServletRequest request = ((ServletRequestAttributes) RequestContextHolder.getRequestAttributes())
				.getRequest();

		String referer = request.getHeader("Referer");

		return referer != null ? referer : request.getHeader("referer");
	}

	public static String getPageQueryString() {

		if (RequestContextHolder.getRequestAttributes() == null) {
			return "";
		}

		HttpServletRequest request = ((ServletRequestAttributes) RequestContextHolder.getRequestAttributes())
				.getRequest();

		return request.getQueryString();
	}

	public static String getUserAgent() {

		if (RequestContextHolder.getRequestAttributes() == null) {
			return "";
		}

		HttpServletRequest request = ((ServletRequestAttributes) RequestContextHolder.getRequestAttributes())
				.getRequest();

		String userAgent = request.getHeader("User-Agent");

		return userAgent != null ? userAgent : request.getHeader("user-agent");
	}

	public static String getRequestMethod() {

		if (RequestContextHolder.getRequestAttributes() == null) {
			return "";
		}

		HttpServletRequest request = ((ServletRequestAttributes) RequestContextHolder.getRequestAttributes())
				.getRequest();

		return request.getMethod();
	}

	public static String getLoggedInUser() {
		String userJson = null;

		if (SecurityContextHolder.getContext().getAuthentication() != null
				&& SecurityContextHolder.getContext().getAuthentication().isAuthenticated()
				&& !(SecurityContextHolder.getContext().getAuthentication() instanceof AnonymousAuthenticationToken)) {

			User user = (User) SecurityContextHolder.getContext().getAuthentication().getPrincipal();

			ObjectMapper mapper = new ObjectMapper();

			try {
				userJson = mapper.writeValueAsString(user);
			} catch (JsonProcessingException e) {
				e.printStackTrace();
			}

			return userJson;
		}

		return userJson;
	}

}
Application Config
Next step is to register your HandlerInterceptor in the Spring application otherwise it won’t be executed on each request coming from the client.
@Configuration
public class AppConfig implements WebMvcConfigurer {

	@Autowired
	private VisitorLogger visitorLogger;

	@Override
	public void addInterceptors(InterceptorRegistry registry) {
		registry.addInterceptor(visitorLogger);
	}

}
Security Config
As I am using Spring Security for this application to extract the logged in user’s principle, so it is necessary to configure the security stuffs here.
@Configuration
public class SecurityConfig extends WebSecurityConfigurerAdapter {

	private static final String PASSWORD_ENCODED = "$2a$10$B18wGZhRjNau6ZBcI/NBQO6EEdJ7GyVvjjWfAK20ODz4B6LmXicRa";// roy

	@Override
	protected void configure(HttpSecurity http) throws Exception {
		http.headers().frameOptions().sameOrigin().and().authorizeRequests()
				.antMatchers("/", "/hello/**", "/h2console/**").permitAll().anyRequest().authenticated().and()
				.httpBasic();
		http.csrf().disable();
		http.headers().frameOptions().disable();
	}

	@Autowired
	public void configureGlobal(AuthenticationManagerBuilder auth) throws Exception {
		auth.inMemoryAuthentication().passwordEncoder(passwordEncoder()).withUser("roy").password(PASSWORD_ENCODED)
				.roles("USER");
	}

	@Bean
	public PasswordEncoder passwordEncoder() {
		return new BCryptPasswordEncoder();
	}

}
Here I am using in-memory authentication instead of user details retrieved from database. The password encoder is required and you cannot put plain text password even in in-memory authentication otherwise your application will throw exception.
You must attach at least one role to a user otherwise you will get the following exception:
org.springframework.beans.factory.BeanCreationException: Error creating bean with name 'springSecurityFilterChain' defined in class path resource [org/springframework/security/config/annotation/web/configuration/WebSecurityConfiguration.class]: Bean instantiation via factory method failed; nested exception is org.springframework.beans.BeanInstantiationException: Failed to instantiate [javax.servlet.Filter]: Factory method 'springSecurityFilterChain' threw exception; nested exception is java.lang.IllegalArgumentException: Cannot pass a null GrantedAuthority collectionI have disabled CSRF token for this example using the line of code:
http.csrf().disable();In production environment don’t disable CSRF for security reasons.
I have also disabled frame using the following line to avoid X-Frame deny error:
http.headers().frameOptions().disable();Ideally you should allow frames from your own origin server if required or completely disable it in production environment.
I have disabled authentication for URL patterns /, /hello/, /h2console/. So I have disabled authentication for home page, page with /hello/ and /h2console/.
REST Controller
The REST controller class that exposes some APIs to test the application.
@RestController
public class GreetingController {

	@GetMapping("/")
	public ResponseEntity<String> home() {
		return new ResponseEntity<String>("Welcome to User Activity Logging", HttpStatus.OK);
	}

	@GetMapping("/hello/{name}")
	public ResponseEntity<String> greet(@PathVariable String name) {
		return new ResponseEntity<String>("Hello, " + name, HttpStatus.OK);
	}

	@GetMapping("/login")
	public ResponseEntity<String> login() {
		return new ResponseEntity<String>("Hello, this is a secured page", HttpStatus.OK);
	}

}
Notice that I have exposed three endpoints, “/”, “/hello” and “/login” and “/login” is the secured one. So, when you hit endpoint “/login” then you need to enter username and password to authenticate before you see the content from this endpoint.
Your “/login” endpoint should have HTTP POST method but for this example, it’s ok.
Main Class
A Spring Boot application with main method is enough to deploy the application in embedded Tomcat server. Here I have used @EntityScan and @EnableJpaRepositories with corresponding base packages so that Spring will pick up Entity classes and Repository interfaces.
@SpringBootApplication
@EntityScan(basePackages = "com.roytuts.spring.online.visitor.tracker.entity")
@EnableJpaRepositories(basePackages = "com.roytuts.spring.online.visitor.tracker.repository")
public class OnlineVisitorTracker {

	public static void main(String[] args) {
		SpringApplication.run(OnlineVisitorTracker.class, args);
	}

}
Testing the Application
Run the main class to access your application URL or endpoints.
Database Connection
To connect to the H2 database console, simply hit URL http://localhost:8080/h2console in the browser and you will need to verify the database details. Make sure your JDBC URL is correct and should be same as given in the application.properties file. Click on the Connect button to connect to the database.
So, visitor table and sequences will be created automatically through the JPA/Hibernate API as I have put the annotation @Id along with @GeneratedValue on the id field in Entity class. The Sequences will be used to generate the next value for the id column.
Even when you login to the H2 database console, a record entry will be saved into the database.
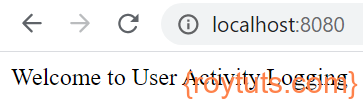
Let’s hit the URL http://localhost:8080/, you will see the following response in the browser:
Let’s hit the URL http://localhost:8080/hello/Soumitra, the following response is displayed:

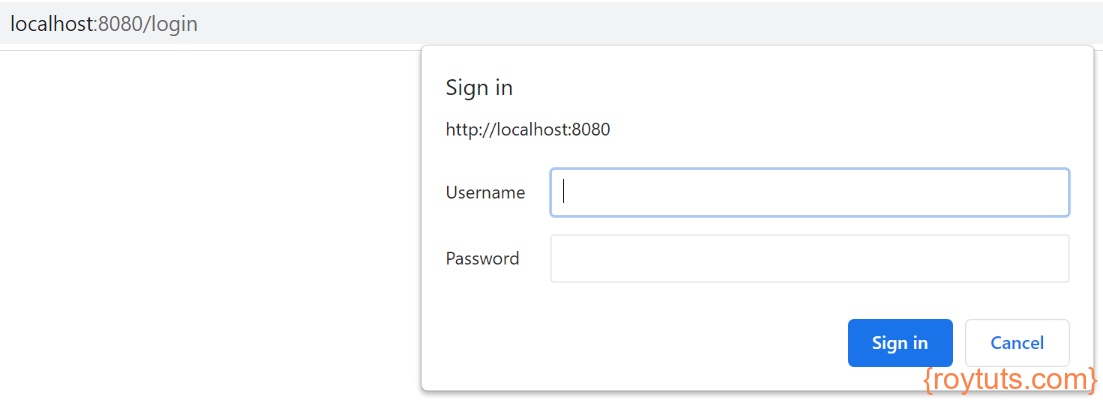
When you hit the URL http://localhost:8080/login, you will be asked to provide username and password in the popup:
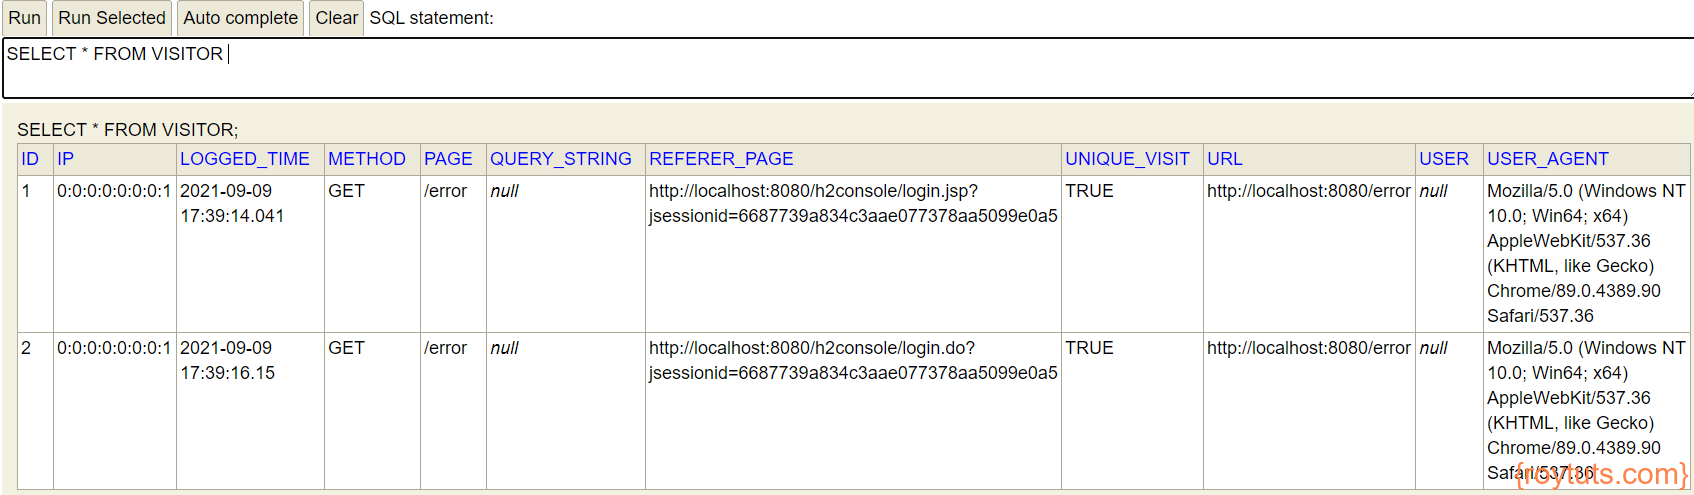
So you will find the following records in the database table:


That’s how a simple system was built to trackonline visitors information using Spring Boot framework.