How to Install and Secure phpMyAdmin on Debian 11
phpMyAdmin is a free, open-source, and web-based application used for managing MySQL and MariaDB databases from the web interface. Creating and managing a database from the command-line interface is very difficult for beginner users. phpMyAdmin provides an easier way to manage MySQL databases, user accounts, and privileges, execute SQL statements, import and export data through the web browser.
In this post, we will show you how to install and secure phpMyAdmin database administration tool on Debian 11.
Prerequisites
- A server running Debian 11.
- A root password is configured on the server.
Getting Started
Before starting, it is a good idea to update your system packages to the latest version. You can update all packages using the following command:
apt-get update -y
Once your system is updated, you can proceed to the next step.
Install LAMP Server
phpMyAdmin is a PHP-based application and runs on a web server. So you will need to install the LAMP server on your server. You can install it using the following command:
apt-get install apache2 mariadb-server libapache2-mod-php php-cli php-mysql php-zip php-curl php-xml php-mbstring php-zip php-gd unzip -y
Once all the packages are installed, you can proceed to the next step.
Install and Configure phpMyAdmin
First, download the latest version of phpMyAdmin from their official website using the following command:
wget https://files.phpmyadmin.net/phpMyAdmin/5.1.1/phpMyAdmin-5.1.1-all-languages.zip
Once the download is completed, unzip the downloaded file with the following command:
unzip phpMyAdmin-5.1.1-all-languages.zip
Next, move the extracted directory to the /usr/share with the following command:
mv phpMyAdmin-5.1.1-all-languages /usr/share/phpmyadmin
Next, create required directory with the following command:
mkdir -p /var/lib/phpmyadmin/tmp
Next, set proper ownership to the phpMyAdmin directory:
chown -R www-data:www-data /var/lib/phpmyadmin
Next, copy the phpMyAdmin sample configuration file:
cp /usr/share/phpmyadmin/config.sample.inc.php /usr/share/phpmyadmin/config.inc.php
Next, install the pwgen and generate a secrete key with the following command:
apt-get install pwgen -y
pwgen -s 32 1
Output:
pau9t1SG6lmaeCFxKqeeaY5N4erIa25K
Next, edit the config.inc.php file and configure it:
nano /usr/share/phpmyadmin/config.inc.php
Define your secrete key and uncomment the following lines:
$cfg['blowfish_secret'] = 'pau9t1SG6lmaeCFxKqeeaY5N4erIa25K'; /* YOU MUST FILL IN THIS FOR COOKIE AUTH! */
$cfg['Servers'][$i]['controluser'] = 'pma';
$cfg['Servers'][$i]['controlpass'] = 'password';

$cfg['Servers'][$i]['pmadb'] = 'phpmyadmin';
$cfg['Servers'][$i]['bookmarktable'] = 'pma__bookmark';
$cfg['Servers'][$i]['relation'] = 'pma__relation';
$cfg['Servers'][$i]['table_info'] = 'pma__table_info';
$cfg['Servers'][$i]['table_coords'] = 'pma__table_coords';
$cfg['Servers'][$i]['pdf_pages'] = 'pma__pdf_pages';
$cfg['Servers'][$i]['column_info'] = 'pma__column_info';
$cfg['Servers'][$i]['history'] = 'pma__history';
$cfg['Servers'][$i]['table_uiprefs'] = 'pma__table_uiprefs';
$cfg['Servers'][$i]['tracking'] = 'pma__tracking';
$cfg['Servers'][$i]['userconfig'] = 'pma__userconfig';
$cfg['Servers'][$i]['recent'] = 'pma__recent';
$cfg['Servers'][$i]['favorite'] = 'pma__favorite';
$cfg['Servers'][$i]['users'] = 'pma__users';
$cfg['Servers'][$i]['usergroups'] = 'pma__usergroups';
$cfg['Servers'][$i]['navigationhiding'] = 'pma__navigationhiding';
$cfg['Servers'][$i]['savedsearches'] = 'pma__savedsearches';
$cfg['Servers'][$i]['central_columns'] = 'pma__central_columns';
$cfg['Servers'][$i]['designer_settings'] = 'pma__designer_settings';
$cfg['Servers'][$i]['export_templates'] = 'pma__export_templates';

$cfg['TempDir'] = '/var/lib/phpmyadmin/tmp';
Save and close the file when you are finished.
Create phpMyAdmin Admin User
It is always recommended to create a separate user for managing the database through phpMyAdmin.
First, import the phpMyAdmin tables to the MariaDB database using the following command:
mysql < /usr/share/phpmyadmin/sql/create_tables.sql
Next, connect to the MariaDB shell with the following command:
mysql
Once you are connected, grant all necessary privileges to the phpmyadmin database with the following command:
MariaDB [(none)]> GRANT SELECT, INSERT, UPDATE, DELETE ON phpmyadmin.* TO 'pma'@'localhost' IDENTIFIED BY 'password';
Next, create an admin user with the following command:
MariaDB [(none)]> CREATE USER myadmin;
Next, grant all the privileges to the admin user with the following command:
MariaDB [(none)]> GRANT ALL PRIVILEGES ON *.* TO 'myadmin'@'localhost' IDENTIFIED BY 'password' WITH GRANT OPTION;
Next, flush the privileges and exit from the MariaDB shell using the following command:
MariaDB [(none)]> FLUSH PRIVILEGES;
MariaDB [(none)]> EXIT;
Once you are finished, you can proceed to the next step.
Configure Apache for phpMyAdmin
Next, you will need to create an Apache virtual host configuration file for phpMyAdmin. You can create it using the following command:
nano /etc/apache2/conf-available/phpmyadmin.conf
Add the following lines:
Alias /phpmyadmin /usr/share/phpmyadmin

<Directory /usr/share/phpmyadmin>
    Options SymLinksIfOwnerMatch
    DirectoryIndex index.php

    <IfModule mod_php5.c>
        <IfModule mod_mime.c>
            AddType application/x-httpd-php .php
        </IfModule>
        <FilesMatch ".+\.php$">
            SetHandler application/x-httpd-php
        </FilesMatch>

        php_value include_path .
        php_admin_value upload_tmp_dir /var/lib/phpmyadmin/tmp
        php_admin_value open_basedir /usr/share/phpmyadmin/:/etc/phpmyadmin/:/var/lib/phpmyadmin/:/usr/share/php/php-gettext/:/usr/share/php/php-php-gettext/:/usr/share/javascript/:/usr/share/php/tcpdf/:/usr/share/doc/phpmyadmin/:/usr/share/php/phpseclib/
        php_admin_value mbstring.func_overload 0
    </IfModule>
    <IfModule mod_php.c>
        <IfModule mod_mime.c>
            AddType application/x-httpd-php .php
        </IfModule>
        <FilesMatch ".+\.php$">
            SetHandler application/x-httpd-php
        </FilesMatch>

        php_value include_path .
        php_admin_value upload_tmp_dir /var/lib/phpmyadmin/tmp
        php_admin_value open_basedir /usr/share/phpmyadmin/:/etc/phpmyadmin/:/var/lib/phpmyadmin/:/usr/share/php/php-gettext/:/usr/share/php/php-php-gettext/:/usr/share/javascript/:/usr/share/php/tcpdf/:/usr/share/doc/phpmyadmin/:/usr/share/php/phpseclib/
        php_admin_value mbstring.func_overload 0
    </IfModule>

</Directory>

# Authorize for setup
<Directory /usr/share/phpmyadmin/setup>
    <IfModule mod_authz_core.c>
        <IfModule mod_authn_file.c>
            AuthType Basic
            AuthName "phpMyAdmin Setup"
            AuthUserFile /etc/phpmyadmin/htpasswd.setup
        </IfModule>
        Require valid-user
    </IfModule>
</Directory>

# Disallow web access to directories that don't need it
<Directory /usr/share/phpmyadmin/templates>
    Require all denied
</Directory>
<Directory /usr/share/phpmyadmin/libraries>
    Require all denied
</Directory>
<Directory /usr/share/phpmyadmin/setup/lib>
    Require all denied
</Directory>
Save and close the file when you are finished then enable the phpMyAdmin configuration file with the following command:
a2enconf phpmyadmin.conf
Next, reload the Apache service to apply the changes:
systemctl reload apache2
You can check the status of the Apache service using the following command:
systemctl status apache2
You should see the following output:
? apache2.service - The Apache HTTP Server
     Loaded: loaded (/lib/systemd/system/apache2.service; enabled; vendor preset: enabled)
     Active: active (running) since Tue 2021-08-17 10:16:28 UTC; 2s ago
       Docs: https://httpd.apache.org/docs/2.4/
    Process: 45027 ExecStart=/usr/sbin/apachectl start (code=exited, status=0/SUCCESS)
   Main PID: 45031 (apache2)
      Tasks: 6 (limit: 2341)
     Memory: 14.6M
        CPU: 89ms
     CGroup: /system.slice/apache2.service
             ??45031 /usr/sbin/apache2 -k start
             ??45032 /usr/sbin/apache2 -k start
             ??45033 /usr/sbin/apache2 -k start
             ??45034 /usr/sbin/apache2 -k start
             ??45035 /usr/sbin/apache2 -k start
             ??45036 /usr/sbin/apache2 -k start

Aug 17 10:16:28 debian systemd[1]: Starting The Apache HTTP Server...
Access phpMyAdmin
At this point, phpMyAdmin is installed and configured. Now, open your web browser and access the phpMyAdmin using the URL http://your-server-ip/phpmyadmin. You should see the phpMyAdmin login page:

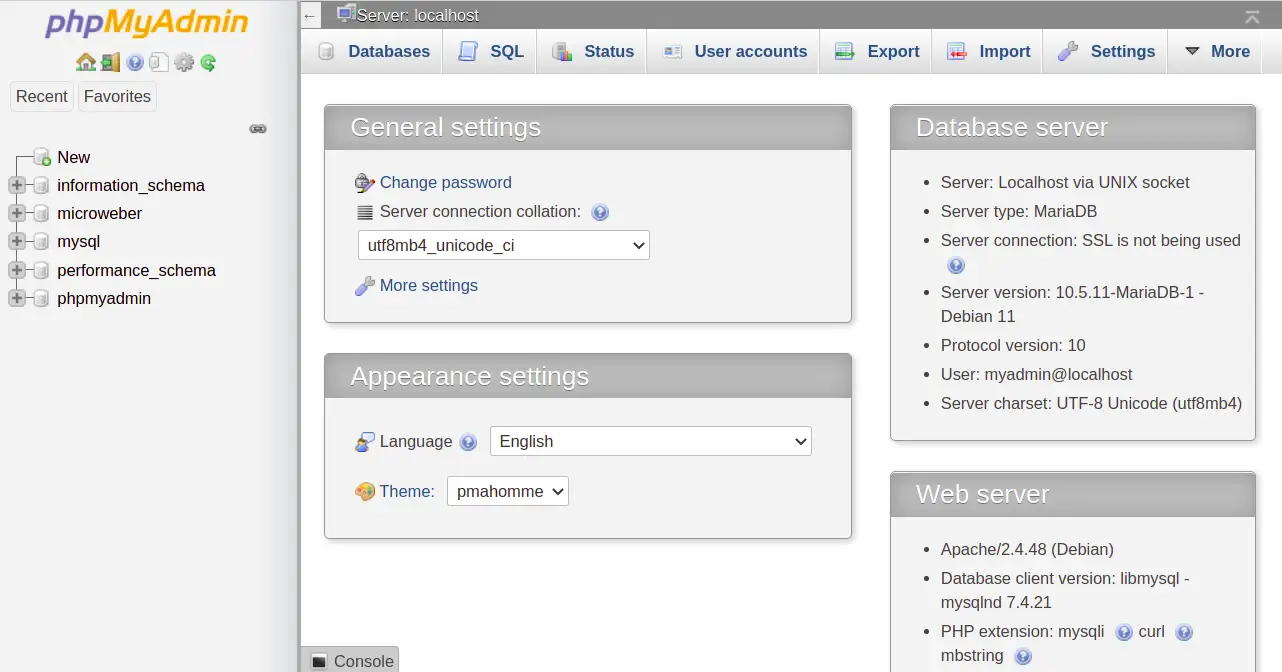
Provide your admin username, password and click on the Go button. You should see the phpMyAdmin dashboard on the following page:
Secure phpMyAdmin
It is a good idea to secure the phpMyAdmin with two-factor authentication. You can do this using the .htaccess authentication and authorization functionalities.
First, edit the phpMyAdmin configuration file:
nano /etc/apache2/conf-available/phpmyadmin.conf
Add the "AllowOverride All" line in the following server block:
<Directory /usr/share/phpmyadmin>
    Options FollowSymLinks
    DirectoryIndex index.php
    AllowOverride All

    <IfModule mod_php5.c>
Save and close the file when you are finished then restart the Apache service:
systemctl restart apache2
Next, create an .htaccess file and define the Apache authentication type:
nano /usr/share/phpmyadmin/.htaccess
Add the following lines:
AuthType Basic
AuthName "Restricted Files"
AuthUserFile /usr/share/phpmyadmin/.htpasswd
Require valid-user
Save and close the file then create a user with the following command:
htpasswd -c /usr/share/phpmyadmin/.htpasswd secureuser
You will be asked to set a password as shown below:
New password:
Re-type new password:
Adding password for user secureuser
Verify phpMyAdmin
At this point, phpMyAdmin is secured with additional authentication. To verify it, open your web browser and access the phpMyAdmin using the URL http://your-server-ip/phpmyadmin. You will be asked for the additional username and password as shown below:
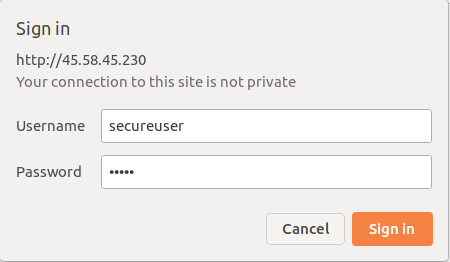
After providing your username and password, you will be redirected to the regular phpMyAdmin login page.
Conclusion
Congratulations! you have successfully installed and secured phpMyAdmin on Debian 11. You can now explore phpMyAdmin and start managing your database from the web browser.

