How to Migrate From CentOS 8 to RockyLinux 8.4
The end of 2021 is near, which means the EOL (end of life) of CentOS 8 is near too. So there are no more updates and support for the CentOS 8 Linux, and it's huge disadvantages for everyone who using CentOS as the main operating system in the development and production environment. On contrary, there is a new Linux distro replacement for CentOS 8, one of them is called "Rocky Linux".
In case you are CentOS 8 user and want to migrate to Rocky Linux, you don't need to rebuild and reinstall your server/server. Because the Rocky Linux project provides a handy migration tool for anyone who wants to migrate from CentOS 8 to Rocky Linux. This tool is a life-saver for anyone who wants to migrate their development or production environment to Rocky Linux.
In this guide, you will learn how to migrate from CentOS 8 to Rocky Linux 8.4 using the migration tool provided by the Rocky Linux project.
Note before migration: Back up all application data on your server, take an image snapshot of your CentOS 8 server to prevent data loss, and move the snapshot to a safe place.
Prerequisites
- A root user or user with sudo privileges. The Rocky Linux migration script must be run as root user.
Below is the screen of our CentOS 8 server before migrating to Rocky Linux.
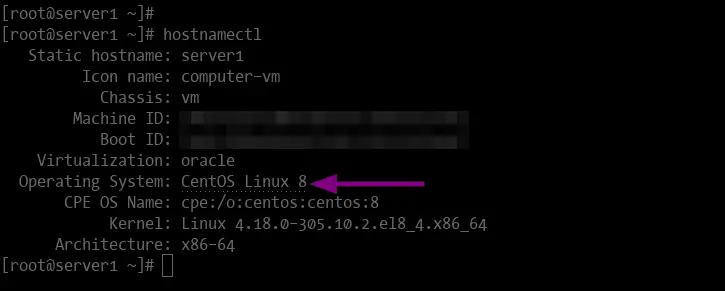
Run the following command to check your CentOS system.
hostnamectl
You will get similar output to the screenshot on top.
Upgrading All Packages
First, you need to upgrade all packages on your CentOS 8 system, then reboot the server server.
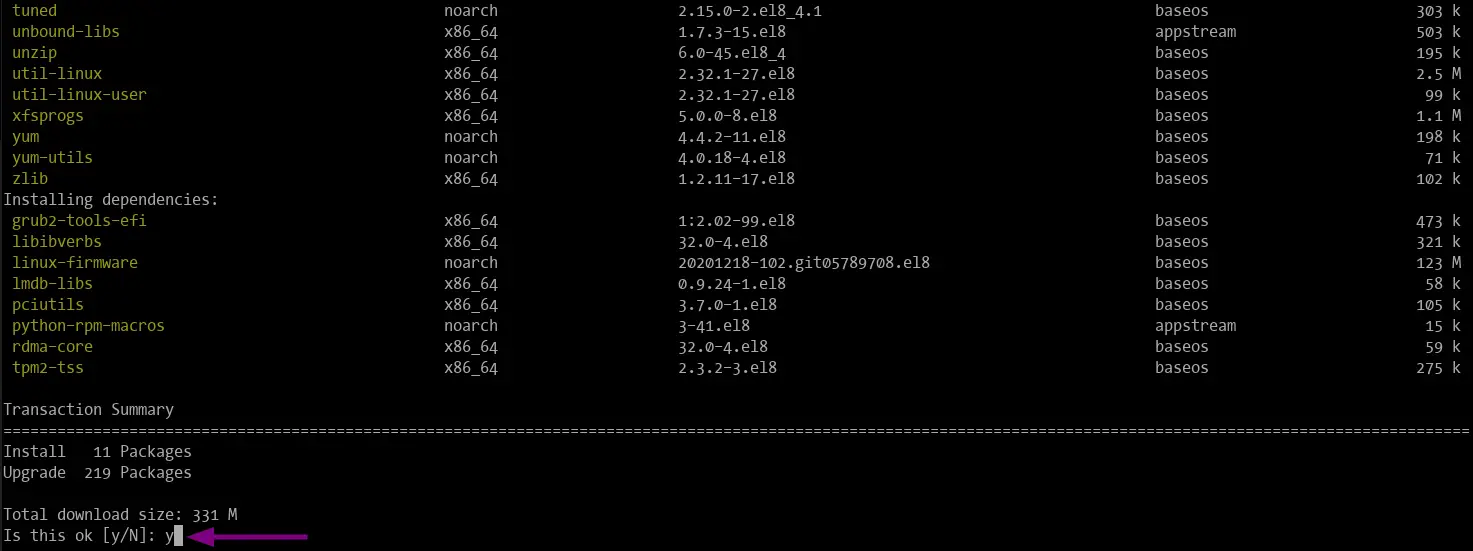
1. Execute the following command to upgrade all packages to the latest version.
sudo dnf upgrade
Now type "y" to confirm the upgrade of packages and wait, it will take time depends on your internet connection.
2. After that, reboot the server to apply all changes to the system using the following command.
sudo reboot
Once the server is up, log in again to your server, then you can continue to the next stage.
Installing Git
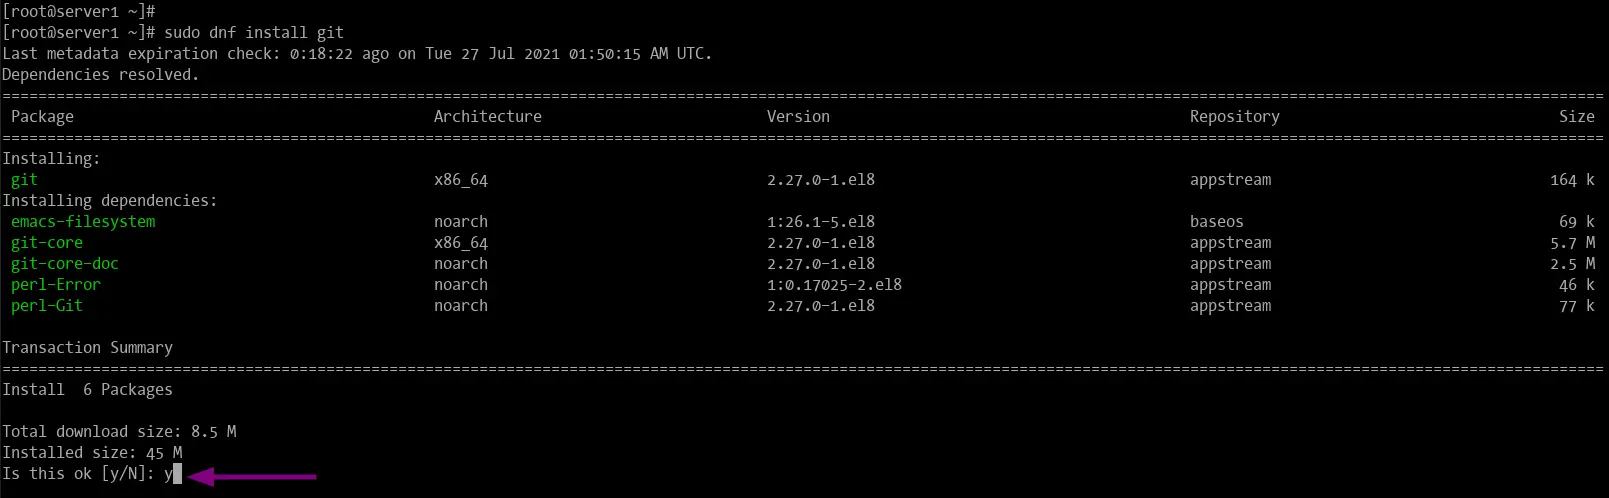
1. Execute the command below to install git on your system.
sudo dnf install git
Type "y" to confirm the installation.
Now go to the next stage to continue.
Download Rocky Tools
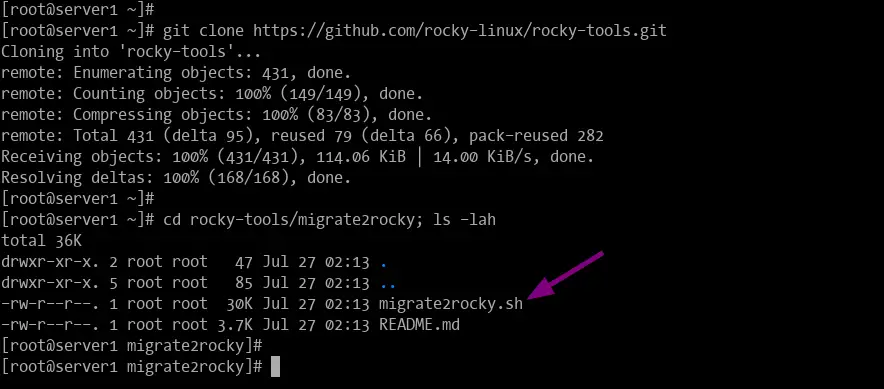
1. Clone the repository "rocky-tools" to your root home directory using the git command below.
git clone https://github.com/rocky-linux/rocky-tools.git
Inside the "rocky-tools" directory you will see two tools, the "migrate2rocky" directory contain the migration tool for Rock Linux, and the "mirror" directory contains the tool for keeping a public and private mirror of Rocky Linux to sync.
2. Change the working directory to "~/rocky-tools/migrate2rocky" and run the "ls" command as below.
cd rocky-tools/migrate2rocky; ls -lah
Now you will see the bash script for the Rocky Linux migration "migrate2rocky.sh".
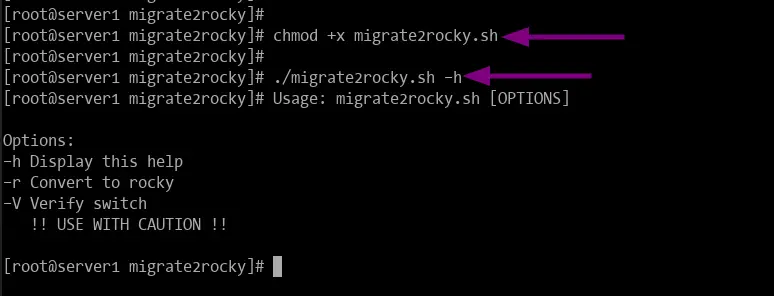
3. Next, Make the script executable by changing the permission of the file using the following chmod command.
chmod +x migrate2rocky.sh
4. Now execute script "migrate2rocky.sh" as below to show help and all available options.
./migrate2rocky.sh -h
You will get similar output as below, and you are ready to go for migrating your CentOS 8 system to Rocky Linux.
Usage: migrate2rocky.sh [OPTIONS]

Options:
-h Display this help
-r Convert to rocky
-V Verify switch
   !! USE WITH CAUTION !!
Migrating CentOS 8 to Rocky Linux
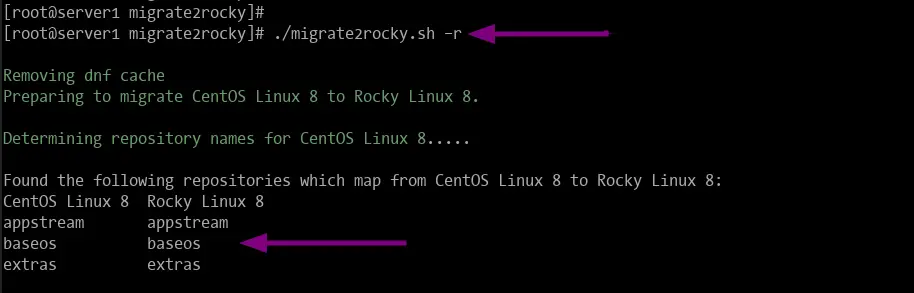
1. Start the migration from CentOS 8 to Rocky Linux by executing the script as below.
./migrate2rocky.sh -r
2. At first, the script will check all main repositories (AppStream, BaseOS, and Extras) for CentOS 8 and remap to the Rocky Linux 8.
Removing dnf cache
Preparing to migrate CentOS Linux 8 to Rocky Linux 8.

Determining repository names for CentOS Linux 8.....

Found the following repositories which map from CentOS Linux 8 to Rocky Linux 8:
CentOS Linux 8  Rocky Linux 8
appstream       appstream
baseos          baseos
extras          extras
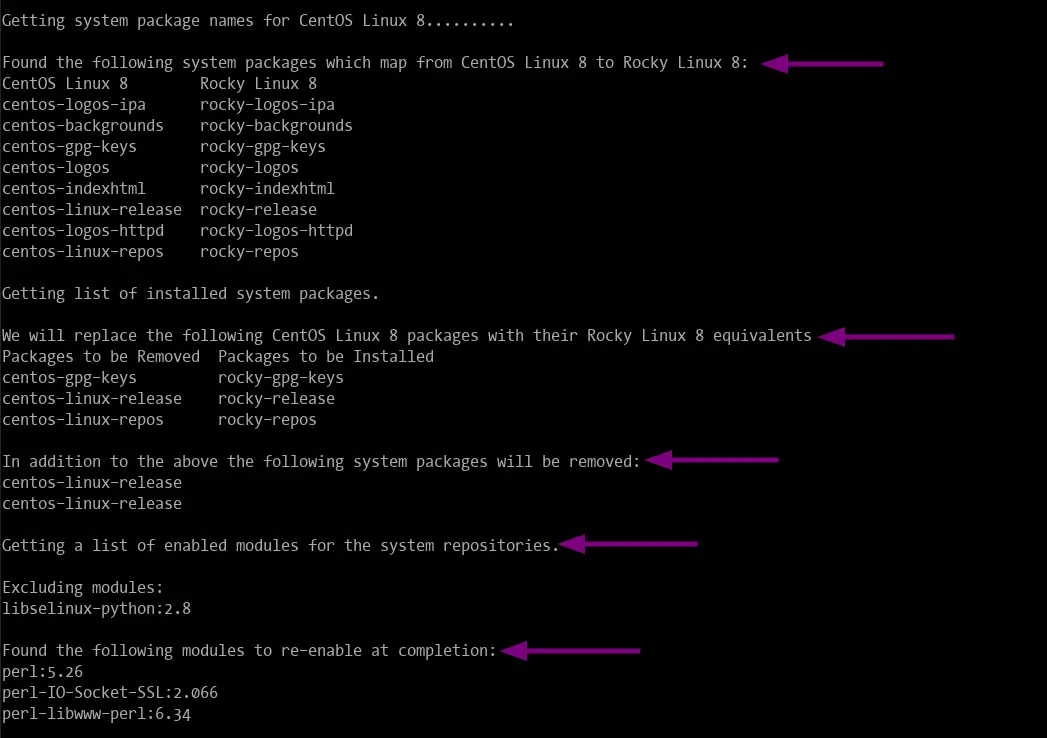
3. After that, the script will replace all packages related to CentOS with new packages for Rocky Linux. Also, it will remove unnecessary packages and install new additional packages.
Getting system package names for CentOS Linux 8..........

Found the following system packages which map from CentOS Linux 8 to Rocky Linux 8:
CentOS Linux 8        Rocky Linux 8
centos-logos-ipa      rocky-logos-ipa
centos-backgrounds    rocky-backgrounds
centos-gpg-keys       rocky-gpg-keys
centos-logos          rocky-logos
centos-indexhtml      rocky-indexhtml
centos-linux-release  rocky-release
centos-logos-httpd    rocky-logos-httpd
centos-linux-repos    rocky-repos

Getting list of installed system packages.

We will replace the following CentOS Linux 8 packages with their Rocky Linux 8 equivalents
Packages to be Removed  Packages to be Installed
centos-gpg-keys         rocky-gpg-keys
centos-linux-release    rocky-release
centos-linux-repos      rocky-repos

Getting a list of enabled modules for the system repositories.

In addition to the above the following system packages will be removed:
centos-linux-release
centos-linux-release

Excluding modules:
libselinux-python:2.8

Found the following modules to re-enable at completion:
perl:5.26
perl-IO-Socket-SSL:2.066
perl-libwww-perl:6.34
The installation of packages during the migration process will take time, so make sure you have a good internet connection.
4. When the migration process is successful, you will get similar output as below.
...
Complete!
Done, please reboot your system.
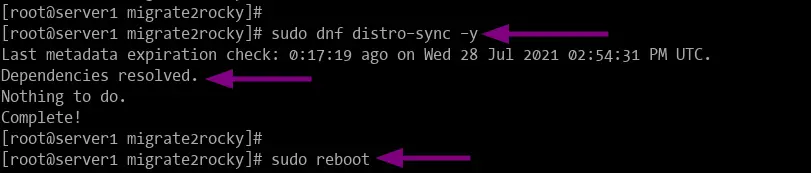
5. Next, execute the following command to make sure all installed packages are matched to the latest version available from any enabled repository on the system.
sudo dnf distro-sync -y
6. After that, reboot the system to apply all changes to the system using the following command.
sudo reboot
7. Now during the boot process, you will see the grub window with Rocky Linux available on the top menu.
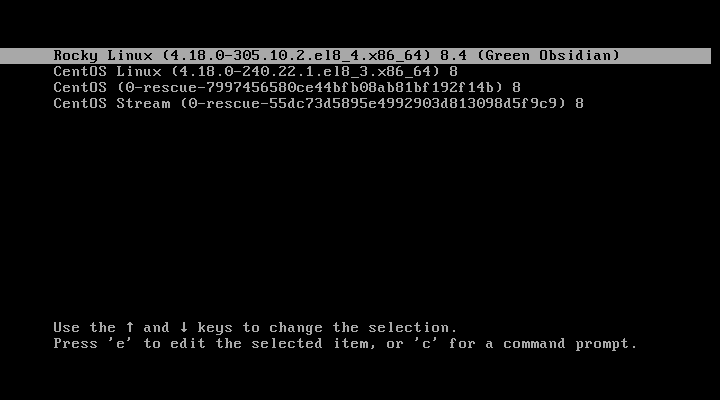
Select "Rocky Linux (4xxxx) 8.4 (Green Obsidian)" and press "Enter" to boot to the new system.
Verify the Migration
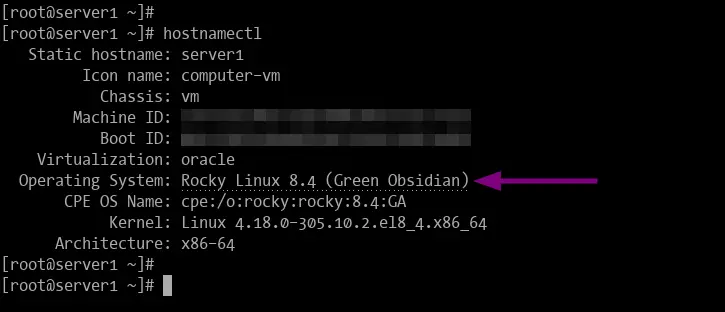
1. Log in to the new system and run the following command to verify the migration result.
hostnamectl
Upon the successful migration, you will see similar output as below.
   Static hostname: server1
         Icon name: computer-vm
           Chassis: vm
        Machine ID: xxxxxxxxxxxxxxxxxxxxxxxxxxxxxxxx
           Boot ID: xxxxxxxxxxxxxxxxxxxxxxxxxxxxxxxx
    Virtualization: oracle
  Operating System: Rocky Linux 8.4 (Green Obsidian)
       CPE OS Name: cpe:/o:rocky:rocky:8.4:GA
            Kernel: Linux 4.18.0-305.10.2.el8_4.x86_64
      Architecture: x86-64
2. Also, you can show the os-release on the system.
cat /etc/os-release
And you will get the following output.
NAME="Rocky Linux"
VERSION="8.4 (Green Obsidian)"
ID="rocky"
ID_LIKE="rhel fedora"
VERSION_ID="8.4"
PLATFORM_ID="platform:el8"
PRETTY_NAME="Rocky Linux 8.4 (Green Obsidian)"
ANSI_COLOR="0;32"
CPE_NAME="cpe:/o:rocky:rocky:8.4:GA"
HOME_URL="https://rockylinux.org/"
BUG_REPORT_URL="https://bugs.rockylinux.org/"
ROCKY_SUPPORT_PRODUCT="Rocky Linux"
ROCKY_SUPPORT_PRODUCT_VERSION="8"
Conclusion
Congratulation! you've successfully migrated the CentOS 8 to Rocky Linux 8.4. The migration process is smooth without any error, and the system is up and running as a Rocky Linux. And now you are ready to start all your services and applications.

