Windows 11 made its debut in 2021, and it brought with it a lot of changes to the Windows interface we know from Windows 10. But ever since that initial release, Windows 11 has been receiving more updates, making more visual changes and adding more features. That includes Windows 11 version 22H2, released in 2022, and the more recent version 23H2 that's starting to roll out. But not everyone is ready to make the jump yet, and you may want to test Windows 11 in a virtual machine, or VM, first.
Virtual machines are a great way to test software without damaging your computer. They create an isolated environment so that any files handled inside a VM can't affect the host operating system. You can also open and close a VM at any time without restarting your computer, so it's a lot more convenient than dual-booting.
If you want to try Windows 11 without the risk of damaging your PC, we're here to show you how to install it in a VM. There are a few options for virtualization software, but we'll be using Hyper-V, which is built into Windows 11 Pro or higher SKUs, though you can also enable it in Windows 11 Home.
How to check if your PC supports Hyper-V
First things first, you need to make sure you have a PC compatible with Hyper-V. Running a VM is not a lightweight workload, so you'll need at least 4GB of RAM on your host PC. In fact, for Windows 11, you'll want even more, because the VM you're creating should have 4GB to itself in order to support Windows 11, according to the system requirements.
There are two other things you'll need:
- A 64-bit Processor with Second Level Address Translation (SLAT).
- CPU support for VM Monitor Mode Extension (VT-x on Intel CPUs).
Most modern processors should support these features, but it's always best to make sure. You can check if your computer can support Hyper-V using Command Prompt or PowerShell. Here's how to do it:
-
Right-click the Start icon or press Windows key + X, then choose Windows PowerShell (Admin) or Windows Terminal (Admin).
The option that shows up here depends on the version of Windows you're running.
- Type systeminfo.exe in the Command Prompt/PowerShell window and press Enter.
-
Check the Hyper-V requirements section at the end. All the items should say Yes for Hyper-V to work.
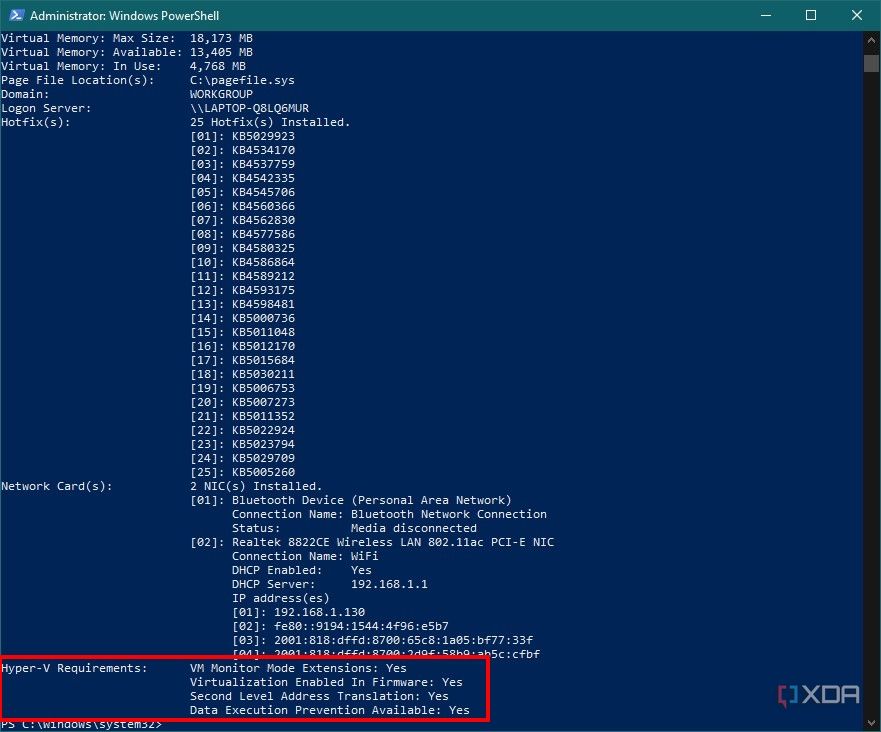

If you see a message saying "A hypervisor has been detected. Features required for Hyper-V will not be displayed", you may already have virtualization software installed. It may also be that certain Windows virtualization features are already enabled, but that means your PC should be ready to go.
If Virtualization Enabled in Firmware says No, you can enable it in your computer's firmware/BIOS settings.
How to enable virtualization in the BIOS
BIOS settings are a little different for every PC, but if you want to enable virtualization in the BIOS, you can follow these steps:
- Open the Start menu
- Click the Power button in the bottom right and then hold Shift while clicking Restart.
-
In the Windows Recovery Environment, click Troubleshoot.
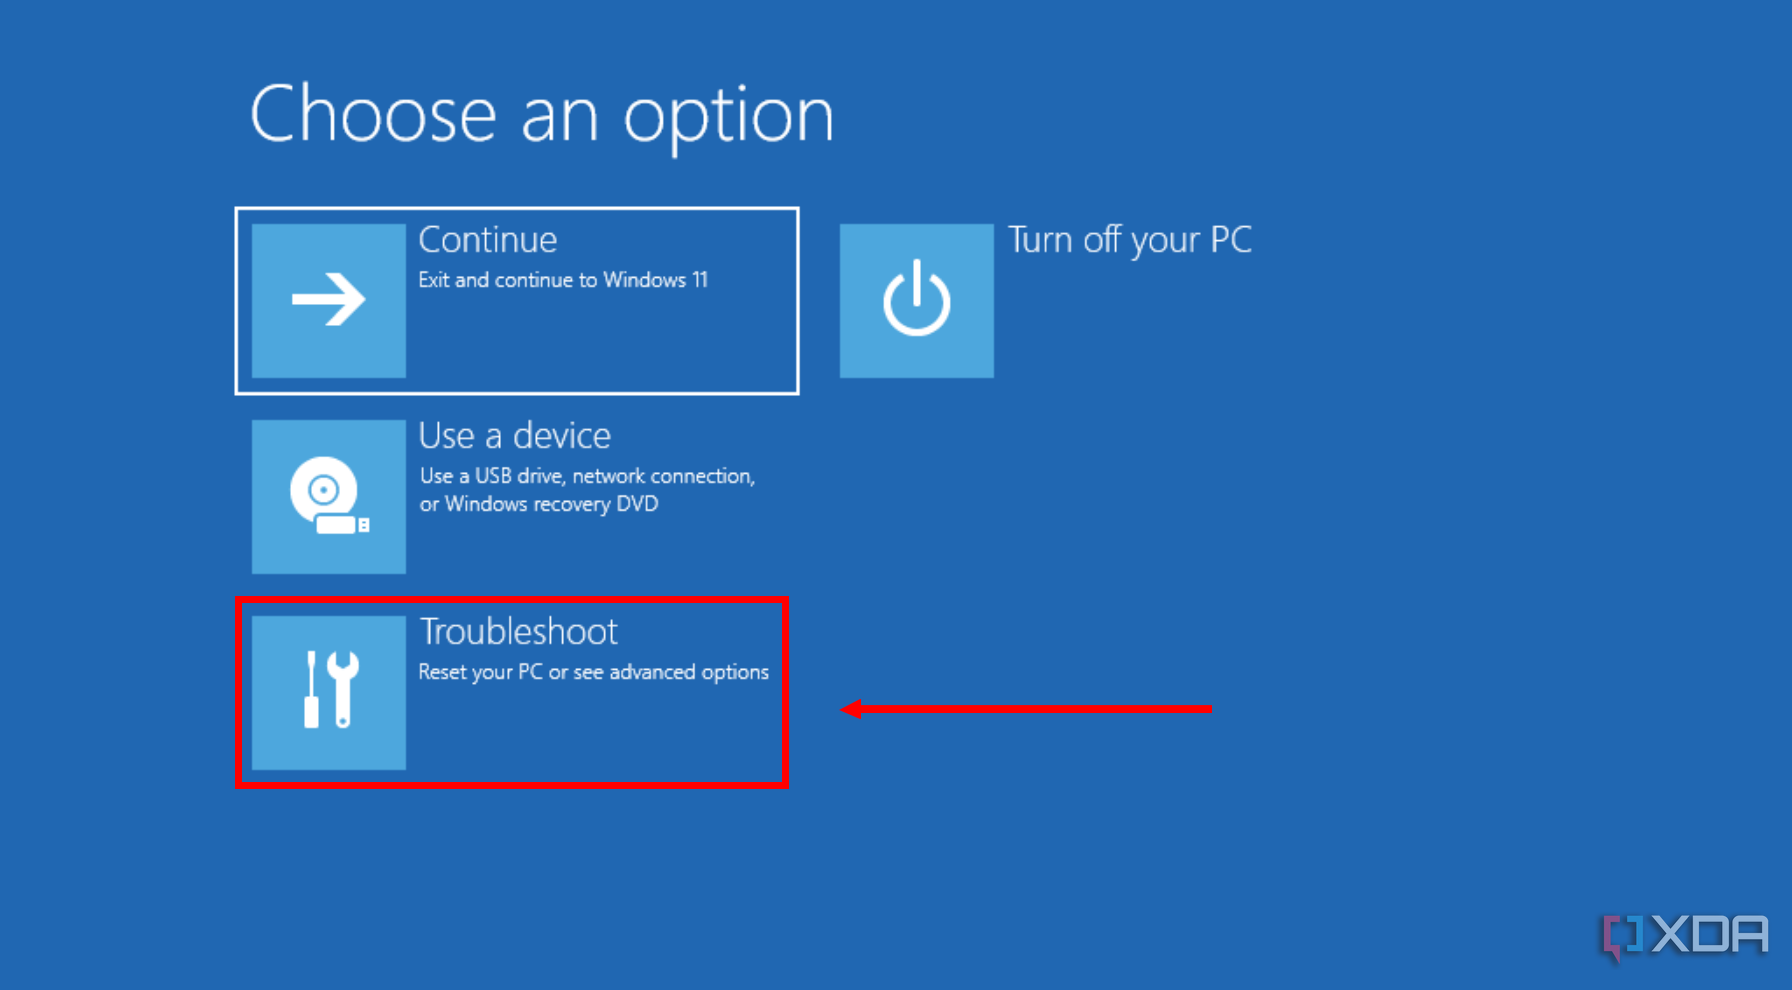
- Choose Advanced options.
-
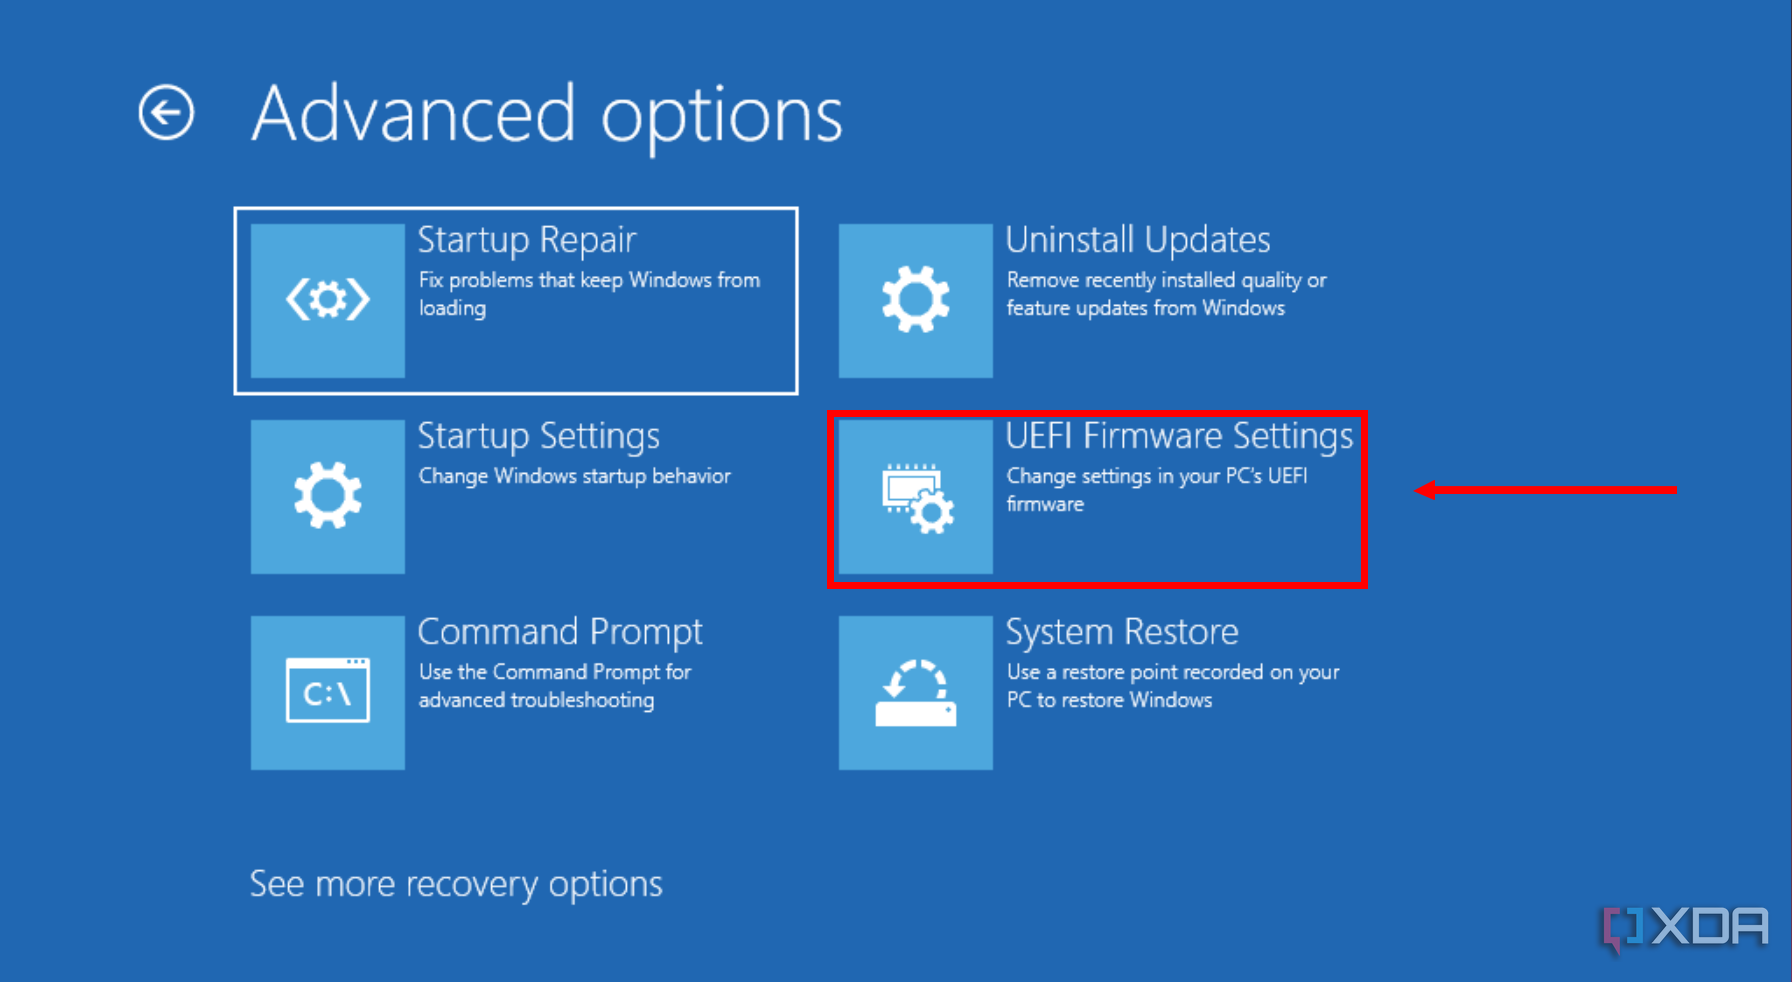
Click UEFI Firmware settings.
-
Once you're in the BIOS, look for an option called Virtualization Technology. It may be under a System section or something similar.
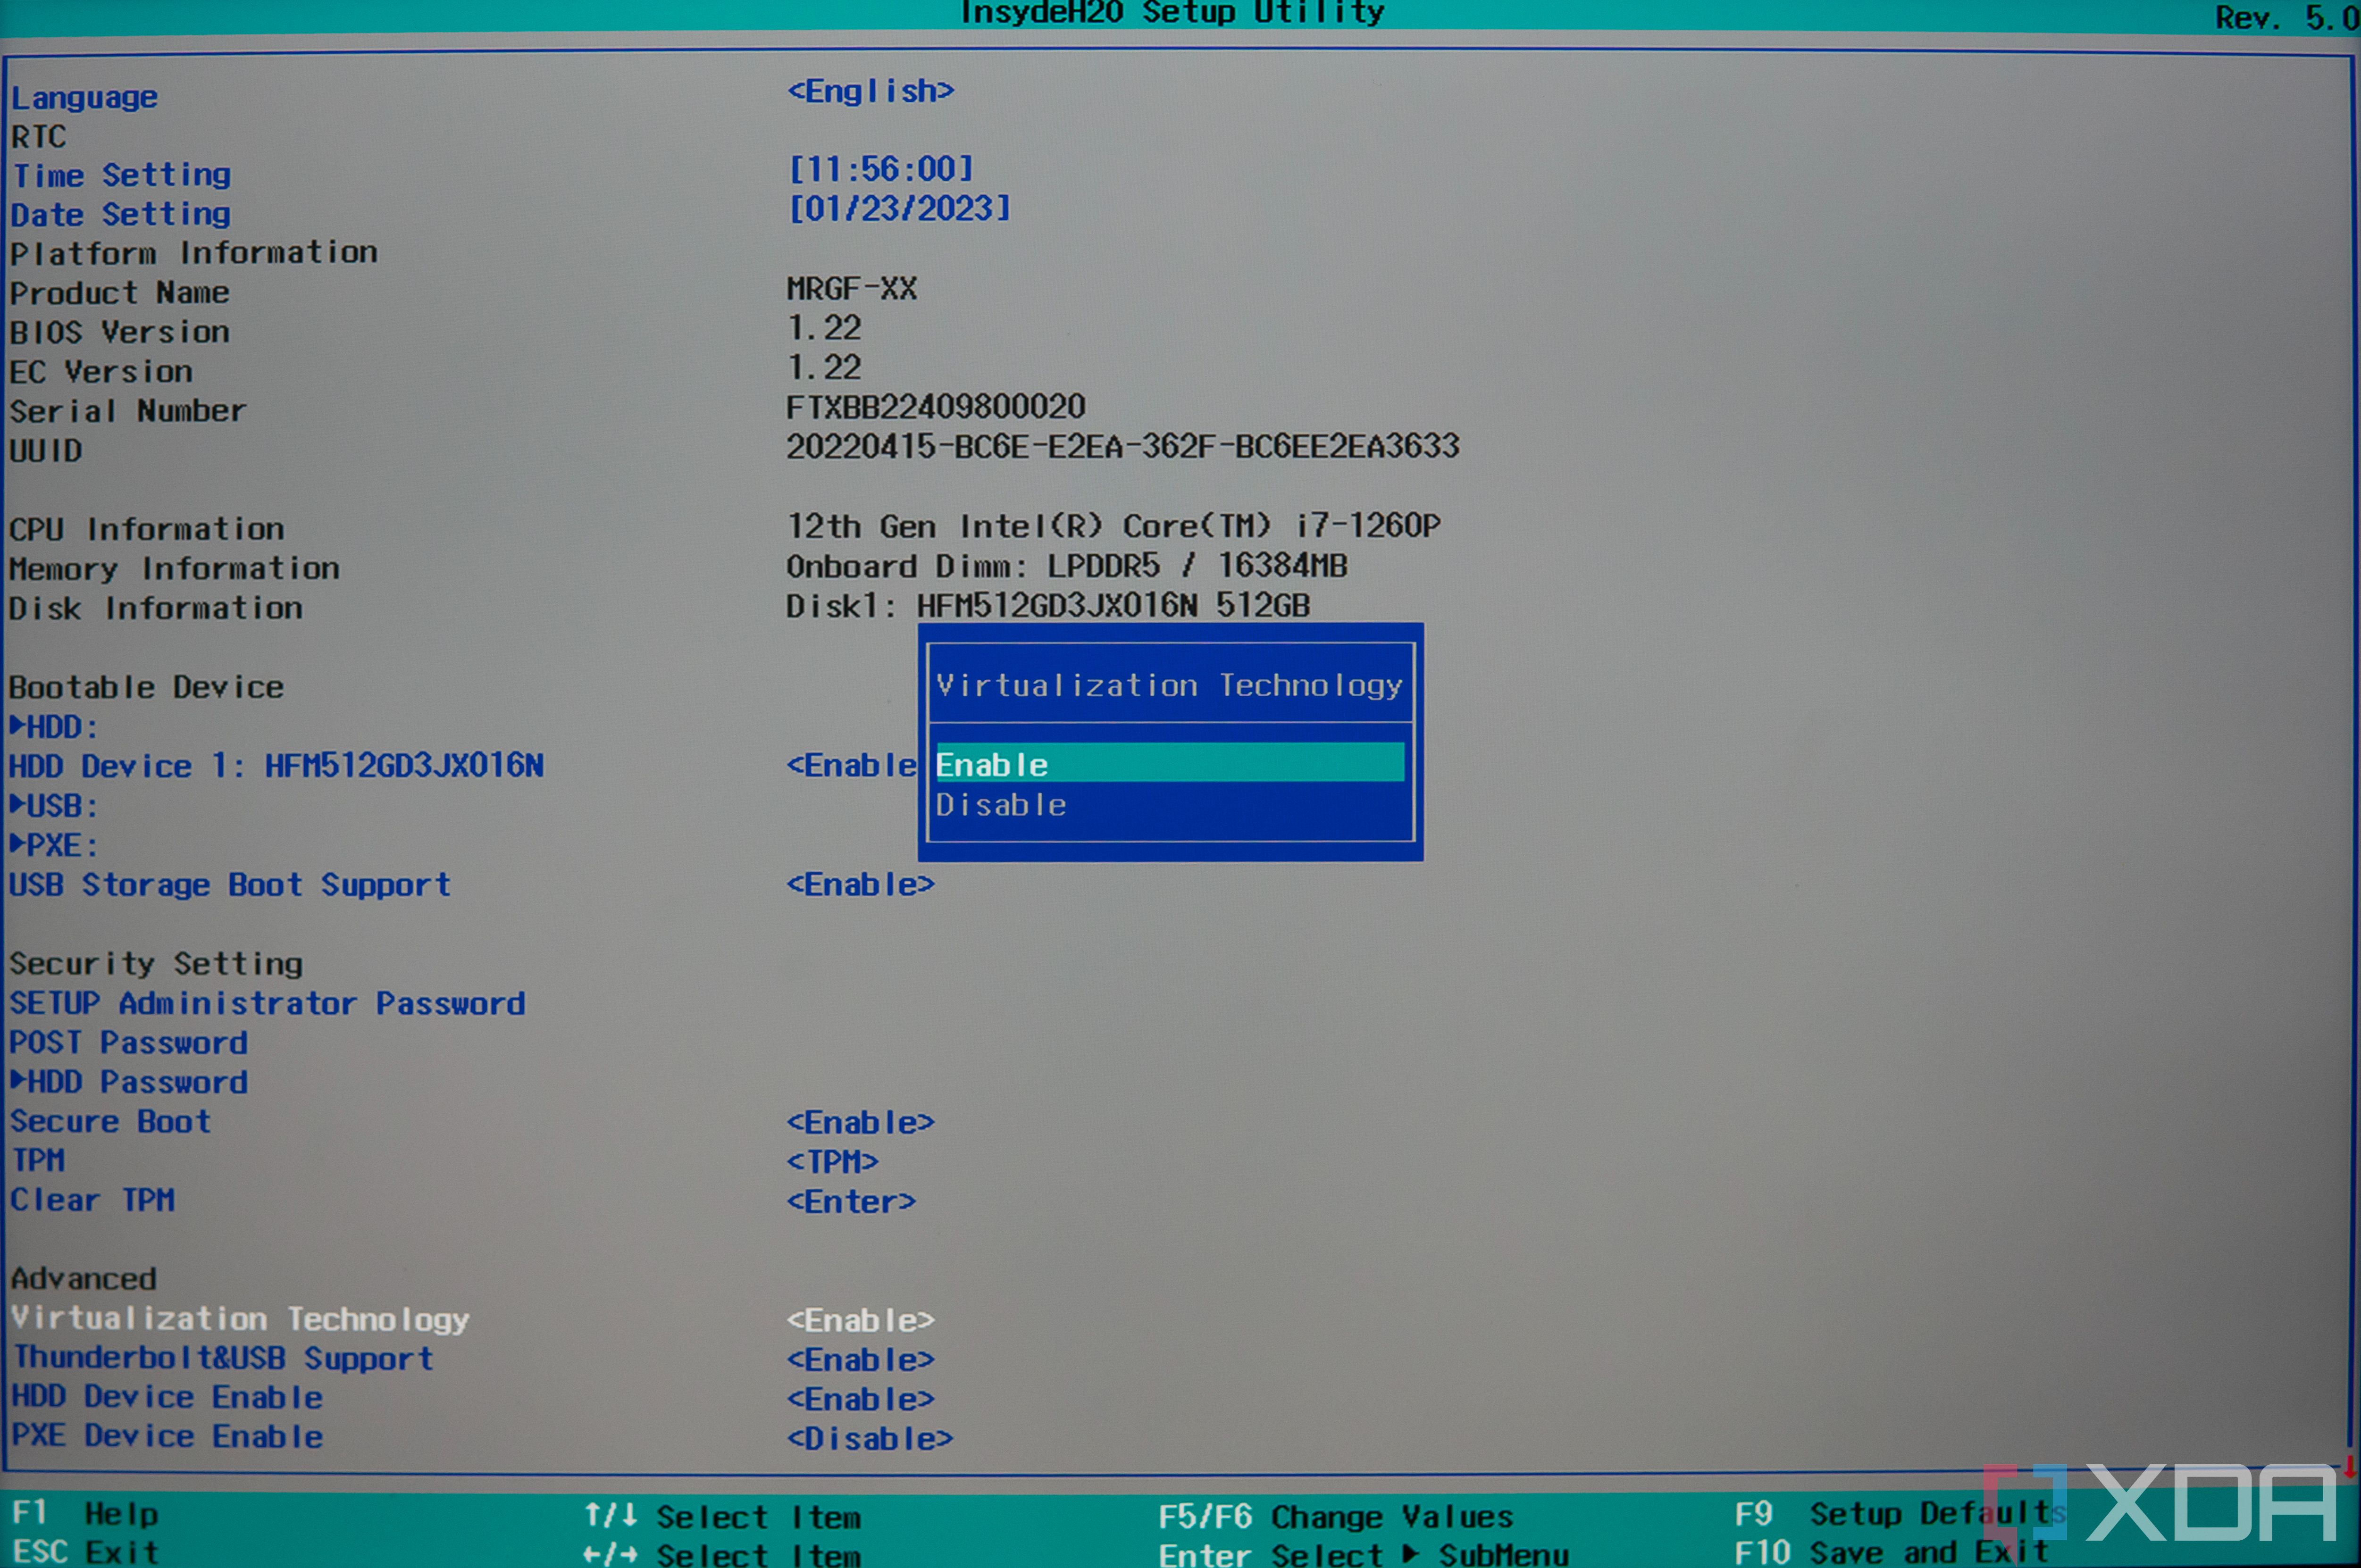
- Select that option and set it to Enabled.
- Save your changes and exit the BIOS to restart your PC back into Windows.


Now that virtualization is enabled in the BIOS, you should be able to set up Hyper-V.
How to enable Hyper-V in Windows
Finally, you'll need to make sure Hyper-V is enabled in Windows. Follow these steps:
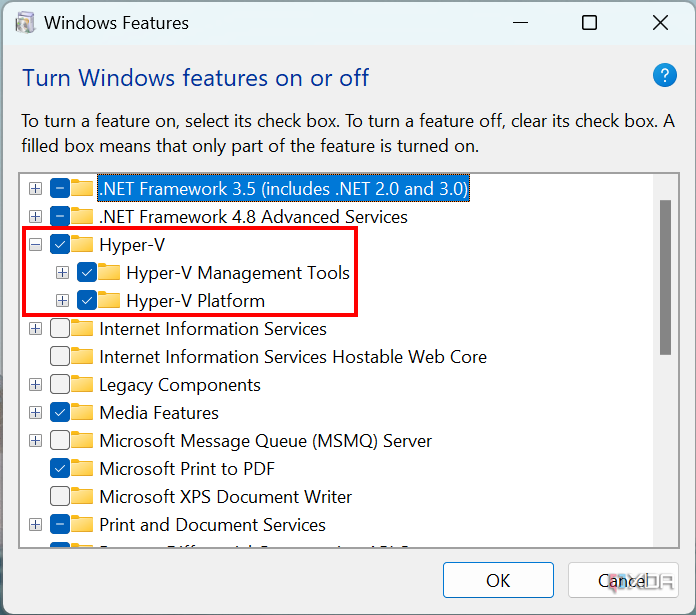
- Open Start and search for Turn Windows features on or off.
-
Check the Hyper-V box and make sure all the sub-options are enabled.
- Click OK and wait for the features to install.
- Restart the computer when prompted.

Download a Windows ISO
With all that sorted out, you're almost ready to create a virtual machine. The last thing you need is an ISO you'll use for it. You have a few options here:
- Download an ISO for the latest stable version of Windows 11 from Microsoft's website. This is the easiest and most reliable way to download Windows 11 to set up a VM.
- Download the latest Windows Insider Preview ISO, in case you want to test upcoming versions of Windows 11 before they're generally available.
- Create your own Windows 11 ISO if you're comfortable doing that. We'd recommend one of the other two options though.
Creating a Windows VM in Hyper-V
Creating a VM in Hyper-V isn't as scary as it might initially seem. Here's what you need to set up a VM with Windows 10 or 11:
- Open Start and search for Hyper-V Manager. Press Enter to launch it.
- Select your PC's name from the pane on the left (this should only be required the first time you use Hyper-V).
-
On the right-side menu, click New, then Virtual machine.

- Click Next.
-
Choose a name for your VM. You can also choose a different location from the default, if you want to.
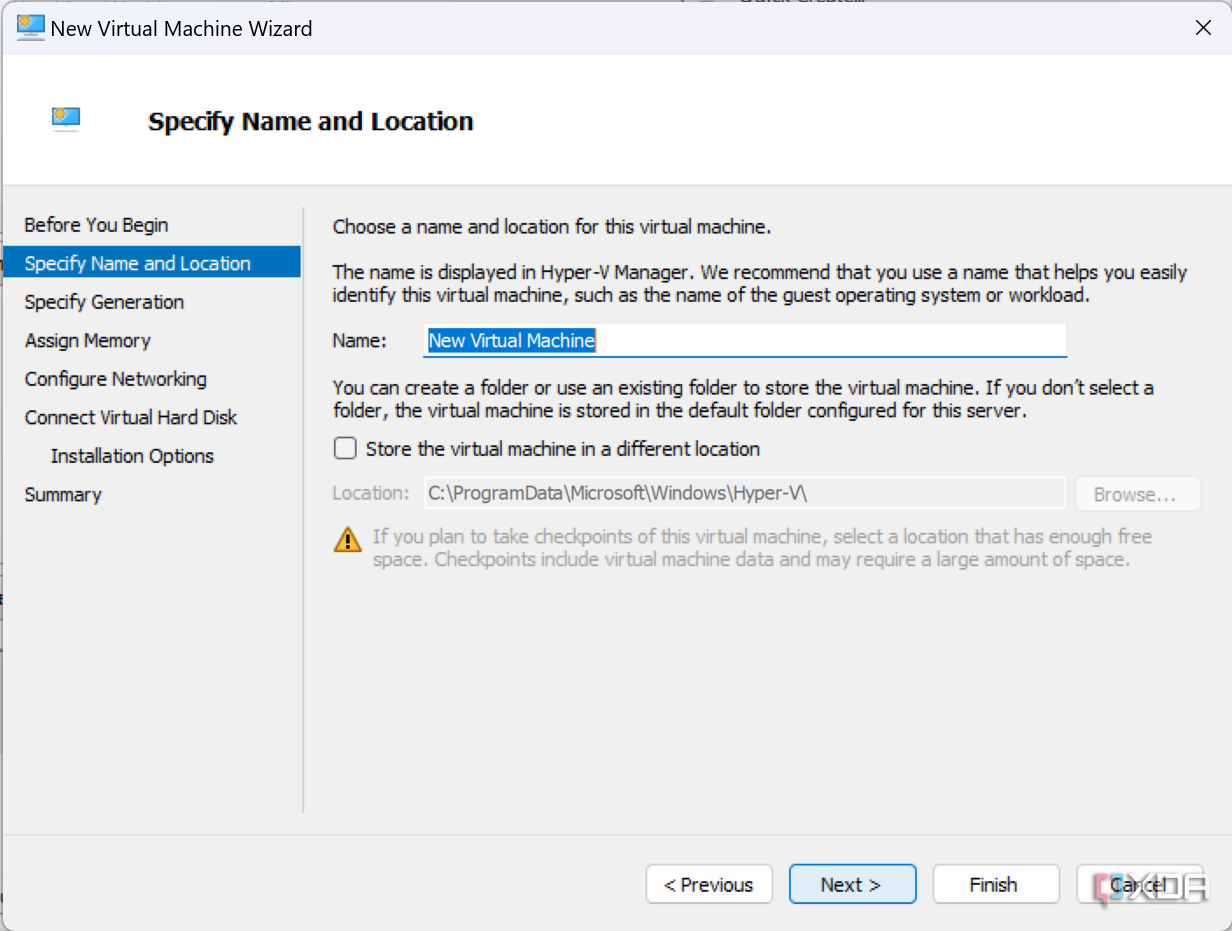
- Click Next.
- Since you'll be running Windows 11, choose Generation 2 then click Next.
-
Choose the amount of memory (RAM) to assign to the virtual machine. Windows 11 requires at least 4GB, or 4096MB. Make sure the Use Dynamic Memory for this virtual machine option is enabled.
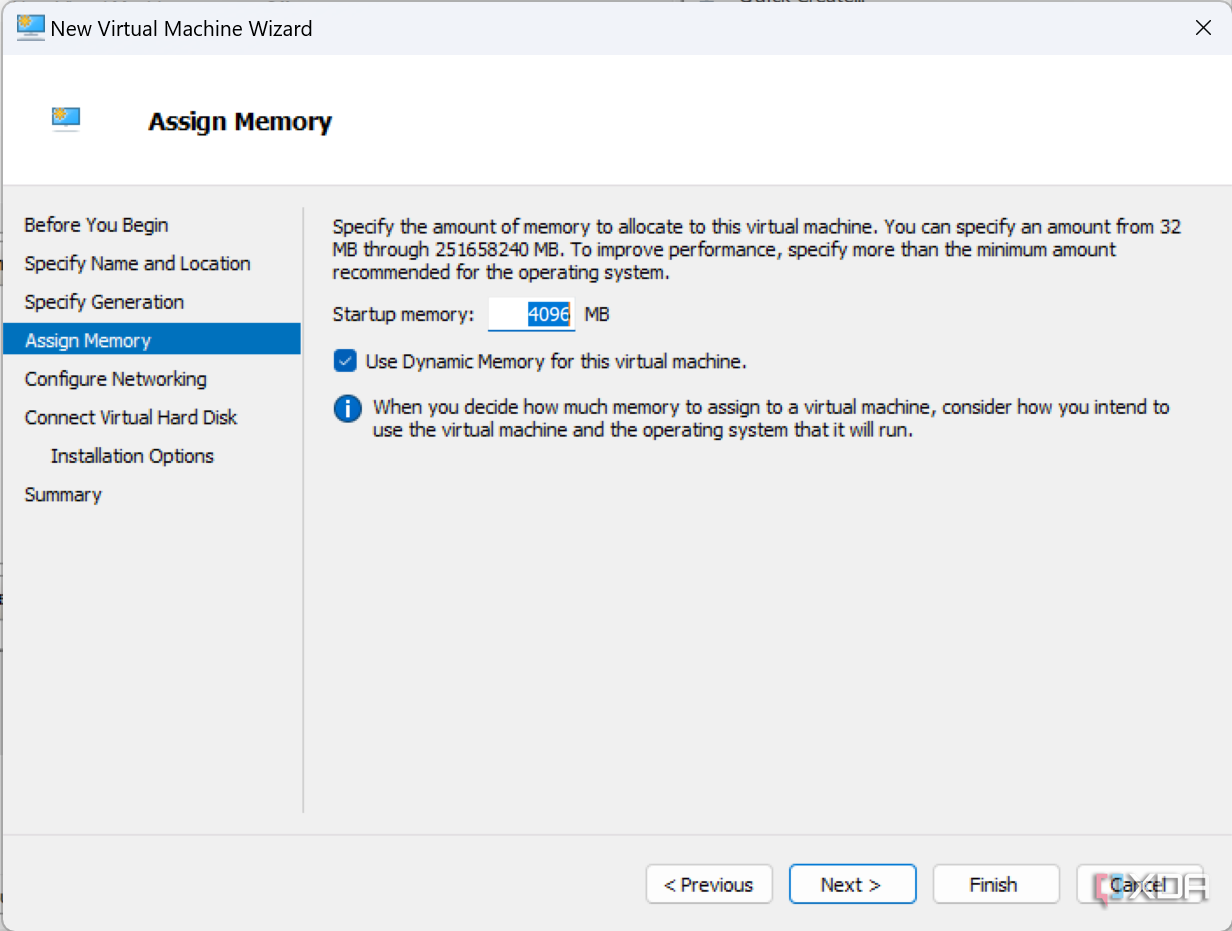
- Click Next.
-
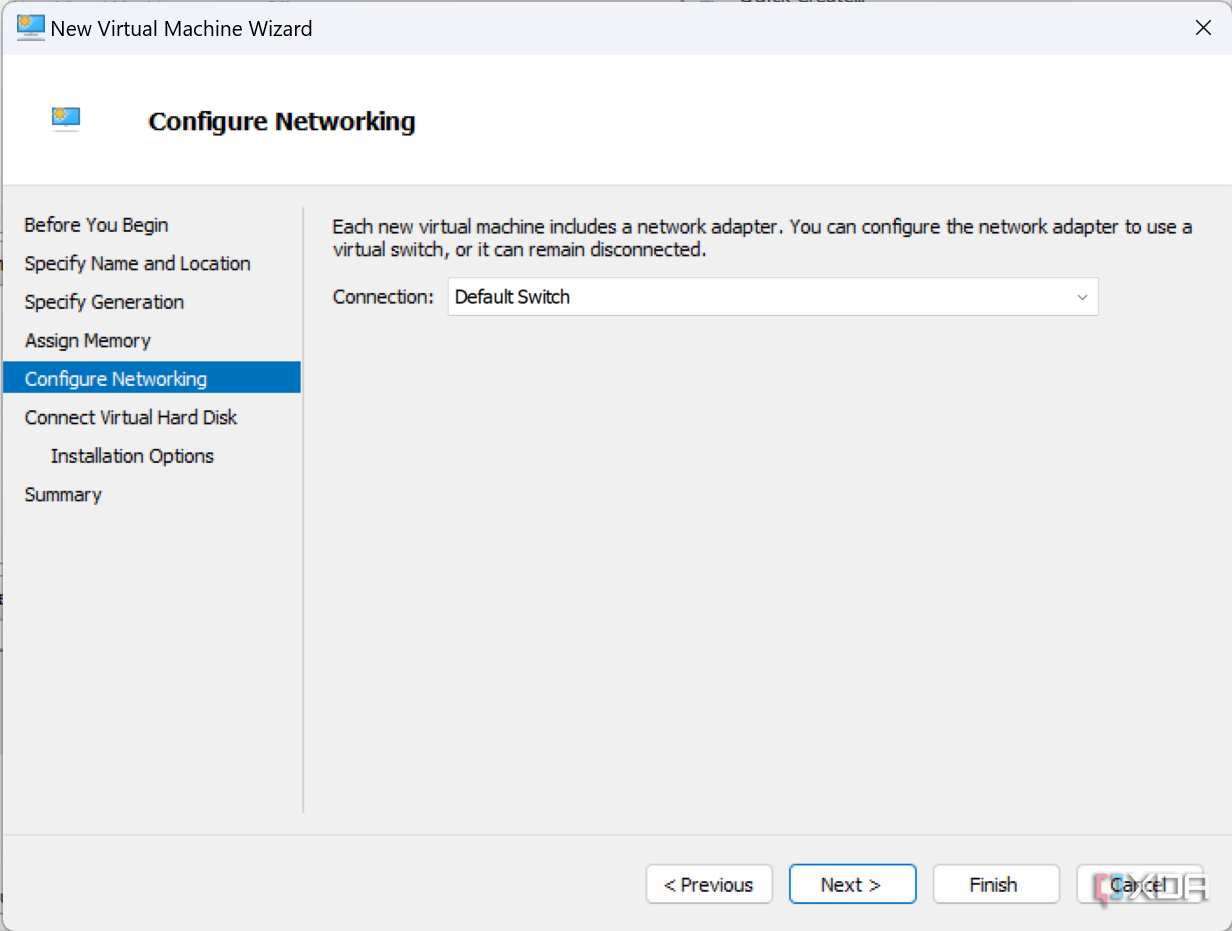
Change the Connection option to Default switch to enable internet support in the virtual machine. Click Next.
-
Choose the Create a virtual hard disk option and (optionally) choose a name for the virtual hard disk (VHDX) file.
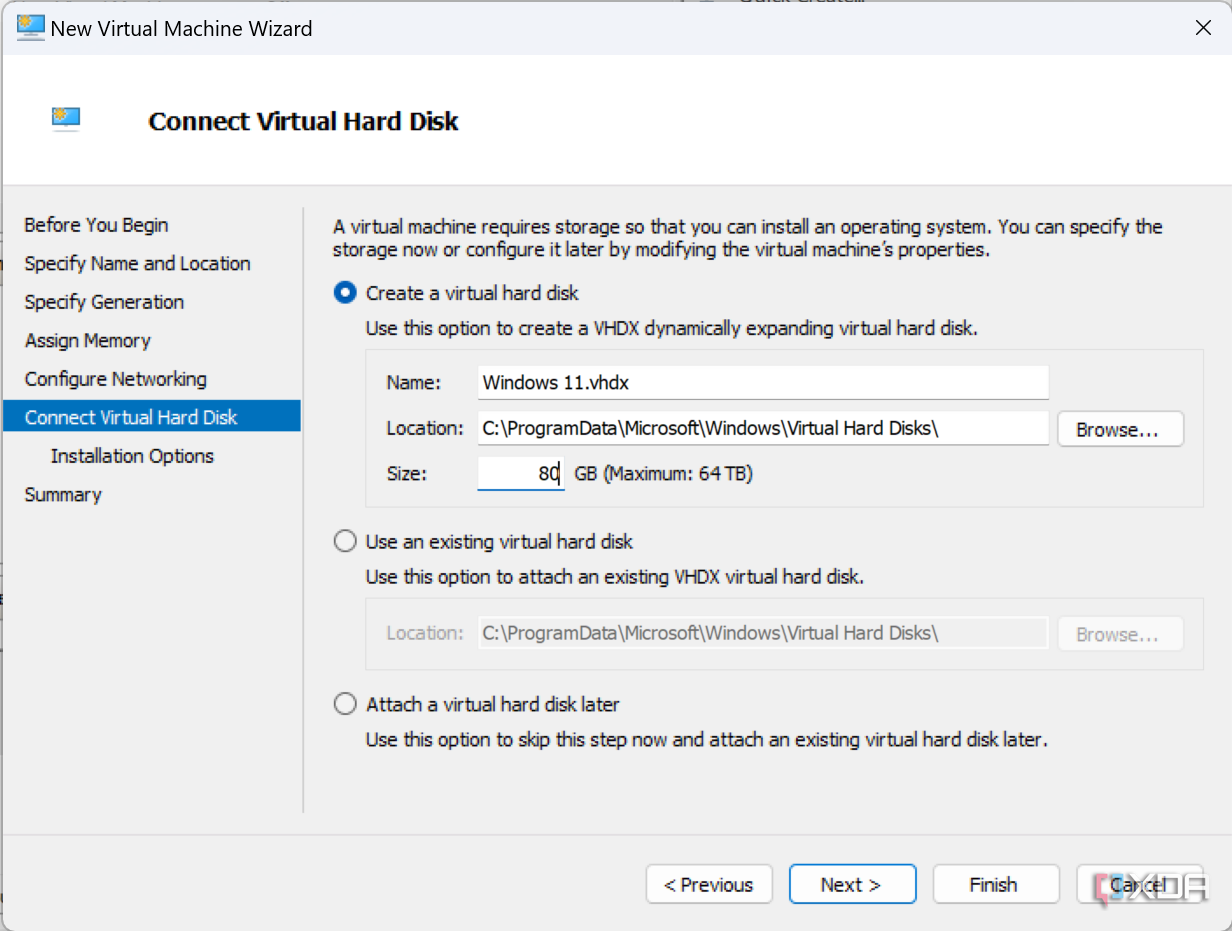
- Choose a size for the virtual hard drive. Windows 11 requires at least 64GB. Click Next.
- Choose the Install an operating system from a bootable image file option and click Browse to search for the ISO file you downloaded earlier.
- Click Next, then Finish.
-
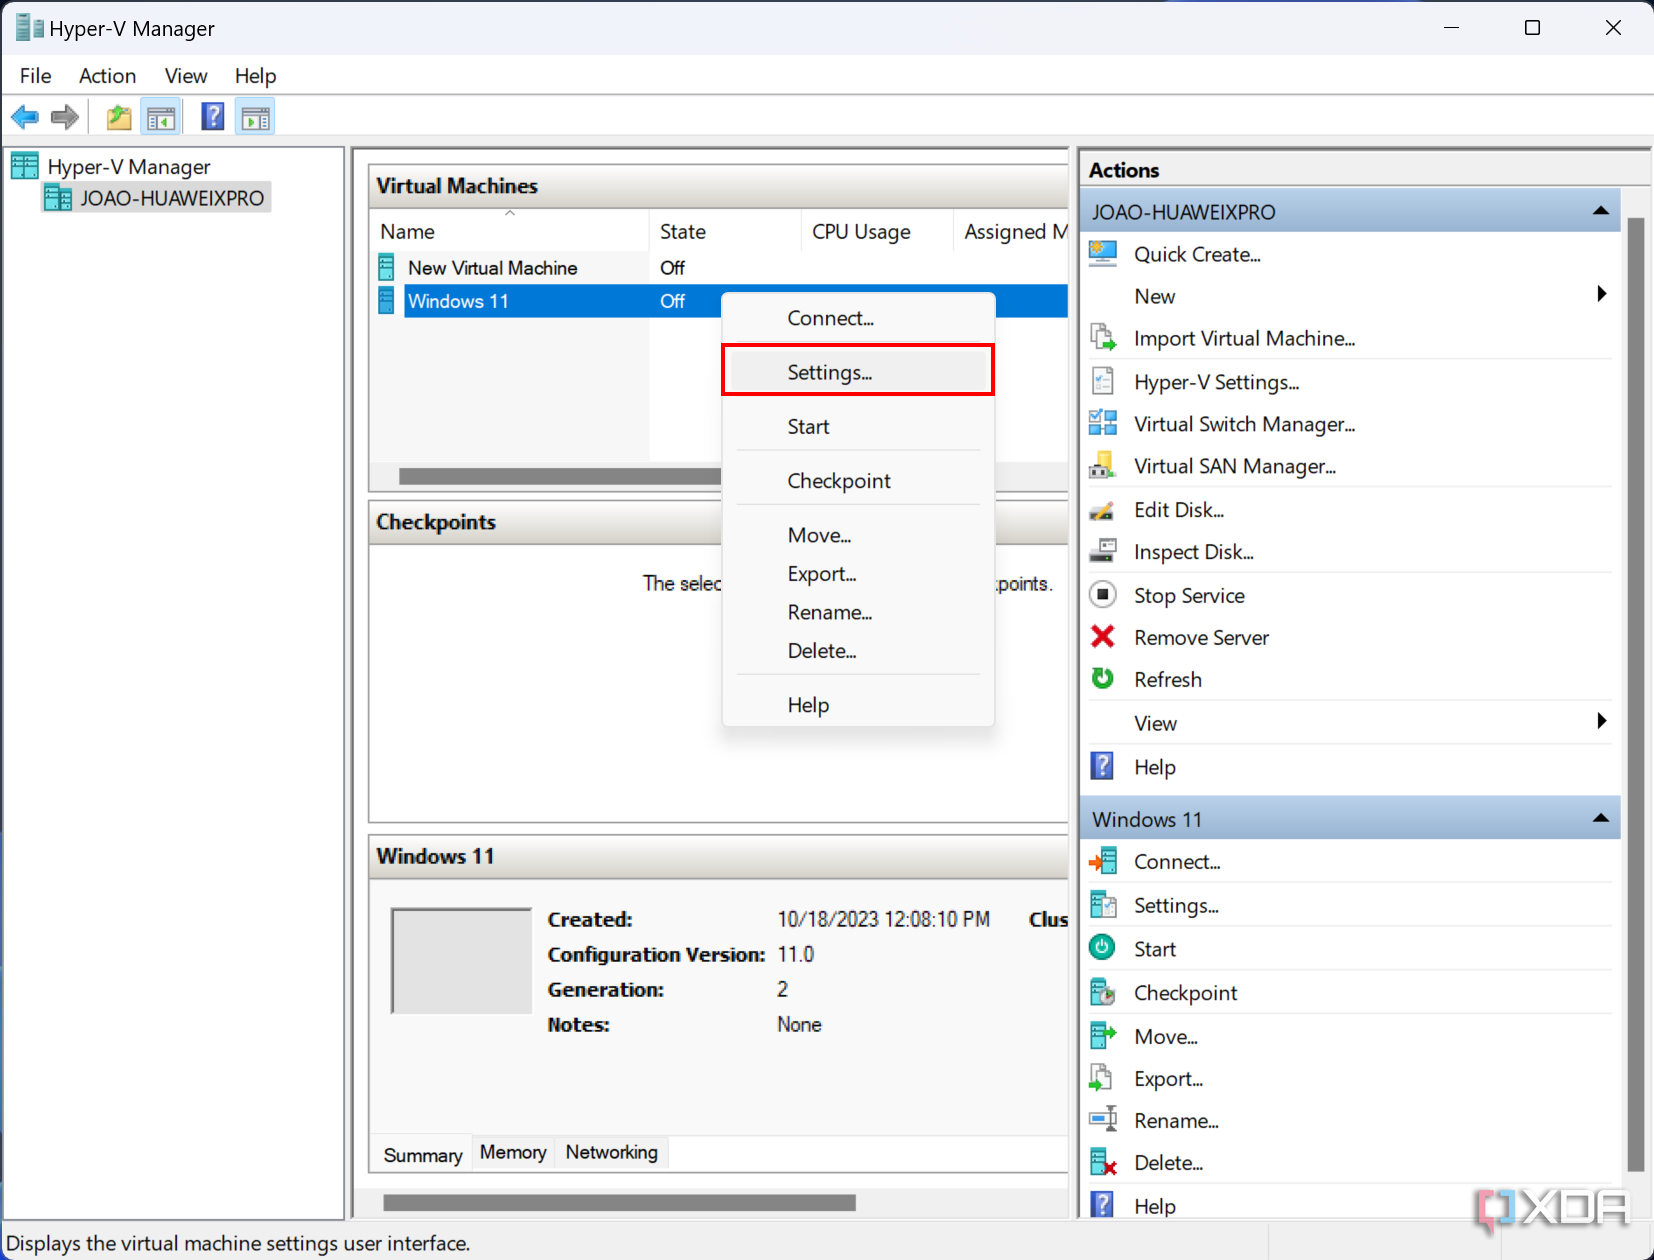
In the Hyper-V Manager window, right-click the VM you just created, then click Settings....
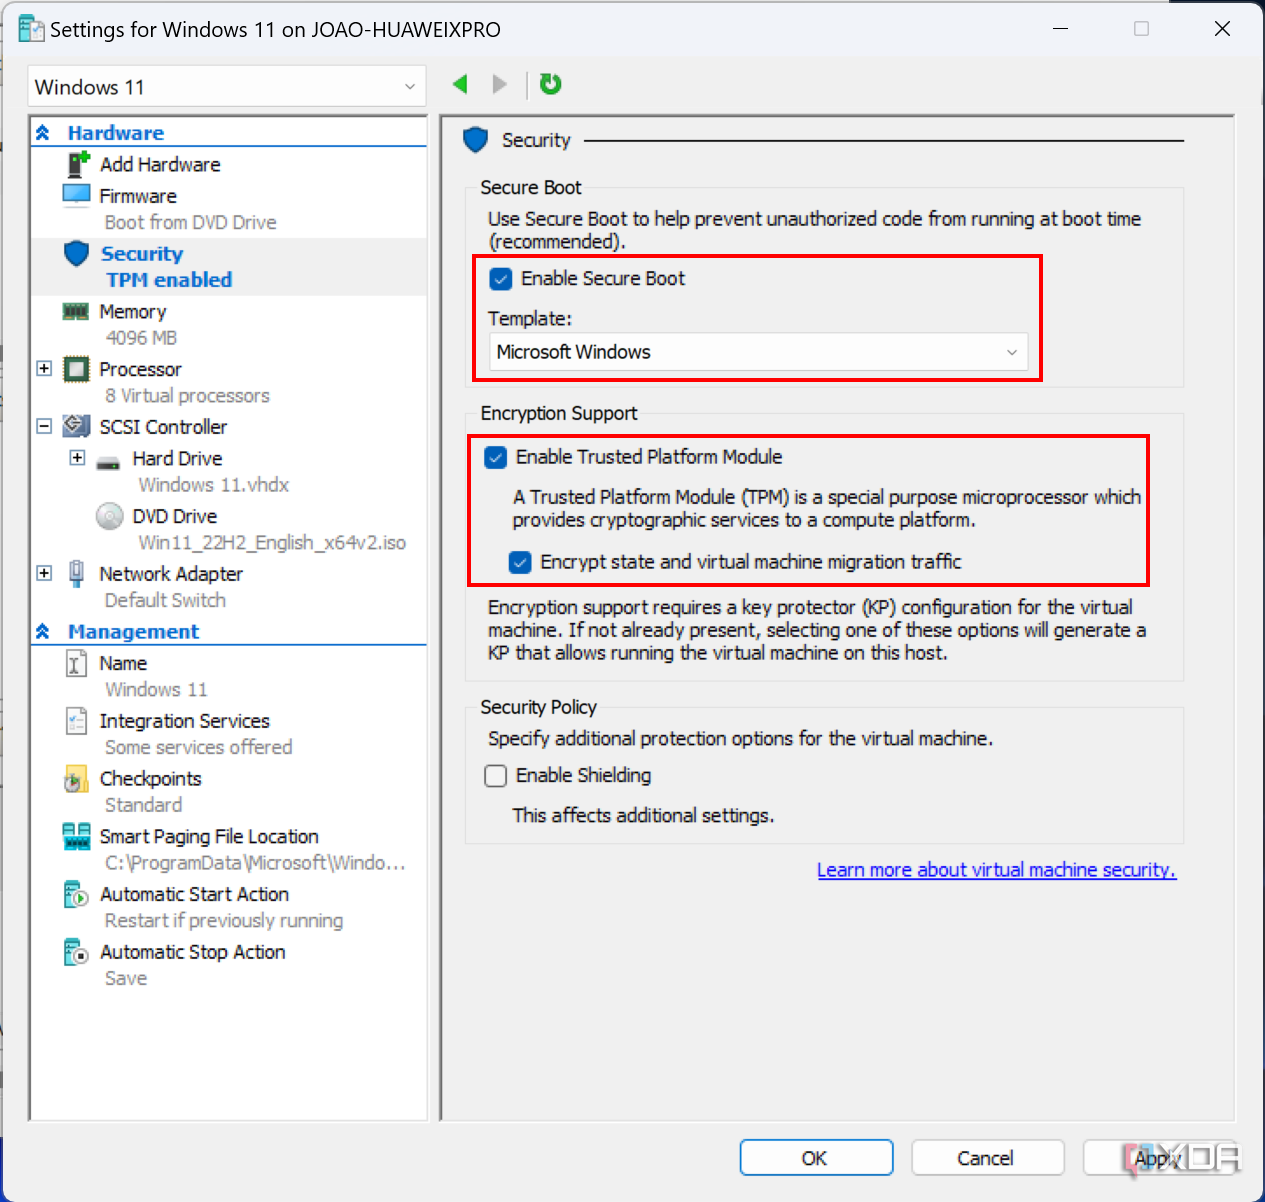
- Click the Security section on the left-side menu.
-
Make sure the Enable Secure Boot and Enable Trusted Platform Module options are both enabled. You'll need these for a Windows 11 VM. Also enable the option that says Encrypt state and virtual machine migration traffic.
- Click Apply.
-
Switch to the Processor section on the left-side menu and make sure the Number of virtual processors is 2 or more, as required by Windows 11.
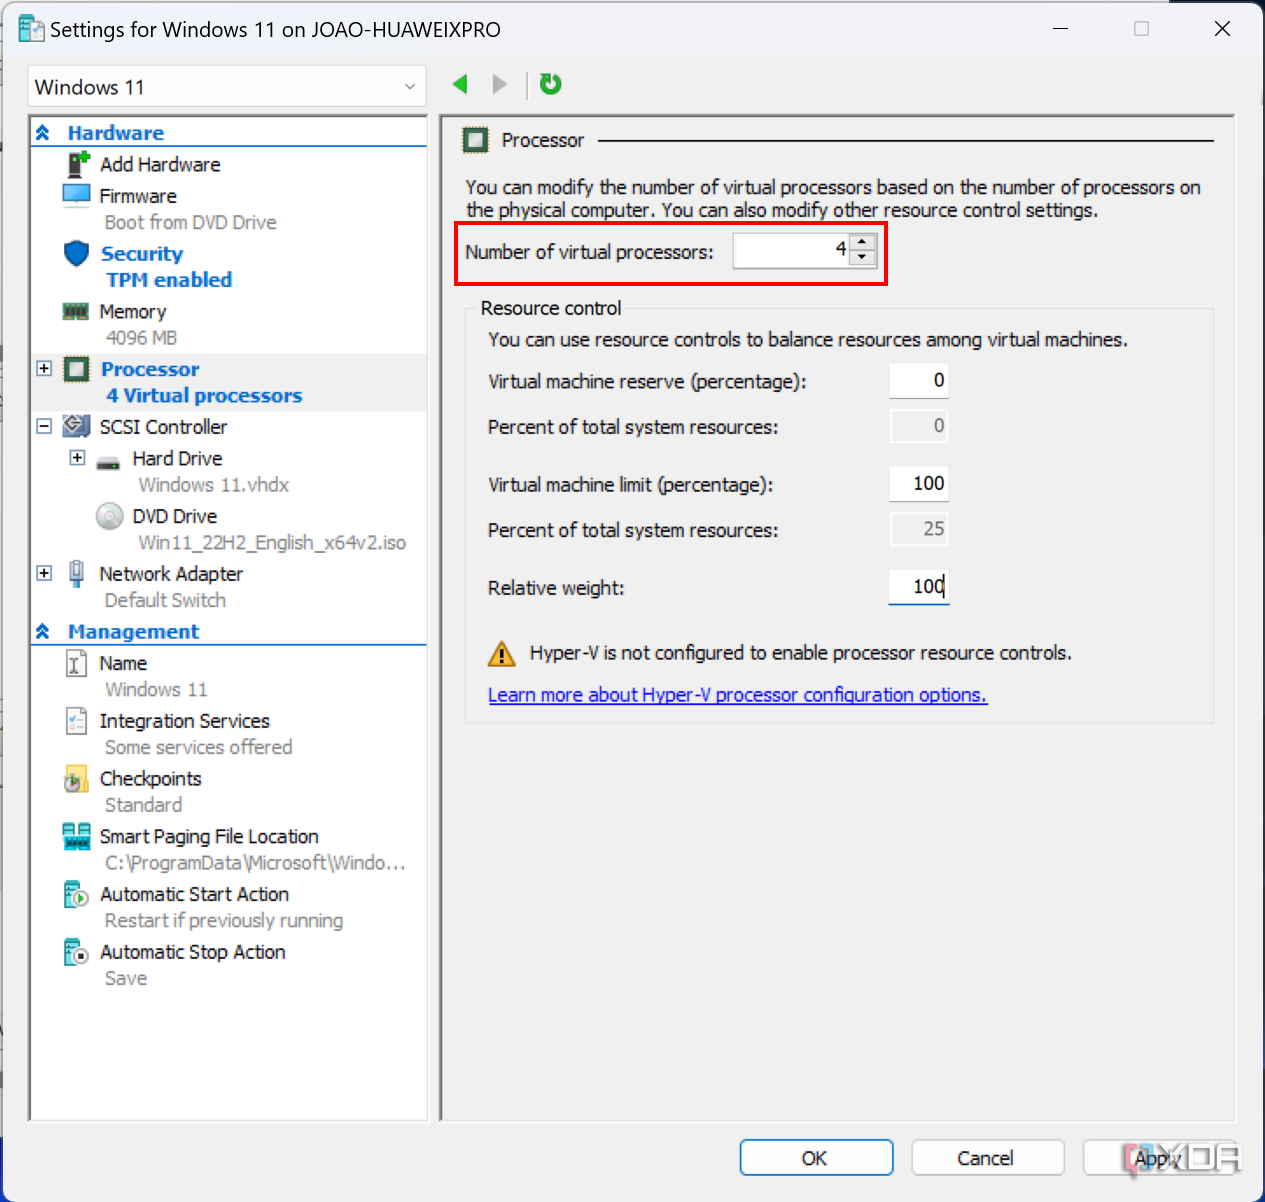
- Click OK.


Install Windows 11 on your VM
Now that the VM is properly configured, all that's left to do is to run it and set up Windows 11. Follow these steps:
- Double-click your newly created VM in Hyper-V.
-
Click Start and press any key when prompted to boot the VM using the ISO file.
If you take too long to press OK, the virtual machine will be stuck. You can click the Reset button in the toolbar to try again.
-
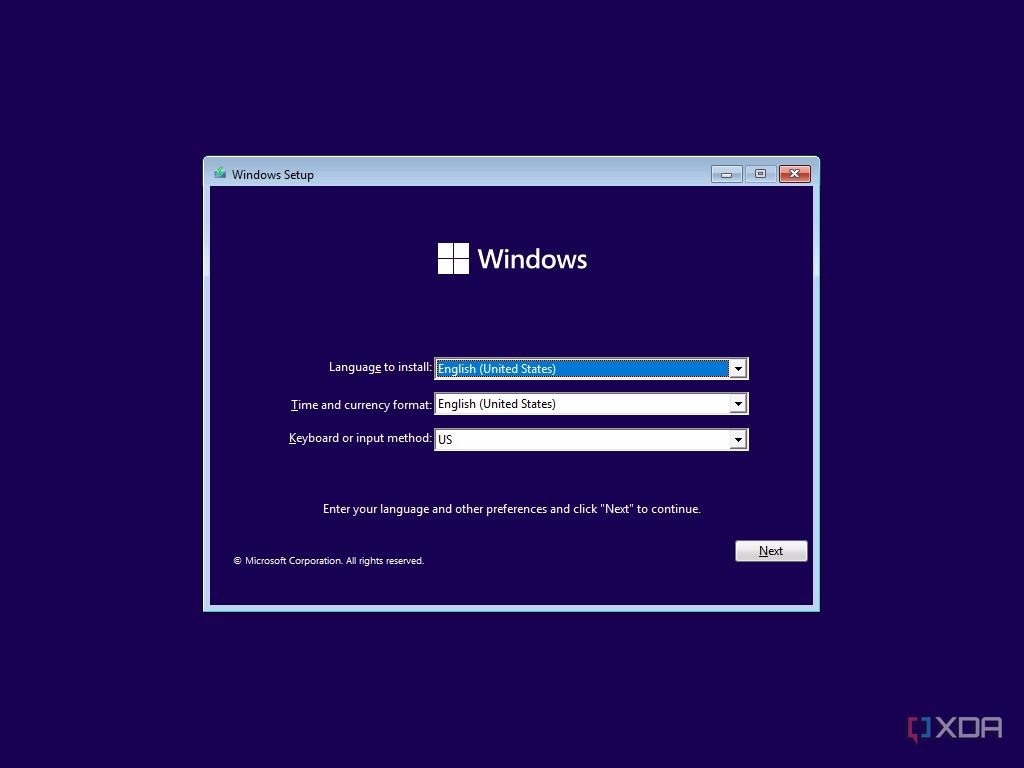
Choose your language and region settings. The default settings should be fine, so you can click Next.
- Click Install now.
-
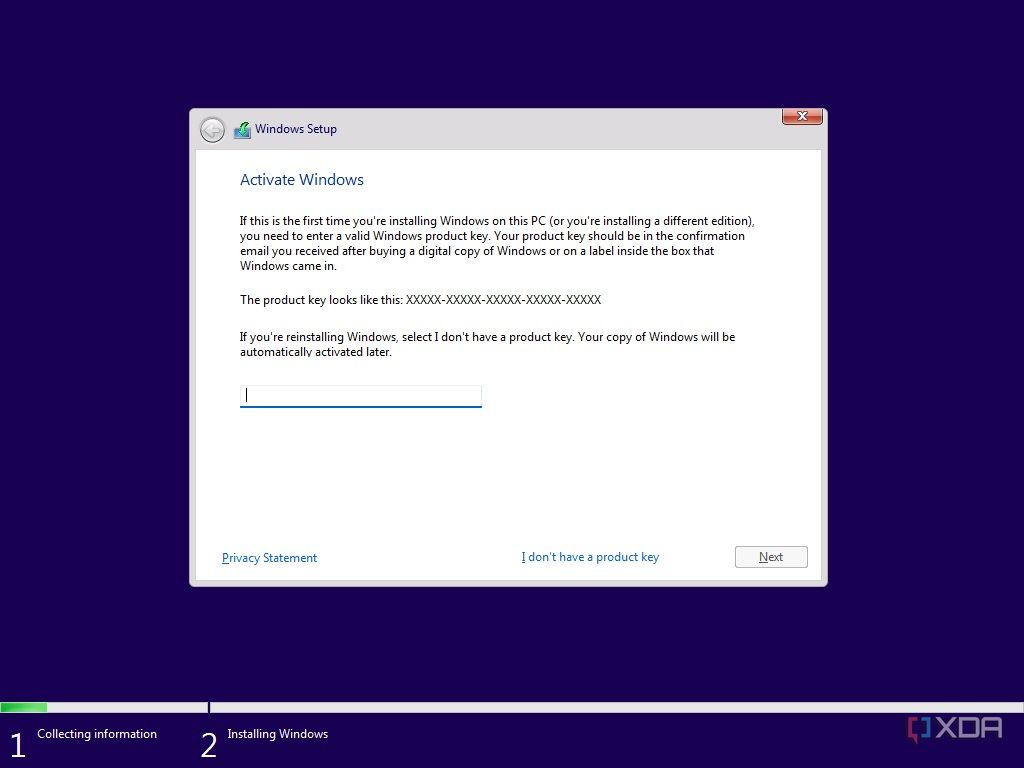
Enter a product key if you have one at hand. You can choose to skip this for now, but you'll need it later.
- Choose the edition of Windows 10 you want to install. You have to choose an edition that matches the product key you used.
-
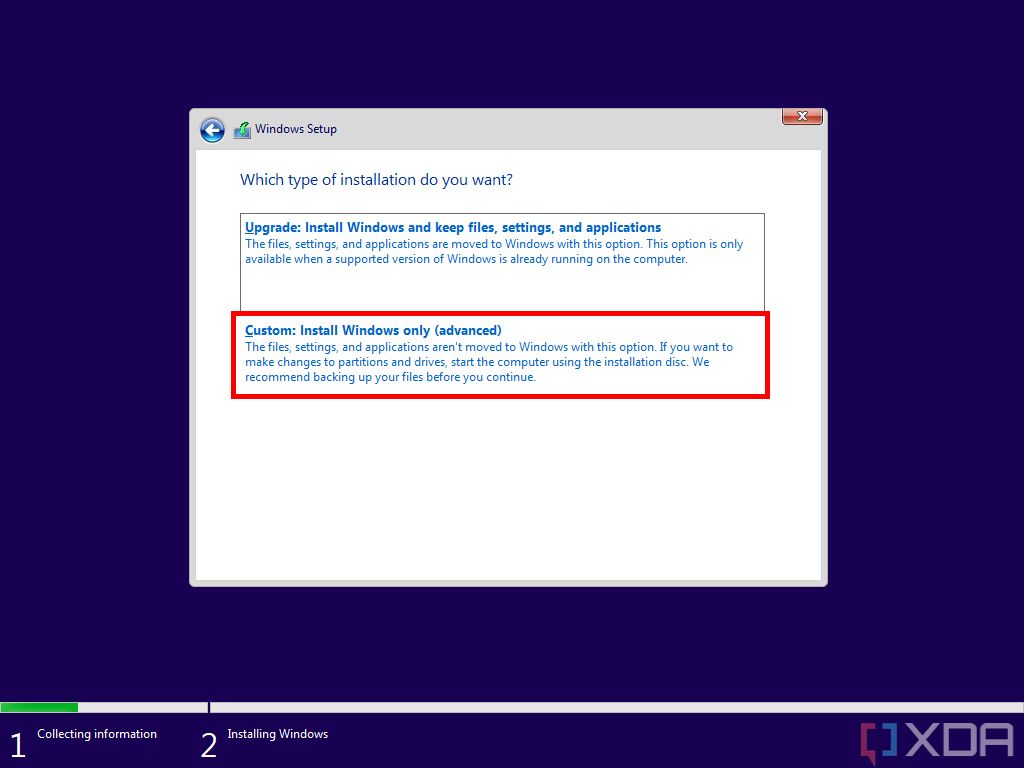
Accept the license agreement, and then choose Custom: Install Windows only (Advanced).
-
You'll now have to create a partition to install Windows. Simple click Drive 0 Unallocated Space, then click Next.
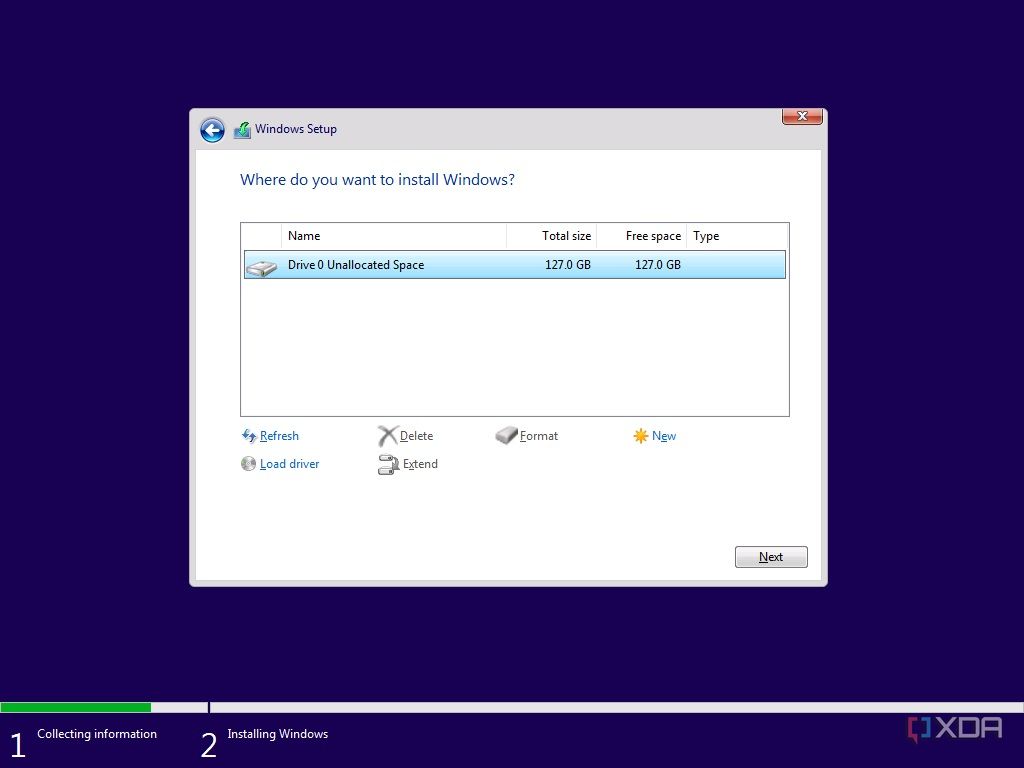
- From here, you can just set up Windows 11 as you would on a brand-new PC. If you need any help with this process, we have a guide on how to install Windows 11, which goes over the out-of-box-experience (OOBE).


You'll now be running Windows 11 in your VM. There may be further updates to download in Windows Update if you want to get the latest features. Be sure to check out our update tracker to know all about the latest updates for Windows 11. And if you want to know everything you can try right now, we also have an extensive list of everything that's already available in Windows 11 previews.
Finally, if you're unsure whether your PC supports Windows 11, we have a list of PCs that will get the upgrade, but you can also check Windows Update or use the PC Health Check app on your PC. Most modern PCs should support it, though, and you can also check out our list of the best laptops you can buy today if yours isn't supported anymore.