Deploy a Real-Time Polling App with Hasura Cloud and YugabyteDB Managed
June 23, 2021
Hasura is a leading vendor in the GraphQL ecosystem, offering a powerful alternative to REST for building microservices and mobile applications. Hasura’s open source GraphQL Engine connects to your database and instantly auto-generates a production-ready GraphQL API backend. YugabyteDB, the open source distributed SQL database, is a perfect complement to GraphQL giving you horizontal scalability, fault tolerance, and global data distribution in a single system. YugabyteDB eliminates many of the scaling and resilience limitations of a traditional monolithic RDBMS.
YugabyteDB offers a validated integration with Hasura, allowing developers to build applications that are highly available, scalable and geo-distributed – without the need to write backend code to handle data requests. In fact, YugabyteDB is the only distributed SQL database to provide integration and support for GraphQL applications. Since both the Hasura GraphQL Engine and YugabyteDB are 100% open source under Apache 2.0 license, developers can get started at no cost and benefit from the innovation velocity of vibrant open source communities. They can deploy the software at scale on any public or private cloud, or use the fully managed public cloud services from the two companies. The technology integration between Hasura Cloud and YugabyteDB Managed (formerly Yugabyte Cloud), our database-as-as-service offering, provides a seamless experience in connecting the two services.
The best way to understand the simplicity of the integration is to see it in action by deploying one of Hasura’s sample applications, the real-time polling app, on Hasura Cloud and YugabyteDB Managed.
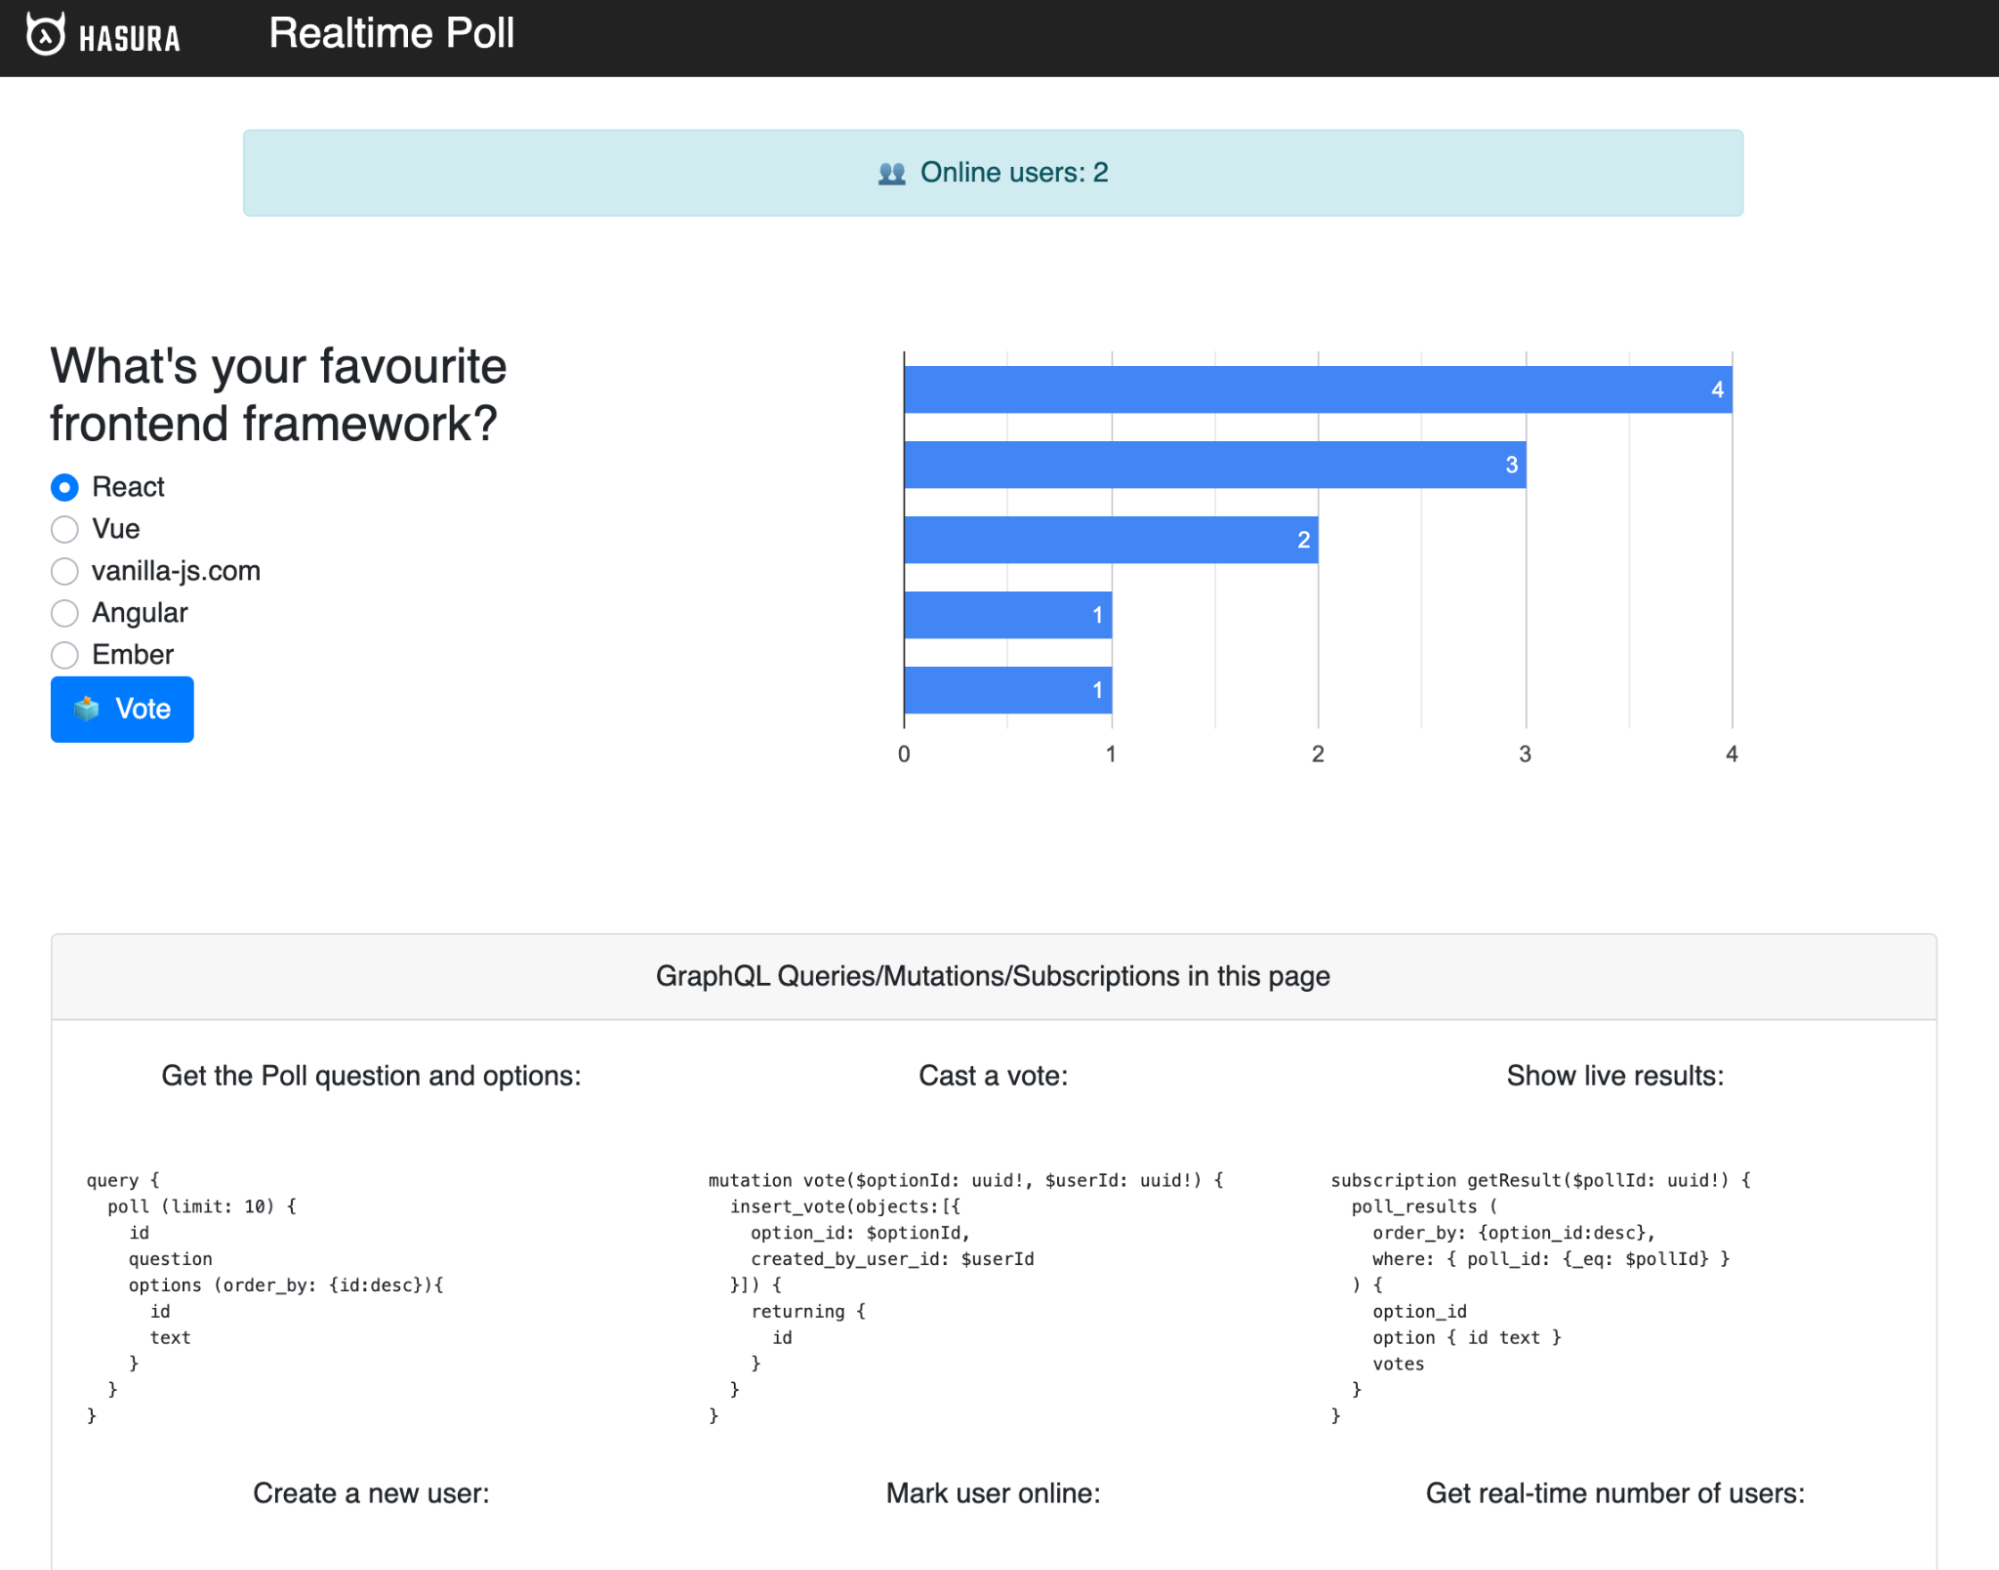
The “realtime-poll” app is built using React and is powered by Hasura GraphQL Engine backed by a YugabyteDB Managed database cluster. It has an interface for users to cast a vote on a poll and the results are updated in the on-screen bar chart, in real-time.
In this blog post, we will walk through the following steps to deploy the application:
1. Create free accounts on Husura Cloud and YugabyteDB Managed
2. Download the application code
3. Create a Hasura project and connect to the YugabyteDB database within the project
4. Install the Hasura console
5. Configure the Hasura project and apply the application’s database schemas modifying SQL statements using Hasura migrations
6. Configure the application and run it
Let’s start.
1. Create free accounts on Hasura Cloud and YugabyteDB Managed
Visit https://hasura.io/cloud/ and click on the “Start Free” button. You will be taken to the cloud console, where you can sign up for a free Hasura Cloud account using your GitHub profile, Google account, or via email.

Next, visit https://cloud.yugabyte.com/register and sign up for a free account. YugabyteDB Managed offers a perpetual free-tier option that allows you to create a database cluster in a container environment in Google Cloud.
Once you verify your email and login to create a free tier cluster.
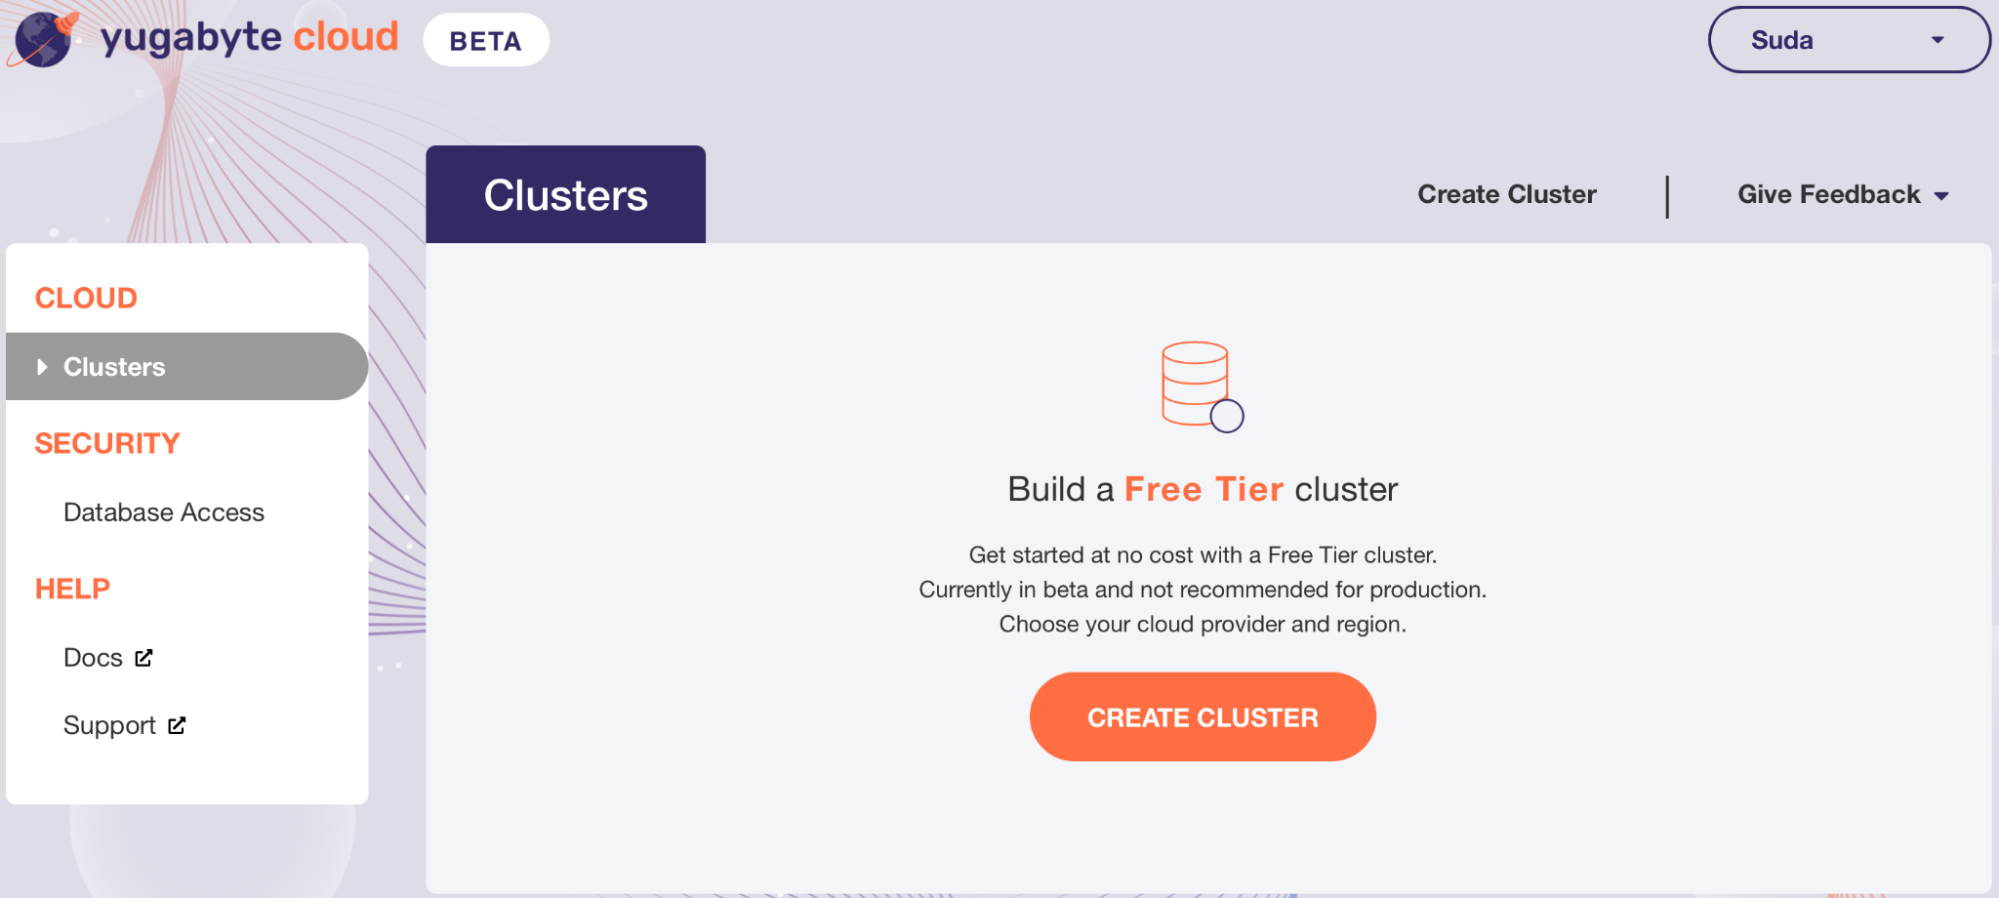
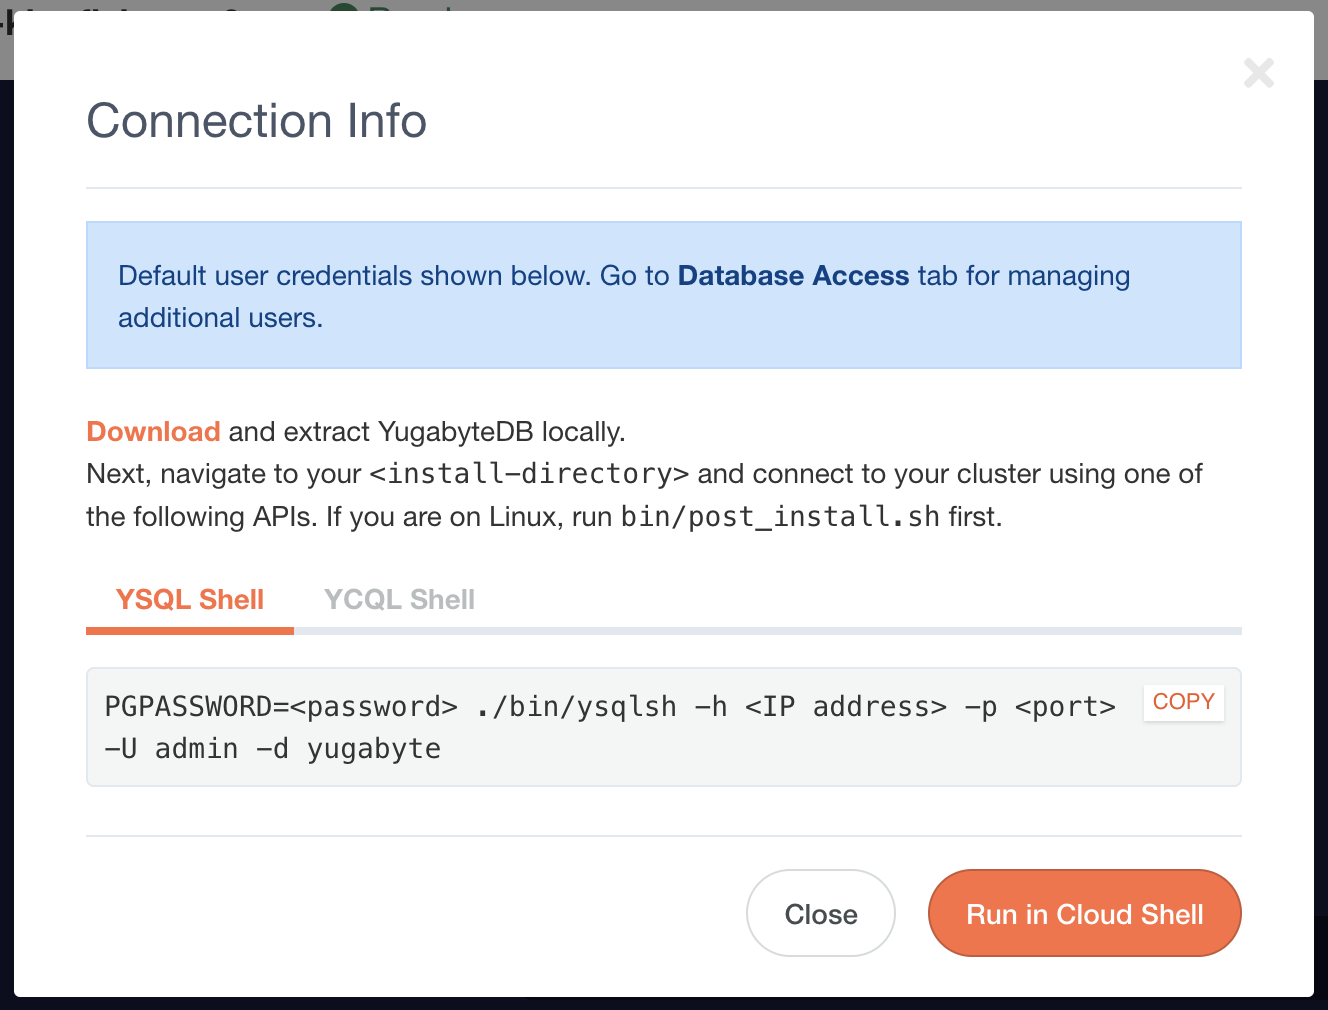
Once the cluster is created, click on “Go to Cluster” and click on the “Connect” button on the top right. Note down the database password, IP address, and port. This database cluster has a default database called yugabyte that we will use in our connection with our Hasura project later.
2. Download the sample application code
The Real Time Poll application is built using React and is powered by Hasura GraphQL Engine backed by a YugabyteDB Managed database cluster. It has an interface for users to cast a vote on a poll and the results are updated in the on-screen bar chart, in real-time using GraphQL Subscriptions.
In the command line, type:
git clone https
://github.com/yugabyte/yugabyte-graphql-apps
cd yugabyte-graphql-apps/realtime-poll
3. Create a Hasura project and connect to YugabyteDB
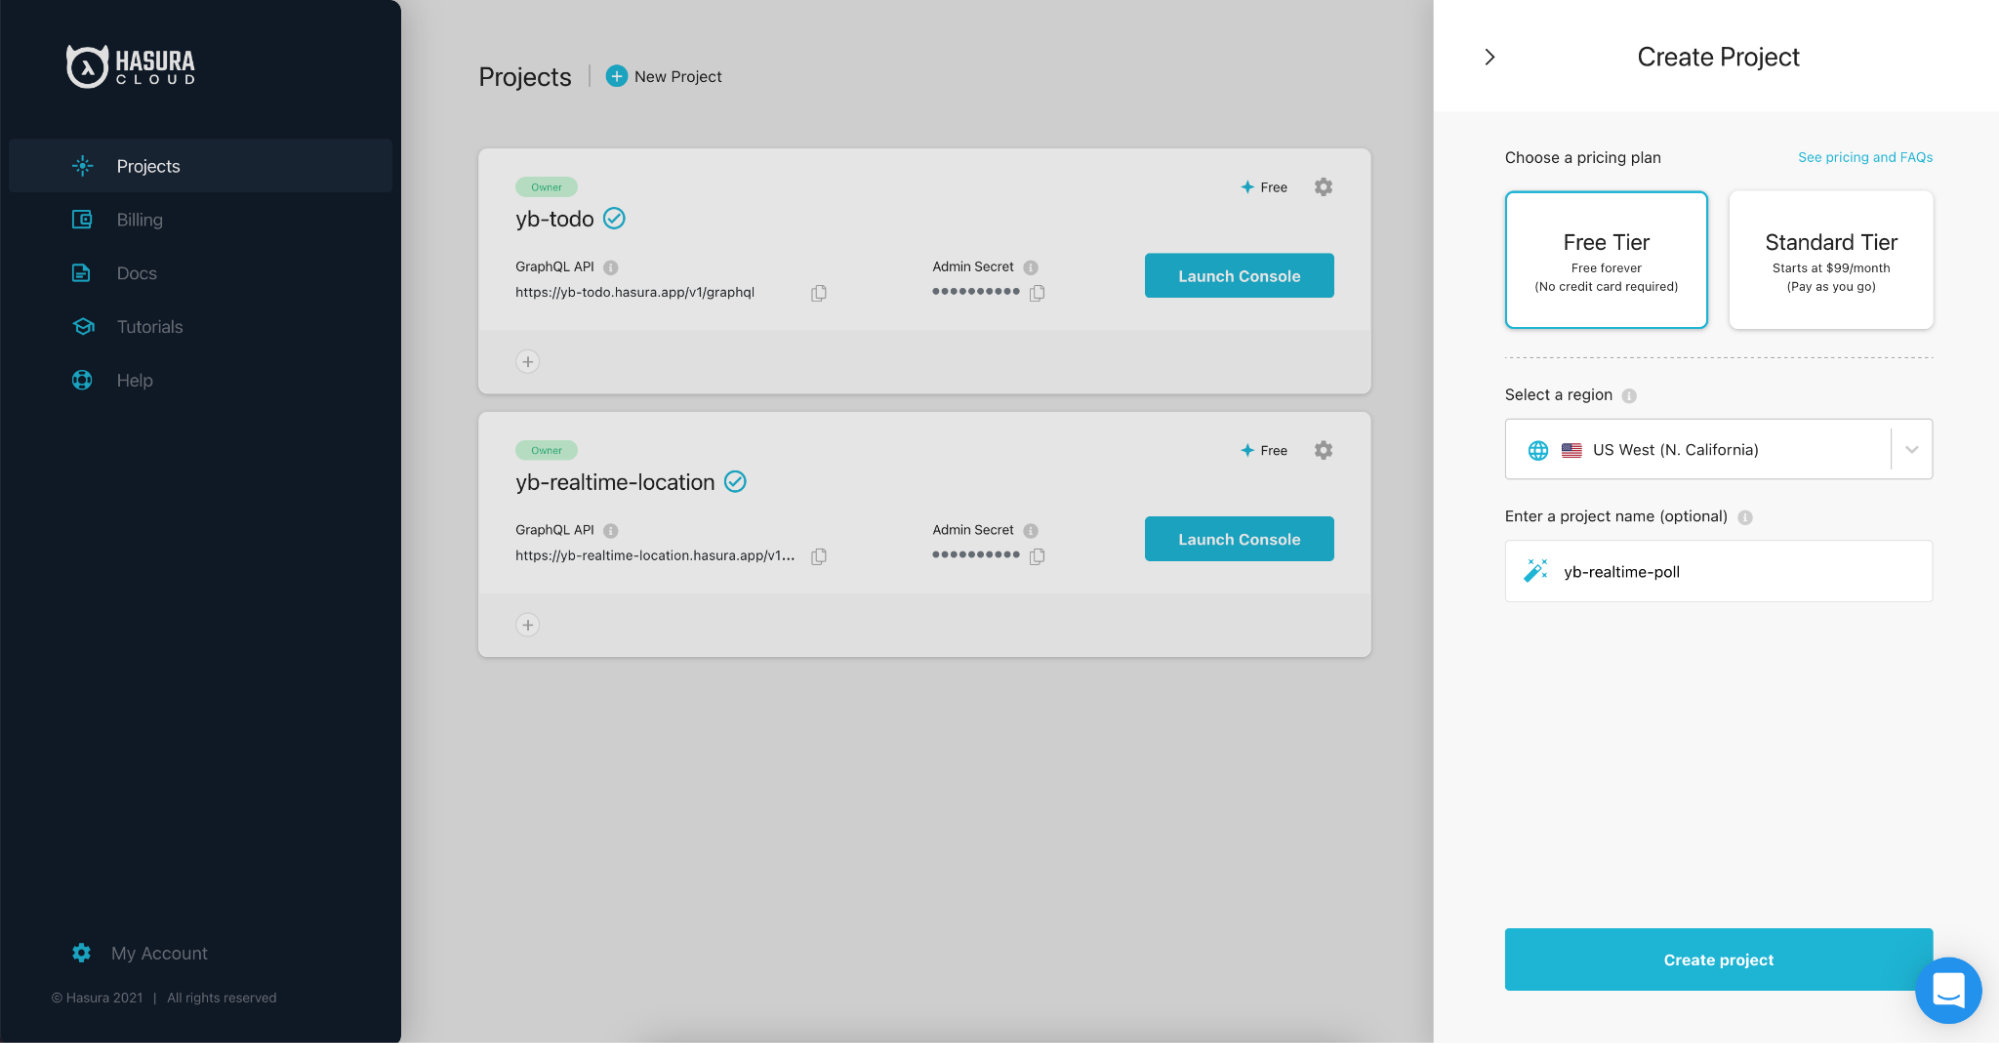
Switch back to the Hasura cloud dashboard and click on “New Project”. Select Free Tier, leave the default region, and give the project a name, e.g., “yb-realtime-poll”. Click the “Create Project” button.
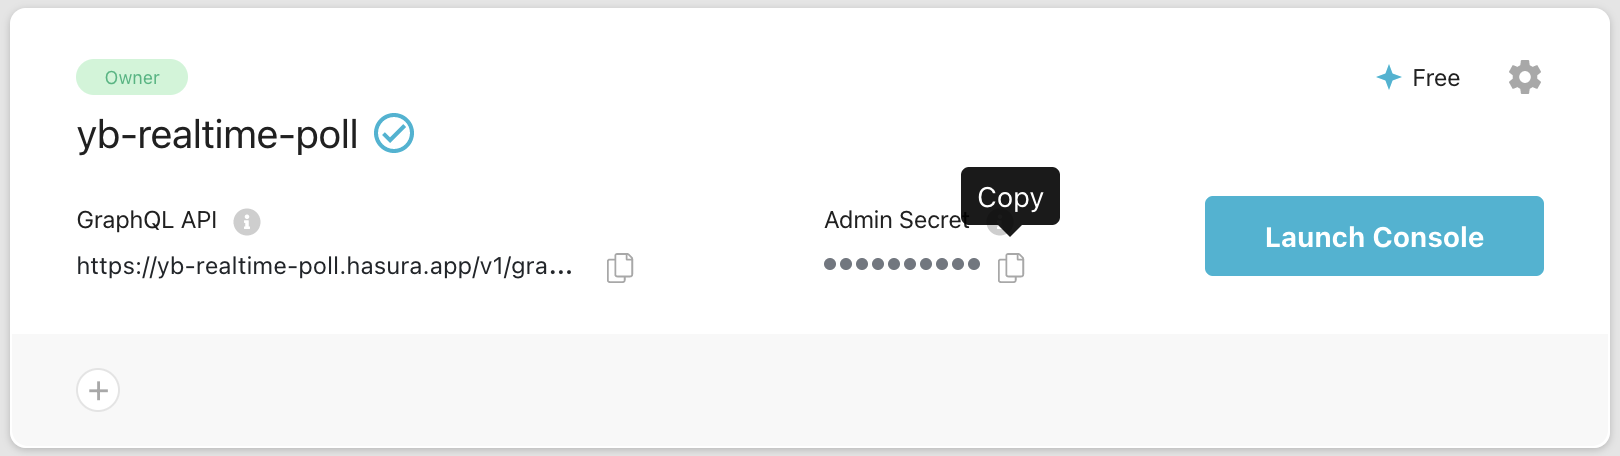
Once the project is created, copy the admin secret to a clipboard. We will use it later when we configure the project in step 5.
Click Launch Console to launch the Hasura project console. In the console, select the Data tab in the top menu to manage database connections. In this blog post, we will connect to the database we created in the first step.
To do this, select “Connect Existing Database”.
Database Display Name: yb-realtime-polldb
Data Source Driver: PostgreSQL
Connect Database Via: Database URL
Database URL: postgresql://admin:<password>@<IP address>:<port>/yugabyte
Replace the password, IP address, and port with what you noted down in step 1.
Here’s an example URL: postgresql://admin:59jh2hj@35.217.31.152:21301/yugabyte
Click Connect Database and wait for confirmation on the top right that the database has been connected.
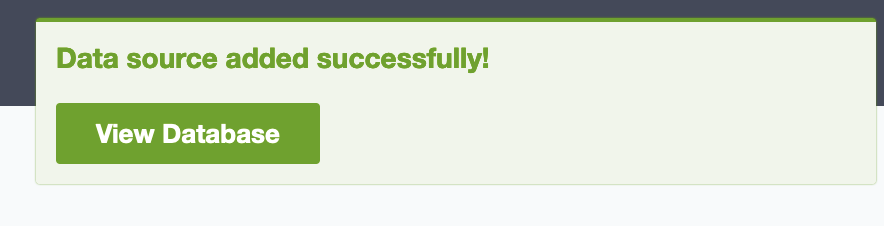
Click on View Database. The schema should be currently empty.
4. Install the Hasura console
We will apply database migrations to our Hasura project using the Hasura CLI. To do this, let us first install the Hasura command line tool by following the instructions in Hasura documentation.
In Mac/Linux, you can use the following command:
curl -L https://github.com/hasura/graphql-engine/raw/stable/cli/get.sh
| bash
On a Mac, you can use Homebrew to do this:
brew install hasura-cli
Update the CLI to the latest version by using this command:
hasura update-cli--version v2.0.0-beta.2
5. Configure the Hasura project and apply migrations
In the terminal (command line), navigate to the hasura directory within the application directory.
cd hasura
Open config.yaml and change the value of two parameters, the “endpoint” and “admin_secret”.
endpoint:  https://yb-realtime-poll.hasura.app
admin_secret: <admin secret from Hasura dashboard>
The endpoint is of the form “https://<Hasura project name>.hasura.app”. You can get the Hasura project name from the cloud console. This is the project you named in step 3. The admin_secret is the string you saved in step 3. Save the file and exit.
Next, go to the migrations directory and rename the default directory to the database display name in step three:
cd migrations
mv default yb-realtime-polldb
Return to the hasura directory and apply the migration.
cd ..
hasura migrate apply --database-name yb-realtime-polldb
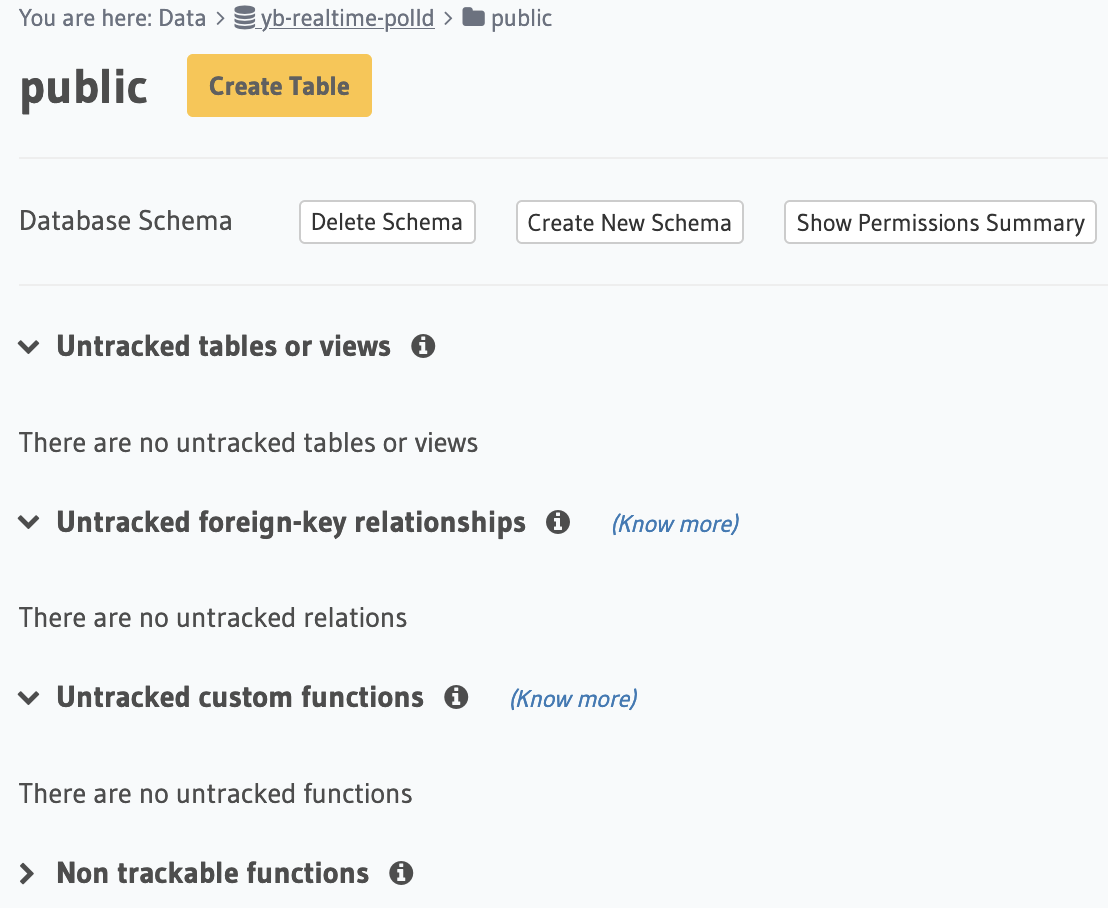
This step creates the tables and views required for the polling application in the database.
Return to the Data tab in the Hasura project console. You should see a list of untracked tables or views. Click on Track All to allow the tables and views to be exposed over the GraphQL API.
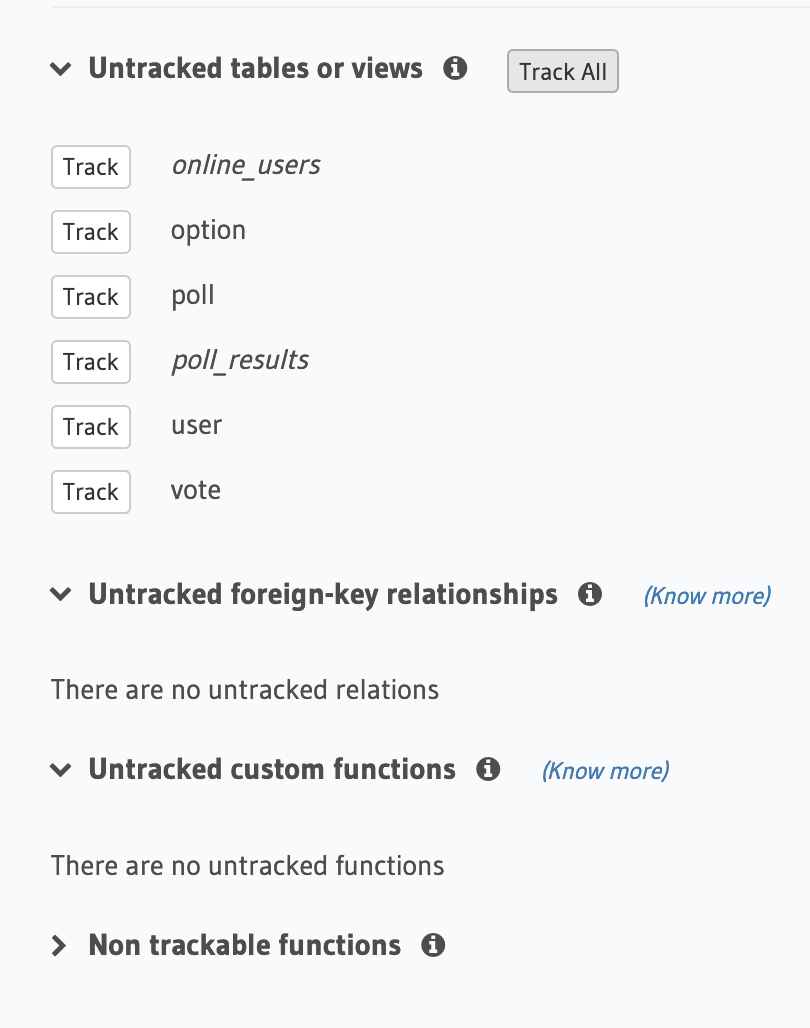
Once the console refreshes, you will see a list of untracked foreign-key relationships. Track them as well so they are exposed via the GraphQL API.

Add a new Array relationship for poll_results table called “option” by clicking on the poll_results table:
poll_results . poll_id → option . poll_id

Save the change.
6. Configure the app
Navigate to the realtime-poll/src directory and open apollo.js.
Edit the constant HASURA_GRAPHQL_ENGINE_HOSTNAME and variable hasura_secret in apollo.js file,
HASURA_GRAPHQL_ENGINE_HOSTNAME | with Hasura cloud GraphQL engine hostname,yb-realtime-poll.hasura.app |
hasura_secret | with the admin_secret string you saved instep 3 |
Save and exit the file.
7. Run the app
Run the app (go the root of repo):
npm install
npm start
Realtime-poll will start on https://localhost:3000.
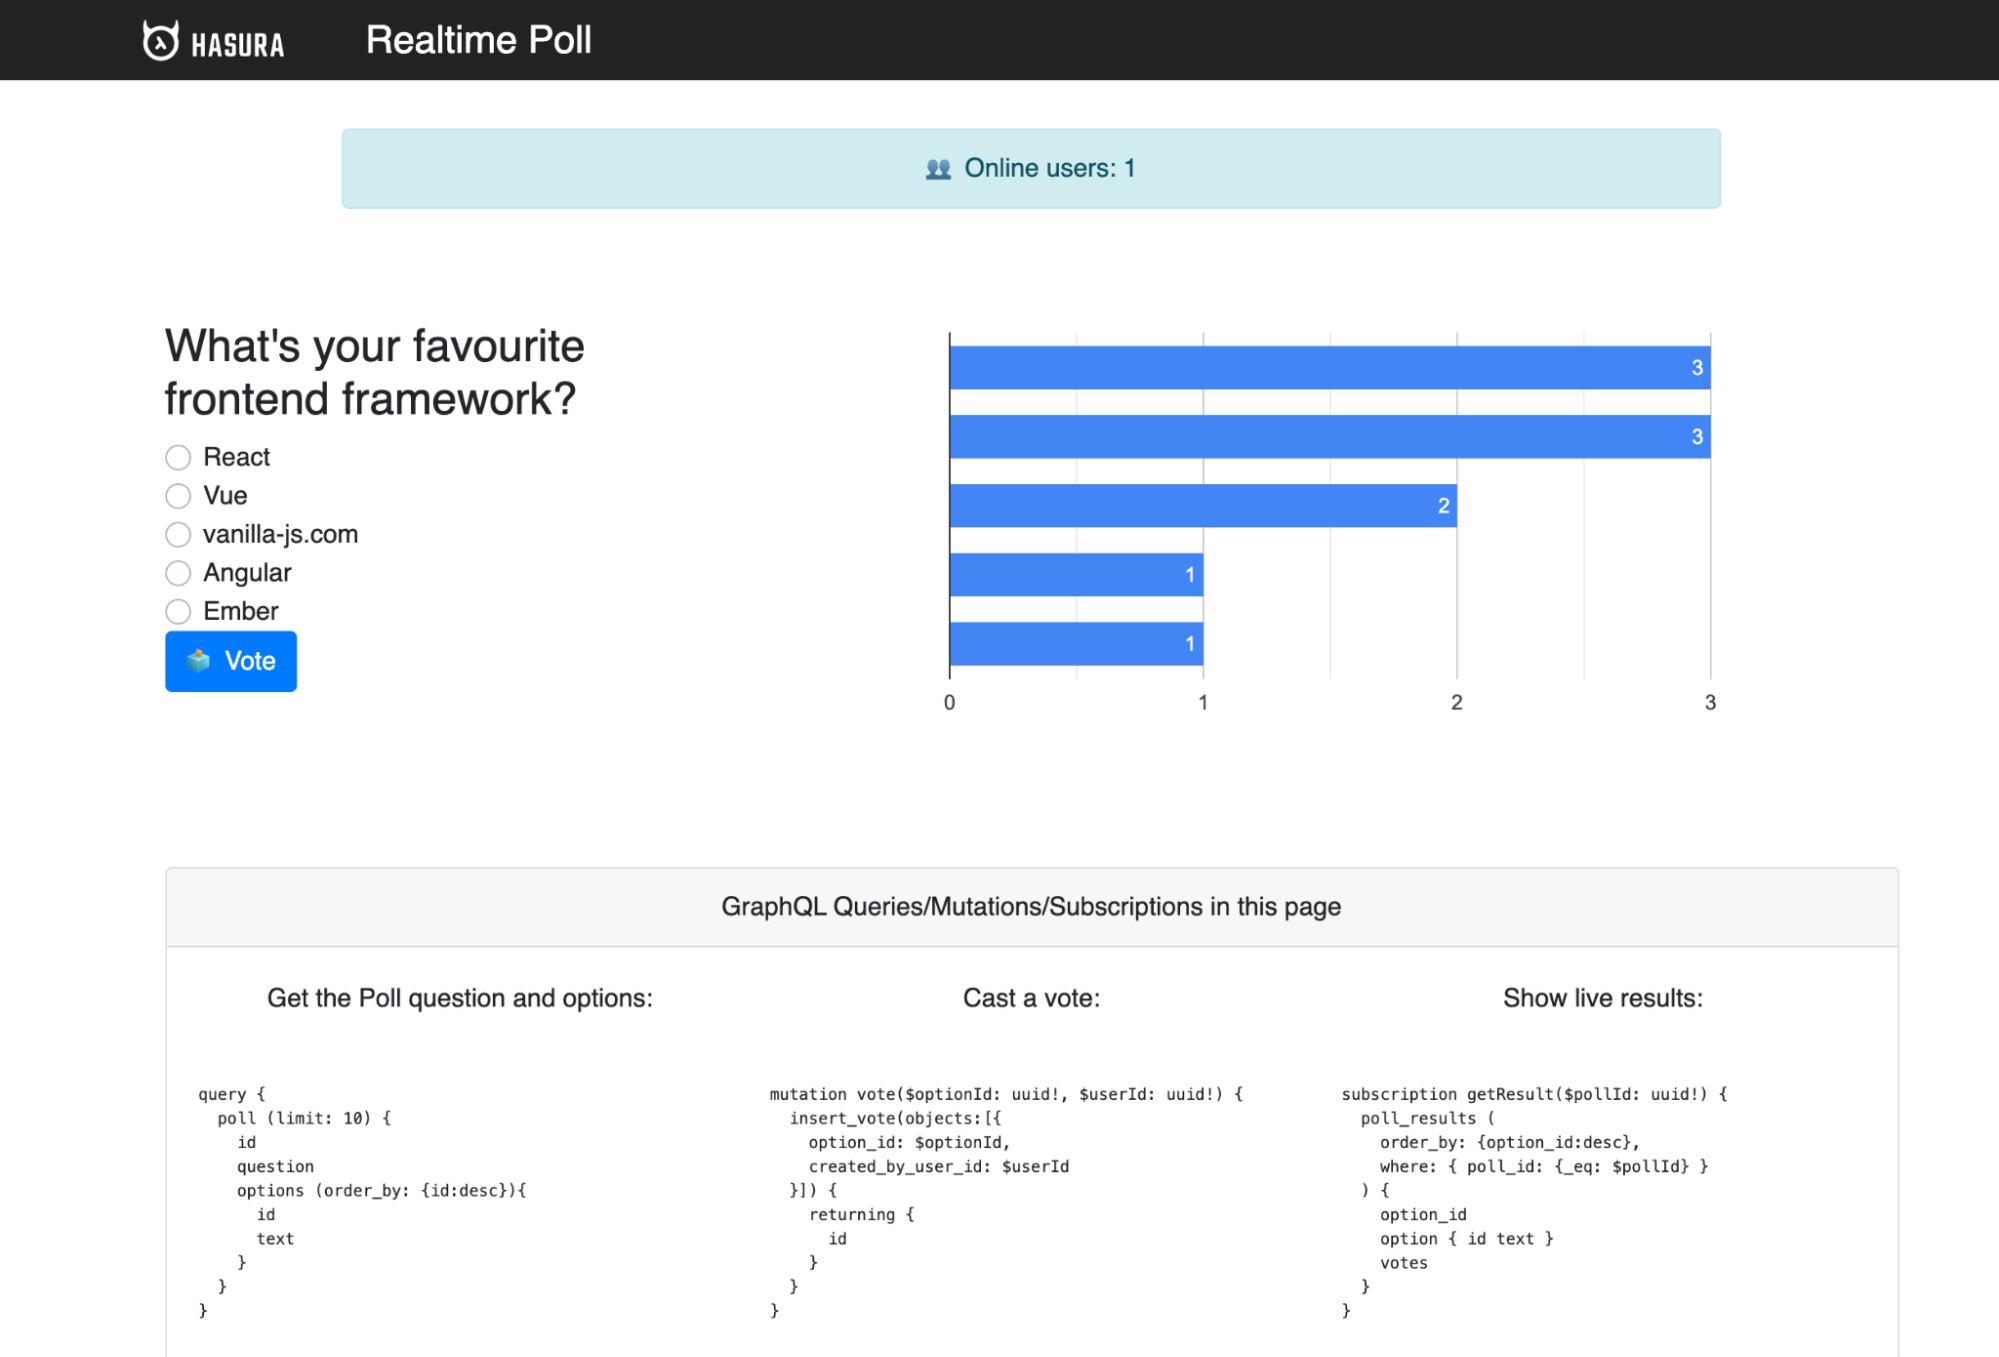
Start another tab and navigate to https://localhost:3000. Cast a vote to React and you’ll see the polls chart automatically get updated using GraphQL Subscriptions.
One can verify the data being committed to the YugabyteDB database instance, by running the following GraphQL queries from Hasura Console.
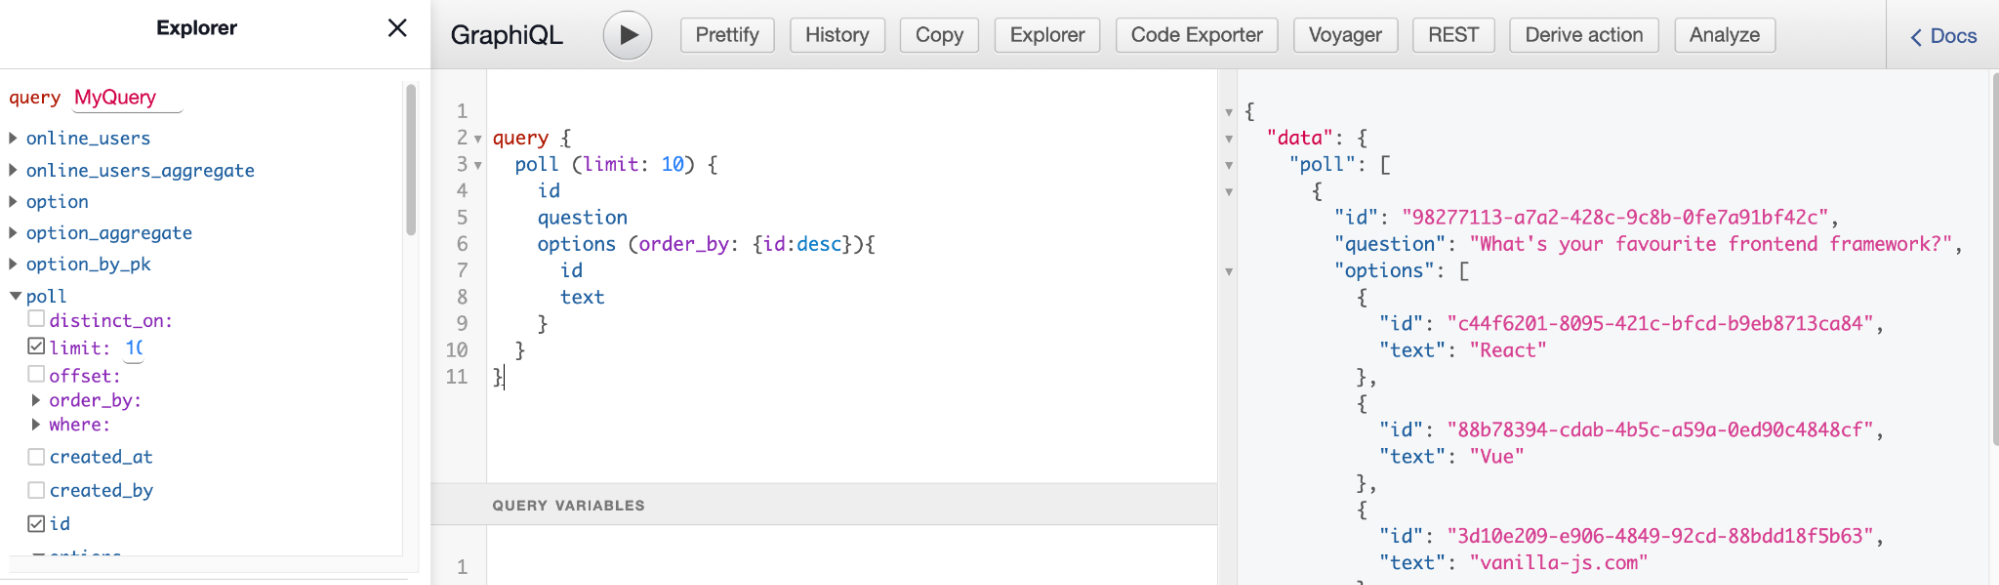
Step 1. Run the below GraphQL Query to retrieve the Poll ID
query {
  poll (limit: 10) {
    id
    question
    options (order_by: {id:desc}){
      id
      text
    }
  }
}
Make a note of the Poll ID
Step 2. Run the below subscription query using the poll id from the previous step
subscription getResult($pollId: uuid!) {
  poll_results (
    order_by: {option_id:desc},
    where: { poll_id: {_eq: $pollId} }
  ) {
    option_id
    option { id text }
    votes
  }
}

{ "pollId" : "98277113-a7a2-428c-9c8b-0fe7a91bf42c"}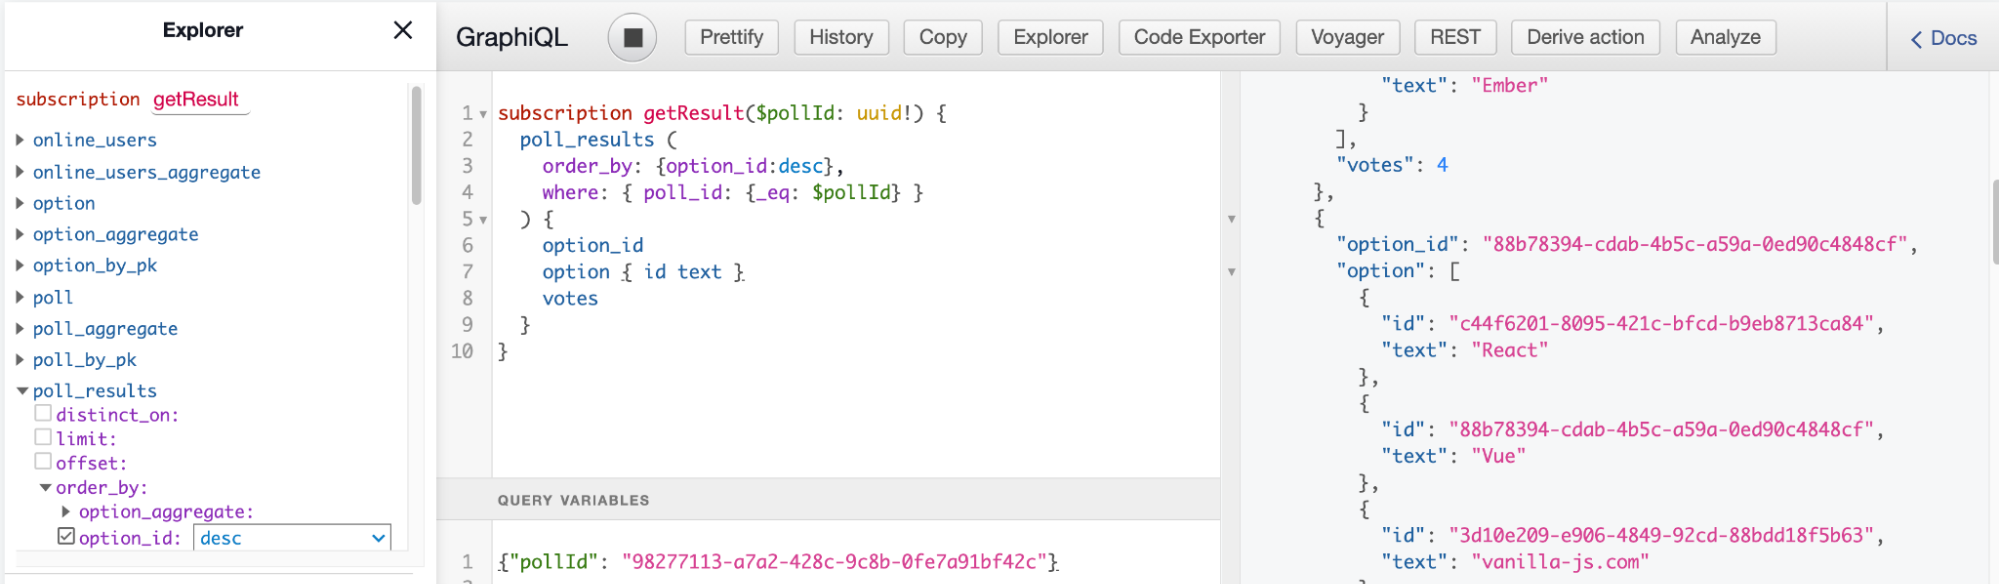
Next Steps
As always we are here to help and answer any questions you may have. Join us on our community Slack channel, and star us on GitHub.


