Policies in Azure are like Wally. They are there, but not obvious to find, hidden in the middle of many services, waiting for someone recognize their importance.
Why do we need Policies
Billing
The billing control in Azure has by itself many different reasons to enforce policies. You, with your single Azure subscription, may think it’s simple to control billing. Imagine how it is for a worldwide corporation with a single tenant and branches in all continents to control the billing of each cloud project.
Avoid Unnecessary Expenses
Auto-Turnoff
Virtual Machines have an auto-turnoff setting. Should virtual machines that are classified as not being 24/7 be using the auto-turnoff?
The company could create different subscriptions, one for the non-24/7 VMs and another for the 24/7 VMs and apply policies to ensure these configurations.
Serverless SQL
If we configure a Serverless SQL, which could turn itself off, to use Azure Defender for SQL, the requests from Azure Defender can prevent the database to ever go offline and provide no cost benefit.
The policies could ensure this is turned off for serverless SQL and keep the Azure Serverless SQL DB provisioned in safe internal virtual networks that doesn’t require Azure Defender for SQL.
BYOL
In order to better manage the licensing of the software, the policies could ensure the use of different subscriptions for services with BYOL enabled and for services without BYOL enabled. The procedure and permissions to make a deployment to each of these subscriptions could be different, exactly to ensure the correct allocation of financial resources
Dev/Test Subscription
The Dev/Test subscription is a great feature provided by Azure to save our money with our development and test environments. The policies can ensure everything related to development and test is only created in Dev/Test Subscriptions.
You can learn more about Dev/Test Subscriptions here
Keep Billing Control
In a big corporation, keep the control about who is spending money in the cloud and if the money is being worth may be difficult. That’s why Cost centres and project isolation and analysis may be a good idea.
Each Azure object allow many Tags, additional information attached to the object.
Using Tags and the policies we can ensure:
- All resources are “Tagged” for billing purposes
- All resources are allocated on the correct place according the billing tags
Security
It’s surprising how often we make implementations in the cloud we would never make in an on premise environment.
When we provision a service, such as an Azure storage account or an Azure SQL Database, most people end up leaving the service with a public internet endpoint.
Would you implement a SQL Server in your on-premise environment and leave it open to the internet? Why would you do this in the cloud?
The policies can ensure that these situations don’t happen or, if they do, they are isolated on a subscription/region intended for test purposes and never in a production environment.
Monitoring and Compliance
Almost all services on Azure implement a diagnostic feature that can enable the service to capture logging information and send to a centralized log analytics. Using policies, we can ensure these options will be correctly configured on all services.
We can also control the region of deployment of our services. In a corporation with many branches all around the world, the subscriptions can be broken down in management groups. This can be done according to the region of the branch and each branch may be restricted to implement solutions on specific locations.
Creating a Policy in JSON
The policies are created using JSON. The more we parameterize the policies, more reusable they will be.
This is an example of a policy to control the naming convention of azure resources
|
1 2 3 4 5 6 7 8 9 10 11 12 13 14 15 16 17 18 19 20 21 22 23 24 25 26 27 28 29 30 31 32 33 34 35 36 37 38 39 40 41 42 43 |
{ "parameters": { "ResourceType": { "type": "String", "metadata": { "displayName": "Resource type", "description": "Resource type to enforce naming pattern.", "strongType": "resourceTypes" } }, "NamePattern": { "type": "String", "metadata": { "displayName": "Resource Name Pattern", "description": "The pattern to be applied to the resource" } } }, "policyRule": { "if": { "allOf": [ { "field": "type", "equals": "[parameters('ResourceType')]" }, { "field": "name", "notLike": "[parameters('NamePattern')]" } ] }, "then": { "effect": "deny" } } } |
You may notice the policy JSON code has two distinct areas: Parameters and PolicyRule. We could build this policy without parameters, for sure, but in this case, it would be a specific policy for one type of object and one naming convention.
Using the policy with parameters allow us to save the policy definition and re-use it for any object type and naming convention.
Effect
Another important option to check on the JSON is the effect . Our example uses only the deny effect.
Each Policy can have multiple effects and Azure uses an order of evaluation of the effects. Some of the effects when on the beginning of the evaluation can cancel the later effects.
These are the available effects for the policies:
- Deny: Refuses the object creation if not compliant with the policy.
- Audit: Record auditing messages about the policy result
- AuditIfNotExists: After the successful creation of the resource, checks of another resource existence. If the resource doesn’t exist, it records an auditing message and mark the deployed resource as non-compliant.
- DeployIfNotExists: This effect will deploy a template in case of the objects of the template don’t exist.
- Append: Creates additional fields on the object being deployed
- Disabled: This effect disables the policy evaluation.
- Modify: The modify effect is used to change objects, adding, or modifying field values. A single modify effect can have many actions
These effects use the following evaluation order:
- Disabled
- Append and Modify
- Deny
- Audit
You can take a look on more details about the effects here
Applying the policies
We organize the cloud of a big corporation using Management Groups and Subscriptions, creating a hierarchy of management groups and subscriptions using the criteria we think it will fit better.
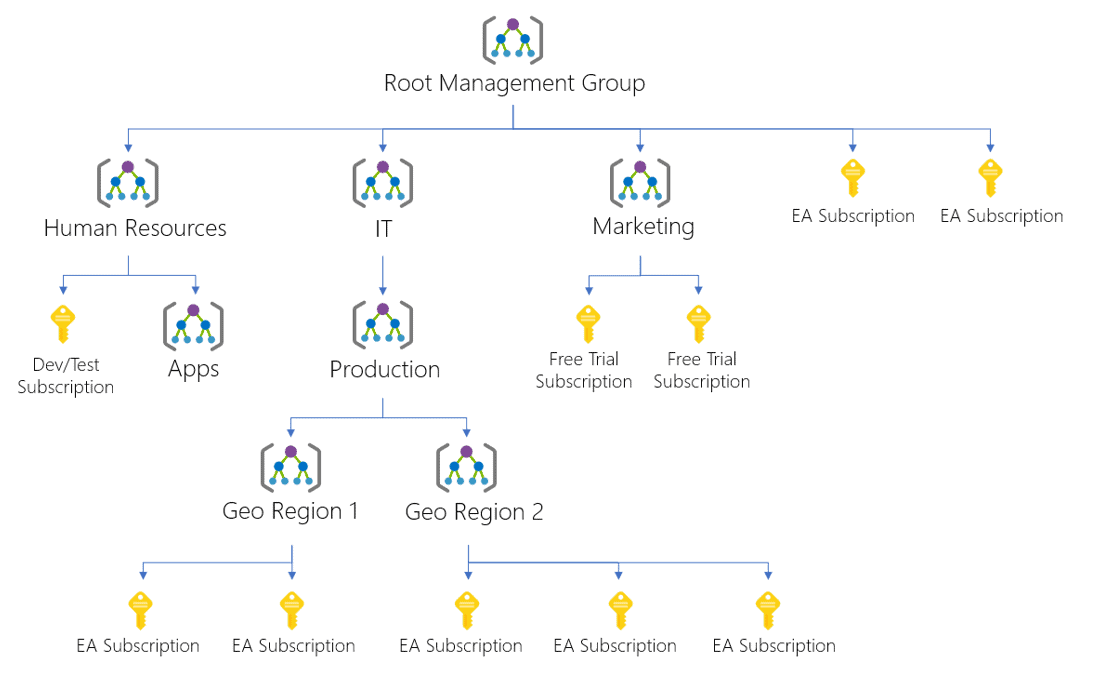
We can apply the policy on any management group, and the policy will be valid to all subscriptions and managed groups below it. Another option is to apply the policy to a subscription, in this case the policy will be valid only to that subscription.
In any of these choices, the process for the policy application is the same.
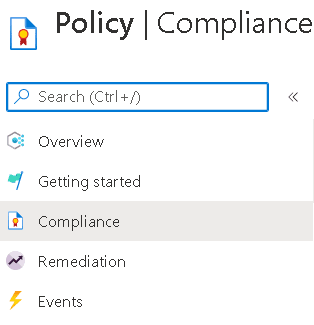
After selecting Policy option in the menu on any of these objects, on the following screen we will find the authoring menu options on the left side, like the image below.
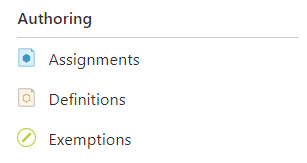
We will use these three options to create and apply the policy:
Definitions: We use this option to create the policy. Usually we store the policy on the object we first used to create its definition and it can be used on this object and below. If the object is a management group, you will be able to apply the policy on any subscription or management group below this one. However, if the object is a subscription, you will only be able to apply the policy to that subscription and resource groups under that subscription.
Assignments: These are the assignments of the policy to the current object. The object can have assignments of policies stored in itself or in any object above, but not in objects below it.
Exemptions: These are objects to define exceptions to the policies. When applying the policies to the subscription/management group we can define a set of exceptions that should not be checked by the policy.
Creating the Policy Definition
- Once you are already on the object selected for the policy (Management Group or Subscription, doesn’t matter) click on Definitions
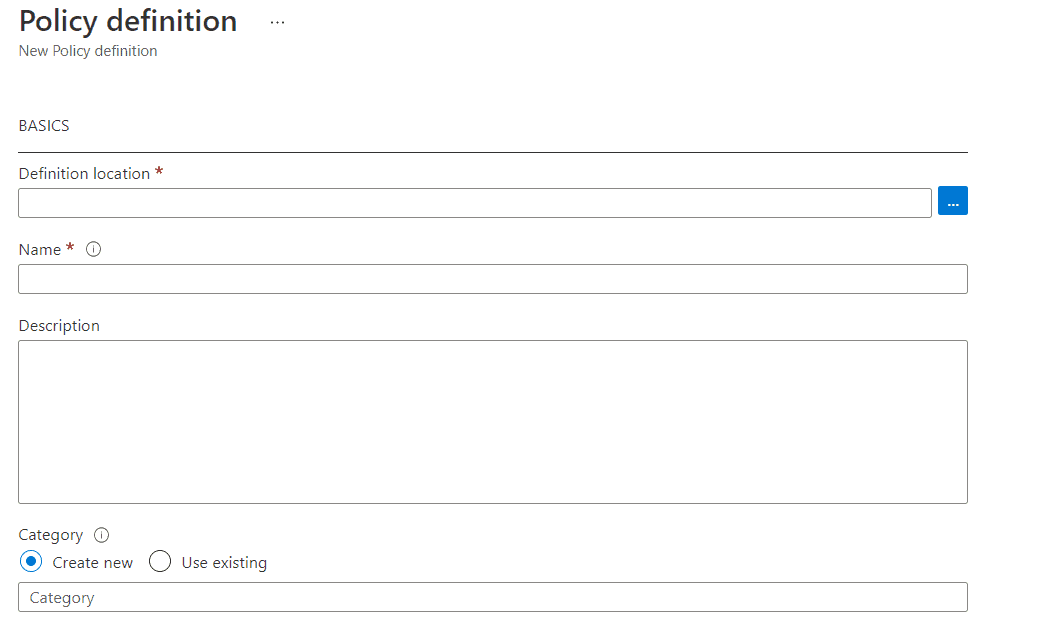
- In Definition Location, click the “…” button
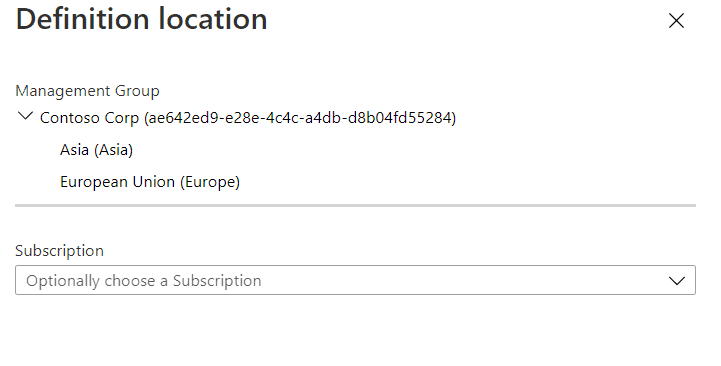
- Choose the location to store the policy. Usually, you should choose the object you are managing at the moment. Mind the subscription is optional, you can choose a management group to store your policy
- Click Select button
- In the Name textbox, type “Naming Convention”, it will be the name of our policy definition
- In the Description textbox, type a description, such as “Create a Naming convention for objects”
- On the Category radio buttons, you can choose between use an existing policy category or create a new category. Leave as Create New
- On the Category textbox, type “Naming Convention”
- On the Policy Rule textbox, past our policy JSON, as you can see above on this blog
- Click Save button
Assigning the Policy
- Under Authoring, click Assignments.
- Click the Assign Policy button
![]()
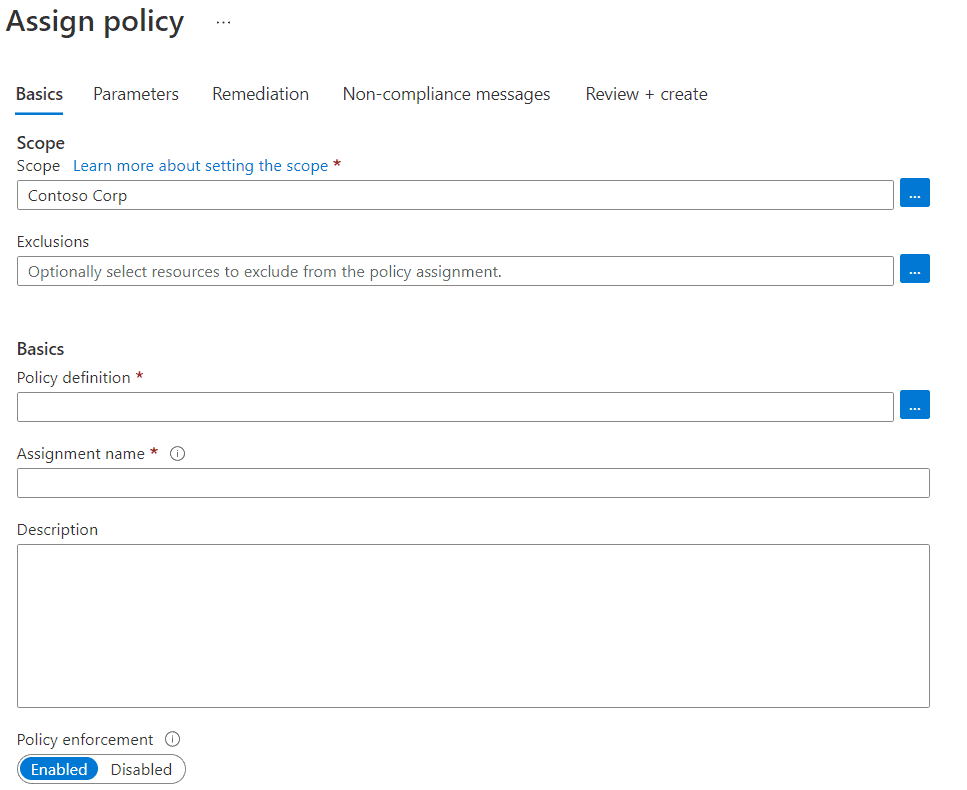
- Click the “…” button besides the Policy definition box
- Click the policy we just created

- Click the Select button
- On the box Assignment Name, type “Resource Group Name Convention”
The parameterized policy is generic and can have many applications. Each assignment will have one specific application, we will define it by setting the parameters.
- Click Next button
- The Resource Type box became a combo where we can choose what resource type we will apply this policy to. In our example, subscriptions/resourcegroups
- On the Resource Name Pattern text box, type “rg-*” as an example. We can use wildcards, creating the name pattern for resource groups.
- Click Next button
- The remediation allows us to configure the policy to execute actions when needed, but we will not use this option, so click Next button
- On the Non-Compliance Message textbox, you can customize the message for non-compliant resource groups
- Click Next button
- Click Create button

Applied Policy
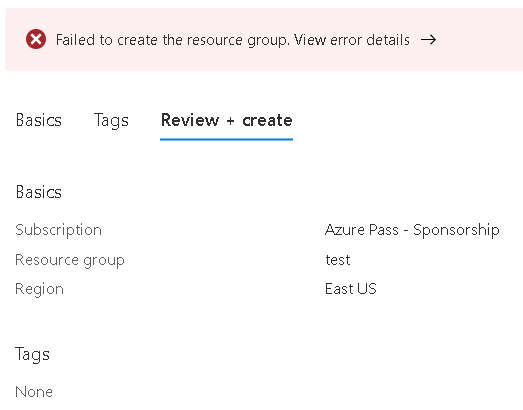
It may take 1 or 2 minutes until the created assignment makes effect. Once it does, you will not be able to create resource groups anymore unless they use the naming convention rg-*
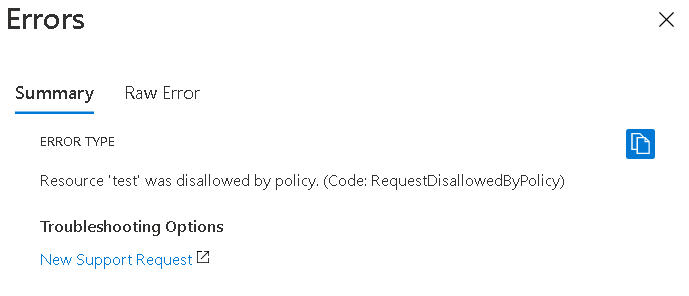
The customized error message is a bit more hidden. Once you receive the error when creating the resource group, you click the message “View error details”.
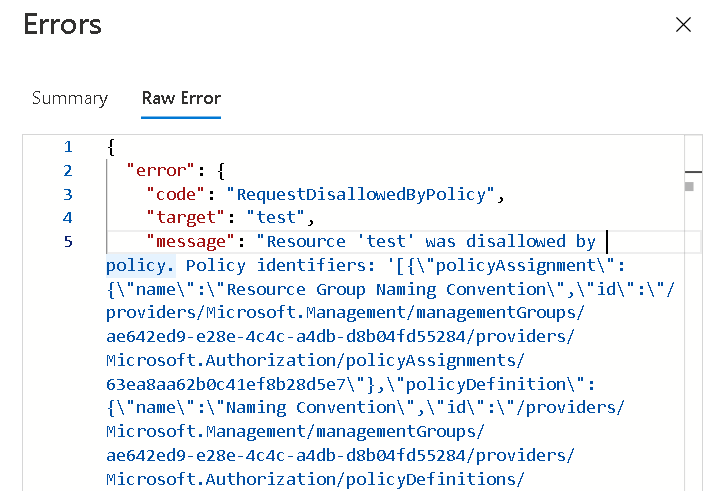
Click the Raw Error tab and you will see a JSON document. This document has the custom message you configured in the policy.
We can use the left menu to check the compliance of the policy on each object that have policy assignments.
Once you click on the Compliance option, you will see the overall compliance of all policies assigned to this object. On this example we have a single policy assigned, so the overall numbers are the same as the single policy.
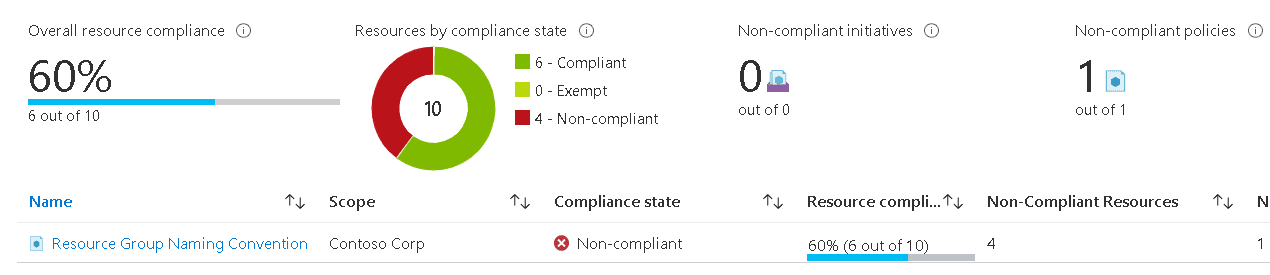
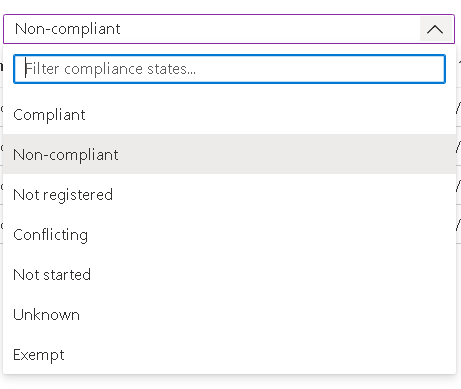
If you click on one policy you will be able to check all the objects by Policy Compliance State. For example, you can see all non-compliant objects.

This is the Policy State filter available on the 2nd dropdown:
Useful Policies
Azure has many useful pre-defined policies. For example, we mentioned on this blog how the tags on each resource can be useful. Many of these policies are planned to manage tags in different ways.
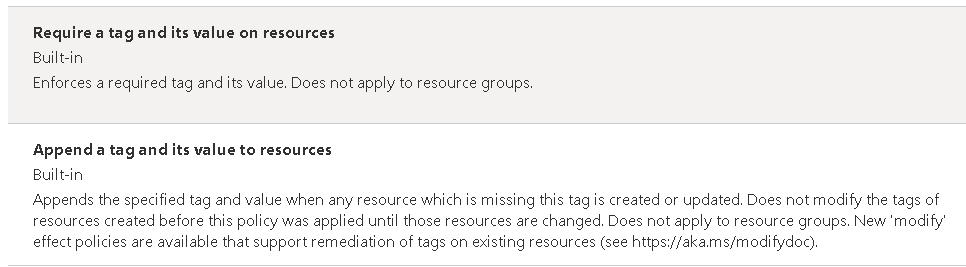
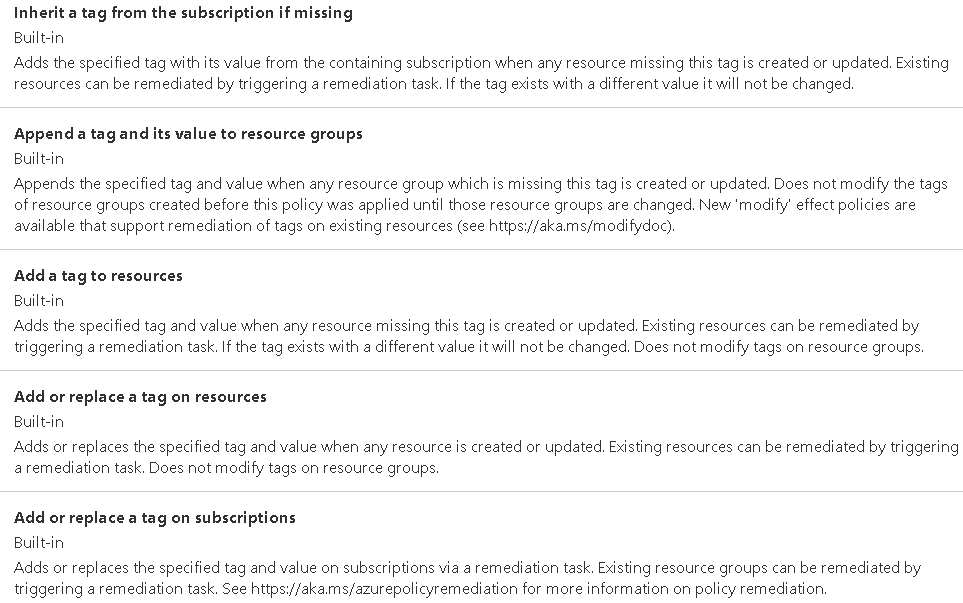
Useful policies will be subject of many other blogs because there are many of them to talk about.
Conclusion
The policies are not very well-known on azure environment, but we require them to keep our cloud environment in order.
Load comments