

When developing a service, one of the main hurdles to consider is authentication. For every action, you’ll need to both authorize the user (check they are who they say they are) and then ensure they can only do actions which they have permission to do.
Auth0, an authentication and authorization platform, simplifies this process immensely. Not only does it allow for easy integration with your own login systems, it makes integrating other login services such as Google and Twitter simple. It allows for a simple setup of permissions, roles with set permissions attached, and for these roles to be assigned to users. These users can then make use of various login systems to access the same account and thus have the same permissions associated with them.
With Spring Boot, this is extremely powerful, partially due to the strong integration of Auth0 with it. A simple redirect to an Auth0 login page will return a token which a Spring Boot server can use to verify the user and access their associated permissions.
This token can then be used to correctly generate access to other services. For example, Ably, a real-time communications solution, makes use of tokens to authenticate with an Ably App. Once a user has authenticated with Auth0 and has an Auth0 token, they can use this to request a token from a Spring Boot server to authenticate directly with Ably, with the appropriate permissions and access granted.
In this tutorial, we’ll be going through the basics of setting up an interoperating system as described above. The actual service we’ll be providing is a chat application, which will:
- Allow users to sign in using a Google account
- Signed in users will be able to publish messages to a group chat
- Non-signed in users will be able to subscribe and read messages published
- Users will be able to see who is online in the chat
- Users will, when joining, be able to load the last 20 messages of conversation they’ve missed
Getting Started
Firstly, let’s set up a basic Spring Boot application. We can use the Spring Initializr with Thymeleaf, Spring Web, OAuth2 Client, Lombok added. Thymeleaf, Spring Web, and OAuth2 Client will all make creating and serving our chat webpage trivial. Lombok will make it easier to write concise and readable classes.
Make sure that you are using Maven to initialize the project. In this tutorial, we’ll be using Java 11, but it shouldn’t impact this tutorial if you use 8 or 16 instead.
Generate the base Spring Application using the Spring Initializr and store the output in your local workspace. This application will contain the dependencies we specified, as well as a basic file called DemoApplication.java. This is the entry point to our application. If you want to try running this to make sure it works, just run ./mvnw spring-boot:run. It should successfully build and run, although as we’ve not added anything yet, it won’t do anything.
In your pom.xml, we’ll also want to add the following, which will allow a few convenient methods for rendering Thymeleaf considering the current login context:
<dependency>
<groupId>org.thymeleaf.extras</groupId>
<artifactId>thymeleaf-extras-springsecurity5</artifactId>
</dependency>
If you run ./mvnw spring-boot:run again in the base directory of your project, you should see the following in your console eventually:
INFO 585 --- [          main] o.s.b.w.embedded.tomcat.TomcatWebServer  : Tomcat started on port(s): 8080 (http) with context path ''
INFO 585 --- [          main] c.e.s.ServingWebContentApplication    : Started ServingWebContentApplication in 0.773 seconds (JVM running for 0.938)
Setting up Auth0
For Auth0, we’ll be needing to:
- Create an Auth0 account
- Set up the callback and logout URLs that Auth0 will use
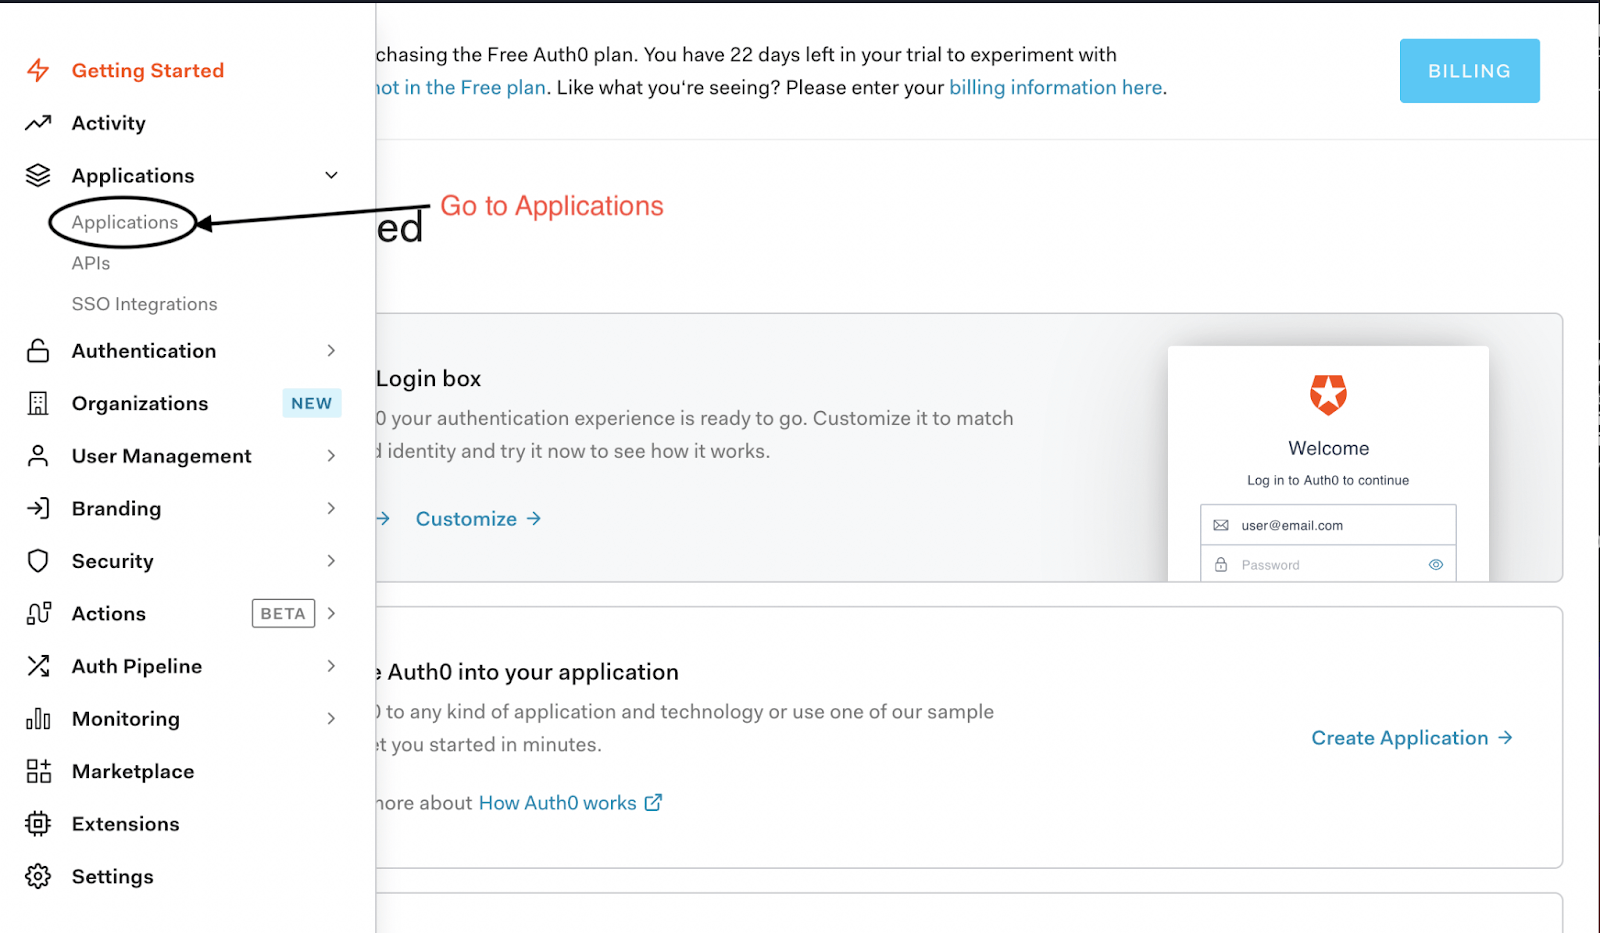
Firstly, sign up to Auth0. Go through the signup process, setting whatever tenant name and region you’d like. Once you’re signed up, go to the ‘Applications’ part of the website. You should see ‘Default App’ here, which you can use for this tutorial, or you can create a new App if you so wish.
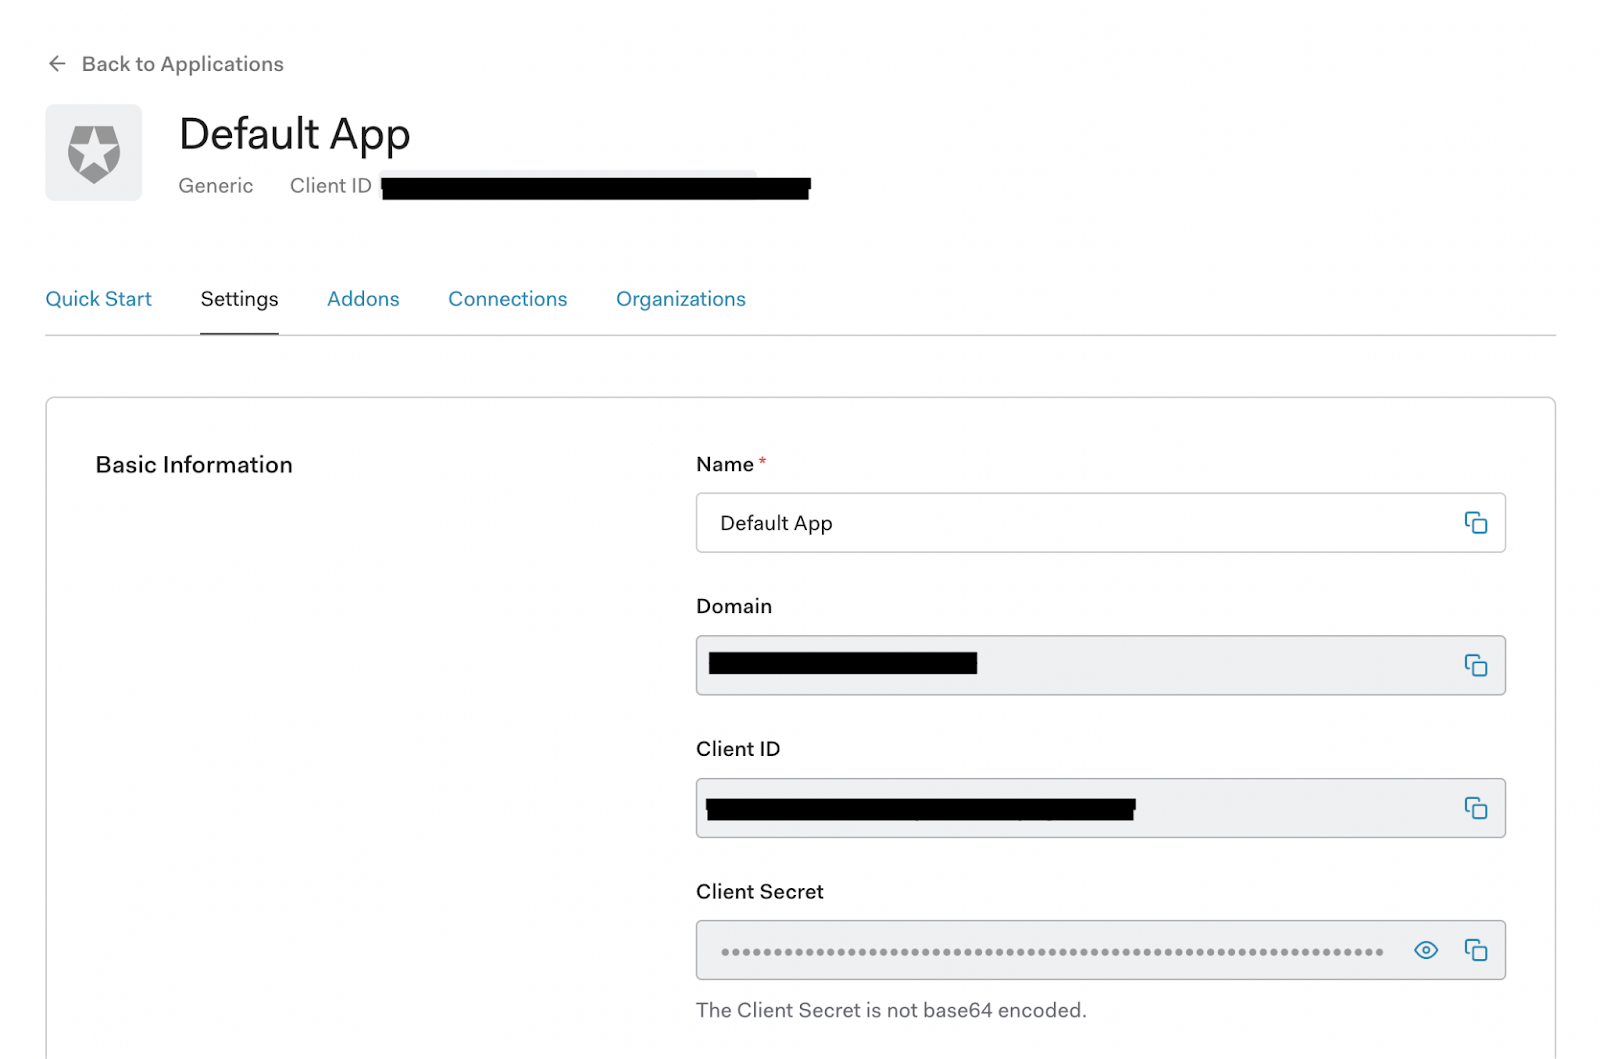
If you go to your app, you should arrive on the ‘Settings’ page for the app. From here, you should make a note of the Domain, Client ID, and Client Secret.
On this settings tab, scroll down to the section called ‘Application URIs’. In it, you should see a field for ‘Allowed Callback URLs’ and ‘Allowed Logout URLs’. For context, the flow of a webpage using Auth0 is:
- Your site links a user to your Auth0 app’s login page, where they sign in
- The Auth0 page redirects the user back to your website’s ‘callback’ page
- When the user wants to log out, they should be directed to the Auth0 app’s logout page and then redirected back to whatever page is indicated in the
returnToquery passed to the logout page.
To avoid potential misuse and abuse, you need to specify what URLs Auth0 is allowed to redirect to. In this tutorial, we’ll be hosting our website locally on port 8080, so set the Allowed Callback URLs to [http://localhost:8080/login/oauth2/code/auth0](http://localhost:8080/login/oauth2/code/auth0). When a user logs out, we’ll have the user redirected back to our main page, so set the Allowed Logout URLs to [http://localhost:8080/](http://localhost:8080/).
Setting up Our Login System
With our template Spring Boot app ready, in addition to our Auth0 app set up, let’s implement our login system. Inside of src/main/resources/application.yml, add the following:
spring:
  security:
    oauth2:
      client:
        registration:
          auth0:
            client-id: YOUR_AUTH0_CLIENT_ID
            client-secret: YOUR_AUTH0_CLIENT_SECRET
            scope:
              - openid
              - profile
              - email
        provider:
          auth0:
            issuer-uri: https://YOUR_AUTH0_DOMAIN_NAME/
Make sure to replace the client-id, client-secret, and issuer-uri with your Auth0 app’s values. For the issuer-uri, make sure you include the https at the start and a trailing slash at the end. For example, if your domain name were myawesomespringauth0app.eu.auth0.com, you should use https://myawesomespringauth0app.eu.auth0.com/.
Finally, let’s set up our security using these details. To keep things simple, we’ll be keeping our Java files within the directory src/main/java/[your project group]/[your project artifact]. Create a file called SecurityConfig.java there, and add the following inside:
import lombok.RequiredArgsConstructor;
import org.springframework.context.annotation.Configuration;
import org.springframework.security.config.annotation.web.builders.HttpSecurity;
import org.springframework.security.config.annotation.web.configuration.WebSecurityConfigurerAdapter;
import org.springframework.security.web.authentication.logout.LogoutHandler;
import org.springframework.security.web.util.matcher.AntPathRequestMatcher;

@Configuration
@RequiredArgsConstructor
public class SecurityConfig extends WebSecurityConfigurerAdapter {
    private final LogoutHandler logoutHandler;

    @Override
    protected void configure(HttpSecurity http) throws Exception {
        http
            .oauth2Login()
            .and().logout()
            .logoutRequestMatcher(new AntPathRequestMatcher("/logout"))
            .addLogoutHandler(logoutHandler);
    }
}
Here we’ve overridden WebSecurityConfigurerAdapter, stating that the site should use our oauth2 details, which we’ve now defined in our application.yml. In addition, we’ve specified to use a logout handler, which we’ll need to adjust to working properly with Auth0.
Create a new file called LogoutHandler.java, and add the following:
import lombok.RequiredArgsConstructor;
import org.springframework.security.core.Authentication;
import org.springframework.security.oauth2.client.registration.ClientRegistration;
import org.springframework.security.oauth2.client.registration.ClientRegistrationRepository;
import org.springframework.security.web.authentication.logout.SecurityContextLogoutHandler;
import org.springframework.stereotype.Controller;
import org.springframework.web.util.UriComponentsBuilder;
import javax.servlet.http.HttpServletRequest;
import javax.servlet.http.HttpServletResponse;
import java.io.IOException;

@Controller
@RequiredArgsConstructor
public class LogoutHandler extends SecurityContextLogoutHandler {

    private final ClientRegistrationRepository clientRegistrationRepository;

    @Override
    public void logout(HttpServletRequest httpServletRequest, HttpServletResponse httpServletResponse,
                    Authentication authentication) {

        super.logout(httpServletRequest, httpServletResponse, authentication);

        String issuer = (String) getClientRegistration().getProviderDetails().getConfigurationMetadata().get("issuer");
        String clientId = getClientRegistration().getClientId();

        String logoutUrl = UriComponentsBuilder
                .fromHttpUrl(issuer + "v2/logout?client_id={clientId})
                .encode()
                .buildAndExpand(clientId)
                .toUriString();

        try {
            httpServletResponse.sendRedirect(logoutUrl);
        } catch (IOException ioe) {
            // Handle or log error redirecting to logout URL
        }
    }

    private ClientRegistration getClientRegistration() {
        return this.clientRegistrationRepository.findByRegistrationId("auth0");
    }
}
All we’re doing here is tacking on a bit to the end of the default logout process, where we call the Auth0 endpoint with the clientID to be logged out. This is important to do as otherwise; even if the user is logged out of the Spring Boot system, they’ll remain authenticated with Auth0, meaning they’ll be able to log right back into the Spring Boot system without entering their login credentials.
Generating out Chat Page
Now we have our basic Spring Boot app ready along with our Auth0 app, let’s create our web page, which will contain our chat app.
Inside of our resources folder, create a folder called templates then in that add index.html. In this, add:
<!DOCTYPE HTML>
<html xmlns:th="http://www.thymeleaf.org">
<head>
    <!-- Ably script -->
    <script src="https://cdn.ably.io/lib/ably.min-1.js"></script>
    <link rel="stylesheet" type="text/css" href="index.css" >
</head>
<body>
<!--The chat app container-->
<div class="chat-container">
    <div class="topnav">
        <div sec:authorize="!isAuthenticated()">
            <a th:href="@{/oauth2/authorization/auth0}">Log In</a>
        </div>
        <div sec:authorize="isAuthenticated()">
            <a th:href="@{/logout}">Log Out</a>
        </div>
    </div>
    <div class="chat">
        <!--Message container - the chat messages will appear here-->
        <div class="data-container">
            <div id="msg-container" class="message-container">
                <h3>Chat</h3>
                <ul class="row" id="channel-status"></ul>
            </div>
            <div class="presence-container">
                <h3>Active users</h3>
                <ul class="row" id="presence-members"></ul>
            </div>
        </div>

        <!--Input container for the input field and send button-->
        <div class="input-container">
            <div class="row text-input-container">
                <input type="text" class="text-input" id="input-field"/>
                <input id="publish" class="input-button" type="submit" value="Send">
            </div>
        </div>
    </div>
</div>
</body>

<!--We'll be creating chat.js in the resources directory later in this tutorial-->
<script src="chat.js"></script>
</html>
There are a few things to note in this HTML:
- <script src="https://cdn.ably.io/lib/ably.min-1.js"></script>: This is including the Ably Client Library, which is what we’ll be using to do all of our realtime chat, activity checks, and more.
- <div sec:authorize="!isAuthenticated()">: This is functionality provided by the Thymeleaf Spring Security dependency. It allows for us to only render the div depending on if we’re authenticated or not.
Other than that, all we’re doing is creating a few elements to allow for login, logout, as well as publishing and viewing of messages once we implement that.
Next, within the resources folder, add a new folder called static, then add a file called index.css. Add the following CSS to the file for our HTML to use:
* {
    box-sizing: border-box;
    font-family: 'Roboto', sans-serif;
}
body {
    background: #f2f2f2;
}
.chat-container {
    background-color: #FFFFFF;
    color: #404040;
    width: 505px;
    margin: 40px auto;
    border: 1px solid #e1e1e8;
    border-radius: 5px;
}
.input-container {
    background-color: #ED760A;
    padding: 20px;
    border-radius: 0 0 5px 5px;
}
.text-input-container {
    background-color: #f2f2f2;
    border-radius: 20px;
    width: 100%;
}
.text-input {
    background-color: #f2f2f2;
    width: 80%;
    height: 32px;
    border: 0;
    border-radius: 20px;
    outline: none;
    padding: 0 20px;
    font-size: 14px;
}
.input-button {
    width: 19%;
    border-radius: 20px;
    height: 32px;
    outline: none;
    cursor: pointer;
}

.data-container {
    display: flex;
}

.message-container {
    height: 300px;
    width: 60%;
    padding: 10px;
    overflow: scroll;
    list-style-type: none;
}
.message-time {
    float: right;
    margin-right: 40px;
}
.message {
    margin-bottom: 10px;
    display: flex;
    justify-content: space-between;
}
.message-info {
    width: 65%;
 }
.message-name {
    margin-top: 0;
    margin-bottom: 5px;
}
.message-text {
    margin-top: 8px;
}
.presence-container {
    background-color: #f2f2f2;
    padding: 10px;
    height: 300px;
    width: 40%;
    overflow: scroll;
    list-style-type: none;
}

.presence-container  ul {
  list-style: none; /* Remove default bullets */
}

.presence-container li::before {
  content: "\2022";
  color: green;
  scale: 4;
  display: inline-block;
  margin-right: 10px;
  padding-top: 3px;
}

.row {
  padding: 0;
}

.topnav {
  overflow: hidden;
  background-color: #ED760A;
}

.topnav a {
  float: left;
  display: block;
  color: black;
  text-align: center;
  padding: 14px 16px;
  text-decoration: none;
  font-size: 17px;
}

/* Navbar links on mouse-over */
.topnav a:hover {
  background-color: #ddd;
  color: black;
}

/* Active/current link */
.topnav a.active {
  background-color: #333333;
  color: white;
}

/* Style the input container */
.topnav .login-container {
  float: right;
}

/* Style the input field inside the navbar */
.topnav input[type=text] {
  padding: 6px;
  margin-top: 8px;
  font-size: 17px;
  border: none;
  width: 150px; /* adjust as needed (as long as it doesn't break the topnav) */
}

/* Style the button inside the input container */
.topnav .login-container button {
  float: right;
  padding: 6px 10px;
  margin-top: 8px;
  margin-right: 16px;
  background-color: #555;
  color: white;
  font-size: 17px;
  border: none;
  cursor: pointer;
}

.topnav .login-container button:hover {
  background: #ccc;
}
With that added, we now need to allow for our Spring Boot server to serve this page to our clients. Create a file called ChatController.java in the same folder as DemoApplication.java. Inside it, place the following:
import org.springframework.stereotype.Controller;
import org.springframework.ui.Model;
import org.springframework.web.bind.annotation.GetMapping;

@Controller
public class ChatController {
    @GetMapping("/")
    public String chat(Model model) {
        return "index";
    }
}
All this is doing is stating we should return the file index from inside our resources/templates folder.
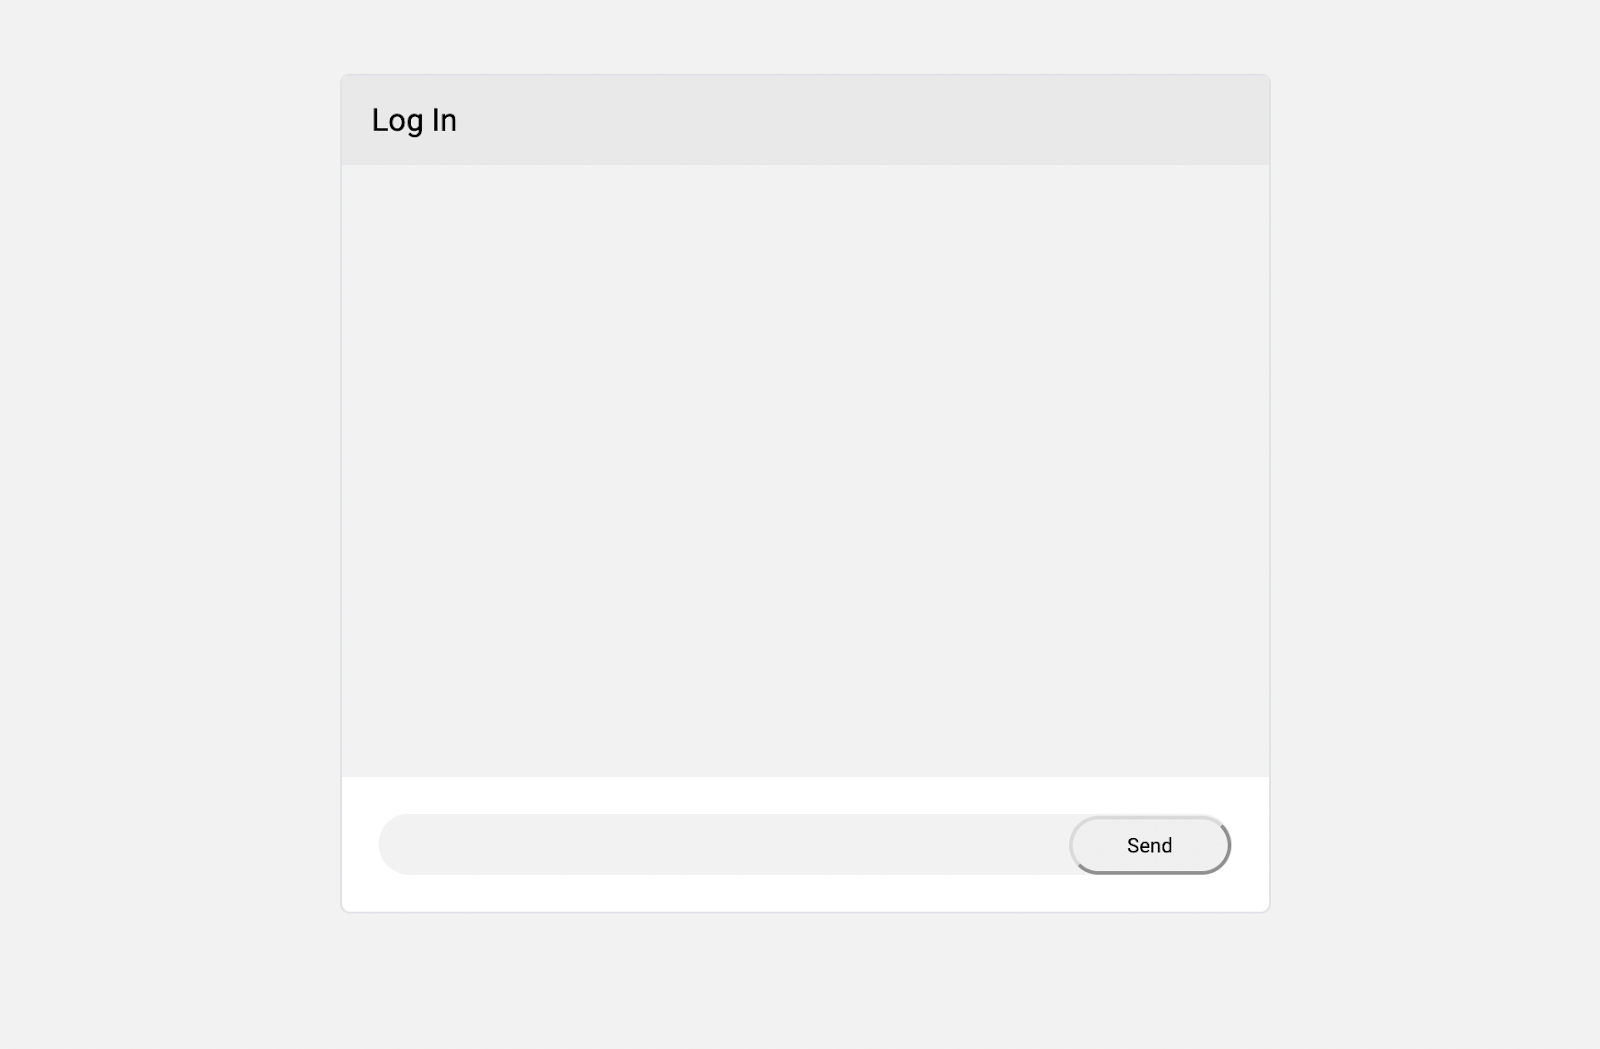
This is a good point to do a quick test to make sure everything’s working as expected. Run ./mvnw spring-boot:run in the base of our project, and try to load localhost:8080 from a browser. If everything’s working, you should see our basic chat page, and the login/logout buttons should correctly direct you to Auth0’s login and back again.
Adding Ably for Realtime Chat
With the above added, we have a login and our web page ready. However, we still need to implement the actual real-time communications our application needs! With Ably, you can easily implement dependable WebSockets-based pub/sub to your Spring Boot apps.
To start, we’ll be needing to:
- Implement a basic messaging system using Ably. This will use Ably’s basic Pub/Sub functionality
- We will want to also retrieve some past messages when a client first connects to the chat. We’ll use Ably’s History functionality to retrieve it, specifically rewind which allows us to seamlessly access history and then subscribe to new updates
- Subscribe to who is currently active in the chat. This will be using Ably’s Presence functionality
- Add a check for if a user is authenticated or not, and only provide publishing permissions if they are. This will be using Ably Tokens, which allow precise control over who has access to what and with what action
Within your resources/static folder, create a file called chat.js, and add the following:
// Connect to Ably, getting an Ably Token from our Spring Boot server
const ably = new Ably.Realtime({
    authUrl: '/ably-token'
});

// Instantiate an object for the 'chat' channel
const channel = ably.channels.get('[?rewind]chat');

// Subscribe for messages sent to the channel
channel.subscribe(function(message) {
    show(message.data, message.timestamp, message.clientId);
});

// Enter the channel's presence set using our clientID
channel.presence.enter();

// Update our list of clients whenever the presence set changes
channel.presence.subscribe(function(presenceMsg) {
    channel.presence.get(function(err, members) {
        if(err) { return console.log("Error fetching presence data: " + err); }
        document.getElementById('presence-members').innerHTML = members.map(function(member) {
            return '<li>' + member.clientId + '</li>';
        }).join("");
    });
});

const sendButton =  document.getElementById("publish");
const inputField = document.getElementById("input-field");

//Add an event listener to check when the send button is clicked
sendButton.addEventListener('click', function() {
    const input = inputField.value;
    inputField.value = "";
    let date = new Date();
    let timestamp = date.getTime();

    // Publish the message to the Ably Channel
    channel.publish('message', input);
  });

function show(text, timestamp, currentUser) {
    const time = getTime(timestamp);
    const messageItem = `<li class="message ${currentUser === ably.auth.clientId ? "sent-message": ""}">
        <div class="message-info">
            <h5 class="message-name">${time} - ${currentUser}</h5>
            <p class="message-text">${text}</p>
        </div>
    </li>`
    document.getElementById("channel-status").innerHTML = document.getElementById("channel-status").innerHTML + messageItem;
    document.getElementById("msg-container").scrollTop = document.getElementById("msg-container").scrollHeight;
}

function getTime(unix_timestamp) {
    var date = new Date(unix_timestamp);
    var hours = date.getHours();
    var minutes = "0" + date.getMinutes();
    var seconds = "0" + date.getSeconds();
    var formattedTime = hours + ':' + minutes.substr(-2) + ':' + seconds.substr(-2);
    return formattedTime;
}
The Javascript is effectively doing the following:
- Connecting to Ably using a token which we will be providing from our server
- Subscribing to messages from the Ably Channel, which it will render in our chatbox
- Subscribing to the presence of a channel, which we display in our activity box
- Publishing messages to our Ably Channel whenever the user submits them
Notably, when subscribing to messages, we include [?rewind=20] at the start of the channel name. This will seamlessly fetch the history of the channel, replay through it to the subscriber, and then continue listening for new messages.
For this to work, however, we’ll need to provide a token from our server. Add the following dependencies to your pom.xml so that we can start adding Ably to the server:
<dependency>
<groupId>io.ably</groupId>
<artifactId>ably-java</artifactId>
<version>1.2.3</version>
</dependency>
<dependency>
<groupId>com.google.code.gson</groupId>
<artifactId>gson</artifactId>
<version>2.8.6</version>
</dependency>
Let’s create a new file called AblyController.java, which will handle generating Ably Tokens for our clients:
import io.ably.lib.rest.AblyRest;
import io.ably.lib.rest.Auth;
import io.ably.lib.types.AblyException;
import io.ably.lib.types.Capability;
import org.springframework.beans.factory.annotation.Value;
import org.springframework.security.core.Authentication;
import org.springframework.security.oauth2.client.authentication.OAuth2AuthenticationToken;
import org.springframework.security.oauth2.core.user.OAuth2User;
import org.springframework.web.bind.annotation.RequestMapping;
import org.springframework.web.bind.annotation.RestController;
import javax.servlet.http.HttpServletResponse;
import java.util.HashMap;
import java.util.Map;

@RestController
public class AblyController
{
   private final AblyRest ablyRest;

   public AblyController(@Value("${ablyApiKey}") String apiKey) throws AblyException {
       ablyRest = new AblyRest(apiKey);
   }

   @RequestMapping("/ably-token")
   public String auth(final Authentication authentication, HttpServletResponse response) throws AblyException
   {
       Map<String,Object> attributes = new HashMap<String, Object>();
       if (authentication != null) {
           OAuth2AuthenticationToken token = (OAuth2AuthenticationToken) authentication;
           OAuth2User oAuth2User = token.getPrincipal();
           attributes = oAuth2User.getAttributes();
       }

       Auth.TokenParams tokenParams = getTokenParams(attributes);
       return createTokenRequest(tokenParams, response);
   }

   public Auth.TokenParams getTokenParams(Map<String, Object> attributes) throws AblyException
   {
       String username = "Anonymous";
       String capability = "{ '*': ['subscribe'] }";
       if (attributes.containsKey("name")) {
           username = (String) attributes.get("name");
         capability = "{ '*': ['subscribe', 'publish', 'presence'] }";
       }

       Auth.TokenParams tokenParams = new Auth.TokenParams();
       tokenParams.capability = Capability.c14n(capability);
       tokenParams.clientId = username;
       return tokenParams;
   }

   public String createTokenRequest(Auth.TokenParams tokenParams, HttpServletResponse response) {
       Auth.TokenRequest tokenRequest;
       try {
           tokenRequest = ablyRest.auth.createTokenRequest(tokenParams, null);
           response.setHeader("Content-Type", "application/json");
           return tokenRequest.asJson();
       } catch (AblyException e) {
           response.setStatus(500);
           return "Error requesting token: " + e.getMessage();
       }
   }
}
Here, we’re checking if the client has authenticated. If they aren’t authenticated, we only allow them to subscribe to messages and presence messages. If they are authenticated, we assign them their name, as well as providing them permission to publish to channels and enter presence.
You should also notice that we’re using ablyApiKey to connect to Ably from this Controller. To get an Ably API key, you’ll need to sign up for a free Ably Account. You can then copy your API key from the Default App’s dashboard. Make sure you’re using an API key which has permission to publish, subscribe, and use presence.
To make the API key available to your Spring Boot application, add the following to your application.yml:
ablyApiKey=INSERT_YOUR_API_KEY_HEREAt this stage, everything should be fully functional. Run ./mvnw spring-boot:run, and load up localhost:8080. You should find that when logged out, you can see who’s present and what messages people publish, but not be able to publish messages from the client. Once logged in, publishing should work, and you should appear present in the right-hand box.

Conclusion
With all this done, we now have our chat app! By incorporating Auth0, Ably, and Spring Boot, it’s incredibly easy to get started, implementing Authentication, pub/sub, presence checks, history, and serving it all from our Spring Boot server.
Ably Realtime is a Pub/Sub platform engineered around Four Pillars of Dependability; this ensures ordering or messages, as well as guarantees on message delivery, ensuring that our clients don’t miss messages or receive them in the wrong order. Often when starting off, these aren’t necessarily considerations, but as your user base grows, the need for a stable, reliable pub/sub system increases.
You can find the source code to this tutorial on GitHub.


