


With Firebase, creating real-time social applications is a walk in the park. And the best thing about it: you don't have to write a single line of server-side code.
In this tutorial, I'll show you how to leverage FirebaseUI to create a group chat app you can share with your friends. It's going to be a very simple Firebase chat app example with just one chat room, which is open to all users.
As you might have guessed, the app for Android chat will depend on Firebase Auth to manage user registration and sign-in. It will also use Firebase's real-time database to store the group chat messages.
Prerequisites
To be able to follow this step-by-step Android chat app tutorial, you'll need the following:
- The latest version of Android Studio
- A Firebase account
Do you need instructions on how to set up a Firebase account and get ready for Firebase development in Android Studio? See my tutorial Get Started With Firebase for Android here on Envato Tuts+.


Now that you're set up, you're ready to learn how to create a chat application in Android using Android Studio. Let's get started!
1. Create an Android Studio Project
Fire up Android Studio and create a new project with an empty activity called MainActivity for the Firebase chat app example.


To configure the project to use the Firebase platform, open the Firebase Assistant window by clicking on Tools > Firebase.
While using the Firebase platform, it's usually a good idea to add Firebase Analytics to the project. Therefore, inside the Firebase Assistant window, go to the Analytics section and press Log an Analytics event.


Next, press the Connect to Firebase button and make sure that the Create new Firebase project option is selected. Once the connection is established, press the Add Analytics to your app button.


At this point, the Android Studio project is integrated with Firebase Analytics and ready to use with all other Firebase services.
2. Add Dependencies
We'll be using two libraries in this Android chat app code project: FirebaseUI and the Android design support library. Therefore, open the build.gradle file of the app module and add the following compile dependencies to it:
1 |
compile 'com.android.support:design:23.4.0' |
2 |
compile 'com.firebaseui:firebase-ui:0.6.0' |
Press the Sync Now button to update the project.
3. Define Layouts
The activity_main.xml file, which is already bound to MainActivity, defines the contents of the home screen of the app. In other words, it will represent the chat room.
Like most other group chat apps available today, our Firebase chat room Android app will have the following UI elements:
- a list that displays all the group chat messages in chronological order
- an input field where the user can type in a new message
- a button the user can press to post the message
Therefore, activity_main.xml must have a ListView, an EditText, and a FloatingActionButton. After placing them all inside a RelativeLayout widget, your layout XML should look like this:
1 |
<?xml version="1.0" encoding="utf-8"?>
|
2 |
<RelativeLayout xmlns:android="https://schemas.android.com/apk/res/android" |
3 |
xmlns:app="http://schemas.android.com/apk/res-auto" |
4 |
xmlns:tools="http://schemas.android.com/tools" |
5 |
android:id="@+id/activity_main" |
6 |
android:layout_width="match_parent" |
7 |
android:layout_height="match_parent" |
8 |
android:paddingBottom="@dimen/activity_vertical_margin" |
9 |
android:paddingLeft="@dimen/activity_horizontal_margin" |
10 |
android:paddingRight="@dimen/activity_horizontal_margin" |
11 |
android:paddingTop="@dimen/activity_vertical_margin" |
12 |
tools:context="com.tutsplus.mychatapp.MainActivity"> |
13 |
|
14 |
<android.support.design.widget.FloatingActionButton
|
15 |
android:layout_width="wrap_content" |
16 |
android:layout_height="wrap_content" |
17 |
android:clickable="true" |
18 |
android:src="@drawable/ic_send_black_24dp" |
19 |
android:id="@+id/fab" |
20 |
android:tint="@android:color/white" |
21 |
android:layout_alignParentBottom="true" |
22 |
android:layout_alignParentEnd="true" |
23 |
app:fabSize="mini" /> |
24 |
|
25 |
<android.support.design.widget.TextInputLayout
|
26 |
android:layout_width="match_parent" |
27 |
android:layout_height="wrap_content" |
28 |
android:layout_toLeftOf="@id/fab" |
29 |
android:layout_alignParentBottom="true" |
30 |
android:layout_alignParentStart="true"> |
31 |
|
32 |
<EditText
|
33 |
android:layout_width="match_parent" |
34 |
android:layout_height="wrap_content" |
35 |
android:hint="Input" |
36 |
android:id="@+id/input" |
37 |
/>
|
38 |
</android.support.design.widget.TextInputLayout>
|
39 |
|
40 |
<ListView
|
41 |
android:layout_width="match_parent" |
42 |
android:layout_height="match_parent" |
43 |
android:layout_alignParentTop="true" |
44 |
android:layout_alignParentStart="true" |
45 |
android:layout_above="@id/fab" |
46 |
android:dividerHeight="16dp" |
47 |
android:divider="@android:color/transparent" |
48 |
android:id="@+id/list_of_messages" |
49 |
android:layout_marginBottom="16dp"/> |
50 |
</RelativeLayout>
|
Note that I've placed the EditText widget inside a TextInputLayout widget. Doing so adds a floating label to the EditText, which is important if you want to adhere to the guidelines of material design.
Now that the layout of the home screen is ready, we can move on to creating a layout for the chat messages, which will be items inside the ListView. Start by creating a new layout XML file called message.xml, whose root element is RelativeLayout.
The layout must have TextView widgets to display the chat message's text, the time it was sent, and its author. You're free to place them in any order. Here's the layout I'll be using:
1 |
<RelativeLayout xmlns:android="http://schemas.android.com/apk/res/android" |
2 |
android:layout_width="match_parent" android:layout_height="match_parent"> |
3 |
|
4 |
<TextView
|
5 |
android:layout_width="wrap_content" |
6 |
android:layout_height="wrap_content" |
7 |
android:layout_alignParentTop="true" |
8 |
android:layout_alignParentStart="true" |
9 |
android:id="@+id/message_user" |
10 |
android:textStyle="normal|bold" /> |
11 |
|
12 |
<TextView
|
13 |
android:layout_width="wrap_content" |
14 |
android:layout_height="wrap_content" |
15 |
android:layout_alignBottom="@+id/message_user" |
16 |
android:layout_alignParentEnd="true" |
17 |
android:id="@+id/message_time" /> |
18 |
|
19 |
<TextView
|
20 |
android:layout_width="wrap_content" |
21 |
android:layout_height="wrap_content" |
22 |
android:layout_below="@+id/message_user" |
23 |
android:layout_alignParentStart="true" |
24 |
android:layout_marginTop="5dp" |
25 |
android:id="@+id/message_text" |
26 |
android:textAppearance="@style/TextAppearance.AppCompat.Body1" |
27 |
android:textSize="18sp" /> |
28 |
</RelativeLayout>
|
4. Handle User Authentication
Allowing users to anonymously post messages to the chat room would be a very bad idea. It could lead to spam, security issues, and a less than ideal chatting experience for the users. Therefore, let us now configure our Firebase chat app example such that only registered users can read and post messages.
Start by going to the Auth section of the Firebase Console and enabling Email/Password as a sign-in provider.


Feel free to enable OAuth 2.0 sign-in providers as well. However, FirebaseUI v0.6.0 seamlessly supports only Google Sign-In and Facebook Login.
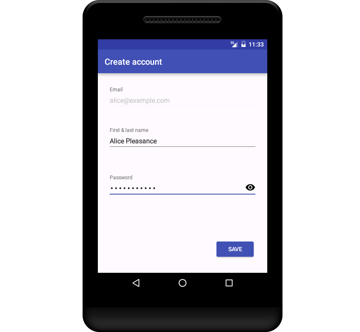
Step 1: Handle User Sign-In
As soon as the app for Android chat starts, it must check if the user is signed in. If so, the app should go ahead and display the contents of the chat room. Otherwise, it must redirect the user to either a sign-in screen or a sign-up screen. With FirebaseUI, creating those screens takes a lot less code than you might imagine.
Inside the onCreate() method of MainActivity, check if the user is already signed in. To do this, check if the current FirebaseUser object is not null. If it's null, you must create and configure an Intent object that opens a sign-in activity. To do so, use the SignInIntentBuilder class. Once the intent is ready, you must launch the sign-in activity using the startActivityForResult() method.
Note that the sign-in activity also allows new users to sign up. Therefore, you don't have to write any extra code to handle user registration.
Add the following code to the onCreate() method:
1 |
if(FirebaseAuth.getInstance().getCurrentUser() == null) { |
2 |
// Start sign in/sign up activity
|
3 |
startActivityForResult( |
4 |
AuthUI.getInstance() |
5 |
.createSignInIntentBuilder() |
6 |
.build(), |
7 |
SIGN_IN_REQUEST_CODE
|
8 |
);
|
9 |
} else { |
10 |
// User is already signed in. Therefore, display
|
11 |
// a welcome Toast
|
12 |
Toast.makeText(this, |
13 |
"Welcome " + FirebaseAuth.getInstance() |
14 |
.getCurrentUser() |
15 |
.getDisplayName(), |
16 |
Toast.LENGTH_LONG) |
17 |
.show(); |
18 |
|
19 |
// Load chat room contents
|
20 |
displayChatMessages(); |
21 |
}
|
As you can see in the above code, if the user is already signed in, we first display a Toast welcoming the user, and then call a method named displayChatMessages. For now, just create a stub for it. We'll be adding code to it later.
1 |
private void displayChatMessages() { |
2 |
|
3 |
}
|
Once the user has signed in, MainActivity will receive a result in the form of an Intent. To handle it, you must override the onActivityResult() method.
If the result's code is RESULT_OK, it means the user has signed in successfully. If so, you must call the displayChatMessages() method again. Otherwise, call finish() to close the app.
1 |
@Override
|
2 |
protected void onActivityResult(int requestCode, int resultCode, |
3 |
Intent data) { |
4 |
super.onActivityResult(requestCode, resultCode, data); |
5 |
|
6 |
if(requestCode == SIGN_IN_REQUEST_CODE) { |
7 |
if(resultCode == RESULT_OK) { |
8 |
Toast.makeText(this, |
9 |
"Successfully signed in. Welcome!", |
10 |
Toast.LENGTH_LONG) |
11 |
.show(); |
12 |
displayChatMessages(); |
13 |
} else { |
14 |
Toast.makeText(this, |
15 |
"We couldn't sign you in. Please try again later.", |
16 |
Toast.LENGTH_LONG) |
17 |
.show(); |
18 |
|
19 |
// Close the app
|
20 |
finish(); |
21 |
}
|
22 |
}
|
23 |
|
24 |
}
|
At this point, you can run the app and take a look at the sign-in and sign-up screens.


Step 2: Handle User Sign-Out
By default, FirebaseUI uses Smart Lock for Passwords. Therefore, once the users sign in, they'll stay signed in even if the app is restarted. To allow the users to sign out, we'll now add a sign-out option to the overflow menu of MainActivity.
Create a new menu resource file called main_menu.xml and add a single item to it, whose title attribute is set to Sign out. The contents of the file should look like this:
1 |
<menu xmlns:android="http://schemas.android.com/apk/res/android" |
2 |
xmlns:app="http://schemas.android.com/apk/res-auto"> |
3 |
|
4 |
<item android:title="Sign out" app:showAsAction="never" |
5 |
android:id="@+id/menu_sign_out"/> |
6 |
|
7 |
</menu>
|
To instantiate the menu resource inside MainActivity, override the onCreateOptionsMenu() method. Then call the inflate() method of the MenuInflater object.
1 |
@Override
|
2 |
public boolean onCreateOptionsMenu(Menu menu) { |
3 |
getMenuInflater().inflate(R.menu.main_menu, menu); |
4 |
return true; |
5 |
}
|
Next, override the onOptionsItemSelected() method to handle click events on the menu item. Inside the method, you can call the signOut() method of the AuthUI class to sign the user out. Because the sign-out operation is executed asynchronously, we'll also add an OnCompleteListener to it.
1 |
@Override
|
2 |
public boolean onOptionsItemSelected(MenuItem item) { |
3 |
if(item.getItemId() == R.id.menu_sign_out) { |
4 |
AuthUI.getInstance().signOut(this) |
5 |
.addOnCompleteListener(new OnCompleteListener<Void>() { |
6 |
@Override
|
7 |
public void onComplete(@NonNull Task<Void> task) { |
8 |
Toast.makeText(MainActivity.this, |
9 |
"You have been signed out.", |
10 |
Toast.LENGTH_LONG) |
11 |
.show(); |
12 |
|
13 |
// Close activity
|
14 |
finish(); |
15 |
}
|
16 |
});
|
17 |
}
|
18 |
return true; |
19 |
}
|
Once the user has signed out, the app should close automatically. That's the reason why you see a call to the finish() method in the code above.
5. Create a Model
In order to store the chat messages in the Firebase real-time database, you must create a model for them. The layout of the chat message, which we created earlier in this tutorial, has three views. To be able to populate those views, the model too must have at least three fields.
Create a new Java class called ChatMessage.java and add three member variables to it: messageText, messageUser, and messageTime. Also, add a constructor to initialize those variables.
To make the model compatible with FirebaseUI, you must also add a default constructor to it, along with getters and setters for all the member variables.
At this point, the ChatMessage class should look like this:
1 |
public class ChatMessage { |
2 |
|
3 |
private String messageText; |
4 |
private String messageUser; |
5 |
private long messageTime; |
6 |
|
7 |
public ChatMessage(String messageText, String messageUser) { |
8 |
this.messageText = messageText; |
9 |
this.messageUser = messageUser; |
10 |
|
11 |
// Initialize to current time
|
12 |
messageTime = new Date().getTime(); |
13 |
}
|
14 |
|
15 |
public ChatMessage(){ |
16 |
|
17 |
}
|
18 |
|
19 |
public String getMessageText() { |
20 |
return messageText; |
21 |
}
|
22 |
|
23 |
public void setMessageText(String messageText) { |
24 |
this.messageText = messageText; |
25 |
}
|
26 |
|
27 |
public String getMessageUser() { |
28 |
return messageUser; |
29 |
}
|
30 |
|
31 |
public void setMessageUser(String messageUser) { |
32 |
this.messageUser = messageUser; |
33 |
}
|
34 |
|
35 |
public long getMessageTime() { |
36 |
return messageTime; |
37 |
}
|
38 |
|
39 |
public void setMessageTime(long messageTime) { |
40 |
this.messageTime = messageTime; |
41 |
}
|
42 |
}
|
6. Post a Chat Message
Now that the model is ready, we can easily add new chat messages to the Firebase real-time database.
To post a new message, the user will press the FloatingActionButton. Therefore, you must add an OnClickListener to it.
Inside the listener, you must first get a DatabaseReference object using the getReference() method of the FirebaseDatabase class. You can then call the push() and setValue() methods to add new instances of the ChatMessage class to the real-time database.
The ChatMessage instances must, of course, be initialized using the contents of the EditText and the display name of the currently signed-in user.
Accordingly, add the following code to the onCreate() method:
1 |
FloatingActionButton fab = |
2 |
(FloatingActionButton)findViewById(R.id.fab); |
3 |
|
4 |
fab.setOnClickListener(new View.OnClickListener() { |
5 |
@Override
|
6 |
public void onClick(View view) { |
7 |
EditText input = (EditText)findViewById(R.id.input); |
8 |
|
9 |
// Read the input field and push a new instance
|
10 |
// of ChatMessage to the Firebase database
|
11 |
FirebaseDatabase.getInstance() |
12 |
.getReference() |
13 |
.push() |
14 |
.setValue(new ChatMessage(input.getText().toString(), |
15 |
FirebaseAuth.getInstance() |
16 |
.getCurrentUser() |
17 |
.getDisplayName()) |
18 |
);
|
19 |
|
20 |
// Clear the input
|
21 |
input.setText(""); |
22 |
}
|
23 |
});
|
Data in the Firebase real-time database is always stored as key-value pairs. However, if you observe the code above, you'll see that we're calling setValue() without specifying any key. That's allowed only because the call to the setValue() method is preceded by a call to the push() method, which automatically generates a new key.
7. Display the Chat Messages
FirebaseUI has a very handy class called FirebaseListAdapter. It dramatically reduces the effort required to populate a ListView using data present in the Firebase real-time database. We'll be using it now to fetch and display all the ChatMessage objects that are present in the database.
Add a FirebaseListAdapter object as a new member variable of the MainActivity class.
1 |
private FirebaseListAdapter<ChatMessage> adapter; |
Inside the displayChatMessages() method, initialize the adapter using its constructor. It expects the following arguments:
- a reference to the
Activity - the
classof the object you're interested in - the layout of the list items
- a
DatabaseReferenceobject
FirebaseListAdapter is an abstract class and has an abstract populateView() method, which must be overridden.
As its name suggests, populateView() is used to populate the views of each list item. If you're familiar with the ArrayAdapter class, you can think of populateView() as an alternative to the getView() method.
Inside the method, you must first use findViewById() to get references to each TextView that's present in the message.xml layout file. You can then call their setText() methods and populate them using the getters of the ChatMessage class.
At this point, the contents of the displayChatMessages() method should like this:
1 |
ListView listOfMessages = (ListView)findViewById(R.id.list_of_messages); |
2 |
|
3 |
adapter = new FirebaseListAdapter<ChatMessage>(this, ChatMessage.class, |
4 |
R.layout.message, FirebaseDatabase.getInstance().getReference()) { |
5 |
@Override
|
6 |
protected void populateView(View v, ChatMessage model, int position) { |
7 |
// Get references to the views of message.xml
|
8 |
TextView messageText = (TextView)v.findViewById(R.id.message_text); |
9 |
TextView messageUser = (TextView)v.findViewById(R.id.message_user); |
10 |
TextView messageTime = (TextView)v.findViewById(R.id.message_time); |
11 |
|
12 |
// Set their text
|
13 |
messageText.setText(model.getMessageText()); |
14 |
messageUser.setText(model.getMessageUser()); |
15 |
|
16 |
// Format the date before showing it
|
17 |
messageTime.setText(DateFormat.format("dd-MM-yyyy (HH:mm:ss)", |
18 |
model.getMessageTime())); |
19 |
}
|
20 |
};
|
21 |
|
22 |
listOfMessages.setAdapter(adapter); |
The group chat app is ready. Run it and post new messages to see them pop up immediately in the ListView. If you share the app with your friends, you should be able to see their messages too as soon as they post them. As you can see, this simple chat app using Firebase works well and is easy to use.
Make an Android Chat App With CodeCanyon Templates
Creating a full Firebase chat app from scratch can be a time-consuming process. Thankfully, you can find well-made Android chat app code templates that will save you hours of work. Here are just a few options that you can find on CodeCanyon, part of Envato Market.
1. FireApp Chat: Android Chatting App With Groups
FireApp Chat is an Android chat app code template for anyone looking to create a platform that's filled with features. This template not only supports chat, but voice and video calls as well. Users get real-time updates about typing, recording, sent messages, and more. It's a great option for a chat app using Firebase.


2. YooHoo: Android Chatting App With Voice and Video Calls
With video calling, group chatting, and extensive media sharing, YooHoo is a Firebase chat app worth buying. The real-time functionality makes it a smooth experience for users. YooHoo also supports more than 30 languages, letting you create an inclusive experience for all.


3. Plax: Android Chat App With Voice and Video Calls
Plax is an Android chat app using Firebase with a familiar, modern design. It includes useful features like:
- full dark mode
- in-app notifications
- media attachments
- SMS user verification
- powerful admin panel
You can easily manage users and app statistics from Firebase. Overall, this Android code is designed for a complete chat application experience for you and your users.


Find Even More Android App Templates and Resources
If you're looking at making more than a chat app in Android, you'll want to have the best tutorials and articles in your corner. That's where Envato Tuts+ has you covered! Keep improving your coding skills and develop all types of projects with these cool templates and guides.

 How to Turn Your WordPress Website Into a Mobile App


 Getting Started With the MStore Pro React Native App Template


 20+ Best Android App Templates for 2023

 13 Best Swift and Xcode App Templates (+2 Free)

 18 Best eCommerce Android App Templates


 Build a Music App With an Android App Template

Conclusion
In this tutorial, you learned how to use Firebase and FirebaseUI to create a very simple group chat application. You also saw how easy it is to work with the classes available in FirebaseUI to quickly create new screens and implement complex functionality.
To learn more about Firebase and FirebaseUI, do refer to the official documentation. Or check out some of our other Firebase tutorials here on Envato Tuts+!


