The Azure DevOps Services is a cloud offering that offers a quick way for project managers, developers, and infrastructure engineers to set up their project foundation.
The Azure DevOps core services include three components:
- Azure Boards, which include native support for Scrum and Kanban, aims to help project managers plan, track, and collaborate work across teams.
- Azure Pipelines to support continuous integration (CI) and continuous delivery (CD) while building, testing, and deploying infrastructure and apps artifacts to any cloud platform.
- Azure Repos, which offer a cloud-hosted private Git repository for version control.
Azure Logic Apps is a cloud service to help you schedule, automate, and orchestrate tasks and workflows between apps and across enterprises and organizations. A Logic App can be built using the Azure portal, or infrastructure as code.
By the end of this article, you will have a good understanding of leveraging a Logic App for Azure DevOps to automate the create of work items, in addition to creating an automated approval-based workflow using Office 365.
The workflow
Throughout this article, assume a SCRUM master is leading a team of developers to build cloud applications. As user stories are added, several tasks will be created automatically. Once approved by the product owner, the user story will be moved to the development backlog.
Developers have access to a Dev Team area path where they pick the approved user stories to develop and build.
The workflow will look Figure 1:
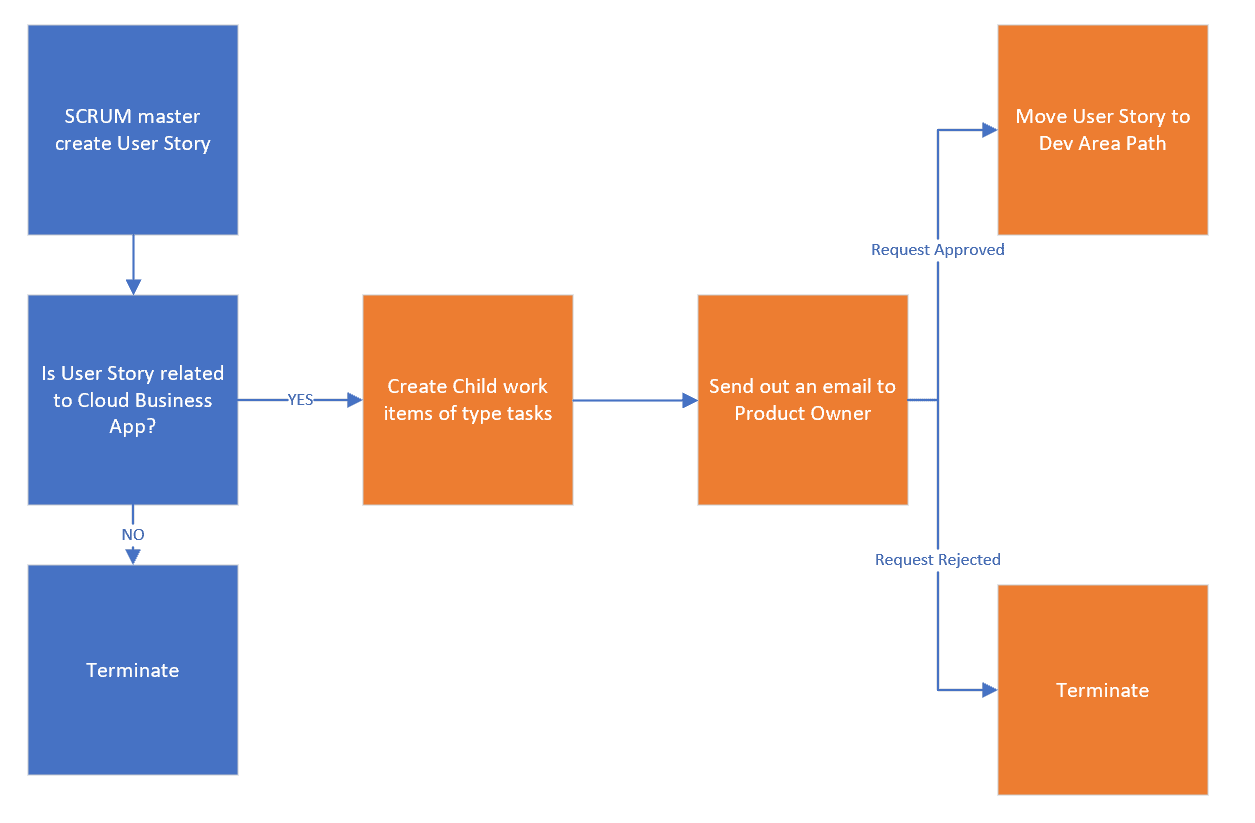
Figure 1: the workflow context
The orange squares will be automated using a Logic App and Office 365 approval workflow.
Azure DevOps Project
To get started, you need to have a project in Azure DevOps. If you already have one, feel free to skip the next two steps.
Go to https://dev.azure.com and sign in using your account. Click New Project as shown below:

Figure 2: Create a new Azure DevOps project
On the Create New Project page, type the name of the project, fill in the description, select the visibility type, select Agile under Work Item Process, and click Create:
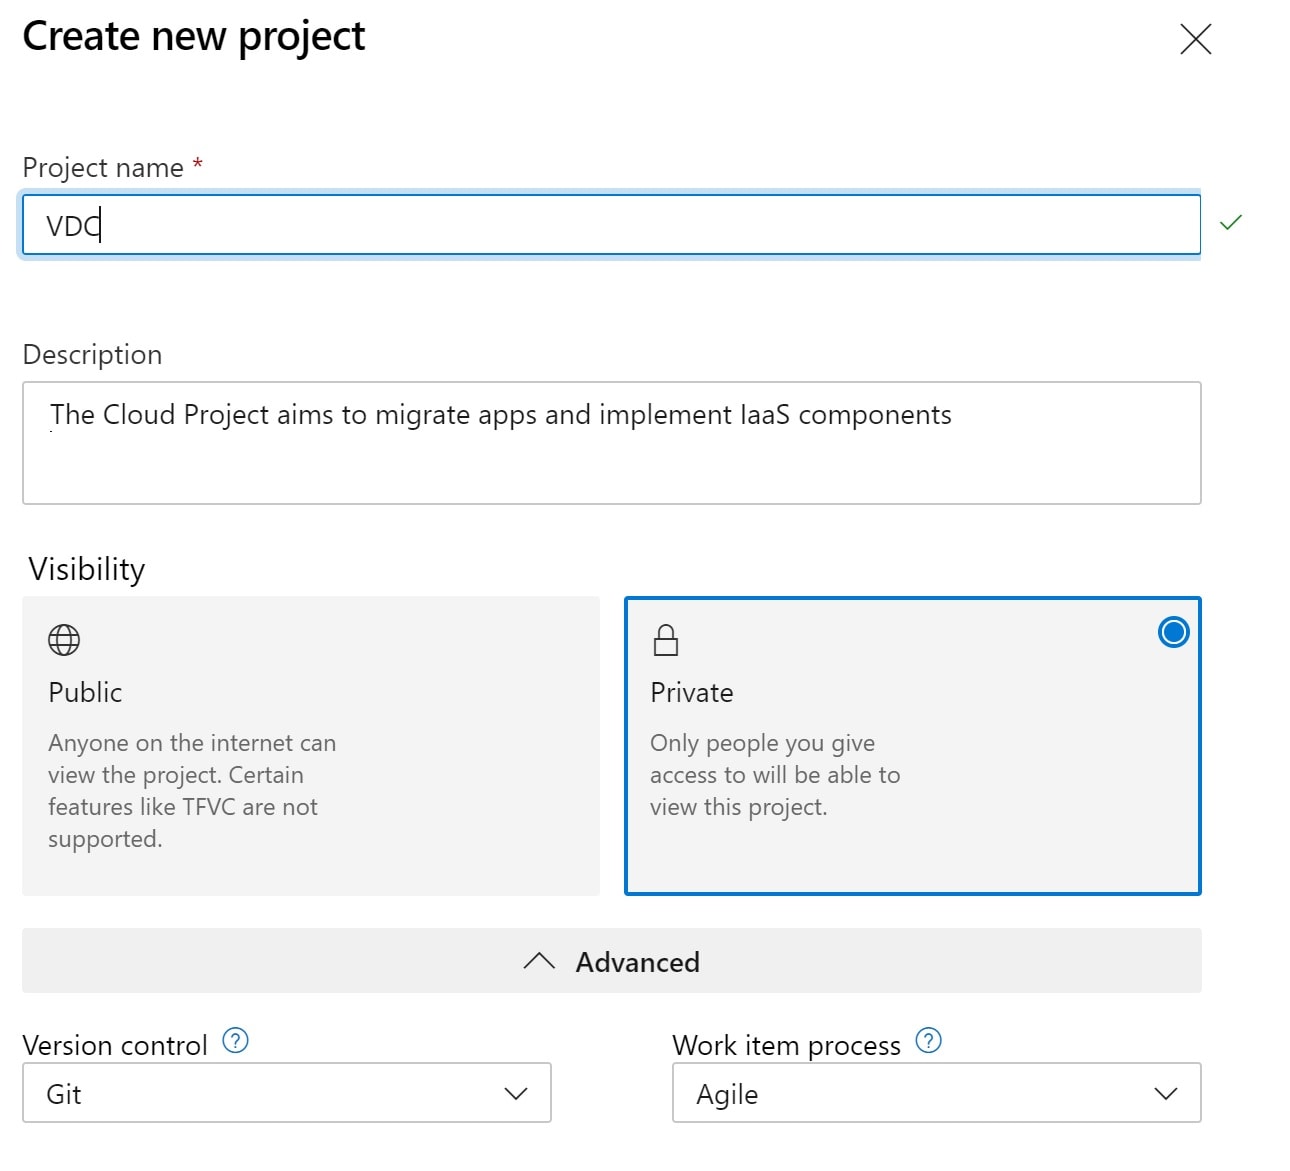
Figure 3: The DevOps project
Creating the Logic App
Now that you have created the project in Azure DevOps, sign into Azure Portal. From your designated resource group under your Azure subscription, click Add as shown in Figure 4.
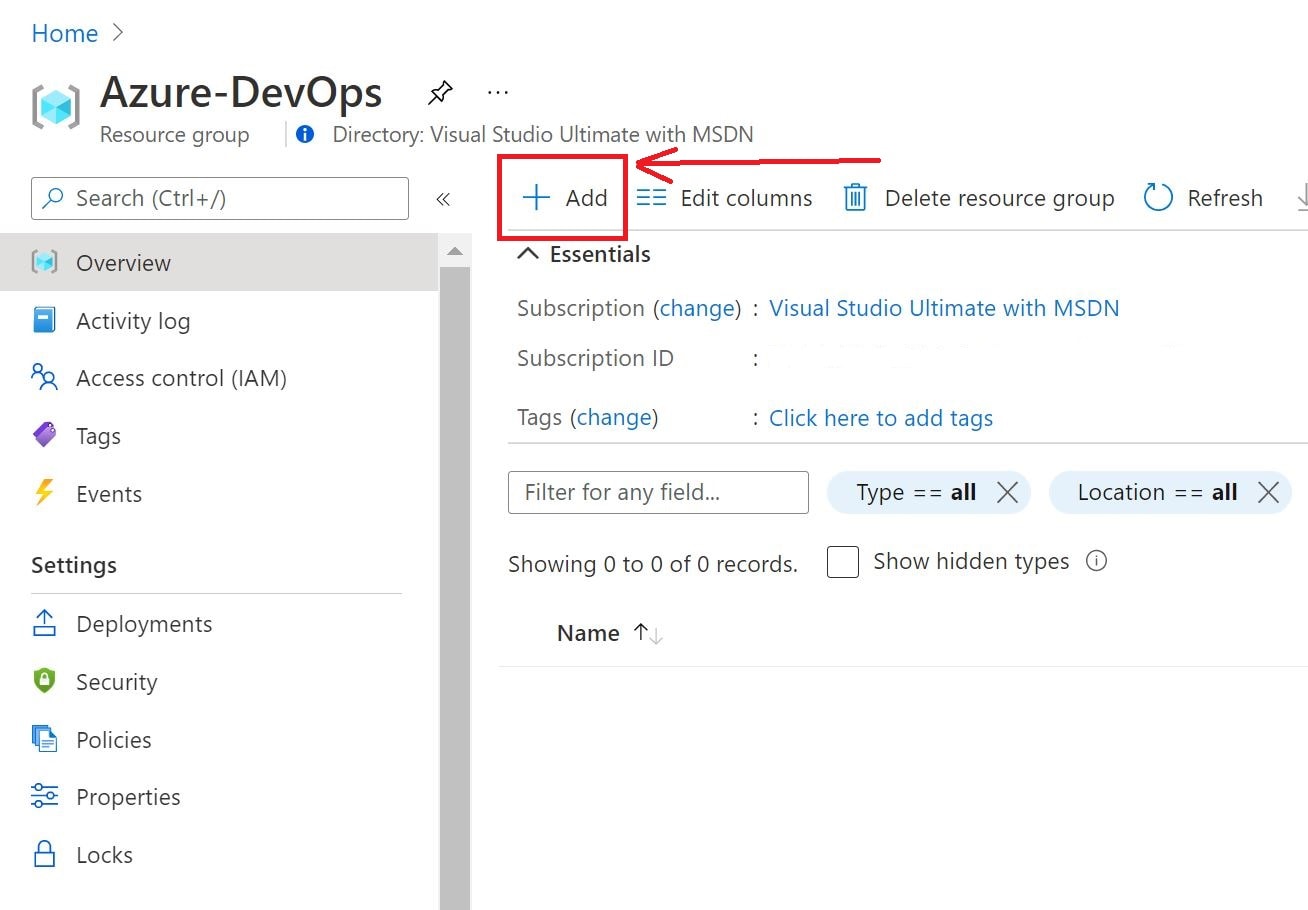
Figure 4: Resource Group to add a Logic App
In the search box, type Logic App and select the one shown in Figure 5.
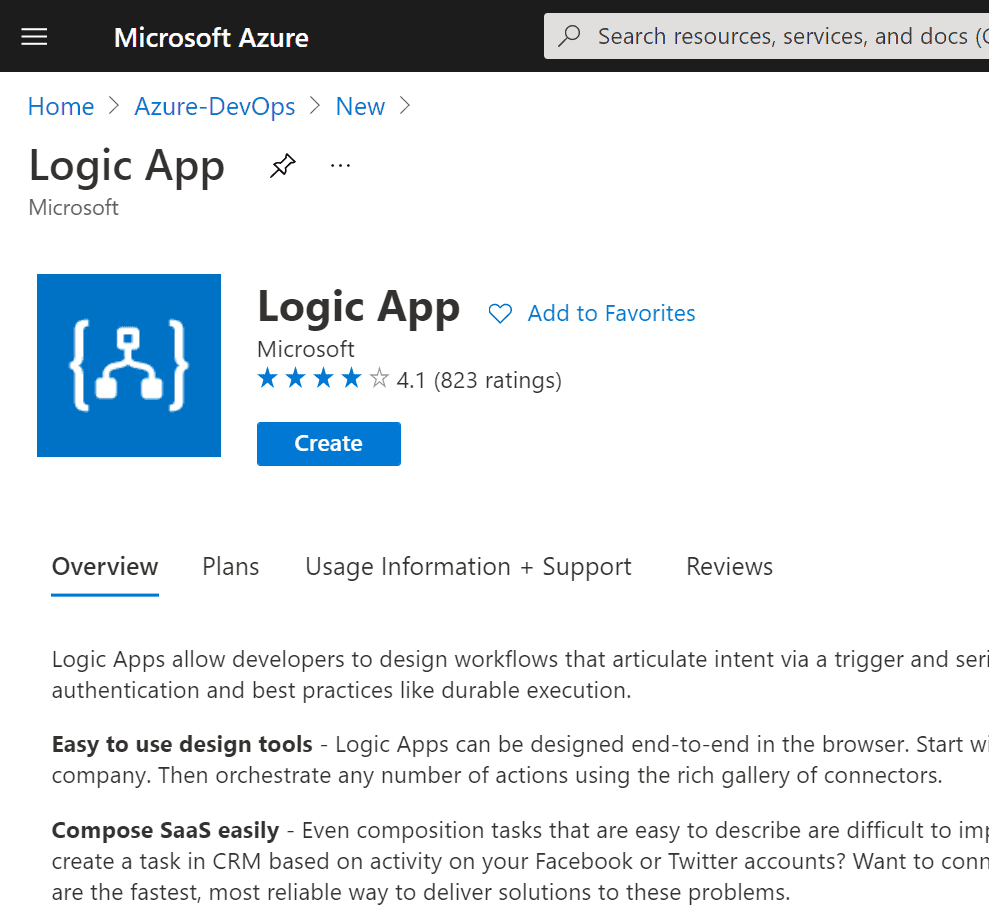
Figure 5: Select Microsoft Logic App
Click Create, and then provide a name for the Logic App to create as shown in Figure 6:
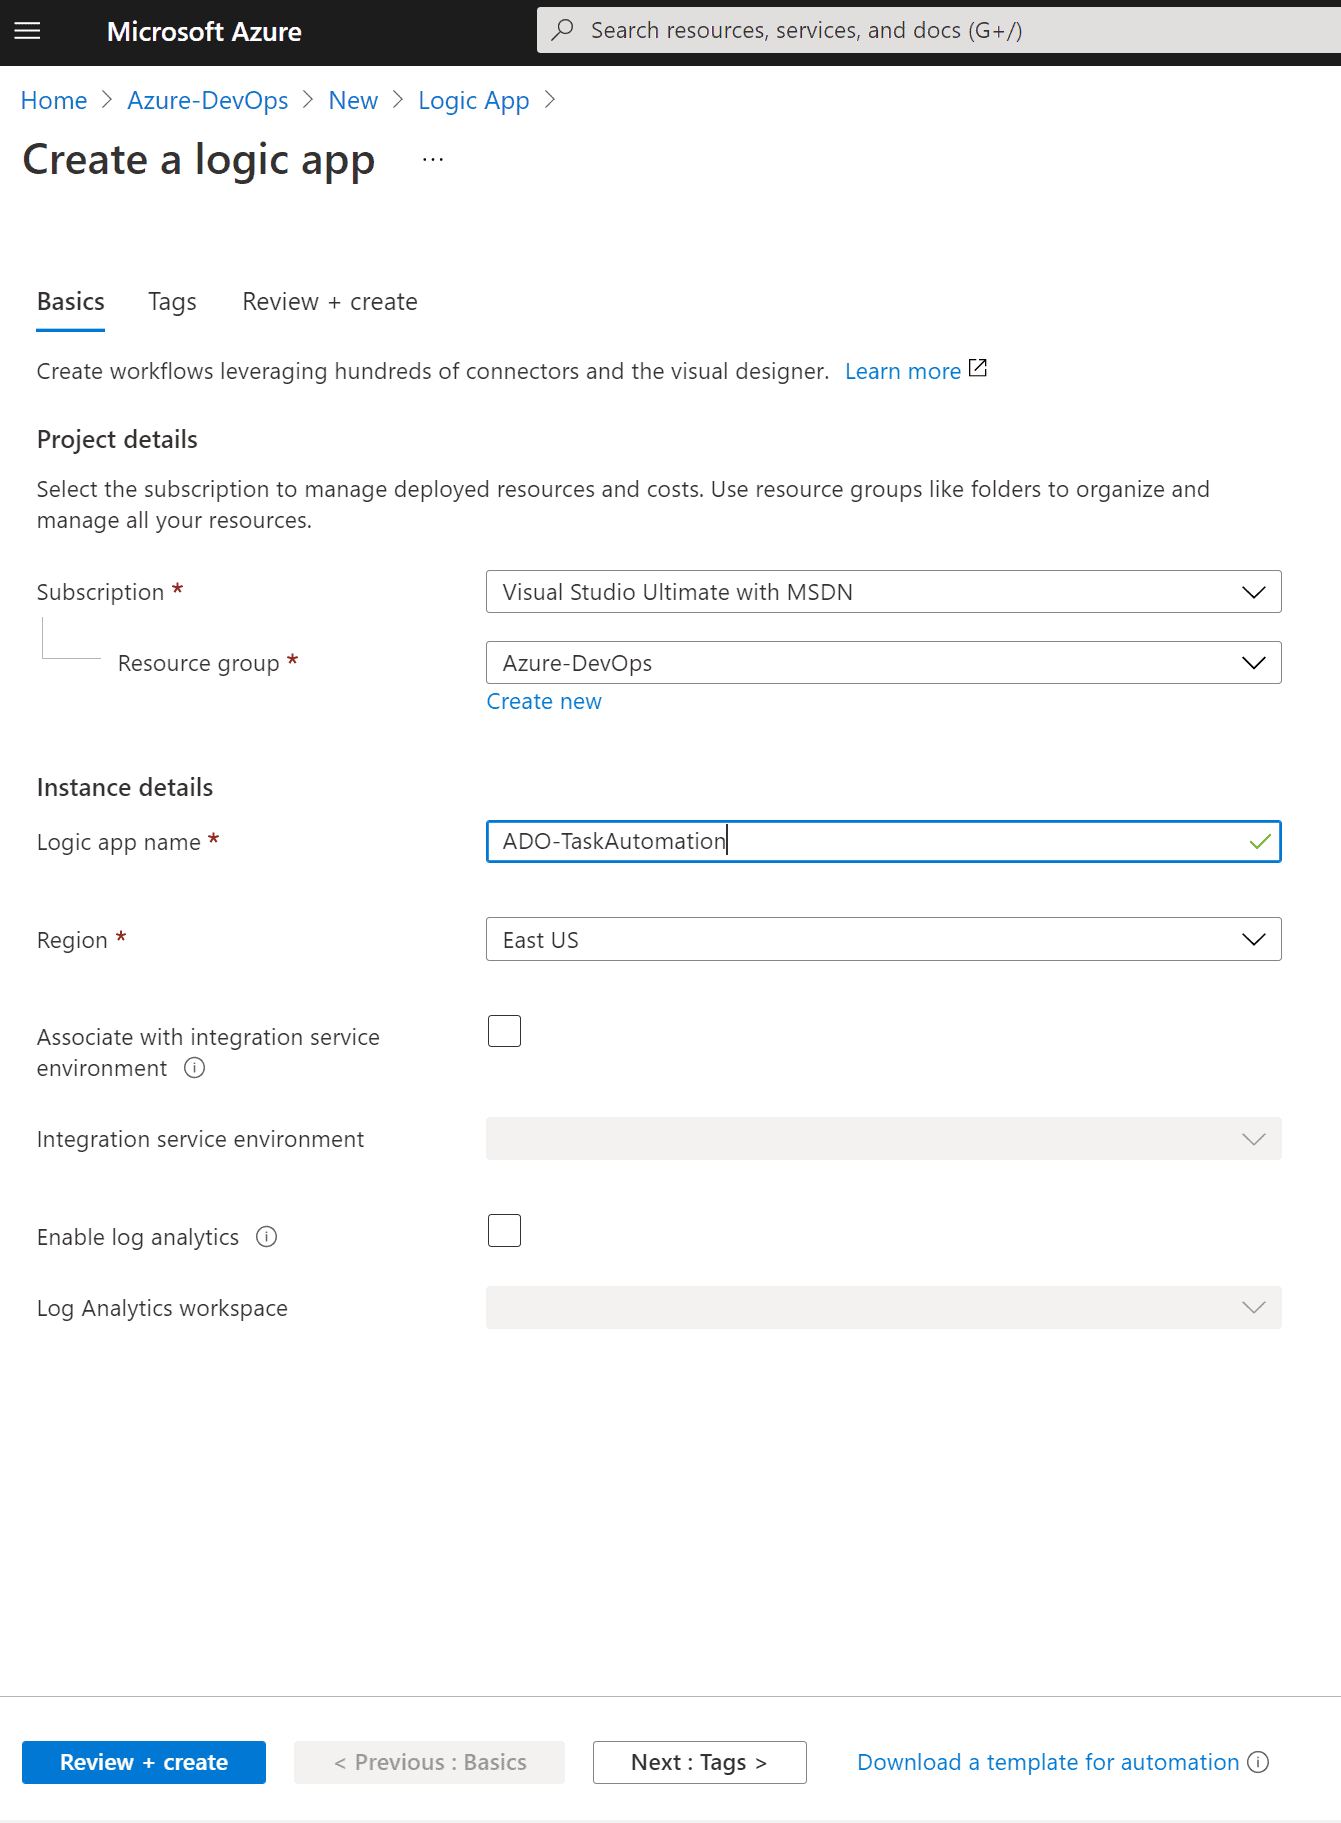
Figure 6: Provide a Logic App name
Click Review + create, then create to deploy the Logic App in your subscription. Validate that your deployment is successfully deployed:
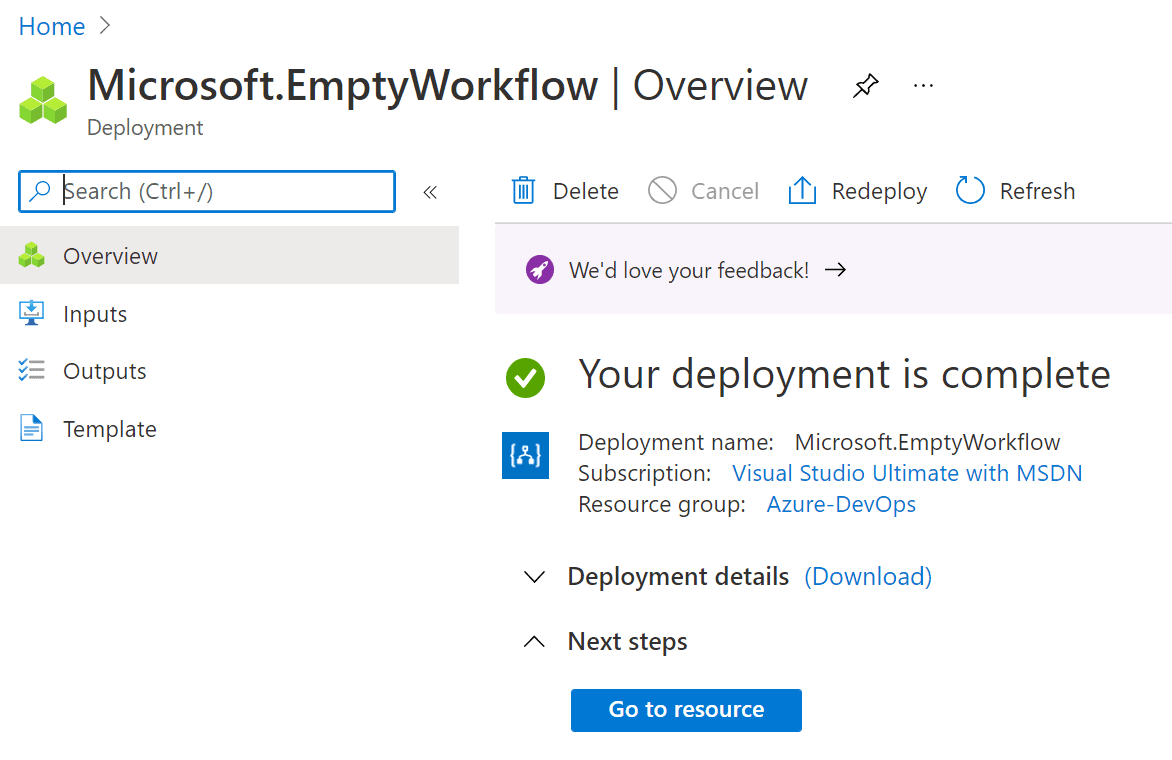
Figure 7: Validate Logic App is successfully deployed
Open the Logic App, click on the Logic App designer, and click Blank Logic App:
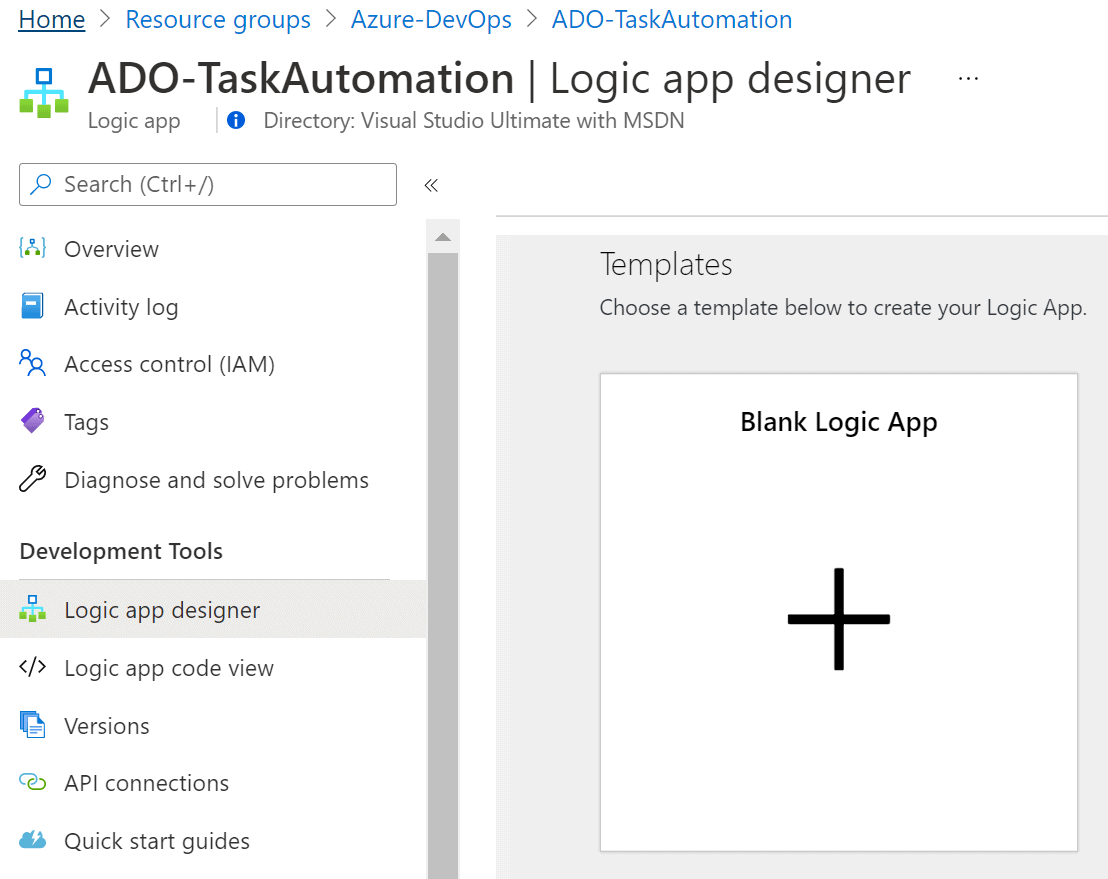
Figure 8: Select Blank Logic App
A list of all Logic Apps connectors can be found here. In the search connectors and triggers field, type DevOps, and select Azure DevOps:
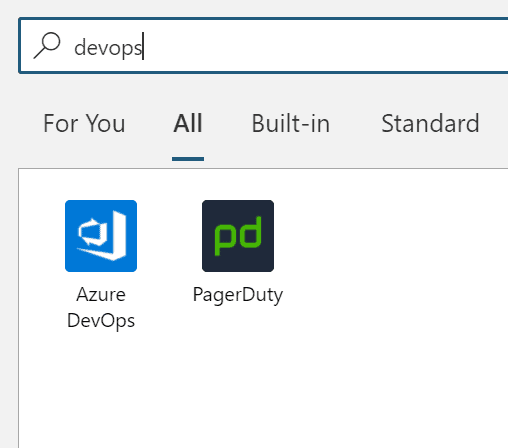
Figure 9: Select Azure DevOps
The Azure DevOps connector is available in all the Logic Apps region here except for the Azure China regions. To use the integration, you will need access to a Visual Studio Team Services account with API access enabled. From the Triggers list, select When a work item is created, and click Sign in to authenticate to your DevOps Project:
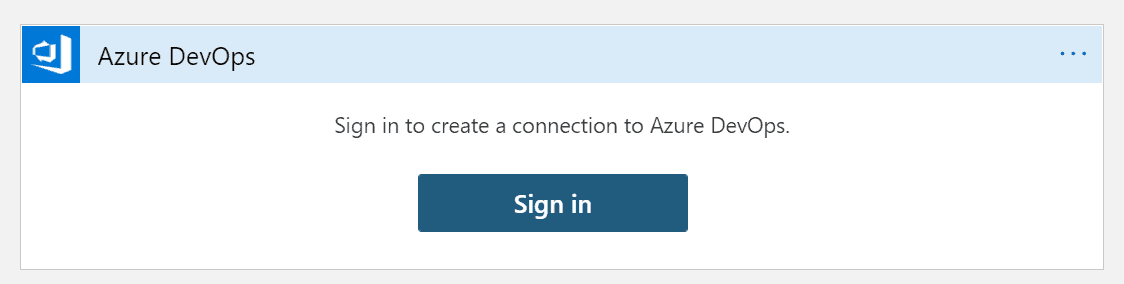
Figure 10: Sign into your DevOps project
Click Accept to grant authorization for the Logic App to access your DevOps item fields:
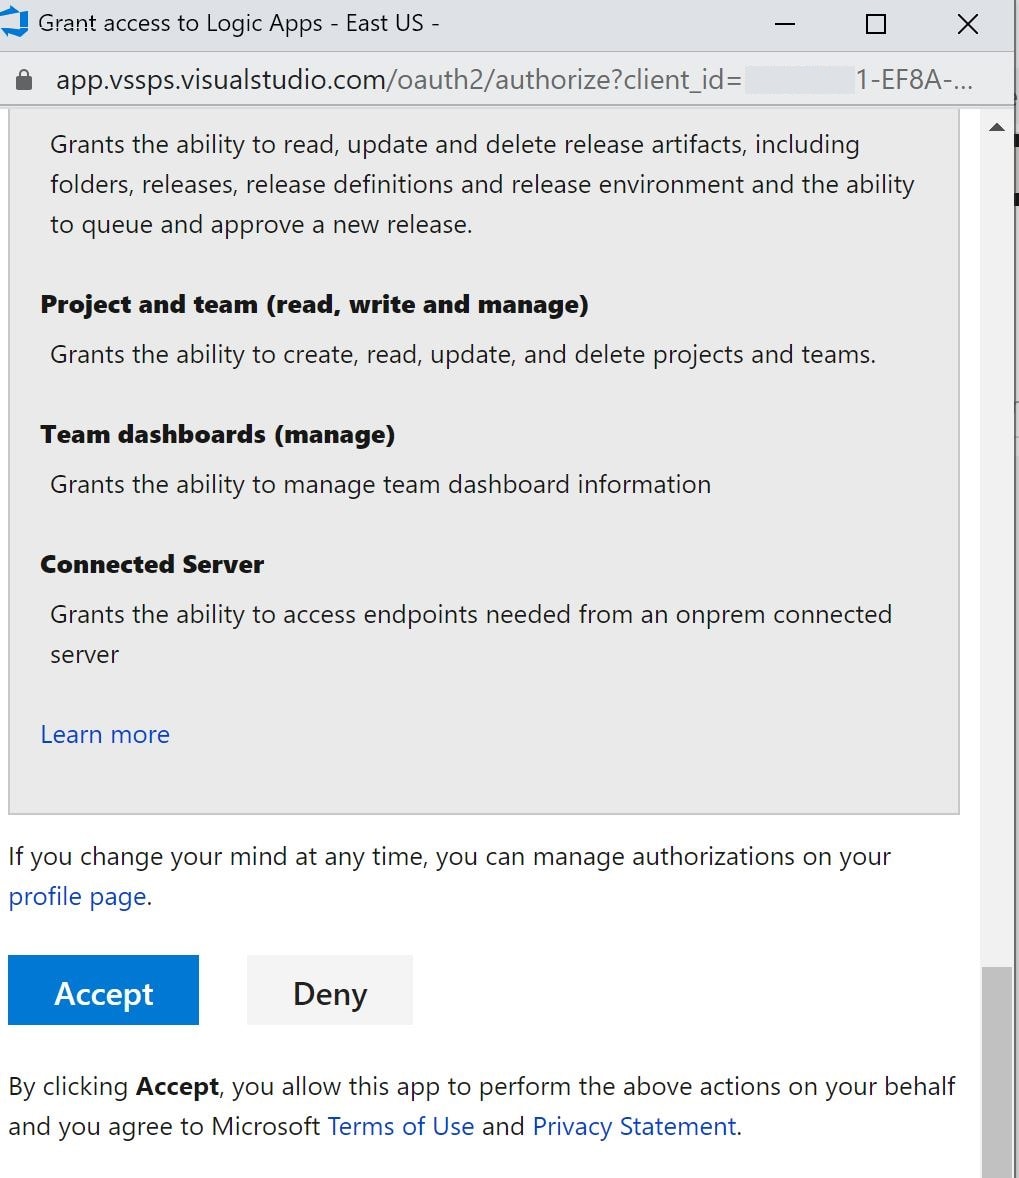
Figure 11: Grant access to the Logic App into DevOps
If you’re not seeing the list of projects you’re expecting, check the account, make sure it has access, and try again. The Azure DevOps connector is designed to work on behalf of the current user credentials only, and it’s not possible to change the connection or switch between accounts. The first step is to configure a trigger when a new User Story is created in the Azure DevOps project. The trigger will run every 1 minute as shown below:
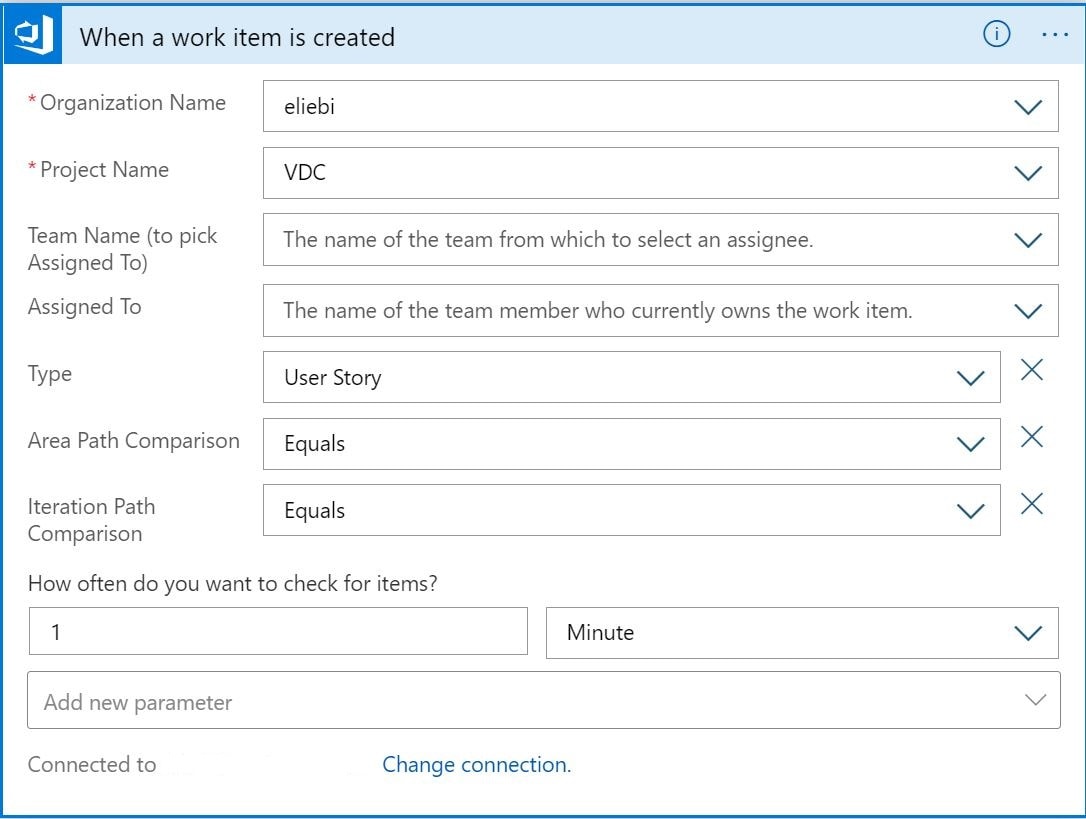
Figure 12: Configure User Story trigger
Next, you will create a conditional statement to control the workflow actions based on the User Story title. Click the + New step to add a new action. Select the Built-in tab and search for Control. From the Actions tab, select Condition. In the condition box, select the And operator, insert Title, choose contains Project Cloud. The above step will filter any newly created user story with a title of Project Cloud.
The condition statement should look like Figure 13.
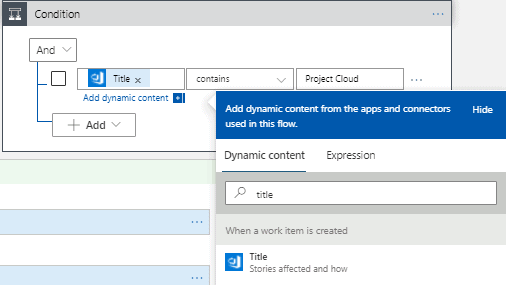
Figure 13: The condition statement
Under True condition, click to add an action, search for DevOps, and select Create a work item from the actions list.
Select the Organization Name, the Project Name and the Work Item Type. In the Title field, add Title as a dynamic content to be followed by the designated Task Title. Adding the dynamic content will ensure each created task will start by its parent title and followed by its own title. Add task description in the Description field. Select Add new parameter and check Link Type and Link URL. On the Link Type, select Hierarchy-reverse to attach the task as a child to the newly created user story. In the Link URL, select URL as dynamic content to add the task URL. The Create a work item action should look like Figure 14.
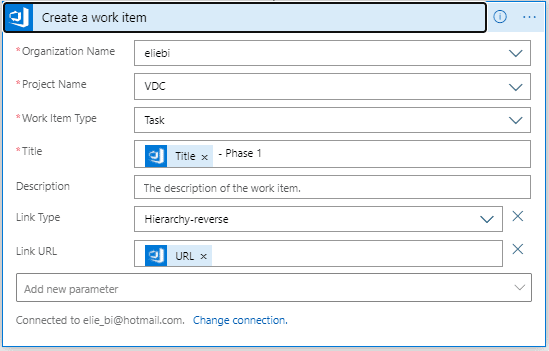
Figure 14: Create a work item
You can add as many work items as needed and to make sure they are linked as child items to the user story, select the URL under When a work item is created section. Under the False condition, click to add Terminate under Actions.
The condition statement should look like the below:
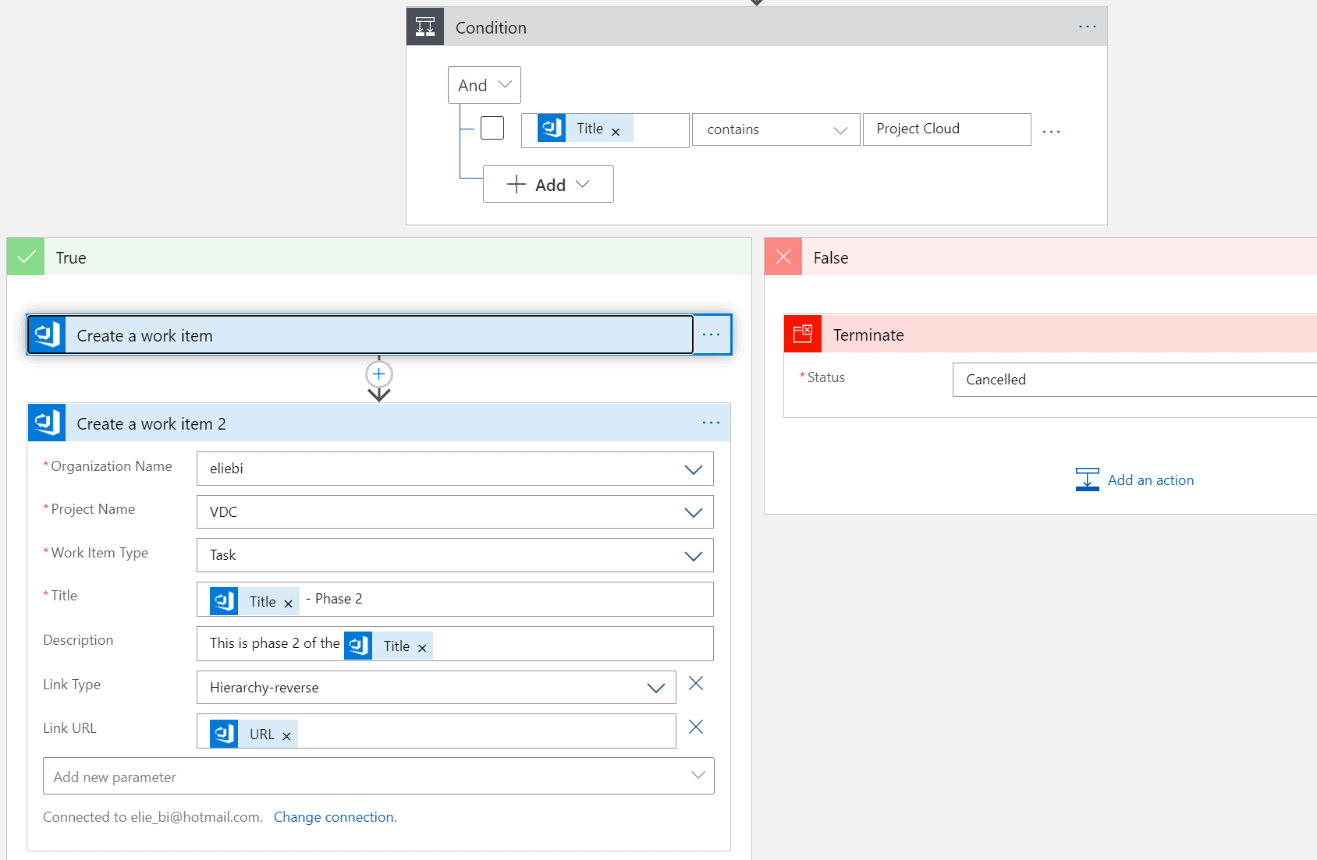
Figure 15: Condition statement configuration
Testing the work item creation
It’s a good practice to try your Logic App on an incremental basis. That approach will help you test and fix your errors before moving forward with additional steps. Save the Logic App by clicking on the Save button on the Azure Portal and browse to your Azure DevOps Project. Under Boards, click Work Items, and click the arrow button to create a new User Story item:
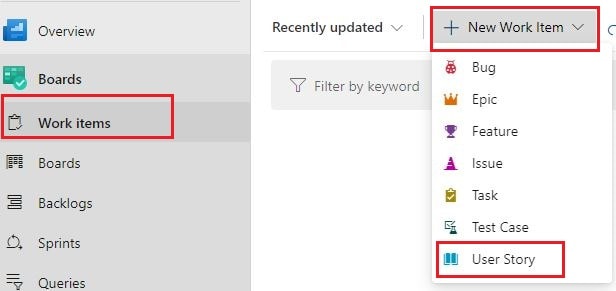
Figure 16: User Story Creation
Fill in the details of the User Story and click Save (It’s a good practice to decide on a naming convention ahead of time for consistency). In this example, the Logic App will trigger the actions when a User Story title contains Project Cloud. Wait for 1 minute and hit refresh. You should see the creation of the new task item as designed and configured in the Logic App above. The task item details should look like the below:
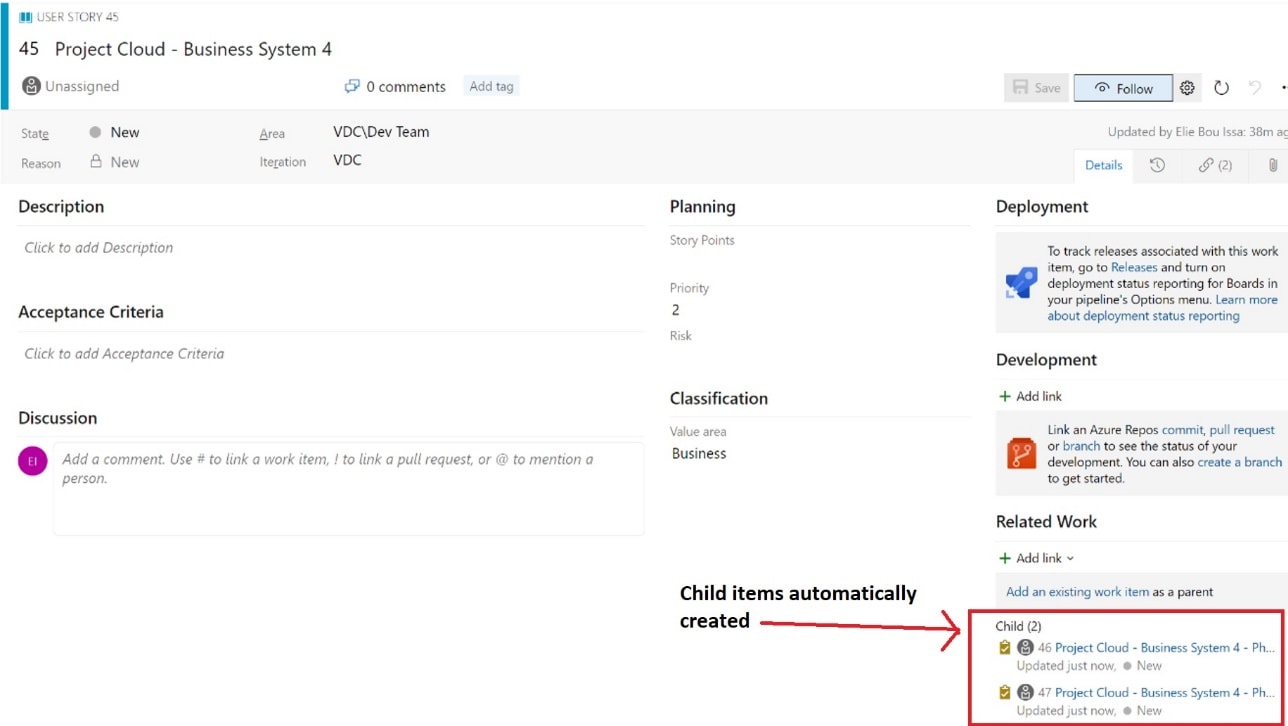
Figure 17: Validate the automation of child task items
After clicking the child item, it should look like Figure 18.
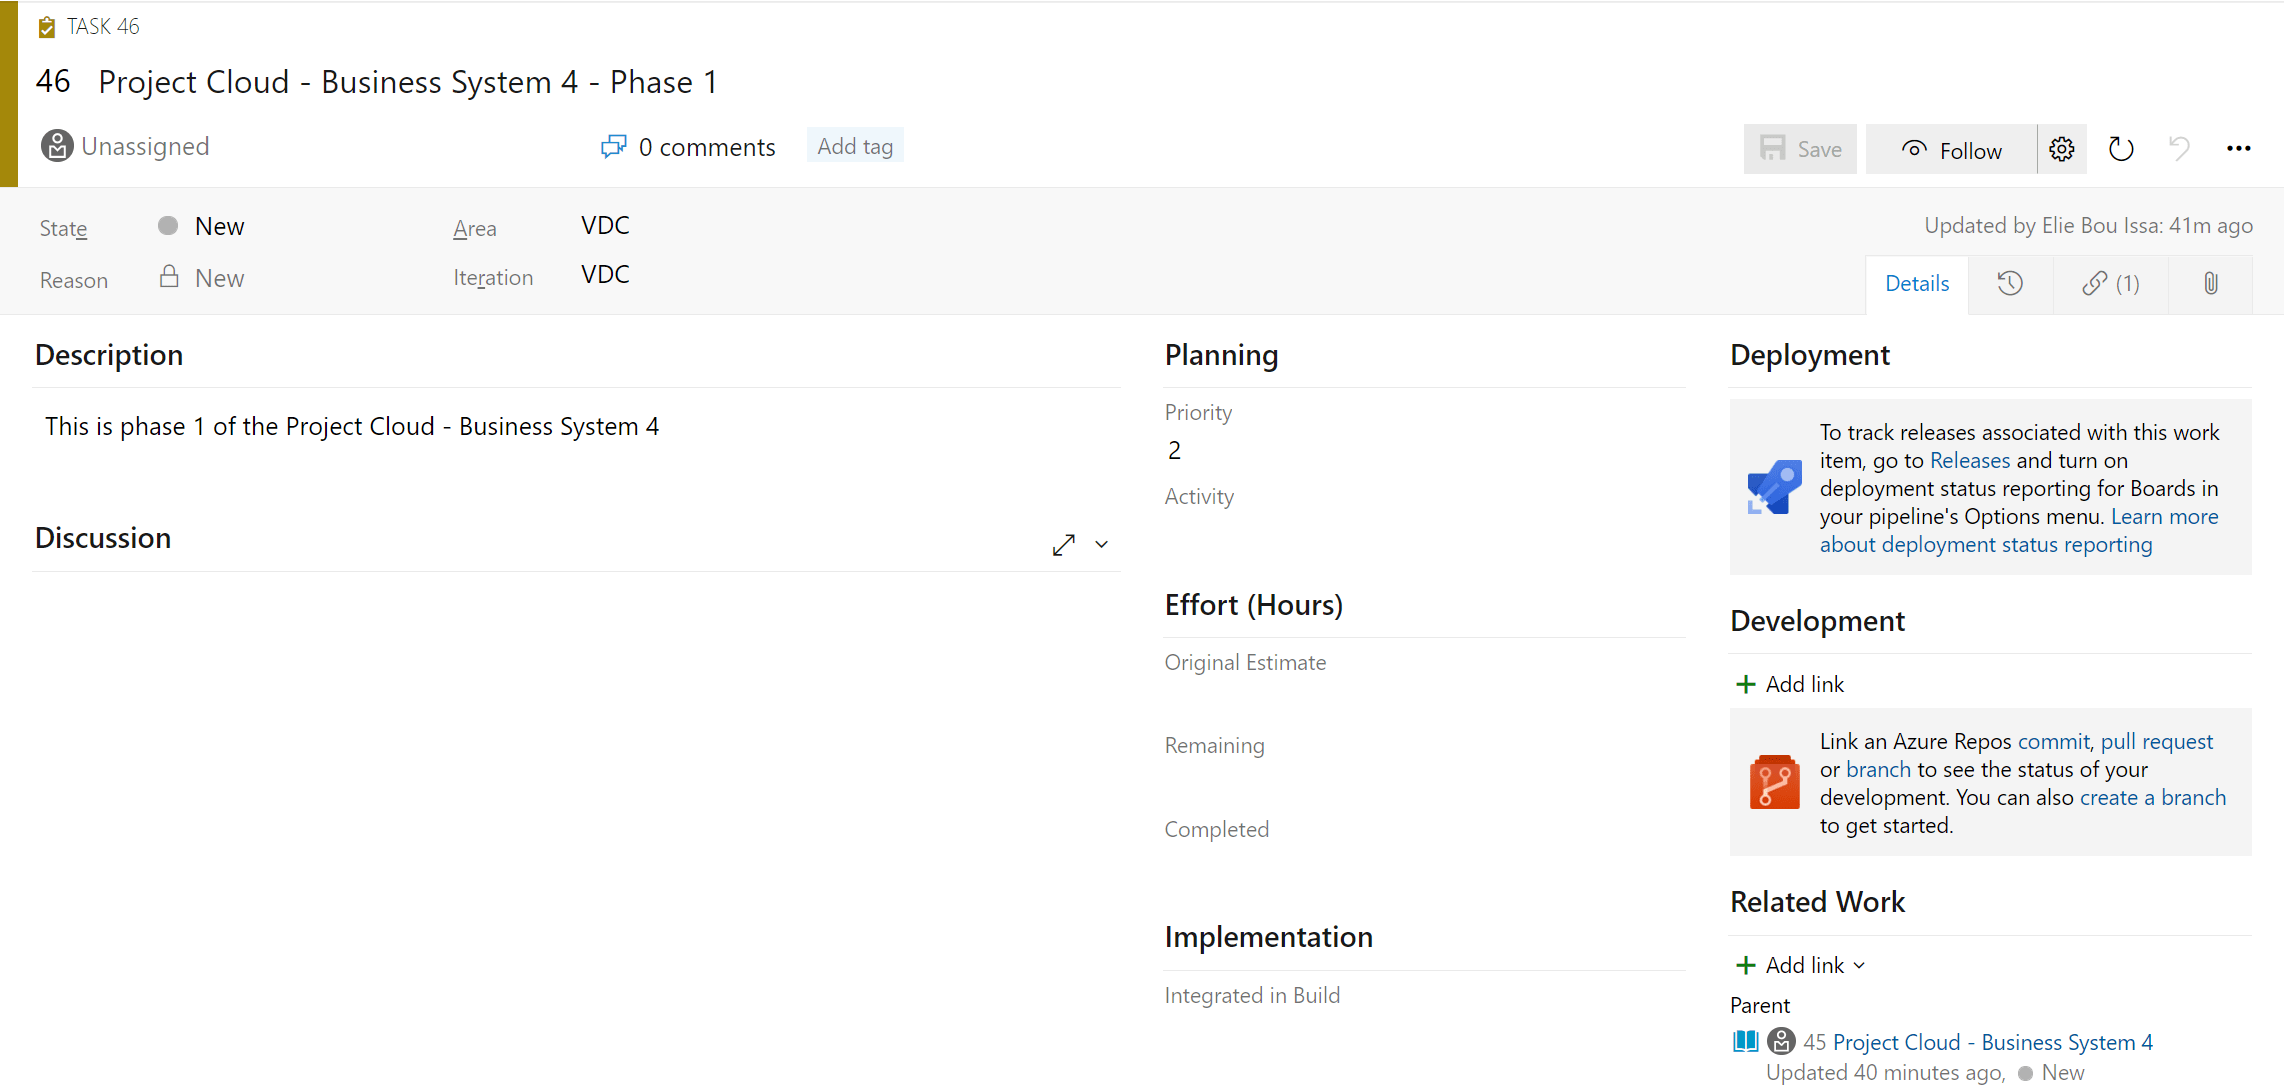
Figure 18: Task Item details
Setting up validation email
In the next steps, you will send out an email to the product owner and leverage the approval-based workflow to approve or reject the addition of the user story scope. To to ensure that the process gets applied to every user story, you need to create a Foreach loop. By default, iterations in the loop run at the same time, or in parallel. This behavior can be changed to sequential iterations from the settings of the Foreach action if desired. The loop works only on arrays, and hence needs to initialize and append the filtered user story id to an array prior to the Foreach loop.
Go back to the Logic App designer. To add a Foreach loop, click the + New Step and click Add an action. Search for variables, and under Actions click Initialize variable. Provide a name for the variable and select Array for its Type. Add another action like the above but select Append to array variable. Select the initialized variable and on the Value field, select the Id from the dynamic box When a work item is created.
The variable should look like Figure 19 below:
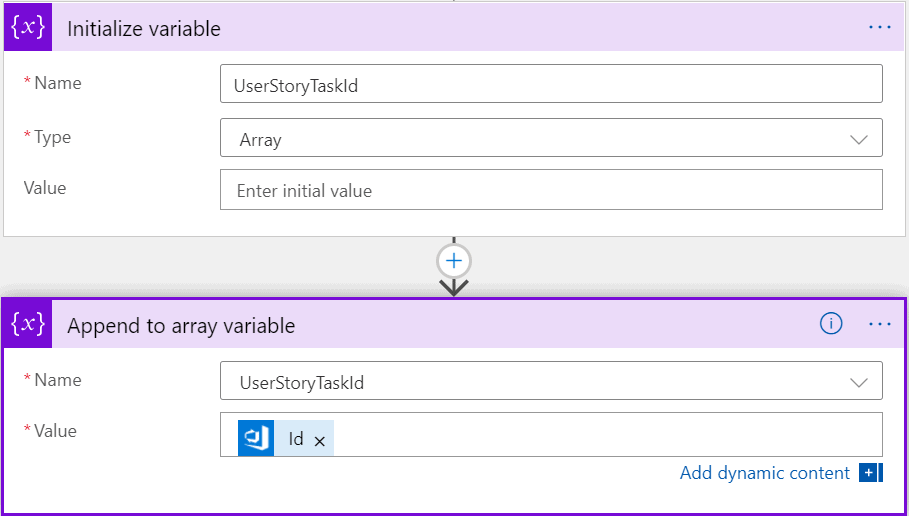
Figure 19: Configure array variable
Click to add an action, and select For Each under Control Built in. In the Select an output from previous steps field, select the variable UserStoryTaskId. Select to add an action, and under Office 365 Outlook, choose Send approval email. You may be asked to log in to an Office365 account. Select Add new parameter and choose Body and other options as desired. Fill in the details as needed.
The send approval email action should look like the figure below:
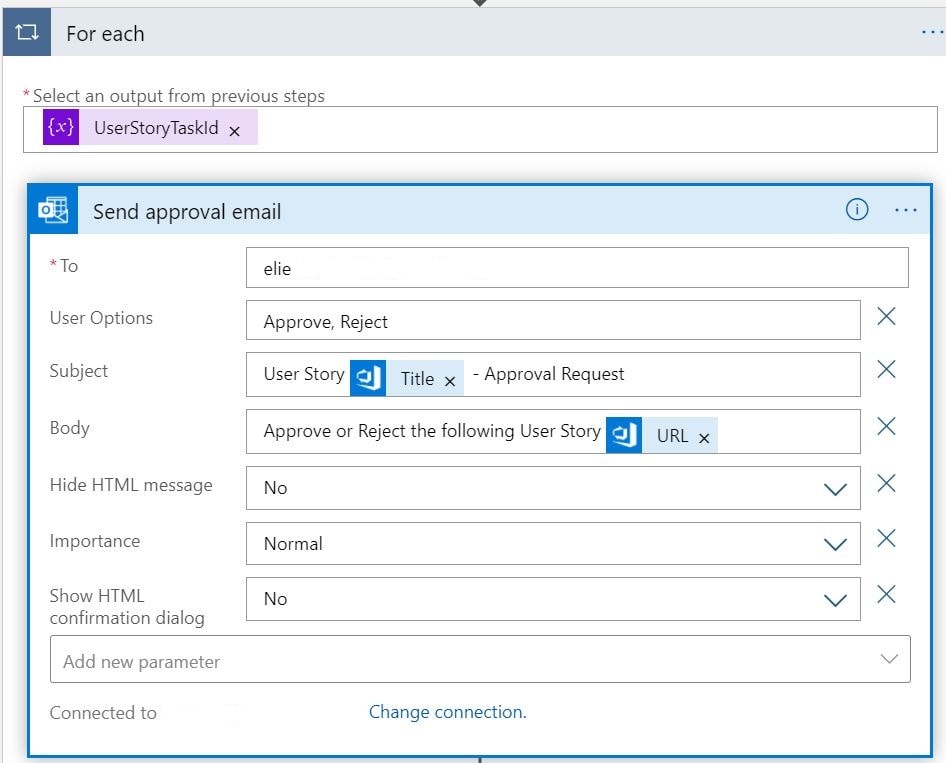
Figure 20: Configure For each statement
The office 365 Outlook connector is available in all Logic Apps regions here. The send approval email operation sends an approval email and waits for a response from the recipient. As a prerequisite, you’d need an email account from an email provider that’s supported by Logic Apps, such as Office 365 Outlook, Outlook.com or Gmail. You can review the connector list here.
The approval workflow requires an email account in Office 365 Outlook or Outlook.com. A more detailed list of requirements can be found here.
Once the email is delivered to the product owner, the user story and its child tasks could either be approved or rejected. If the request is approved, the parent work item will move to a different area path Dev Team which makes it visible to the developers’ team. An area path is defined at the project level and leveraged to determine what shows up on the team’s backlog. Do not get confused between the area and the iteration paths. The area path allows you to group work items by team, product, or feature area. Iteration or sprint paths allow you to group work into sprints, milestones, or other time-specific events.
In this example, a Dev Team area path was created with proper permissions to the Dev Team group. Any work item in that area path would become the responsibility of the Dev Team. To create an area path, go to project settings in Azure DevOps project, select Project configuration, and select Areas.
Select new child, and name the area as shown in Figure 21.
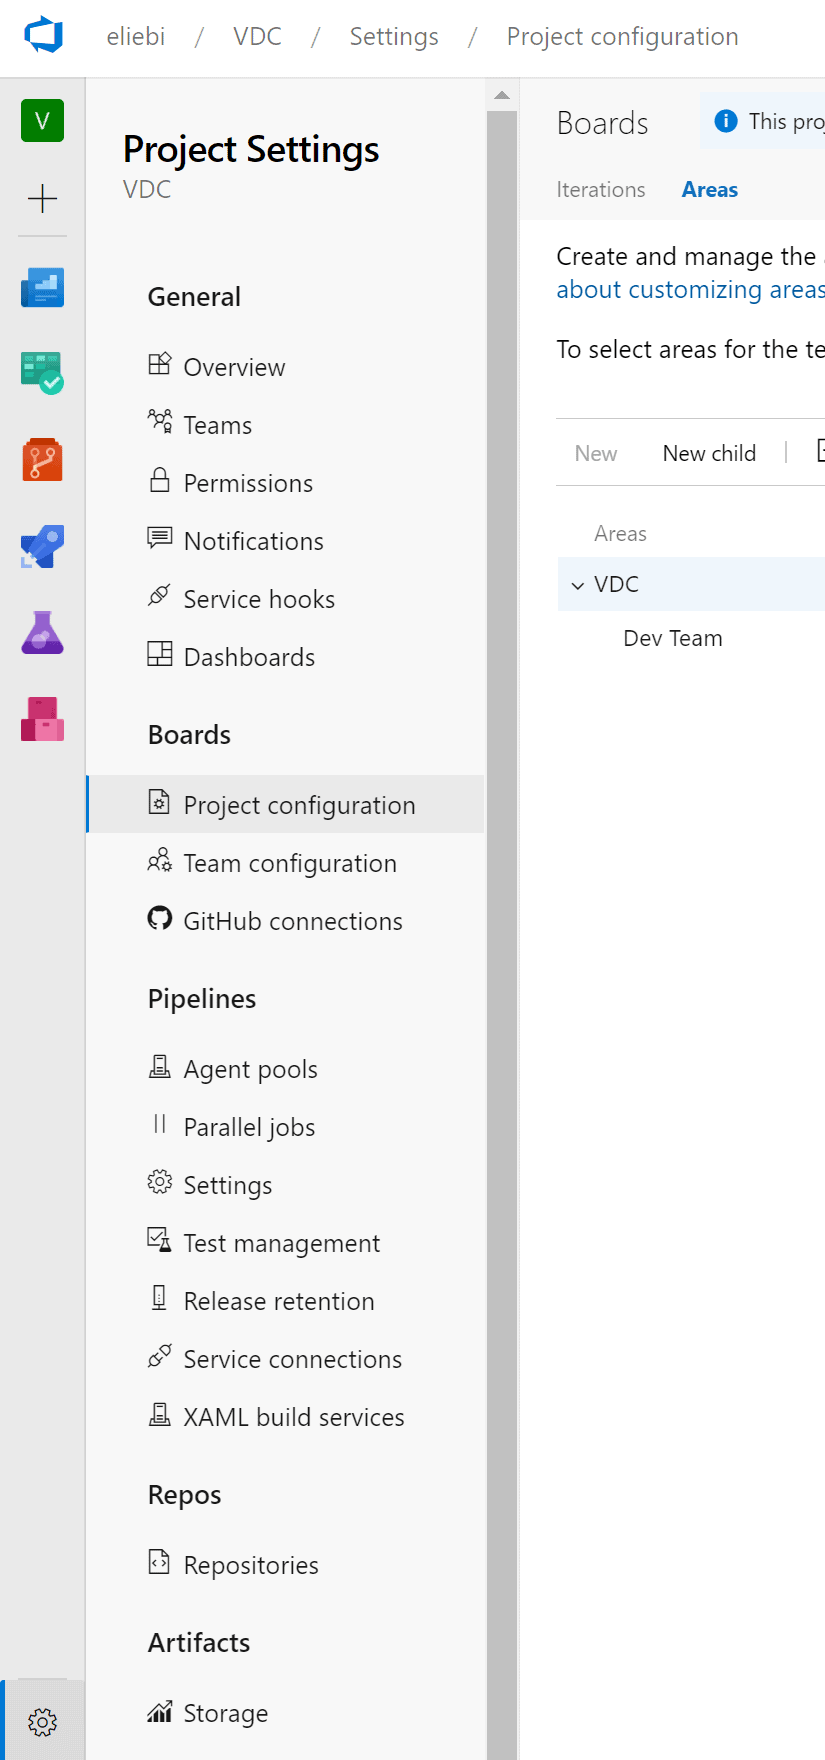
Figure 21: Configure Area path
You can create a hierarchy of area paths to support sub-areas, up to 14 levels deep. To set the security for the Area, click on Team Configuration and select Areas. Select the area, hit the …, and click Security. Set the proper permissions as desired.
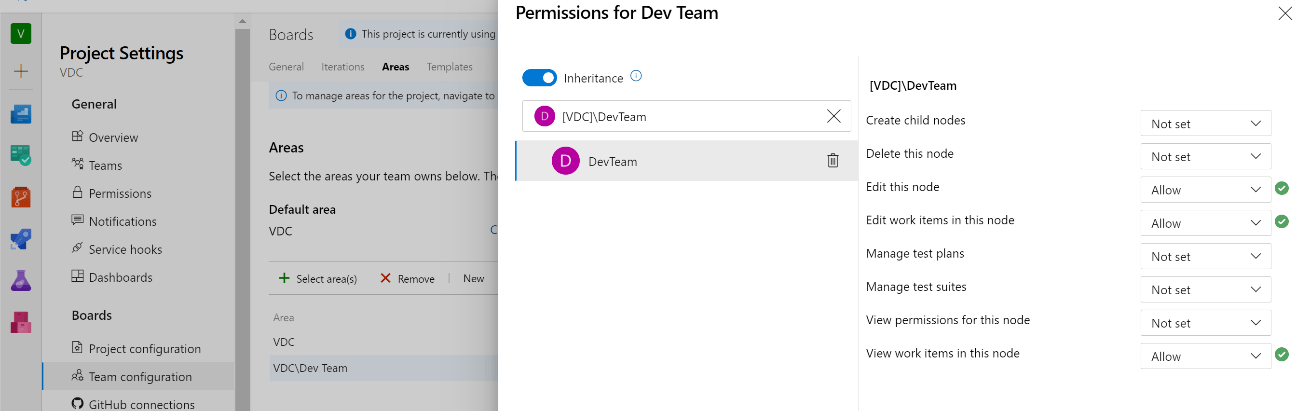
Figure 22: configure area path security
Once done with the areas, switch back to the Logic App. Add a condition statement after the Send approval email by adding a new action to the For each loop. Chose And operator with the Selected Option to be equal to Approve.
The condition statement should look like the figure below:
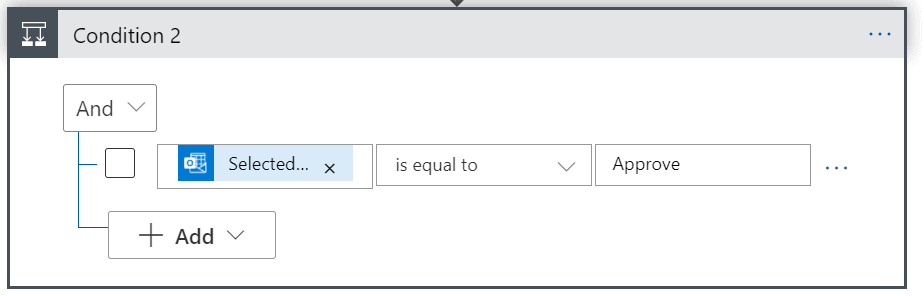
Figure 23: Configure Condition statement
If the condition is true, click a DevOps action and select Update a work item. Fill in the details and select Id from When a work item is created. Click Add new parameter, select Area Path and type the desired area path.
In this example, the True condition look like the figure below:
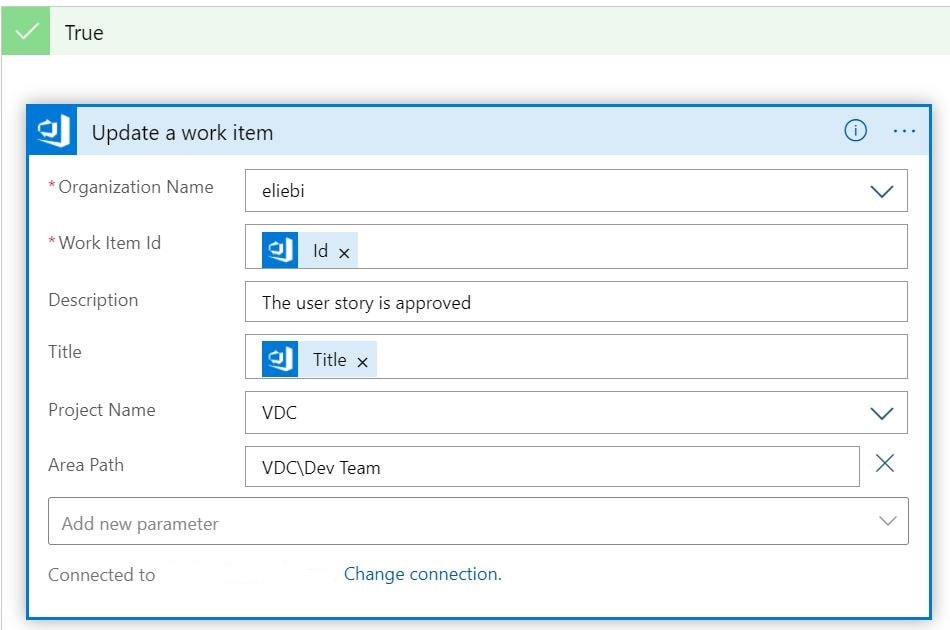
Figure 24: Configure True condition
Make sure to save your Logic App.
Testing the automated email
In the Azure DevOps project, create a new user story with the title Project Cloud – Business System 5. Child tasks should be created in a minute as configured above. An email will be sent and should look like the following:
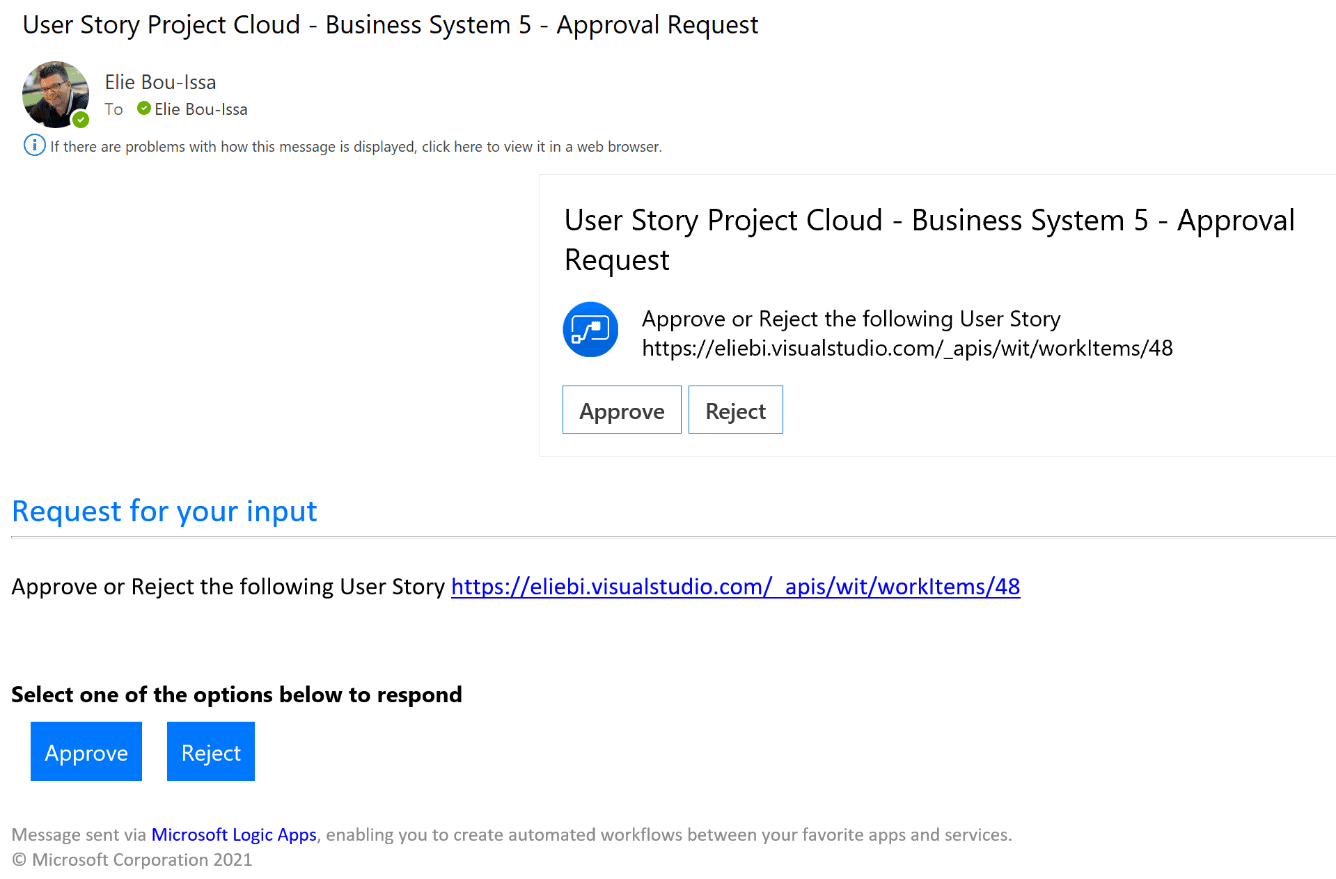
Figure 25: Approval email
Under Request for your input, click Approve. You should see the following confirmation, along with the updated area path:
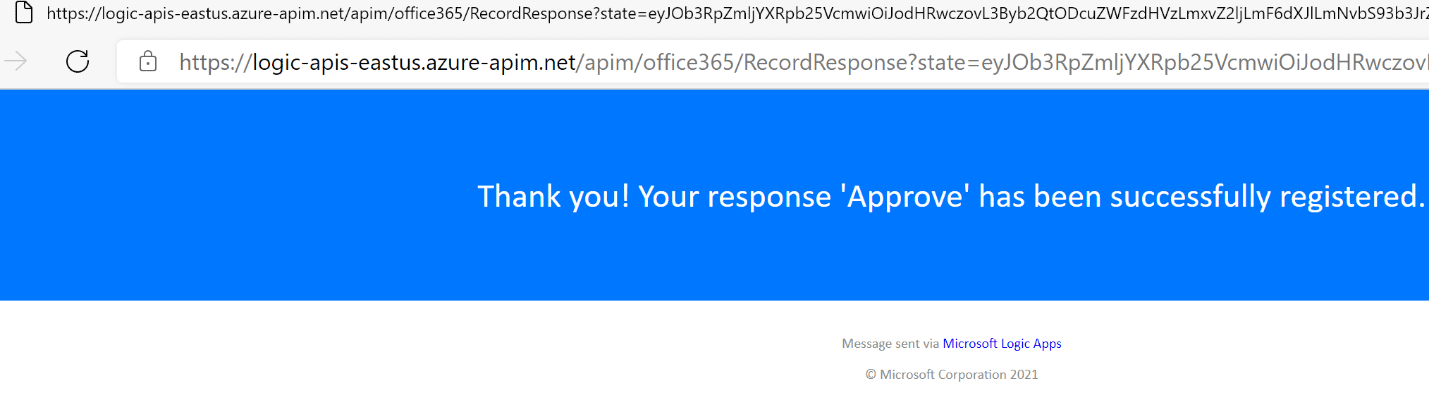
Figure 26: Approval email response confirmation
Go back and take a look at the original user story. You can now see the area has been updated.
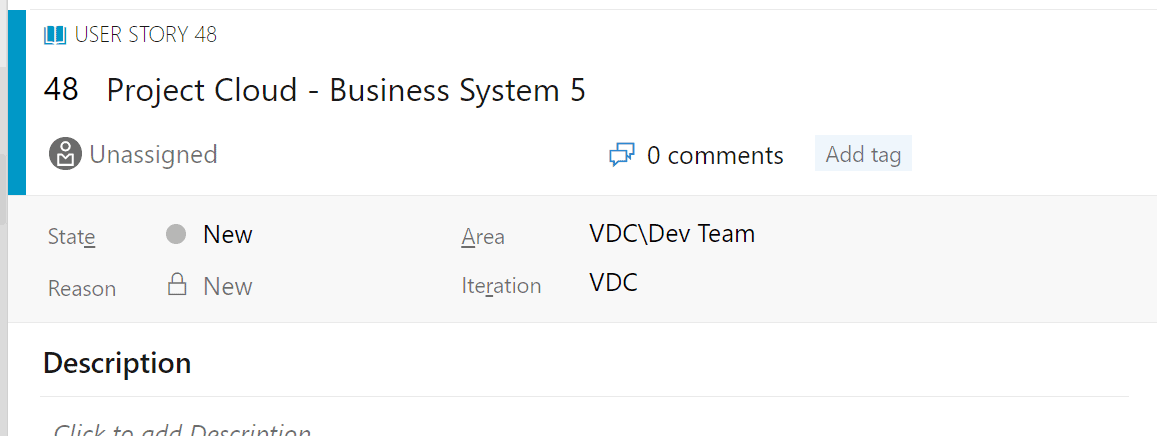
Figure 27: Area path update
Completing the Logic App
Once you’re happy with the Logic App, and it’s working as expected, you can rename the actions to more meaningful terms. This will help you and others better understand the actions you’ve configured. To do so, click on the … of the action you want to rename, and click Rename.

Figure 28: Rename Logic App action
In this example, I renamed the Logic App actions to look like the below:
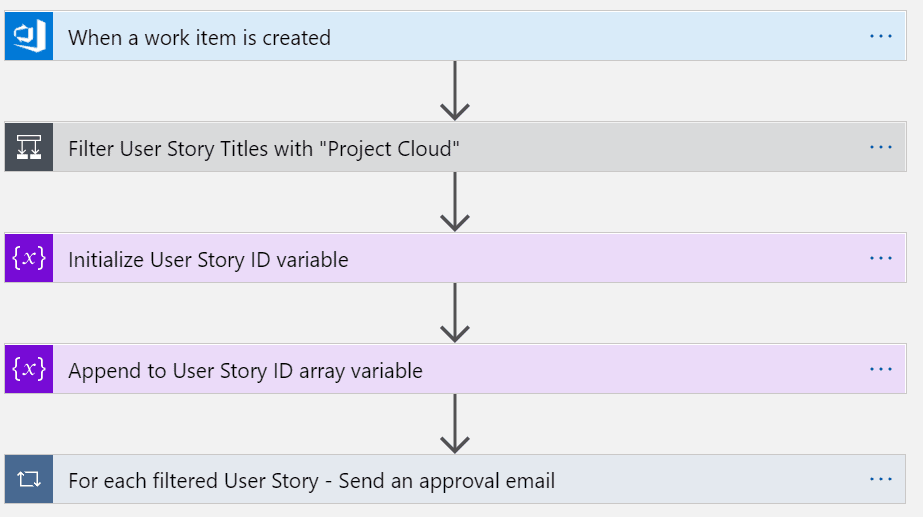
Figure 29: Logic App actions renamed
In case you were having issues running your Logic App, click the Overview section. From the right-hand side of the screen, select Runs history and click to select an item to view its status:
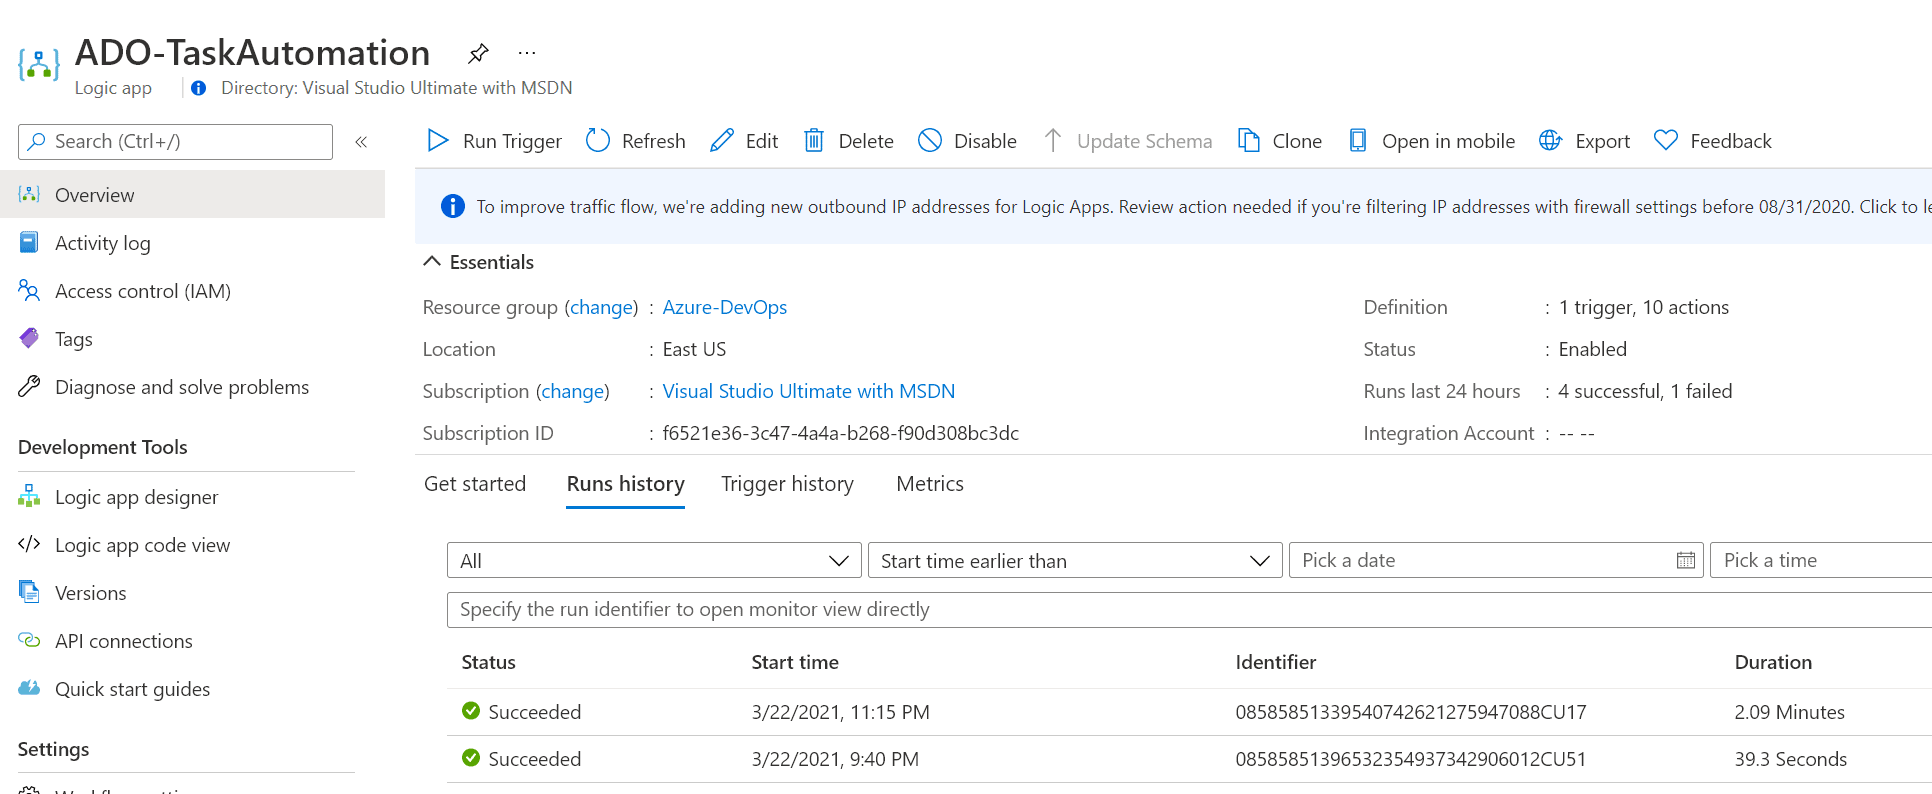
Figure 30: View Logic App status
When the Logic App run window opens, click Run details to view the details of each task. From there, you should be able to troubleshoot which action has failed, succeeded, or got skipped.
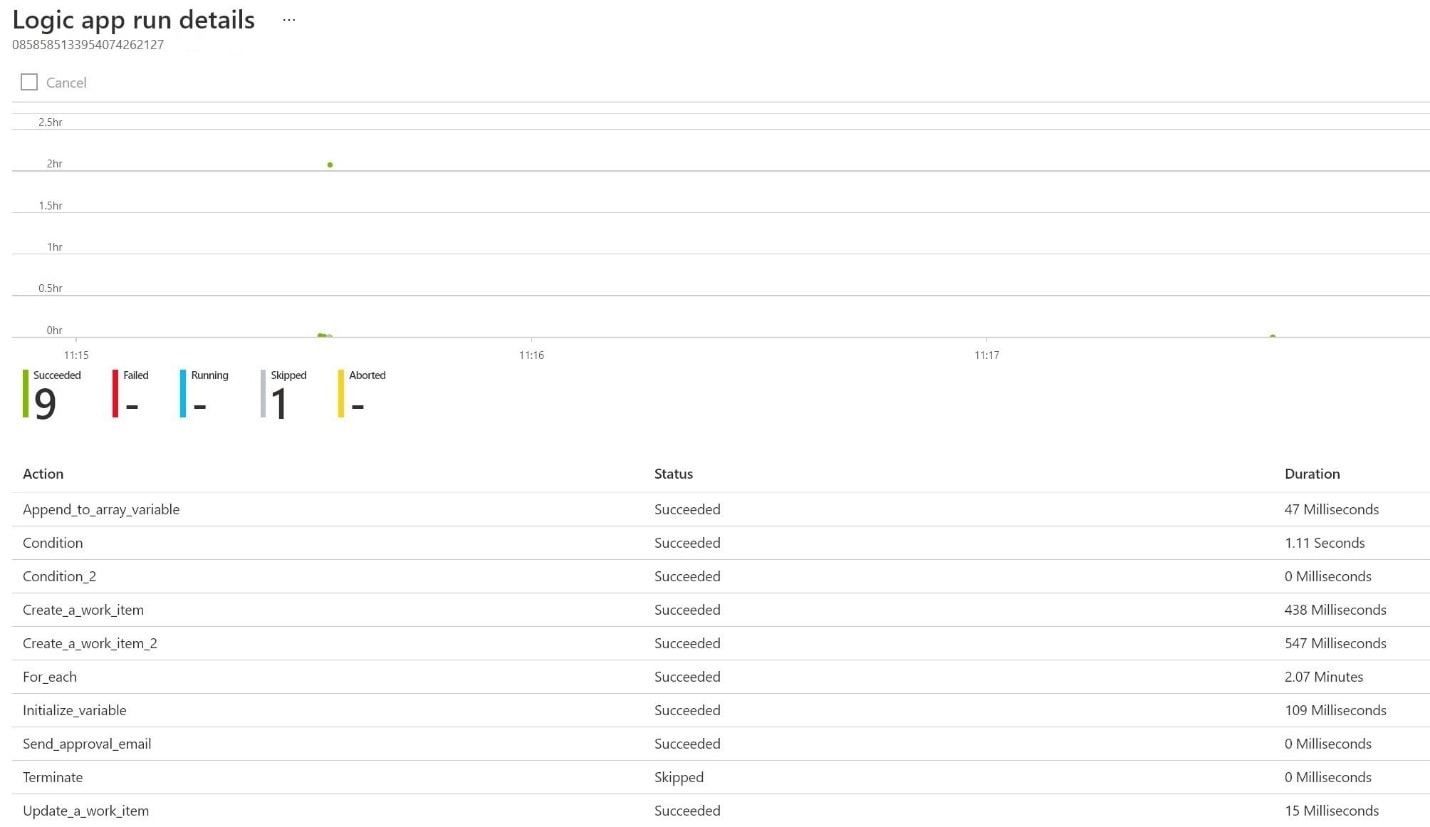
Figure 31: Troubleshoot Logic App
Using Logic Apps to automate Azure DevOps
As you’ve seen in this article, you won’t need any code or programming skills to build automation between Azure DevOps and Office 365 Outlook. The automation described in this article allowed you to follow a consistent approach to create child work item tasks based on a specific criterion and getting user stories formerly approved by the product owner and delivered to the developers without any interaction from the project manager.
It’s important to spend some time and consider leveraging automation in any type of engagement as it will not only save you time but also make your project more scalable on the long run, save you efforts and costs.
If you like this article, you might also like How to Configure CI/CD in Azure DevOps.
Load comments