Populate Seq with realistic sample data
Without the log data, searches, and dashboards that show what your application or system is up to, Seq is just a blank frame.
This makes it awkward to try out Seq for the first time, or to demonstrate it to someone else: there's nothing to see until you've already done the background work to get some data in there.
Seq 2021.2 solves this problem: in three very simple steps, you can populate it with sample data:
The sample monitors a fictitious online coffee distributor in real-time: "customers" place orders for beans through an MVC-style web API, and "warehouse staff" pack and post them off.
"Batch processes" run, things occasionally "break" or slow down 😁 - the simulation was a lot of fun to write, and you can find the complete source on GitHub if you're curious about how it works, or want to help improve the data set.
The sample comes with pre-built dashboards and related configuration - behind the scenes we have a new templating system in the works that we use for this, and you can take a peek at it, too, over here.
Here's how to load it up!
1. Create an API key on your Seq server
We're going to use seqcli to generate the sample data, and it will need to authenticate using an API key.
In the Seq UI, under your user avatar, choose API keys from the drop-down menu, and create a new API key.
The API key will need to have full permissions - Read, Write, Setup, and Ingest.
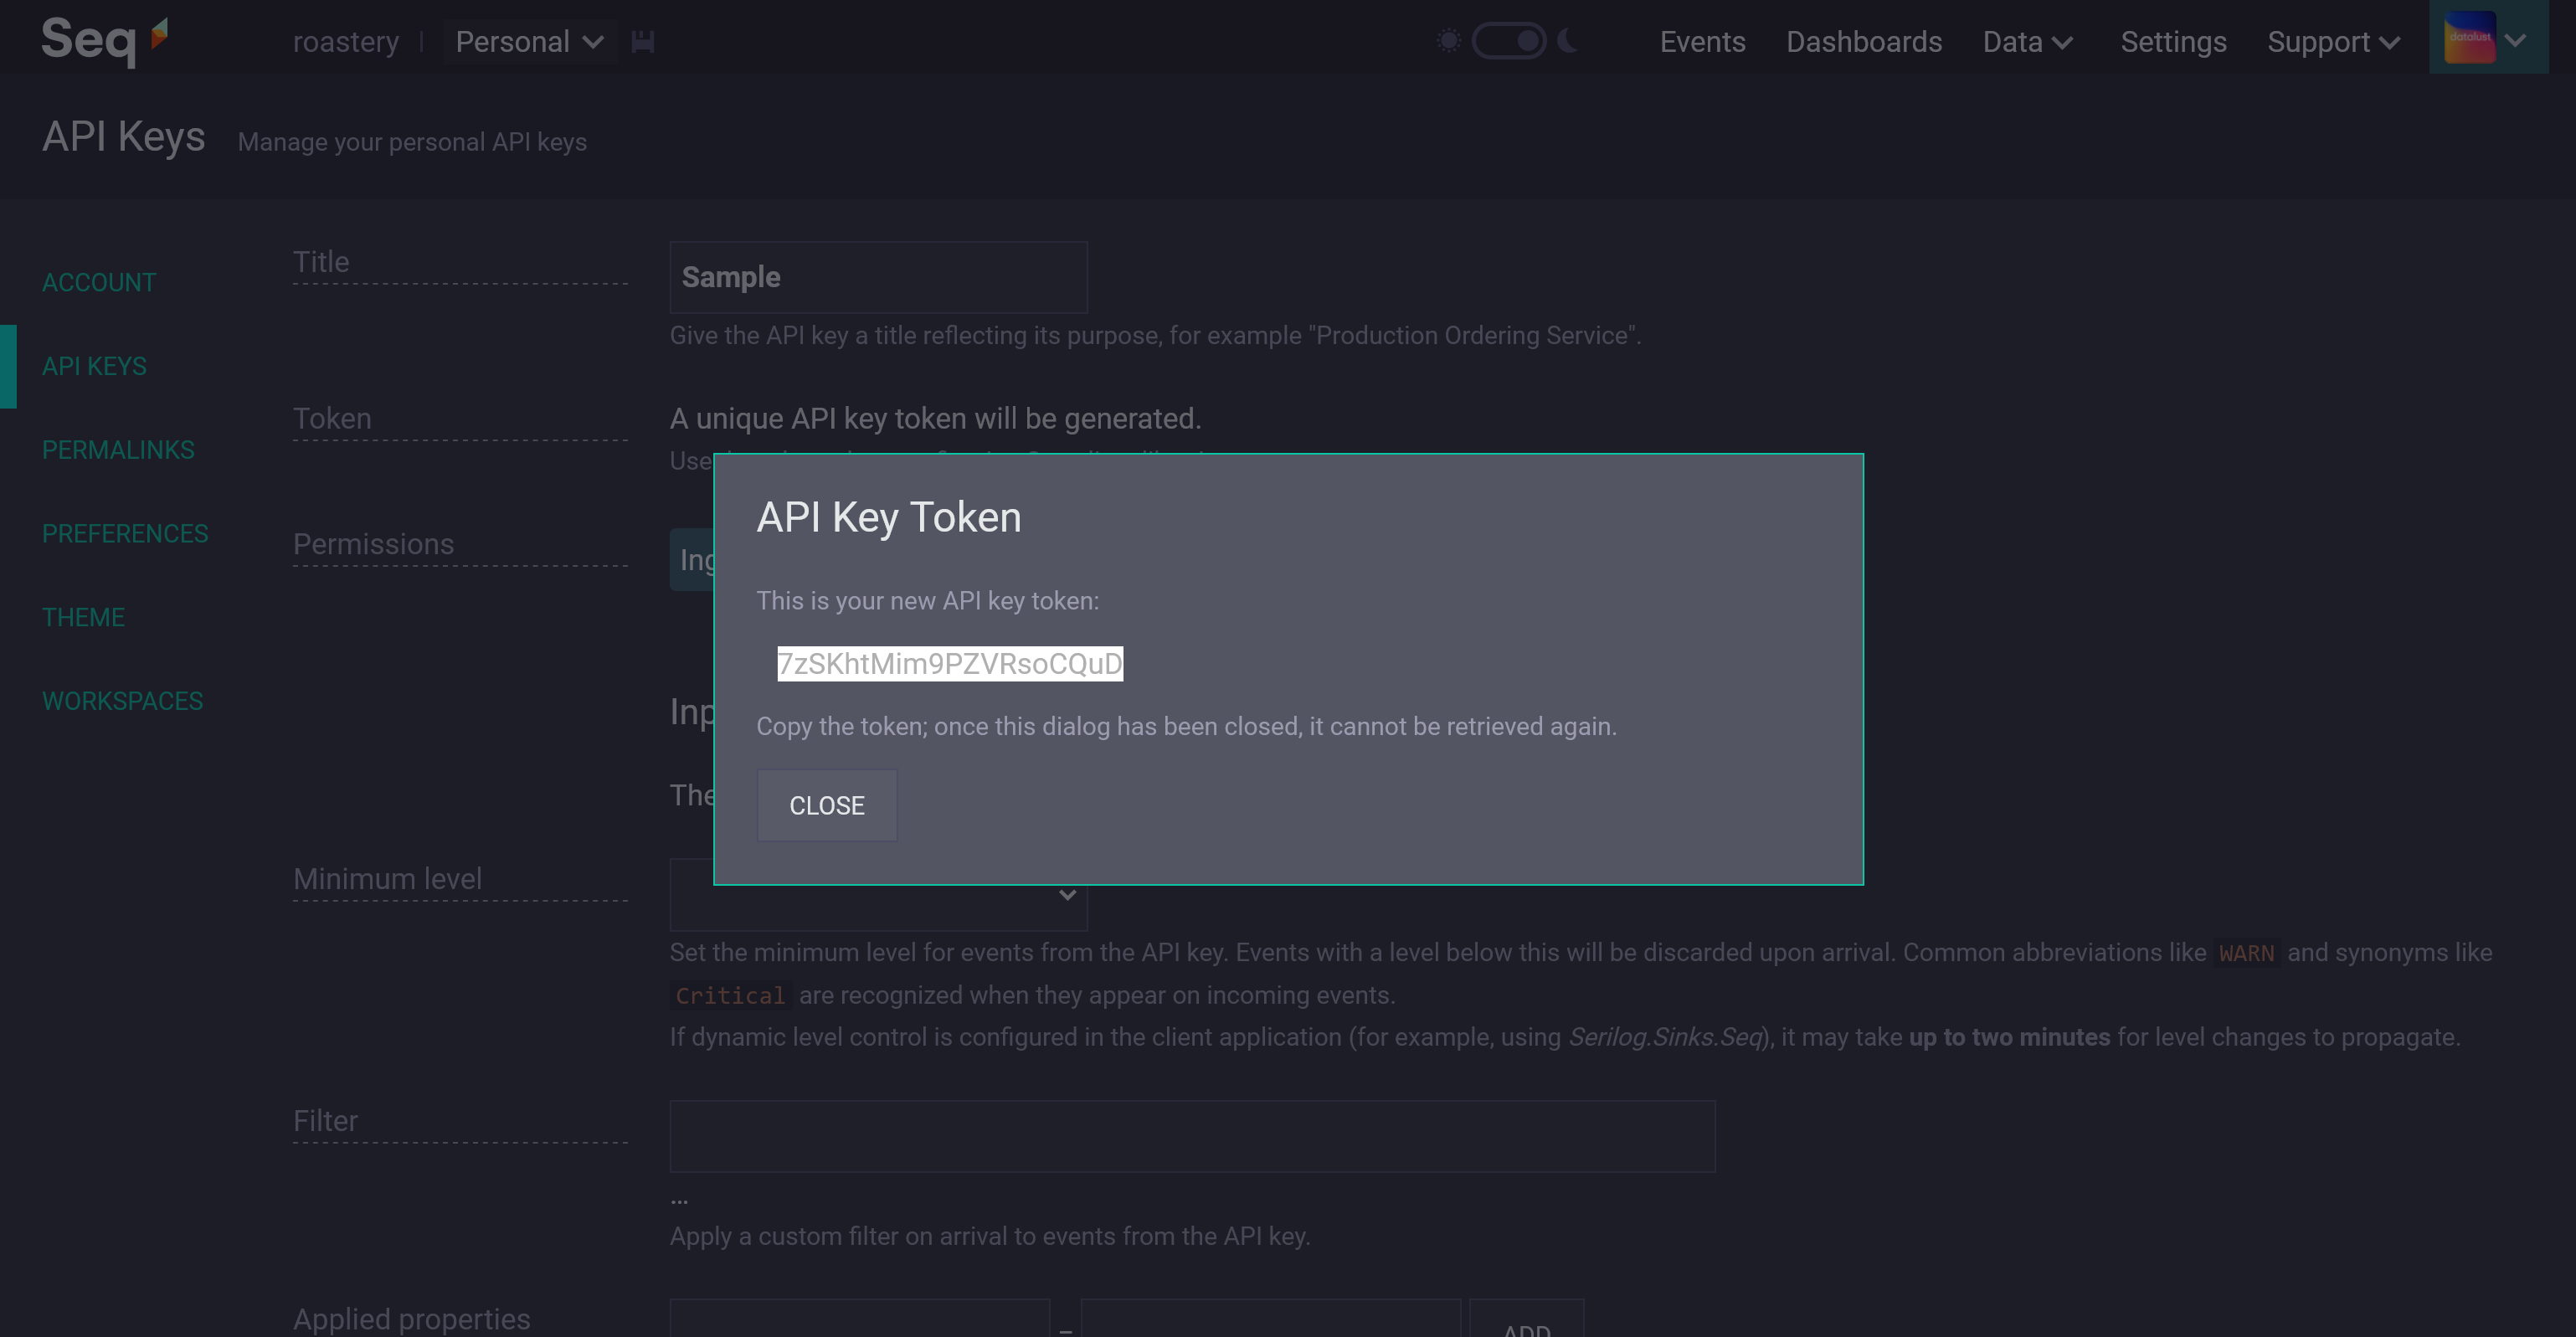
Don't forget to copy the API key token. These are hashed like passwords, and so can only be retrieved at the time they're created.
2. Set up the sample
In the commands below, for <server> specify the URL of your Seq server, and for <apiKey>, the API key you created in step (1).
On Windows, where seqcli is bundled with Seq itself, so you're probably good to go already:
seqcli sample setup -s <server> -a <apiKey>On Linux or macOS:
docker run --rm -it datalust/seqcli sample setup -s <server> -a <apiKey>If the command is successful, your Seq server will now have:
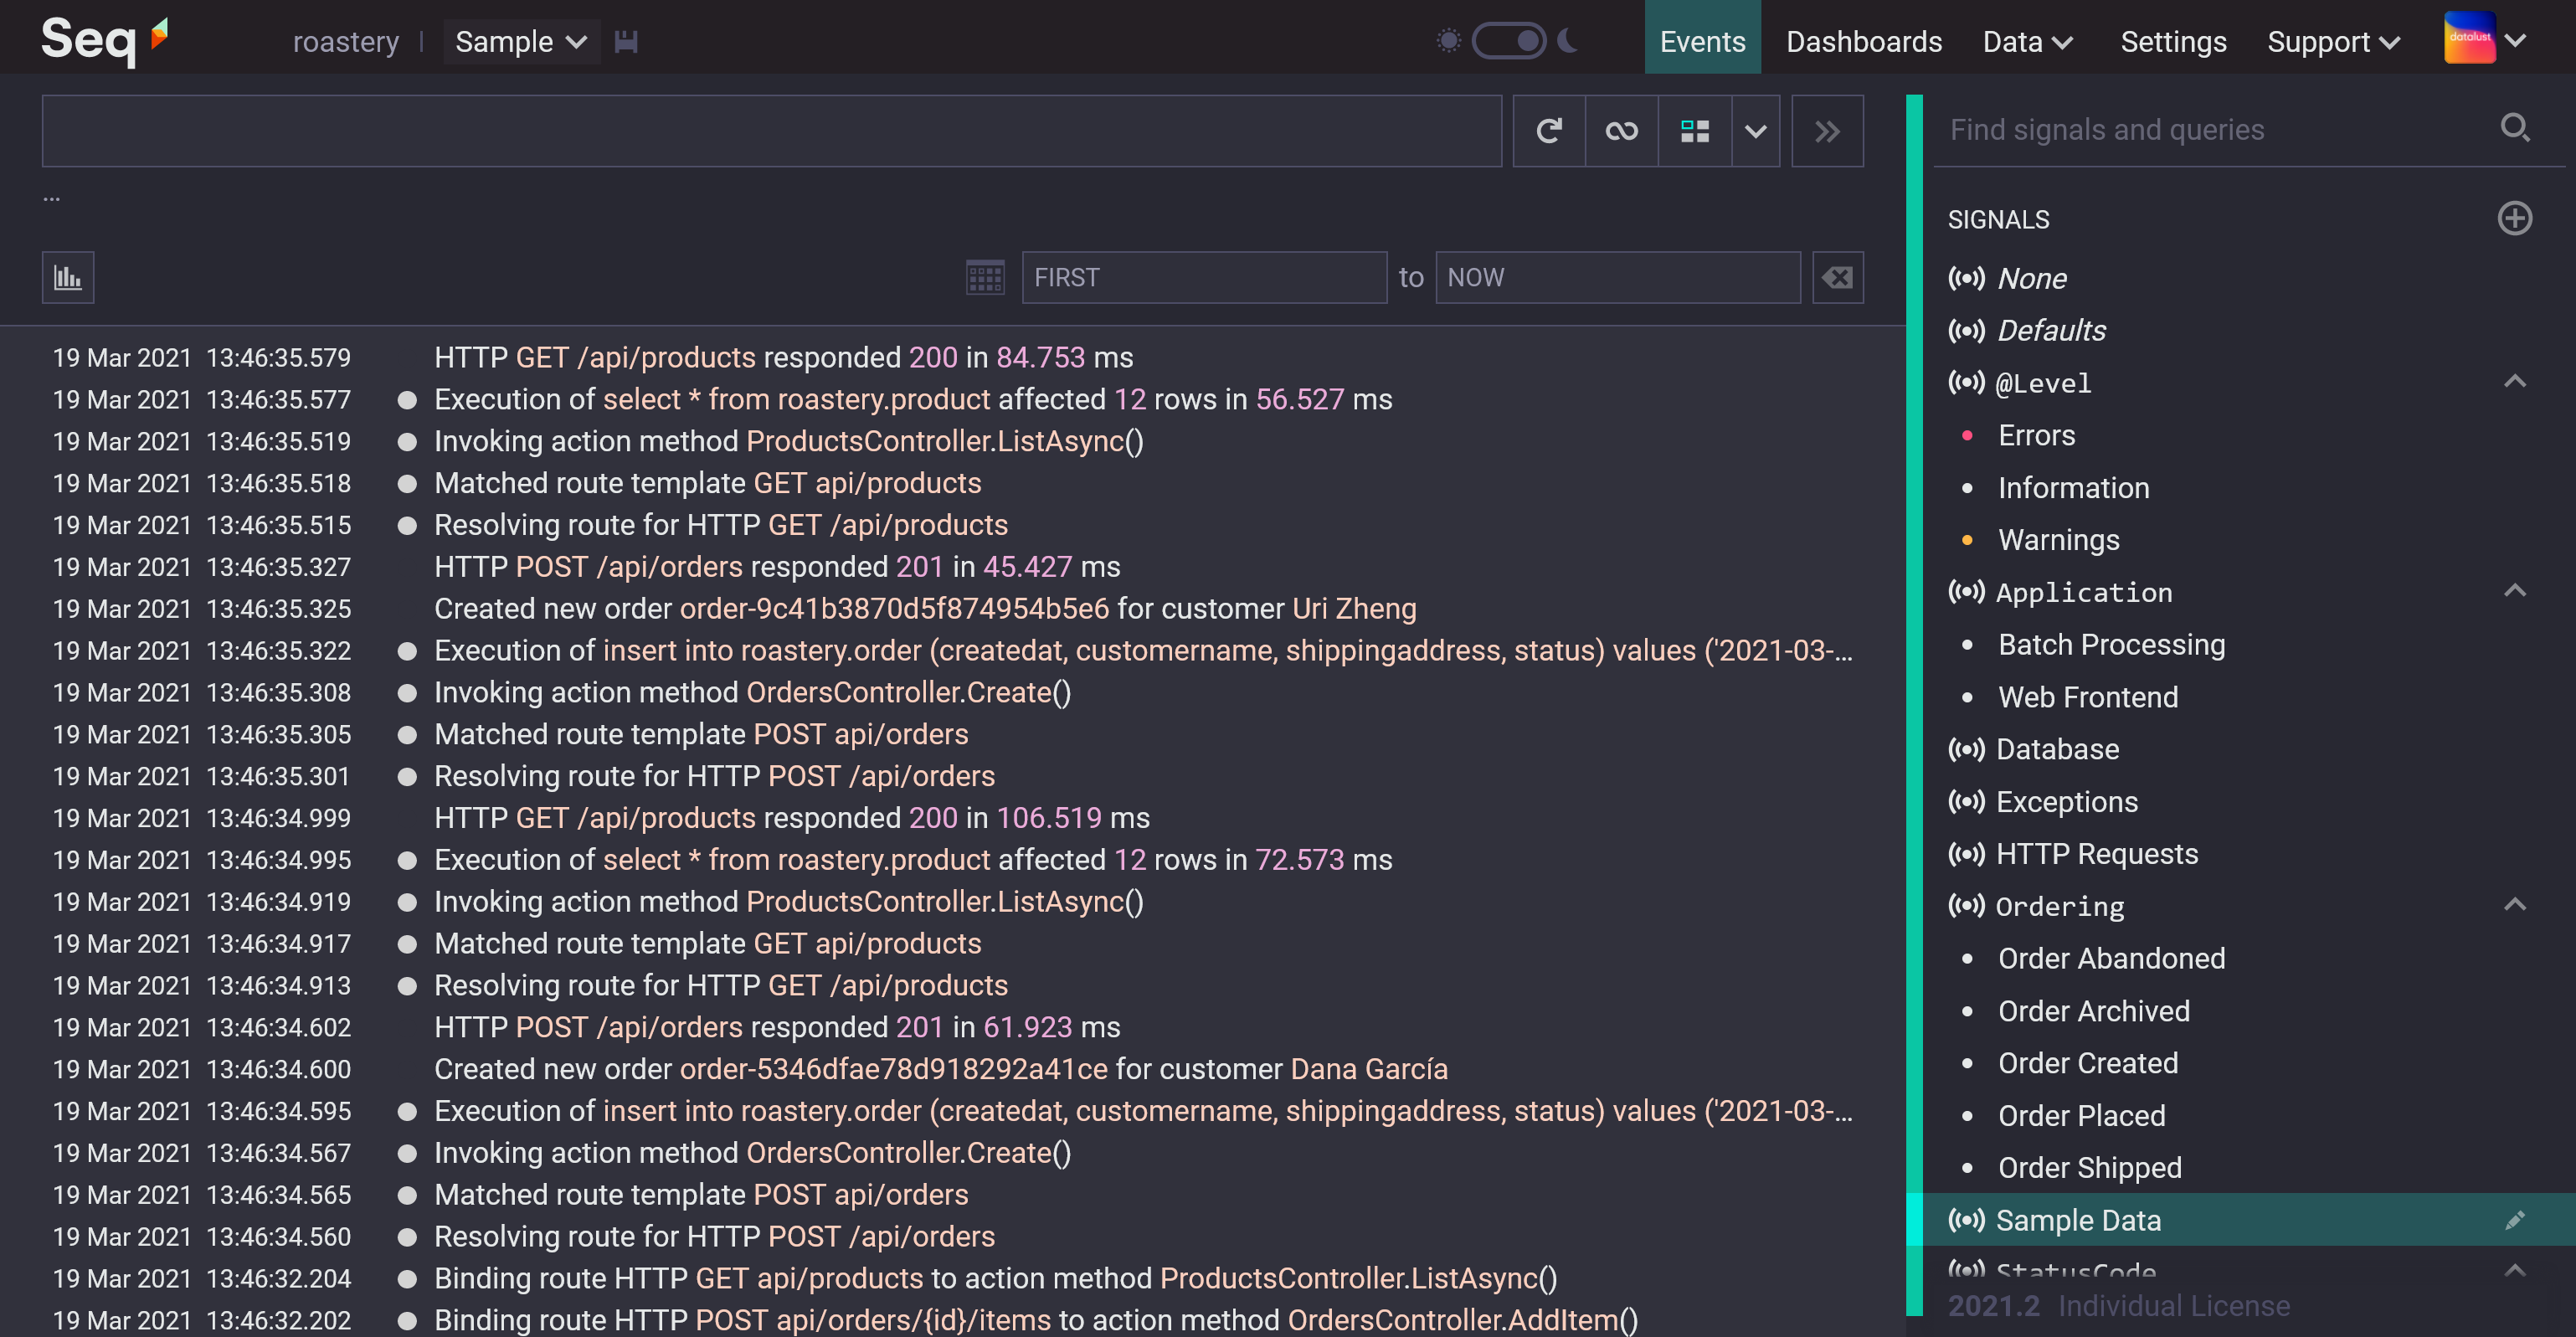
- A workspace called Sample - choose this from the workspace list that drops down next to the Seq logo in the navigation bar,
- Quite a few sample signals and saved queries,
- Some nicely-laid-out sample dashboards, and
- A sample retention policy, which will delete sample events after 30 days.
⚠ Be careful to run the setup command only once, or you'll end up with duplicate entities 😉😉.
3. Ingest some sample log events
Now it's time to light everything up with data!
On Windows:
seqcli sample ingest -s <server> -a <apiKey>On Linux or macOS:
docker run --rm -it datalust/seqcli sample ingest -s <server> -a <apiKey>With the sample ingest command running, open up one of the dashboards - Orders in the last 5 minutes is a good starting point:
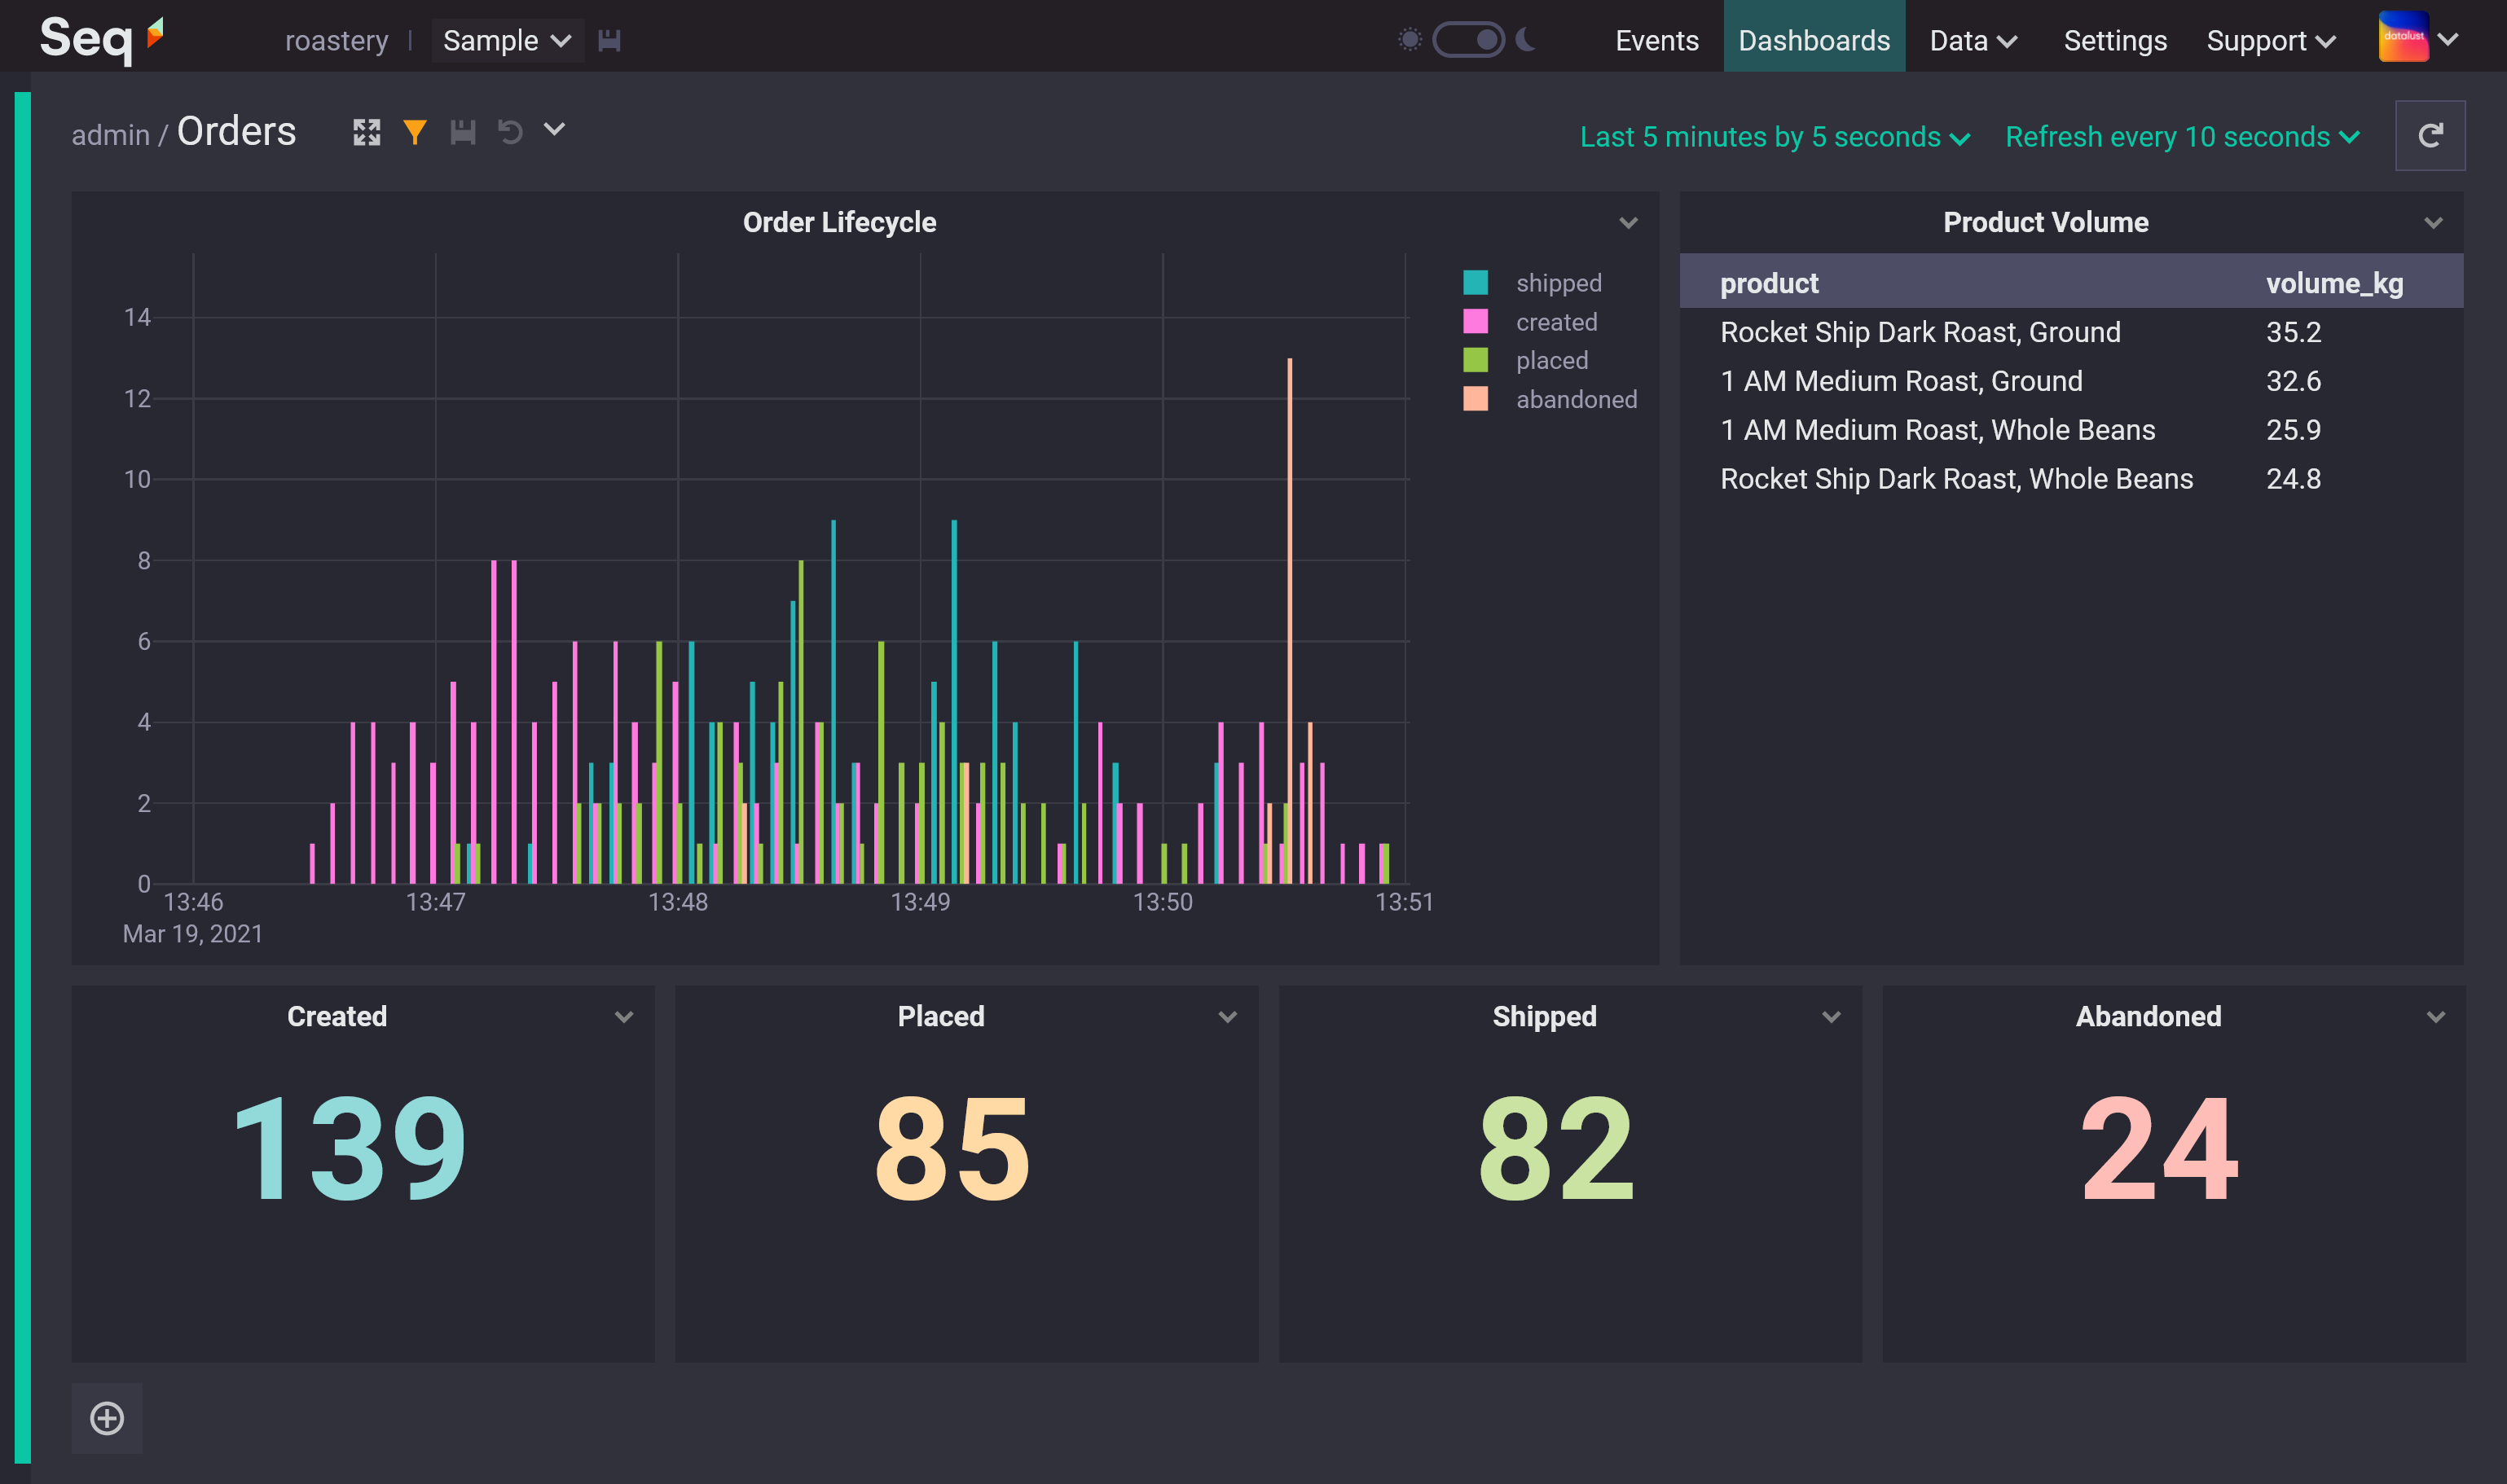
For as long as sample ingest is running, you'll see data streaming in: check out the Data > Ingestion and Storage screens to keep tabs on the resources being used.
You can stop and re-run sample ingest as much as you like.
Happy logging! 😎