
In this article, we’ll take a first look at Snowpack — specifically Snowpack 3, which at the time of writing has just been released. Snowpack is a front-end build tool that’s been getting a lot of attention in the community for offering a different approach from tools like webpack, and I’ve been keen to check it out for a while. Let’s dive in!
A History of Build Tools
Before we look into Snowpack, we need to take a quick moment to understand how and why bundlers like webpack came to be. JavaScript’s lack of a module system prior to ES2015’s modules meant that, in the browser, the closest we could get to modules was to split our code up into files that put code into the global scope, as this was how we shared it between files. It was common to see code like this:
window.APP = {}

window.APP.Authentication = {...}
window.APP.ApiLoader = {...}
When Node.js arrived and gained popularity, it had a module system in the form of CommonJS:
const Authentication = require('./Authentication.js')
const APILoader = require('./APILoader.js')
Once this became popular as part of Node, people wanted to be able to use it in the browser. That’s when tools started emerging that did this; they could take an application that used CommonJS modules, and bundle it into one large JavaScript file, with all the requires removed, that could be executed in the browser. Browserify was the first such tool that I can remember using to do this, and, to be honest, it felt like magic! This was around the time that webpack came to be, and other tools also supported using CommonJS.
When ES Modules were first introduced (see “Understanding ES6 Modules” for a refresher), people were keen to use them, but there were two problems:
- Whilst the spec was done, browsers didn’t support ES Modules.
- Even if a browser did support ES Modules, you probably still wanted to bundle in production, because it takes time to load in all the modules if they’re defined as separate files.
Webpack (and others) updated to support ES Modules, but they would always bundle your code into one file, both for developing and for production. This meant that a typical workflow is:
- Edit a file in your application.
- Webpack looks at which file changed, and rebundles your application.
- You can refresh the browser and see your change. Often, this is done for you by a webpack plugin such as hot module reloading.
The problem here lies in step two as your application grows in size. The work for webpack to spot a file change and then figure out which parts of your application to rebundle into the main bundle can take time, and on large applications that can cause a serious slowdown. That’s where Snowpack comes in …
Snowpack’s Approach
Snowpack’s key selling point for me is this line from their documentation:
Snowpack serves your application unbundled during development. Each file needs to be built only once and then is cached forever. When a file changes, Snowpack rebuilds that single file.
Snowpack takes full advantage of ES Modules being supported across all major browsers and doesn’t bundle your application in development, but instead serves up each module as a single file, letting the browser import your application via ES Modules. See “Using ES Modules in the Browser today” for more detail on browsers and their support for unbundled ES Modules.
It’s important to note at this point that you must use ES Modules to use Snowpack. You can’t use CommonJS in your application.
This however raises a question: what if you install a dependency from npm that does use CommonJS? Although I hope one day that the majority of npm packages are shipped as ES Modules, we’re still a fair way off that, and the reality is even if you build an application exclusively in ES Modules, it’s highly likely at some point you’ll need a dependency that’s authored in CommonJS.
Luckily, Snowpack can deal with that too! When it sees a dependency (let’s say, React), in your node_modules folder, it can bundle just that dependency into its own mini-bundle, which can then be imported using ES Modules.
Hopefully you can see why Snowpack caught my eye. Let’s get it up and running and see how it feels to use on an application.
Getting Started
To start with, I create a new empty project folder and run npm init -y to get me up and running. This creates a basic package.json which I can go in and edit later if I want to. You can also run npm init without the -y, which will make npm prompt you to answer questions to fill in the details in your package.json. I like using -y to quickly get up and running; I can edit the package.json later.
I then install Snowpack as a developer dependency:
npm install --save-dev snowpack
And now I add two scripts into my package.json:
"scripts": {
  "start": "snowpack dev",
  "build": "snowpack build"
},
This sets us up two npm run commands:
npm run startwill run Snowpack in development mode.npm run buildwill run a production build of Snowpack, which we’ll talk more about later.
When we run our application, Snowpack fires up a little development server that will run our application locally. It will look for an index.html file, so let’s create one of those and also create app.js, which for now will just log hello world to the console:
<!DOCTYPE html>
<html lang="en">
<head>
  <meta charset="UTF-8">
  <meta name="viewport" content="width=device-width, initial-scale=1.0">
  <title>Snowpack testing</title>
</head>
<body>

  <script src="./app.js"></script>
</body>
</html>
console.log('hello world')
Now we can run npm run start (or npm start for short — start is one of the npm lifecycle methods where you don’t need to prefix it with run).
You should see your terminal output look something like this:
snowpack

  http://localhost:8080 • http://172.18.33.234:8080
  Server started in 80ms.

▼ Console

[snowpack] Hint: run "snowpack init" to create a project config file. Using defaults...
[snowpack] Nothing to install.
The first part of the output tells us that Snowpack is running on localhost:8080. The next line prompts us to create a Snowpack configuration file, which we’ll do shortly, but it’s the last line that I want to highlight:
[snowpack] Nothing to install.
This is Snowpack telling us that it’s checked for any npm modules that need dealing with, and it hasn’t found any. In a moment, we’ll add an npm package and take a look at how Snowpack deals with it.
Generating a Configuration File
You can run npx snowpack init to generate the configuration file as the command line output suggests. We won’t be needing to change Snowpack’s behavior until we come to bundling for production, but if you do you can create this file and configure a wide range of options to get Snowpack running just how you want it to.
Writing in ES Modules
Let’s create another JavaScript file to see how Snowpack deals with multiple files. I created api.js, which exports a function that takes a username and fetches some of their public repositories from GitHub:
export function fetchRepositories(user) {
  return fetch(`https://api.github.com/users/${user}/repos`)
    .then(response=> response.json());
}
Then, in app.js, we can import and use this function. Feel free to replace my GitHub username with your own!
import {fetchRepositories} from './api.js';
fetchRepositories('jackfranklin').then(data => console.log(data));
Save this file, and run Snowpack again if you didn’t leave it running previously. In the browser console, you’ll see an error:
Uncaught SyntaxError: Cannot use import statement outside a module
This is because of our <script> tag in our HTML file:
<script src="./app.js"></script>
Because ES Modules behave slightly differently from code that doesn’t use ES Modules, it’s not possible for browsers to just start supporting ES Modules in all scripts. Doing so would almost certainly break some existing websites, and one of the main goals of JavaScript is that any new features are backwards compatible. Otherwise, every new JS feature might break thousands of existing websites!
In order to use ES Modules, all we need to do is tell the browser that by giving the script tag a type of module:
<script type="module" src="./app.js"></script>
And when you save that, your browser should refresh automatically (another nice thing Snowpack does out of the box) and you’ll see a list of GitHub repositories logged to the console.
Installing npm Dependencies
Let’s see how Snowpack deals with installing a package from npm. I’m going to get our list of repositories rendered onto the screen with Preact. Firstly, let’s install it:
npm install --save preact
To check it’s working, I’ll update app.js to render Hello world onto the screen:
import {fetchRepositories} from './api.js';
import {h, render} from 'preact';

fetchRepositories('jackfranklin').then(data => {
  render(h('p', null, 'Hello world'), document.body);
});
Note that I’m using the h helper to create HTML, rather than use JSX. I’m doing this for speed purposes, to get an example up and running. We’ll swap to JSX a bit later in this article and see how Snowpack handles it, so hold tight.
Now when we run npm start, Snowpack will output this:
[snowpack] ! building dependencies...
[snowpack] ✔ dependencies ready! [0.33s]
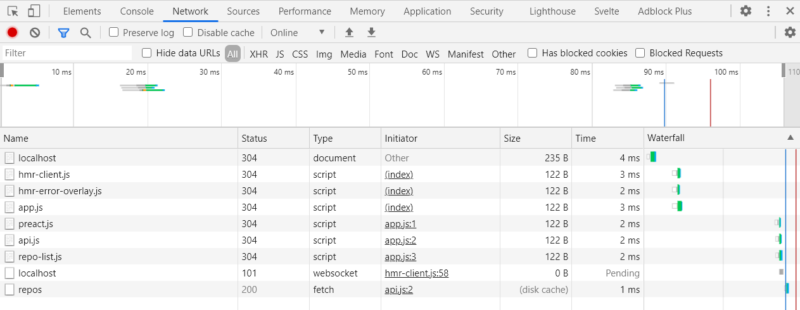
You can see that it found Preact, and created an ES Modules bundle ready for us to use. If you look in the Network tab of the developer tools, you’ll see a request to app.js, api.js and preact.js, which is the file Snowpack created for us from the Preact dependency. What’s nice about Snowpack’s approach is that now it’s created that Preact file, it will cache it and only ever change it if Preact changes. Given that Preact is a dependency, we’re probably not going to be changing it regularly, so it shouldn’t have to do that work often. This is one of the ways Snowpack keeps development nice and snappy.
Supporting JSX
Snowpack has good support for a number of syntaxes and filetypes out of the box. It does support JSX, but with one condition: all JSX must be defined in .jsx files. You can change this, if you want (check the documentation for details), but I’ve always liked using .jsx. Let’s create a new JSX file that contains our Preact component, repo-list.jsx:
import {h} from 'preact';

export function RepoList(props) {
  return <ul>{props.repos.map(repo => {
    return <li><p>{repo.name}</p></li>
  })}</ul>
}
Note that, despite the fact that we don’t call the h helper directly, we need to import it so that Snowpack doesn’t assume we’re using React.
Now in app.js we can render our component:
import {h, render} from 'preact';
import {fetchRepositories} from './api.js';
import {RepoList} from './repo-list.jsx';

fetchRepositories('jackfranklin').then(data => {
  render(h(RepoList, { repos: data }, null), document.body);
});
And we have our list of repositories on the screen.
Production Builds
At the time of writing, running a Snowpack production build won’t bundle and minify all your files together into one bundle as you might expect. It’s explained further in the Snowpack production build guide, but Snowpack’s speciality is to be an ES Modules multi-file build tool, not a complete bundler. At the time of writing, Snowpack is working on providing built-in bundling via esbuild, but the docs state that this is still very experimental and shouldn’t be relied on for large projects.
Instead, the use of another bundler that Snowpack provides plugins for is recommended:
Note that you don’t have to manually install the other bundler. These are Snowpack plugins which you can configure in your Snowpack configuration file. Snowpack will then take care of calling webpack/Rollup for you to bundle your application when you run snowpack build.
Bundling with Webpack
We’ll look shortly at Snowpack’s built-in esbuild bundler support, but for now using one of these plugins is a straightforward solution and also the recommended approach. Let’s get Snowpack’s webpack plugin set up to minify our code when we build for production. First, we’ll install it:
npm install --save-dev @snowpack/plugin-webpack
You’ll also need a configuration file, so run npx snowpack init (if you haven’t already) to generate a configuration file where we can configure the webpack plugin for production builds.
In snowpack.config.js, make the plugins item look like so:
plugins: [
  ['@snowpack/plugin-webpack', {}]
],
The empty object is where you can place any extra configuration settings, though it should work just fine out of the box. Now when we run npm run build, Snowpack will recognize that we’ve added the webpack plugin and bundle accordingly, generating us an optimized, minified bundle that we can ship.
One of the nice things that webpack provides out of the box is dead code elimination — also known in the JavaScript community as “tree shaking” — to avoid code that’s not required making it into our final bundle.
We can see this for ourselves if we export and define a function in api.js which we never use:
export function fetchRepositories(user) {
  return fetch(`https://api.github.com/users/${user}/repos`)
    .then(response=> response.json());
}

export function neverUsed() {
  console.log('NEVER CALLED')
}
If we run npm run build once more, and then load our minified output (it will be in the build/js directory and be called app.[hash].js) we can see that if we search the file for 'NEVER CALLED', it’s not been included. Webpack was smart enough to understand that we never called that function, so it could be removed from the final output.
Bundling with esbuild
To get a sense of what the future might look like once Snowpack’s esbuild support is improved and esbuild itself is more production ready (see the esbuild docs for more detail on esbuild and its roadmap), let’s configure that. First remove all the webpack plugin configuration from your snowpack.config.js file and instead add an optimize object:
plugins: [
],
optimize: {
  bundle: true,
  minify: true,
  target: 'es2018',
  treeshake: true,
},
Now when you run npm run build, esbuild will take over and perform the final optimization steps, creating build/app.js, which will be a fully minified version. It also removes dead code just like webpack, so our neverUsed() function has not made it into the final build.
For now, I’d stick with the webpack plugin if you need fully robust, battle-tested bundling, but for side projects or small apps, it might be worth exploring esbuild further.
Conclusion
Snowpack offered me a fantastic developer experience and one that’s left me very keen to try it again on another project. I know in this article we used Preact, but Snowpack supports many other libraries including React, Svelte and many more which you can find documented on the website.
If you haven’t used Snowpack before, I highly recommend giving it a go, and keeping your eye on Snowpack over the coming months and years. I wouldn’t be surprised if it’s a tool that the majority of developers are using in the not-too-distant future.
Here’s a handy Snowpack demo on GitHub, demonstrating how Snowpack functions as a module bundler both in development mode and (with the help of its Webpack plugin) how it can minify your code for production.
Snowpack FAQ
Snowpack is a modern, lightweight build tool for web applications. It’s designed to replace traditional, heavy bundlers by leveraging the native module system of modern browsers to deliver faster and more efficient development and build processes.
Unlike traditional bundlers that package all your code into a single bundle, Snowpack transforms your code in development without bundling it. This allows for faster development iterations and leverages the native browser ESM (ECMAScript Modules) support for more efficient production builds.
Snowpack is well-suited for modern web development projects using JavaScript, TypeScript, and other web technologies. It’s particularly effective for single-page applications and projects with a modular code structure.
Yes, Snowpack is framework-agnostic and can be used with any JavaScript framework or library. It adapts well to different project structures and provides seamless integration with popular frontend frameworks.
Snowpack uses a “no-bundle” approach during development, which means it installs dependencies as individual ESM files. In production, it optimizes and bundles the dependencies for efficient delivery to the browser.
Snowpack is optimized for modern browsers with native ESM support. While it can be used with legacy browsers, additional tools like Babel may be needed to ensure compatibility.
 Jack Franklin
I'm a JavaScript and Ruby Developer working in London, focusing on tooling, ES2015 and ReactJS.