How to Configure Nginx as a Web Server and Reverse Proxy for Apache on CentOS 8
As you know, Apache and Nginx both are free, open-source, and powerful web servers around the world. Apache is known for its power while the Nginx is known for its speed. Both have some drawbacks and benefits. Nginx uses PHP-FPM to load the PHP files while Apache loads PHP on its own. Apache is used for the dynamic part of the website while Nginx serves static files like graphics, CSS, and js files.
It is a good idea to use both of them on a single server and get benefits from both. In this tutorial, we will show you how to use the Nginx as a web server and reverse proxy for Apache web server on CentOS 8.
Prerequisites
- A server running CentOS 8.
- A domain name pointed with your server IP.
- A root password is configured the server.
Install Apache and PHP
First, you will need to install the Apache webserver and PHP in your server. You can install it using the following command:
dnf install httpd php php-cli -y
Once the installation is finished, start the Apache service and enable it to start at system reboot with the following command:
systemctl start httpd
systemctl enable httpd
Configure Apache Web Server
By default, the Apache webserver listen on port 80. So, you will need to configure the Apache webserver to listen on port 8080. You can do it by editing the Apache main configuration file:
nano /etc/httpd/conf/httpd.conf
Change the post from 80 to 8080 as shown below:
Listen 8080
Save and close the file then restart the Apache service to apply the changes:
systemctl restart httpd
Next, check the Apache listening port with the following command:
ss -antpl | grep httpd
You should get the following output:
LISTEN 0 128 *:8080 *:* users:(("httpd",pid=1693,fd=4),("httpd",pid=1692,fd=4),("httpd",pid=1691,fd=4),("httpd",pid=1688,fd=4))
Next, create a info.php file inside the Apache web root directory:
nano /var/www/html/info.php
Add the following line:
<?php phpinfo(); ?>
Save and close the file when you are finished.
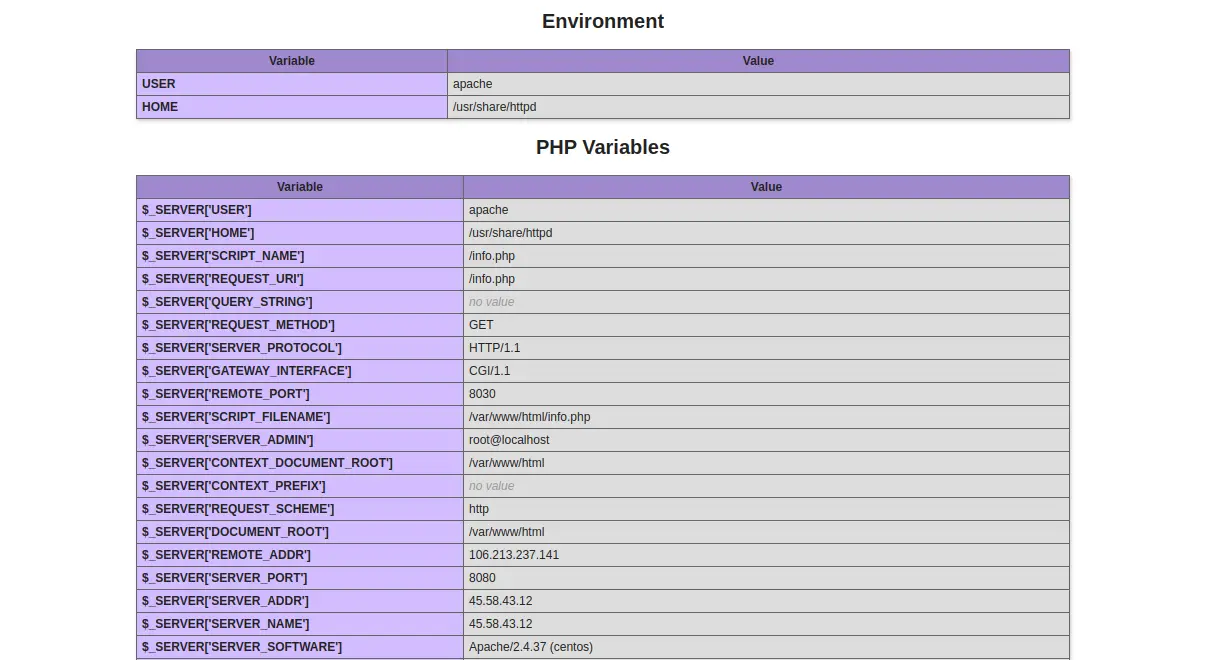
Next, open your web browser and access the URL http://your-server-ip:8080/info.php. You should see the following page:
Install Nginx Web Server
Next, you will need to install the Nginx package on your server. You can install it with the following command:
dnf install nginx -y
Once the Nginx has been installed, start the Nginx service and enable it to start at system reboot with the following command:
systemctl start nginx
systemctl enable nginx
Configure Nginx as a Reverse Proxy for Apache
Now, you will need to configure the Nginx as a reverse proxy to forward all request coming on port 80 to the Apache webserver which is listening on port 8080.
First, create a new Nginx virtual host configuration file with the following command:
nano /etc/nginx/conf.d/proxy.conf
Add the following lines:
server {
    listen 80;
    server_name test.example.com;

    location ~ \.php$ {
        proxy_pass http://your-server-ip:8080;
        proxy_set_header Host $host;
        proxy_set_header X-Real-IP $remote_addr;
        proxy_set_header X-Forwarded-For $proxy_add_x_forwarded_for;
        proxy_set_header X-Forwarded-Proto $scheme;
    }
}
Save and close the file when you are finished. Then, restart the Nginx webserver to apply the changes:
systemctl restart nginx
Now, open your web browser and access the URL http://test.example.com/info.php. You should see the following page:

As you can see, PHP is served by an Nginx web server.
Conclusion
In the above guide, you learned how to configure Nginx as a web server and reverse proxy for Apache. I hope this will helps you to increase the performance of your website.

