During the 2020 PASS Virtual Summit, a person tweeted something about how he wanted to scream at the next presenter who used the PowerShell ISE that comes with Windows. Several people leapt to the defense of that particular tool. In addition, during the live panel discussion on PowerShell, someone asked what would be the best editor to use. Between these two incidents, and my previous desire to write an article on moving from the ISE to Visual Studio Code, I thought it was time to write an article on the tools you can use to write PowerShell scripts, so this article covers PowerShell editors and environments.
I’ll start by saying that, most of the time, I still use the PowerShell ISE that comes with Windows, but I really should be moving to Visual Studio Code, and, in this article and the second part, I’ll explain why I should but also why I haven’t.
Editing versus running
Before I go too deep into this article, I want to distinguish between editing a file and running it. I’m going to focus on editors here, but most development environments include a way to execute a PowerShell script or PowerShell commands. However, do not confuse the editor with the execution environment.
Notepad
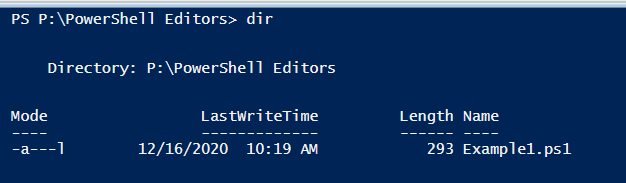
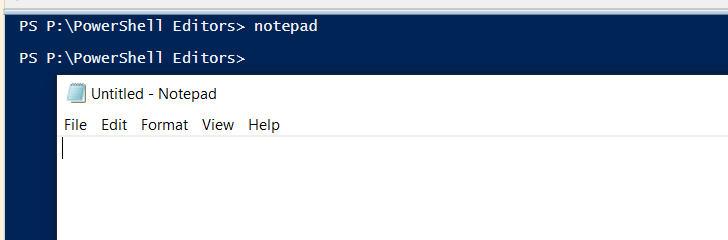
The simplest tool one can use to write and edit PowerShell Scripts is Notepad. A PowerShell script is basically a text file that is interpreted when it’s run. If no other tool is available on the machine you’re on, Notepad is almost certainly there. That said, it only allows you to edit a file, you can’t actually execute your file. You have to save it and then execute it using another tool such as the PowerShell shell.
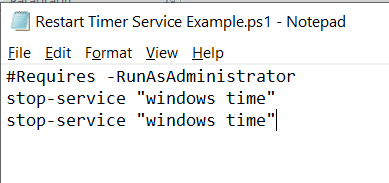
This script is valid PowerShell, and I could edit the file, for example, replace the name of the service if I wanted, but I can’t do more than simple editing. For a quick and dirty edit, this may be all that is needed. In my experience, it is the fastest way to open, edit, and then close a file, but that’s about the only real advantage. If I want to run this script, I still need to have an execution environment.
PowerShell shell
If you go to your start menu and enter Windows PowerShell, you should see something like the following:
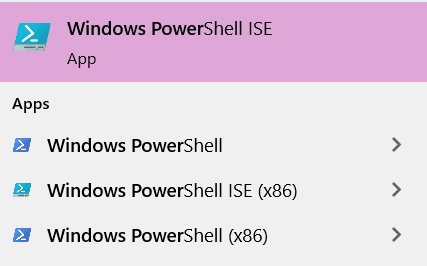
In this case, select the second choice: Windows PowerShell.
This action opens a window that looks similar to the following:
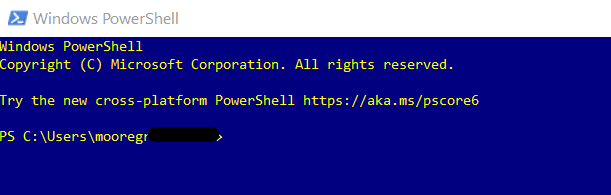
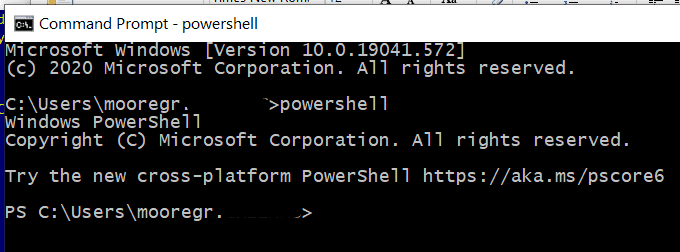
The window looks a lot like a standard CMD window, but with the addition of PS before the prompt. You can also get here from a CMD window itself by typing PowerShell in the CMD window.
Other than the color, these are the same. You can type PowerShell Cmdlets into either one and execute them, or even run actual PowerShell scripts.
However, you can’t edit a PowerShell script here. The window is only the CMD line for PowerShell.
To execute a cmdlet, you can simply type it:

To run an actual script, you need to tell PowerShell the string you’re giving it is the name of a script to run, not a string to echo back.

Note here that PowerShell takes the passed string and echoes it back.
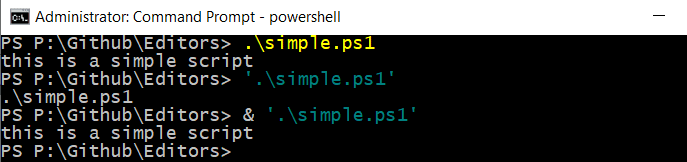
To force PowerShell to execute the string in quotes, start with an & symbol:
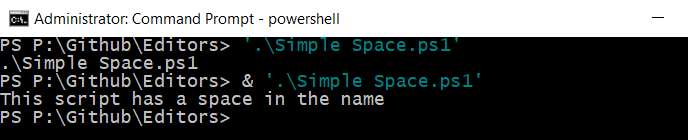
The & causes the script to be executed.
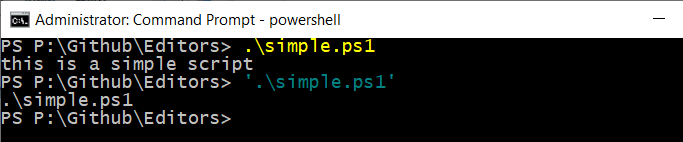
Note, however, if the script has no spaces in the name, you don’t need quote marks. As a result, PowerShell attempts to execute it:

If you do put quotes around it, PowerShell treats it as a string.
Generally it’s safer to use the & symbol, which is also known as the call operator
Note that in the PowerShell Command Line, generally auto-completion works as you might expect and will intelligently try to insert the & and quotes as needed if it can find a script in the directory that matches what you type.
One last tip: if you already have a CMD window open, you can start the PowerShell shell by running the command powershell. This command gets you to the shell the same way as if you had done it via the GUI.
Linux
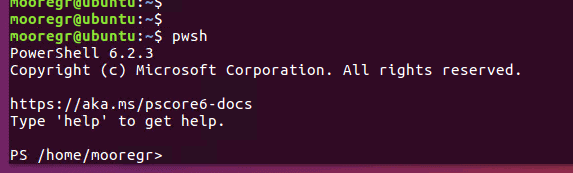
One of PowerShell’s wonderful features is that you are not limited to running it only on Windows. You can, of course, write scripts and execute them on Linux. In the examples below, I am running Ubuntu Linux, but this should work for other distributions of Linux also.
Whereas the command on Windows to open the PowerShell shell is PowerShell, on Linux it’s pwsh:
You can run most PowerShell scripts and cmdlets on Linux just like you would in Windows. However, some scripts or cmdlets such as those that make calls to the Windows GUI or Windows specific concepts will obviously fail. For example, get-services can’t run on Linux, but get-help will.
Another important detail is that Linux is case sensitive, as seen in the examples below:
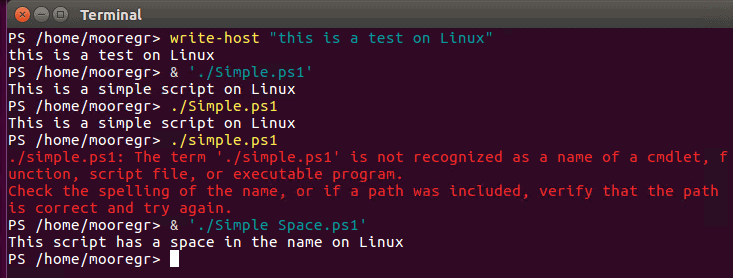
Note that simple.ps1 and Simple.ps1 are not treated the same on Linux like they would be under Windows.
While Linux won’t have Notepad like Windows, you should be able to find VIM or a similar text editor available in your distro.
PowerShell ISE
A comment about this the PowerShell ISE prompted this article. The PowerShell ISE is the PowerShell Integrated Scripting Environment. Despite it being disparaged by some, honestly, it’s my go-to tool most of the time. Let me start by saying what it is not and why it is often disparaged: it’s not a modern IDE. Most of all, I would say what it lacks that I would look for the most in a modern IDE is tight control with some sort of source control system such as git. This limitation is not a show-stopper since you can still use git and other source control systems via the command line, but it can be inconvenient.
That said, an advantage of the PowerShell ISE is that you will almost certainly find a copy of it on every Windows computer where you might run PowerShell Scripts. It is not available on Linux.
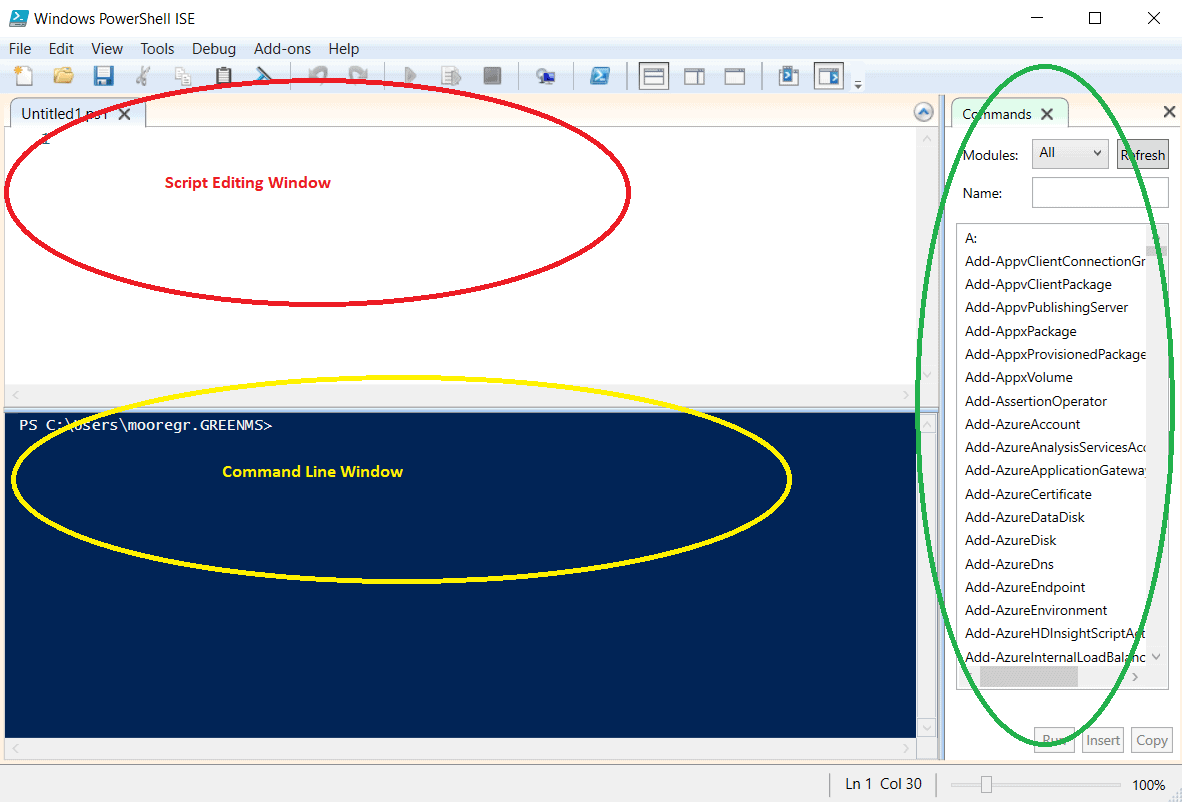
There are three main parts to the PowerShell ISE. The most obvious one is the largest, the Script Editing Window. This window is where you can open scripts, edit them and even run them. In the screenshot below, it’s the large white area with the red circle and text. In this case, PowerShell ISE has just been opened and is ready for creating a new script. By default, it is titled Untitled1.ps1. To open another window, press Ctrl-N. This action creates a new window called Untitled2.ps1, and so on. The file menu allows you to open and save files.
Below this window in the default layout is the command line window. This window operates very similarly to the PowerShell shell described above. It has one important addition that I find very helpful that I will describe in a bit.
Finally, a help window is found to the right of both windows. This windows shows installed cmdlets and allows searching for them and to get additional help. This functionality can be quite useful at times.
Script editing window
This section is not meant to be a full tutorial on all the PowerShell ISE features, but I wanted to call out a couple of important features.
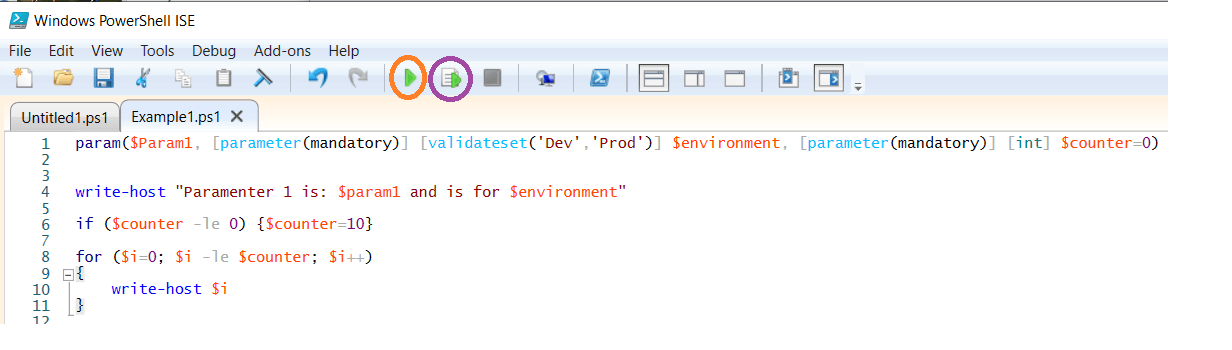
There are two icons with a green arrow on them. The one circled in Orange runs the entire script in the current edit window. If there are mandatory parameters, you are prompted for them. If a parameter is not mandatory, you will not be prompted for it and cannot provide a value when running it this way.

Pressing F5 performs the same action; this is your basic run command.
However, if you highlight just a portion of the script and press the button circled in purple, or press F8, it runs ONLY the lines highlighted.
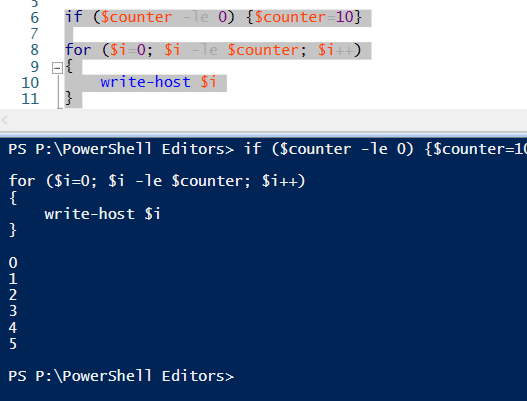
Now note, that in the ISE, variables remain in scope within the session. Since the last time I ran this script I had given $counter the value of 5, it remembered that for this script scrap.
This behavior can be confusing but also useful.
Using this ability to run only a portion of your script, and the fact that variables remain in scope and valid during your session can be convenient when debugging. However, it can also mean that sometimes you get unexpected results if you aren’t keeping track of what you last ran and what value some variables may have.
Command line window
The command line window of the ISE has several useful features. You can execute simple scripts and cmdlets in it if you desire.

Notice this too will recall the last value of a variable.
You can execute many CMD commands here, though many will be interpreted using a PowerShell native cmdlet.
That’s a dir command but acting much like the PowerShell cmdlet Get-ChildItem because it’s an alias.
You can also start other programs in there.
However, what’s most powerful about this window is the way it handles parameters for PowerShell scripts.

Notice that as soon as I press the – key, a drop-down appears showing the available parameters. The drop-down window helps run a seldom-used script when I don’t recall the available parameters.
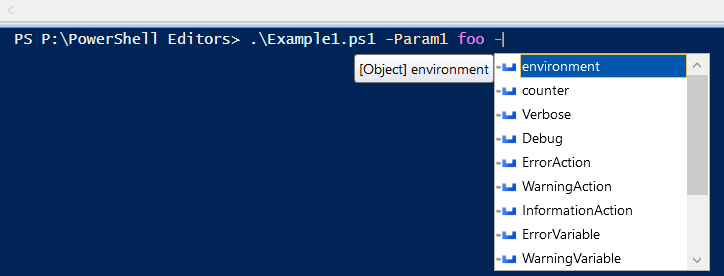
Notice that as you provide parameters, the available parameter list shrinks, only showing you the ones that have not yet been assigned a value. This behavior prevents you from entering the same parameter twice.

Finally, you’ll notice that the available options are shown if a parameter has a validateset. This means I’m far less likely to enter Development when I really need to enter Dev.
I mentioned above there’s a reason I still tend to use PowerShell ISE a lot and honestly, it’s because of this auto-completion. It’s a VERY handy tool and saves me a lot of time and effort when running seldom used scripts or initially debugging them.
Threads
One more area of interest in the PowerShell ISE is how it handles running multiple scripts at once.
To demonstrate load the following two scripts:
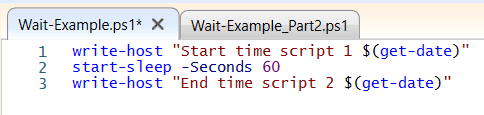
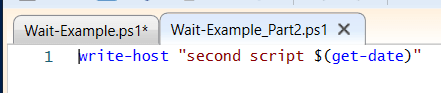
Wait-Example.ps1 and Wait-Example_Part2.ps1 are both available at github for this article.
If you go to the first tab and press F5, it starts to execute. It sleeps for 60 seconds, giving you plenty of time to go to the 2nd tab and try to execute Wait-Example_Part2.ps1. However, you will find that you can’t.
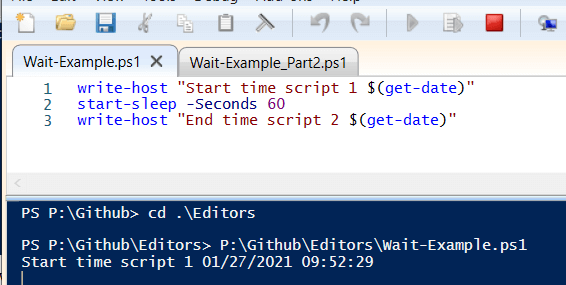
The red box is a button to let you know a script is running, but you can also press that to abort a script’s execution. As long as the first script is running, you don’t have the option to execute the second script.
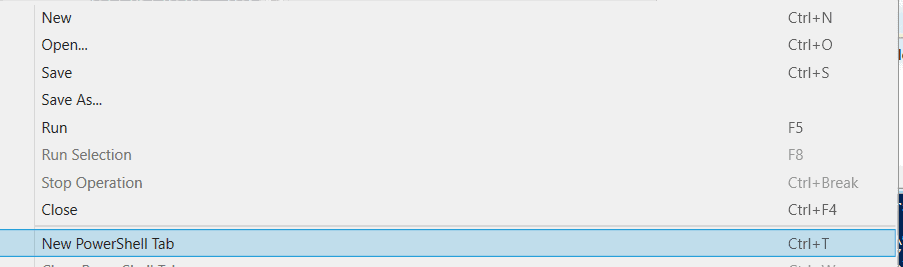
Normally, this is not an issue, but there are times when you may want to start a long-running script and do other work in the meantime. Fortunately, the PowerShell ISE offers a solution.
Instead of pressing Ctrl-N or using the menu to open a new PowerShell editor window, press Ctrl-T or use the menu to open a new PowerShell Tab
You will end up with a window similar to below.
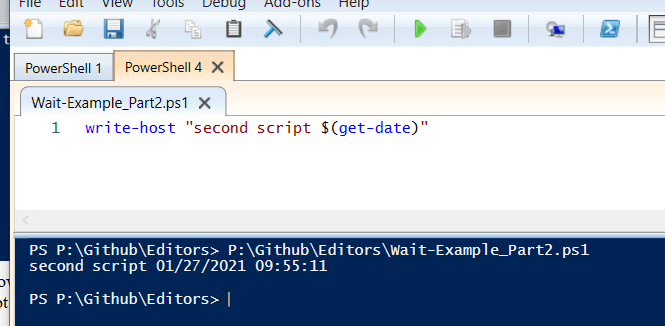
Now you can execute a long-running script in the PowerShell 1 tab and continue working in your second tab (in my case it’s PowerShell 4 because I had previously opened two other tabs and then closed them).
Essentially, you’re running two instances of PowerShell at this point which can be very useful at times.
PowerShell editors and environments
More can be done in the PowerShell ISE such as opening a remote window or debugging, but this should be enough to get you started. As I mentioned, it’s not a full-fledged modern IDE with git support and other features, but honestly, it’s often good enough for what it does. I would not look askance at anyone for using it for demos and quick scripting needs.
That said, there are other tools out there, and in my next article, I’ll discuss those.
Until then, happy scripting!
If you liked this article, you might also like How to Use Parameters in PowerShell

Load comments