
React developers need a code editor that enables them to write React code productively. There are thousands of free extensions in VS Code’s marketplace that can help supercharge your development workflow. In this article, I’ll highlight a selection of extensions and settings that will drive your React coding productivity to a professional level.
Some of the extensions I’ll list here aren’t React specific, but they’ll increase your efficiency and coding speed nevertheless. In reality, you’ll only find a handful extensions that will be truly useful in your daily coding schedule.
Implementing the tools and techniques listed in this article will probably save you hours of development work — hours that would have been wasted on resolving many small but crucial issues. They’ll also help you reduce coding mistakes. The key to productivity is to automate as many tasks as you can. The following extensions and settings will help you achieve that goal.
Language Support
When you install VS Code for the first time, it will give you a lot of features out-of-the box without the use of any extensions — such as syntax highlighting for JavaScript and support for TypeScript and JSX code.
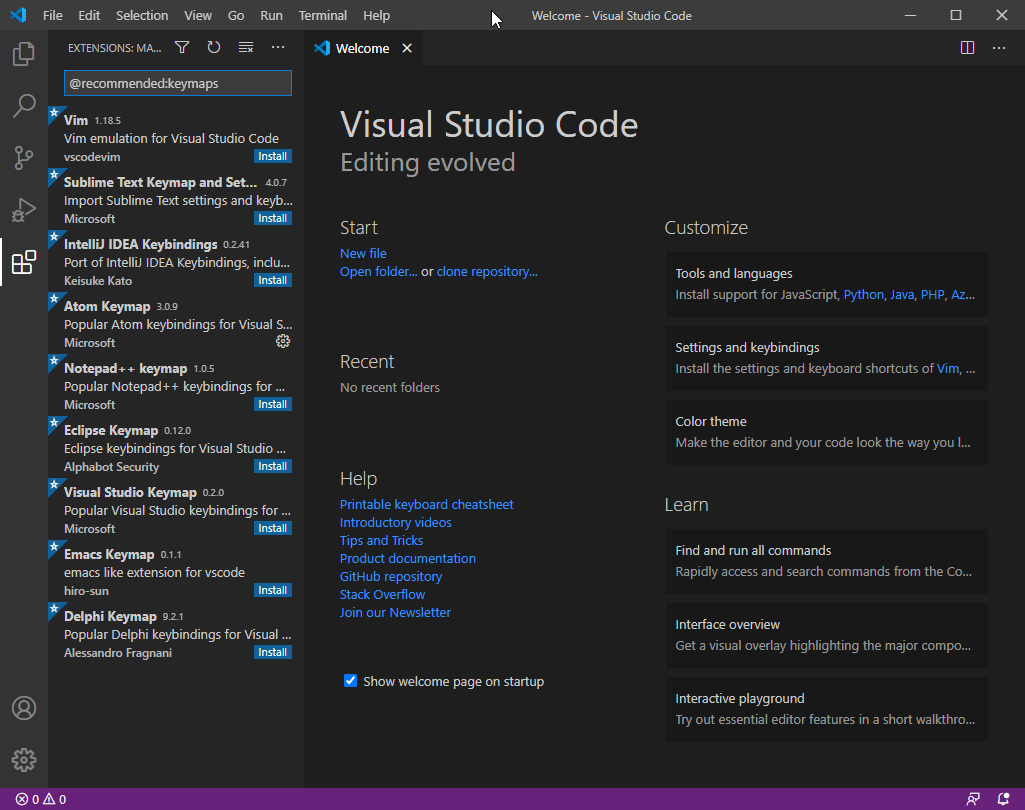
Below is a snapshot of the Welcome tab. You can always find it under the Help menu.

This is where you need to perform the initial setup. Since our focus is on React, we’ll start by setting up JavaScript Language Extension, which will provide us with additional features essential to our coding productivity workflow.
JavaScript Language Extension
On the Welcome tab, in the Tools and languages section, click the JavaScript link to install. A reload prompt will appear, which you should click for the new feature to take effect.
The JavaScript language extension provides multiple features, including:
- Intellisense
- Snippets
- JSDoc support
- Hover information
- Auto imports
The full list and documentation for these features can be found in the VS Code docs. I highly recommend you read each feature to get acquainted on how to use them in your development workflow.
Pictured below is an example of Intellisense and Auto import in action.
When the tab key is pressed, the Header component is imported at the top. The closing > symbol has to be typed in, which will autocomplete the code as: <Header><Header/>.
After installing the JavaScript language feature, VS Code may prompt you to provide a jsconfig.json file at the root of your project. It isn’t necessary, but setting this up will help IntelliSense provide more accurate prompts. Here’s a sample config:
{
  "compilerOptions": {
    "module": "commonjs",
    "target": "es6",
    "baseUrl": ".",
    "paths": {
      "~/*": ["./*"],
      "@/*": ["./src/*"],
      "~~/*": ["./*"],
      "@@/*": ["./*"]
    }
  },
  "exclude": ["node_modules", ".cache", "dist"]
}
The above configuration tells the JavaScript language server which files are part of your source code and which ones aren’t. This ensures the language service only analyzes your source code and therefore performs fast. The full configuration has been documented here, explaining all the possible values that can be used in jsconfig.js.
TypeScript Support
TypeScript is highly recommended if you’re looking into building large-scale, complex React projects. This is because TypeScript provides type safety and thus reduces the chances of delivering buggy code on your front-end applications. VS Code does provide TypeScript language support out of the box by providing a number of features, such as:
- Syntax and Semantic Highlighting
- IntelliSense
- Snippets
- JS Doc support
- Hover information and Signature Help
- Formatting
- JSX and auto closing tags
The full list is documented here. With TypeScript, JSX code is written in .tsx file extensions. When compiled, the output will result in a file with a .jsx extension.
Do note that VS Code doesn’t provide a compiler for TypeScript. You have to install one in your global Node.js environment like this:
npm install -g typescript
Alternatively, you can install the extension Compile Hero Pro, which provides a compiler for TypeScript and many other languages, including:
- Less
- Sass, SCSS
- Stylus
- Jade
- Pug
The extension provides many more configurable options on when and how to compile your TypeScript and styling code. If you’d like to learn more about setting up React and TypeScript, I’d recommend you check out our other article, “React with TypeScript: Best Practices”, for a more detailed explanation.
Flow
Flow is Facebook’s alternative to TypeScript. It provides the same features but only works with React projects and is less popular. VS Code doesn’t support it natively, but you can install the extension Flow Language Support, which provides a limited number of features such as IntelliSense and Rename.
Keymap Settings
If you’re migrating to VS Code from another code editor, you’ll be happy to learn you can continue using the same keyboard shortcuts that you were already used to. If you’re new to code editors, do skip this section. However, if you’ve used code editors before, you’re probably aware that re-training your muscle memory is unproductive and it takes time to adjust.
On the Welcome tab, under the Settings and key bindings section, you’ll see links for installing keyboard shortcuts for Vim, Sublime, Atom and others. If you click the others link, you’ll get a full list of keymaps you can install.
I used to be an Atom user before I switched to VS Code. Setting up Atom’s keymap in VS Code is as simple as clicking the Atom link. This will install the Atom Keymap extension for me. The following configuration in settings.json is required to make VS Code more “Atom like”:
// Controls whether the prompt will show
"atomKeymap.promptV3Features": true,

// Changes the multi cursor mouse binding
"editor.multiCursorModifier": "ctrlCmd",

// Open folders(projects) in new window without replacing the current one
"window.openFoldersInNewWindow": "on",
Do read the instructions provided by your keyboard shortcut extension on how to set yours up. The documentation can be found by simply clicking on the keymap extension in the Extension Bar.
Emmet JSX Support
Emmet is a web development toolkit that allows you write HTML code more efficiently. If you’re new to Emmet, check out the demo to see how it works.
VS Code comes with Emmet built in, and it already supports JSX syntax. Unfortunately, most React starter projects use the .js extension. The issue with this is that VS Code doesn’t recognize such files as React code, so JSX features aren’t activated. There are two ways of fixing this:
- Rename all your files with JSX code to
.jsxextension (recommended) - Configure VS Code to recognize all
.jsfiles as React files. Update yoursettings.jsonas follows:"emmet.includeLanguages": { "javascript": "javascriptreact" }
To access settings.json, simply go to the top menu tab then click View > Command Palette. Type “settings” and then choose the option Preferences: Open Settings(JSON). Alternatively, you can press Ctrl + P then type “settings.json” to open the file quickly. You can also use the shortcut Ctrl + , to open the UI version of Settings in a new tab. The first top right-hand corner icon button will open settings.json when you click on it.
The second option seems to be the easiest route. Unfortunately, this causes issues with other JavaScript development tools such as eslint-config-airbnb, which has a ruleset that enforces the .jsx file extension for React code. Disabling that rule will cause other issues later on.
The official React team do recommend using .js extension for React code. From my personal experience, it’s better to rename all files with React code to .jsx , and use a .js extension for files containing plain JavaScript code. This way, you’ll have an easier workflow with all development tools.
Formatting
Writing high-quality code requires you to write consistent code. As developers, we’re human, and it’s very easy to forget the standards we’ve set for ourselves. In this section, we’ll look at the essential tools that will help us automate the writing of consistent code.
EditorConfig
EditorConfig is a simple configuration file that contains only formatting rules. You’ll have to install an extension that will allow VS Code to read those rules and override its own. Simply go through the following steps to set it up:
- Install the EditorConfig for VS Code extension. Do note this will override user/workspace settings with settings found in
.editorconfigfiles. - Create a
.editorconfigfile at the root of your project and copy this example config:# editorconfig.org root = true [*] indent_style = space indent_size = 2 end_of_line = lf charset = utf-8 trim_trailing_whitespace = true insert_final_newline = true
VS Code will now observe these rules to format your code. Let’s quickly talk about line endings. Windows uses CRLF to indicate termination of a line, while UNIX-based systems use LF. If you happen to use files with mixed line endings, you’ll encounter a number of issues when committing files. You can configure Git on how to handle line endings.
The approach I prefer is just to enforce all project files on any platform to use the LF line endings. Do note that EditorConfig won’t convert line endings for existing files. It will only set the LF for new files. To convert all existing files, you have two choices:
- do it manually (click the text CRLF on the status bar to switch)
- use
prettierto format all your files
Let’s look at Prettier next.
Prettier
Prettier is the easiest code formatter to set up for JavaScript code. It supports JavaScript, TypeScript, JSX, CSS, SCSS, Less and GraphQL. To set it up, go through the following steps:
- Install the Prettier code formatter extension.
- Ensure VS Code uses Prettier as its default formatter. Update
settings.jsonas follows:"editor.defaultFormatter": "esbenp.prettier-vscode", // Use prettier as default formatter "editor.formatOnPaste": true, // format code on paste "editor.formatOnType": true, // format code as you type "editor.formatOnSave": true, // format code when you hit save "files.trimTrailingWhitespace": true, // remove trailing white spaces from all lines "files.trimFinalNewlines": true, // Ensures there's only one blank line at the end of the file - Install Prettier as a dev dependency in your project:
npm install --save-dev prettieroryarn add -D prettier. - Create
.prettierrcand copy the following example rules:{ "arrowParens": "avoid", // Omit parenthesis when possible. Example: `x => x`. If set to "always", the example would be` (x) => x` "semi": false // removes semicolons at the end of JavaScript statements } - Update
package.jsonby adding this command to yourscriptssection:{ "scripts": { "format": "prettier --ignore-path .gitignore --write ." } }
For the steps 3–5, you’ll have to do it for each project that you want Prettier to support. You can now click the format command under the npm scripts panel on VS Code, shown in the screenshot below.
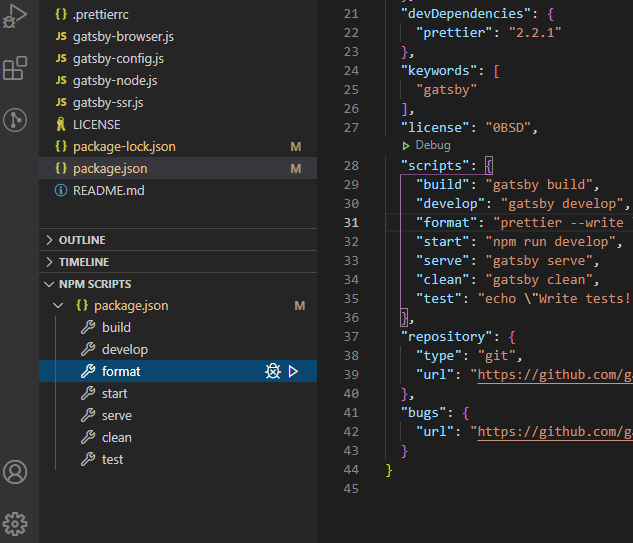
Alternatively, you can just run the command npm run format to run Prettier.
This will cause all your files to be reformatted properly and consistently according to Prettier’s default rules and those that you have overridden in .prettierrc and .editorconfig files. Line endings will also be made consistent too.
As you may have noticed, code format settings are now located in three different locations. You may wonder what will happen if we have conflicting rules. With Prettier activated, it will handle these rules according to the following priority:
- Prettier configuration file
.editorconfig- VS Code Settings (ignored if any other configuration is present)
Prettier configuration takes precedence in case there’s any conflict.
HTML to JSX
As any true developer worth their salt knows, it’s common to copy HTML code you found somewhere from the Internet and paste it into your React code. This often requires that you convert HTML attributes into valid JSX syntax. Fortunately, there’s an extension called html to JSX that will perform the conversion for you. Once you install it, it will allow you to easily:
- convert existing HTML code into JSX
- convert HTML code into valid JSX syntax while pasting
This means attributes such as class will be converted to className. This is a really great timesaver.
React Snippets
On VS Code’s marketplace, there are quite a number of snippet extensions for JavaScript projects. For React, the most popular one is ES7 React/Redux/GraphQL/React-Native snippets. Once you install this one, you probably won’t need to install another, as it comes with more than enough snippets than you can memorize.
Here’s a sample of JavaScript snippets:
| Prefix | Method |
|---|---|
imp→ |
import moduleName from 'module' |
imn→ |
import 'module' |
imd→ |
import { destructuredModule } from 'module' |
exp→ |
export default moduleName |
exd→ |
export { destructuredModule } from 'module' |
edf→ |
export default (params) => { } |
nfn→ |
const functionName = (params) => { } |
dob→ |
const {propName} = objectToDescruct |
The extension provides many more snippets that are specific to:
- React
- React Native
- Redux
- GraphQL
- PropTypes
- Console
- Test Scripts
There are also snippets that insert complete React components. For example, typing “rfc” then pressing tab will insert the following React component snippet for you:
import React from 'react'

export default function $1() {
  return <div>$0</div>
}
If you’re going to install this extension, you better memorize at least a handful of the snippets to help you write code faster. Using snippets is faster than copy–pasting.
Refactoring
Writing React code often requires you to write simple and fast statements in order to test functionality early. Quite often, you’ll find the need to reuse the code you wrote. This means you need to extract and refactor your code in order to fulfill the “write once, use everywhere” mantra.
You can take the time to refactor your code manually, or you can speed the process up by using VS Code React Refactor to help you refactor your code in just two steps.
Pretty neat, right?
Auto Tools
In this section, we’ll look at extensions that help you automate frequent code operations as you type.
Auto Close Tag
While not using Emmet, the Auto Close Tag extension can help you close JSX tags automatically. It also places the cursor between tags as soon as it closes.
Here’s a quick demo of the extension in action:
Auto Rename Tag
As you write JSX code, you’ll often find yourself renaming tags, such as <div> to <section>. When you perform these changes, the closing tag remains unchanged. Changing it manually is bothersome, especially if it’s a common occurrence. You can automate renaming tags with by installing the Auto Rename Tag extension. Once installed, it will automatically rename your closing tag in real time as you edit the opening tag.
Linting
Linting in React is an essential part of a TDD toolchain that helps you ship high-quality code. It’s also a crucial step when the codebase is being shared across a team of developers, as it enforces a consistent coding style for all. Linting is extremely useful for catching errors as you type new code.
ESLint is the most popular JavaScript linter and is the easiest to configure and set up. ESLint has a number plugins that support the React library. Support for ESLint in VS Code is provided by the ESLint extension. When active, VS Code will continuously run ESLint in the background and highlight errors for you as you type and save your code. The extension also provides an option to auto-fix issues via the context menu.
Similar to Prettier, there are a number of steps that are required to be followed for the ESLint extension to work. Setting up ESLint in VS Code to work with your project is a bit of a process, and I’d recommend you check out this video on how to install and configure ESLint.
Do check out our article “Up and Running with ESLint” if you want more information on JavaScript linting. You should be aware that there’s an eslint-plugin-prettier plugin that’s required to be installed to ensure both Prettier and ESLint play well together.
There are other linter tools available, but you’ll likely conclude that ESLint is the best.
Summary
As we come to the end of this article, I’d like to mention that there are many more JavaScript VS Code extensions that you may be interested in. One extension I’d like to highlight is Bracket Pair Colorizer 2. I’ve found it very useful in identifying long sections of code blocks. The extension gives every pair of matching brackets a different color, making it easy to see where one code block ends and another begins.
We’re also living in the age of AI, and it would be prudent for me to mention about the new AI-assisted development extensions that are now available in VS Code’s marketplace. I don’t have much experience with them yet, but I thought I’d list the most prominent ones here:
From my research, Tabnine seems to be getting the most love from JavaScript developers. It does a good job of predicting your next line of code by providing better suggestions than IntelliSense. Here’s an interesting conversation I came across about the extension:
There is a plugin for VS Code called Tabnine that does a limited version of this. It does a very decent job of jumpstarting my brain by suggesting the next few tokens. I am surprised at how often it comes up with a better suggestion than I was originally going to type.
— Lorenzo Swank (@lswank) July 13, 2020
I hope this guide will help you improve your coding speed and productivity immensely as you develop your React projects using VS Code.
Want to get even more out of VS Code? Check out Visual Studio Code: End-to-End Editing and Debugging Tools for Web Developers on SitePoint Premium.
FAQs About VS Code for React
Can I write React in Visual Studio?
Yes, you can write React applications in Visual Studio, particularly with Visual Studio Code (VS Code), a lightweight and versatile code editor. Many developers prefer VS Code for web development, including React. You can install it for free and enhance your React development experience by adding relevant extensions. VS Code offers excellent IntelliSense support for JavaScript and TypeScript, aiding in auto-completion, code navigation, and error checking, which are essential for React development.
For managing React projects in Visual Studio Code, you typically set up Node.js for package management, utilize Git integration for version control, and use built-in debugging tools. You can also initiate new React projects easily with “Create React App,” a widely adopted tool for project scaffolding.
Overall, Visual Studio Code offers a flexible and efficient environment for React development, making it a popular choice for many web developers. It simplifies React project setup, coding, debugging, and version control, ultimately streamlining the development process.
How to set up React in VS Code?
Setting up a React development environment in Visual Studio Code (VS Code) is a straightforward process. First, ensure you have VS Code installed; you can download it from the official website. Next, install Node.js, which is essential for managing dependencies and development tools in React projects. You can download Node.js from the official website, and it includes npm, the Node Package Manager.
To create a new React project, the simplest and most widely used method is to employ Create React App, a command-line tool. Open your terminal or command prompt and run the following command:npx create-react-app my-react-app
Replace “my-react-app” with your desired project name. This command initializes a new React project with a sensible default configuration.
After creating the project, navigate to its folder in the terminal and open it in VS Code using the command code .. This command launches the VS Code editor with your project folder. To enhance your React development experience, consider installing VS Code extensions like “ESLint” for code linting and “Prettier” for code formatting. To start the development server and preview your React app, run npm start in the terminal within your project folder. This command will open your app in a web browser, and you can begin building your React application while taking advantage of the development tools and features provided by VS Code and Create React App.
Is VS Code good for React?
Visual Studio Code (VS Code) is an excellent choice for React development. It combines the advantages of being lightweight, fast, and highly customizable, making it a favorite among developers working on React applications. VS Code’s lightweight nature ensures quick startup times and minimal resource consumption, which is essential for a smooth development experience.
One of the standout features of VS Code is its rich ecosystem of extensions available through the Visual Studio Code Marketplace. For React developers, this means access to a wide range of extensions tailored specifically for React development, such as linters, formatters, and code snippets. These extensions significantly enhance productivity by streamlining tasks like code quality checks and code generation.
Additionally, VS Code offers excellent support for JavaScript and TypeScript, which are core languages for React development. Its IntelliSense feature assists with auto-completion, code navigation, and error checking, ensuring that you can write React code efficiently and with fewer errors. The built-in debugger, Git integration, and a strong developer community further contribute to making VS Code a highly suitable and well-rounded choice for React development.
What is the VS Code extension for React?
In Visual Studio Code (VS Code), there are several essential extensions for React development that enhance your workflow. While there isn’t a single “official” extension for React, these extensions are widely used by React developers.
First, ESLint is a crucial tool for maintaining code quality. The ESLint extension for VS Code integrates ESLint into your development environment, helping you catch and fix code issues, ensuring your React code follows best practices and standards.
Another valuable extension is Prettier. This code formatter enforces consistent code style and readability in your React projects. The Prettier extension for VS Code automatically formats your code as you write, ensuring your React code is well-organized and adheres to your preferred style.
Additionally, the “Reactjs code snippets” extension offers a collection of handy code snippets for React, simplifying the process of creating common React components, hooks, and structures by providing shortcuts. These three extensions, in combination, provide a robust foundation for React development in Visual Studio Code, ensuring clean, error-free code and an efficient coding experience.
How do I deploy React app from Visual Studio Code?
Deploying a React app from Visual Studio Code involves several key steps. First, ensure your React app is ready for production by building it with the command npm run build. This creates an optimized and minified version of your app in the “build” directory, which is ideal for deployment.
Next, select a hosting platform that suits your project’s needs. Popular choices include Netlify, Vercel, GitHub Pages, AWS Amplify, Firebase, and Heroku. Each platform has its own deployment process and requirements, so choose the one that aligns with your project goals.
Once you’ve chosen a hosting platform, follow its documentation and guidelines to set up an account and configure your deployment settings. This usually involves linking your code repository to the platform and specifying build and deployment options. If your chosen platform supports continuous integration and continuous deployment (CI/CD), consider automating the deployment process to ensure your app is always up to date. After deployment, thoroughly test your live app to ensure it functions correctly, and be prepared for ongoing monitoring and maintenance to address any potential issues and make necessary updates. Visual Studio Code serves as your code editor and development environment, while the deployment process primarily relies on external tools and hosting services, so refer to your chosen platform’s documentation for specific deployment instructions.
 Michael Wanyoike
I write clean, readable and modular code. I love learning new technologies that bring efficiencies and increased productivity to my workflow.