
Finally a Nuget package for Machine learning
I always wanted to have a Nuget package which can be plugged with a .Net application by which we can create Machine learning applications.
Microsoft has announced the Open source and Cross-platform Machine learning framework ML.NET
ML.NET first version
ML.NET is just a baby yet but it has already shown the capability of becoming a giant.
With its first version, we can perform Machine learning tasks like Classification, regression etc. Have a look here for some basic information for these ML algorithms.
Along with some basic algorithms – we can even train the model, predict using models along with other basic Machine learning tasks.
ML.NET can be extended to work with ML libraries like TensorFlow, Accord.NET, and CNTK etc.
A big picture

As you can see above, the framework can be extended to work with third-party libraries and it has some awesome libraries as well. Training and Consumption both are present for many popular ML tasks like regression and classification.
Apart from this, ML.NET also supports core data types, extensible pipelines, high-performance math, data structures for heterogeneous data, tooling support, and more.
Install ML.NET Nuget package
Let us see how to add this Nuget package in your .Net applications.
Important notes before starting:
First, make sure that you have installed .NET Core 2.0 or later. ML.NET also works on the .NET Framework. Note that ML.NET currently must run in a 64-bit process.
Once you have all these installed, open your Visual Studio 2017 -> Create New Project -> Select Core Web application:

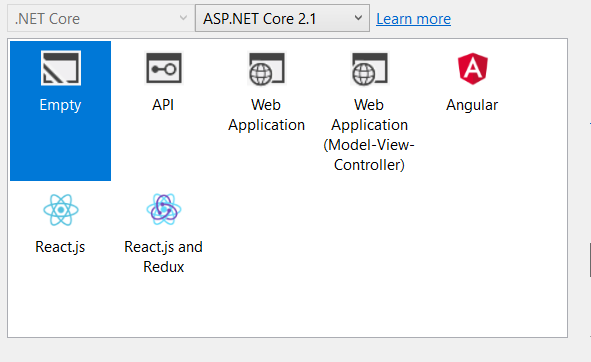
Select empty for now:
Once the application is created, let us add required Microsoft.ML Nuget package.
Search with “Microsoft.ML” in Nuget Package Manager and click on Install:

Once the package is installed, let us add some sample code.
Training the model
We will first see the steps to train our model.
Creating pipeline
We will create a LearningPipeline which will encapsulate the data loading, data processing/featurization, and learning algorithm:
var pipeline = new LearningPipeline();
Loading data
Imagine we have a big file with all the data we require and we want to apply ML algorithms to that data. Let us get the data from that big file
We get the path as below:
var SentimentDataPath = "pathToFile";

string dataPath = GetDataPath(SentimentDataPath);
Once we have the path, use TextLoader to load the data from training file:
pipeline.Add(new TextLoader<SentimentData>(dataPath, useHeader: true, separator: "tab"));
Data is loaded now.
Create the features
Next step is to convert the data columns to the feature. For that TextFeaturizer is used:
pipeline.Add(new TextFeaturizer("Features", "SentimentText");
We have completed all preprocessing steps.
Apply algorithm
Next step is to apply different algorithms.
We will apply FastTreeBinaryClassifier here:
pipeline.Add(new FastTreeBinaryClassifier() { NumLeaves = 5, NumTrees = 5, MinDocumentsInLeafs = 2 });
FastTreeBinaryClassifier is a decision tree learner we will use in this pipeline.
Convert labels back to the original value
Next step is to convert the predicted labels back to the original value. We will use PredictedLabelColumnOriginalValueConverter for this:
pipeline.Add(new PredictedLabelColumnOriginalValueConverter() { PredictedLabelColumn = "PredictedLabel" });
Train the model
We have added everything required to our pipeline, next and important step is to train our pipeline which basically loads the data, trains the featurizer and learner:
var model = pipeline.Train<SentimentData, SentimentPrediction>();
The training phase is completed, next step is to predict the data using this training model.
Predict from the trained model
We can use to predict for us.
Below is the code for prediction:
SentimentData data = new SentimentData
{
SentimentText = "Today is a great day!"
};

SentimentPrediction prediction = model.Predict(data);

Console.WriteLine("prediction: " + prediction.Sentiment);
Note – Code reference and whole code is here: https://github.com/dotnet/machinelearning/blob/master/test/Microsoft.ML.Tests/Scenarios/SentimentPredictionTests.cs
Get more details from here: https://www.microsoft.com/net/learn/apps/machine-learning-and-ai/ml-dotnet
That is it. You can predict the sentiment from the sentence using above code.
As I said, ML.NET is not mature yet but it is an awesome framework to keep a watch on.
Hope it helps.

Reblogged this on Razin's Tech blog.
LikeLike
this is a good first look, please keep posting Sir..
LikeLike