How to Install OpenNMS Network Monitoring Tool in CentOS 8
OpenNMS is a free and open-source network monitoring and network management platform used for managing enterprise networks around the world. It is based on Java and is designed to manage thousands of devices from a central location. It has the ability to discover and monitor the services or nodes automatically in your network.
Features
- Supports SNMP, JMX, WMI, NPRE, NSCLient++ and XMP
- Event-driven Architecture
- Supports device and application monitoring
- Typology Discovery and Path Outage
- Configure and Execute Service Monitors
- Supports Layer 2 and Layer 3 Network Topologies
In this tutorial, we will show you how to install and configure OpenNMS on CentOS 8 server.
Prerequisites
- A server running CentOS 8.
- A root password is configured the server.
Getting Started
OpenNMS is a Java-based application. So you will need to install Java in your system. You can install it with other required packages by running the following command:
dnf install java-11-openjdk-devel curl unzip -y
After installing Java, you can verify the java version with the following command:
java -version
You should get the following output:
openjdk version "11.0.9" 2020-10-20 LTS
OpenJDK Runtime Environment 18.9 (build 11.0.9+11-LTS)
OpenJDK 64-Bit Server VM 18.9 (build 11.0.9+11-LTS, mixed mode, sharing)
Once you are finished, you can proceed to the next step.
Install OpenNMS
By default, OpenNMS is not available in the CentOS 8 default repository. So you will need to add the OpenNMS repository to your system.
First, add the GPG key with the following command:
rpm --import https://yum.opennms.org/OPENNMS-GPG-KEY
Once the GPG key is added, run the following command to add the OpenNMS repo.
dnf install https://yum.opennms.org/repofiles/opennms-repo-stable-rhel8.noarch.rpm
Next, you can install the OpenNMS by running the following command:
dnf install opennms -y
This will install OpenNMS, PostgreSQL and other packages in your server.
Configure PostgreSQL
OpenNMS uses PostgreSQL as a database backend. You can initialize the PostgreSQL database with the following command:
postgresql-setup --initdb --unit postgresql
You should get the following output:
 * Initializing database in '/var/lib/pgsql/data'
 * Initialized, logs are in /var/lib/pgsql/initdb_postgresql.log
Next, start the PostgreSQL service and enable it to start at system reboot with the following command:
systemctl enable postgresql
systemctl start postgresql
Next, you will need to create a database and user for PostgreSQL.
First, log in to the PostgreSQL with the following command:
su - postgres
Once login, create a user with the following command:
[postgres@centos8 ~]$ createuser -P opennms
You will be asked to set a password asshown below:
Enter password for new role:
Enter it again:
Next, create a database with the following command:
[postgres@centos8 ~]$ createdb -O opennms opennms
Next, set the password for PostgreSQL user with the following command;
[postgres@centos8 ~]$ psql -c "ALTER USER postgres WITH PASSWORD 'password';"
Next, exit from the PostgreSQL shell with the following command:
[postgres@centos8 ~]$ exit;
Next, you will need to modify the access policy for PostgreSQL. You can do it by editing the file /var/lib/pgsql/data/pg_hba.conf:
nano /var/lib/pgsql/data/pg_hba.conf
Find the following lines:
# IPv4 local connections:
host    all             all             127.0.0.1/32            ident
# IPv6 local connections:
host    all             all             ::1/128                 ident
And, replaced them with the following lines:
host    all             all             127.0.0.1/32            md5
host    all             all             ::1/128                 md5
Save and close the file then restart the PostgreSQL service to apply the changes:
systemctl restart postgresql
Next, you will need to define your database in /opt/opennms/etc/opennms-datasources.xml file.
nano /opt/opennms/etc/opennms-datasources.xml
Change the following lines that match with your database:
<jdbc-data-source name="opennms"
                    database-name="opennms"
                    class-name="org.postgresql.Driver"
                    url="jdbc:postgresql://localhost:5432/opennms"
                    user-name="opennms"
                    password="opennms" />

<jdbc-data-source name="opennms-admin"
                    database-name="template1"
                    class-name="org.postgresql.Driver"
                    url="jdbc:postgresql://localhost:5432/template1"
                    user-name="postgres"
                    password="password" />
Save and close the file when you are finished.
Initialize and Start OpenNMS
Next, you will need to initialize OpenNMS. First, add the Java settings with the following command:
/opt/opennms/bin/runjava -s
You should get the following output:
runjava: Looking for an appropriate JVM...
runjava: Checking for an appropriate JVM in JAVA_HOME...
runjava: Skipping... JAVA_HOME not set.
runjava: Checking JVM in the PATH: "/etc/alternatives/java"...
runjava: Did not find an appropriate JVM in the PATH: "/etc/alternatives/java"
runjava: Searching for a good JVM...
runjava: Found a good JVM in "/usr/lib/jvm/java-11-openjdk-11.0.9.11-0.el8_2.x86_64/bin/java".
runjava: Value of "/usr/lib/jvm/java-11-openjdk-11.0.9.11-0.el8_2.x86_64/bin/java" stored in configuration file.
Next, initialize the database by running the following command:
/opt/opennms/bin/install -dis
Next, enable the OpenNMS to start at system reboot with the following command:
systemctl enable --now opennms
You should get the following output:
Synchronizing state of opennms.service with SysV service script with /usr/lib/systemd/systemd-sysv-install.
Executing: /usr/lib/systemd/systemd-sysv-install enable opennms
Created symlink /etc/systemd/system/multi-user.target.wants/opennms.service → /usr/lib/systemd/system/opennms.service.
Now, you can check the status of the OpenNMS service with the following command:
systemctl status opennms
You should get the following output:
? opennms.service - OpenNMS server
   Loaded: loaded (/usr/lib/systemd/system/opennms.service; enabled; vendor preset: disabled)
   Active: active (running) since Wed 2020-11-25 09:21:32 EST; 13s ago
  Process: 26880 ExecStart=/etc/init.d/opennms -s start (code=exited, status=0/SUCCESS)
 Main PID: 27928 (java)
    Tasks: 67 (limit: 12523)
   Memory: 555.6M
   CGroup: /system.slice/opennms.service
           ??27927 bash /etc/init.d/opennms -s start
           ??27928 /usr/lib/jvm/java-11-openjdk-11.0.9.11-0.el8_2.x86_64/bin/java --add-modules=java.base,java.compiler,java.datatransfer,java>

Nov 25 09:21:42 centos8 opennms[26880]: [DEBUG] System property 'opennms.library.jicmp' set to '/usr/lib64/libjicmp.so.  Attempting to load ji>
Nov 25 09:21:42 centos8 opennms[26880]: [INFO] Successfully loaded jicmp library.
Nov 25 09:21:42 centos8 opennms[26880]: [DEBUG] System property 'opennms.library.jicmp' set to '/usr/lib64/libjicmp.so.  Attempting to load ji>
Nov 25 09:21:42 centos8 opennms[26880]: [INFO] Successfully loaded jicmp library.
Nov 25 09:21:42 centos8 opennms[26880]: [DEBUG] System property 'opennms.library.jicmp6' set to '/usr/lib64/libjicmp6.so.  Attempting to load >
Nov 25 09:21:42 centos8 opennms[26880]: [INFO] Successfully loaded jicmp6 library.
At this point, OpenNMS is started and listening on port 8980. You can check it with the following command:
ss -antpl | grep :8980
You should get the following output:
LISTEN 0 50 *:8980 *:* users:(("java",pid=27928,fd=988))
Once you are finished, you can proceed to the next step.
Configure SELinux and Firewall
By default, SELinux is enabled in the CentOS 8 server. So you will need to disable it first. You can disable it by editing /etc/selinux/config file:
nano /etc/selinux/config
Find the following line:
SELINUX=enforcing
And, replace it with the following line:
SELINUX=permissive
Save and close the file then reboot the system to apply the changes.
Next, allow port 8980 through firewalld with the following command:
firewall-cmd --permanent --add-port=8980/tcp
Next, reload the firewalld to apply the changes:
firewall-cmd --reload
Once you are finished, you can proceed to the next step.
Access OpenNMS Web Interface
Now, open your web browser and access the OpenNMS web interface using the URL http://your-server-ip:8980/opennms. You will be redirected to the OpenNMS login page:
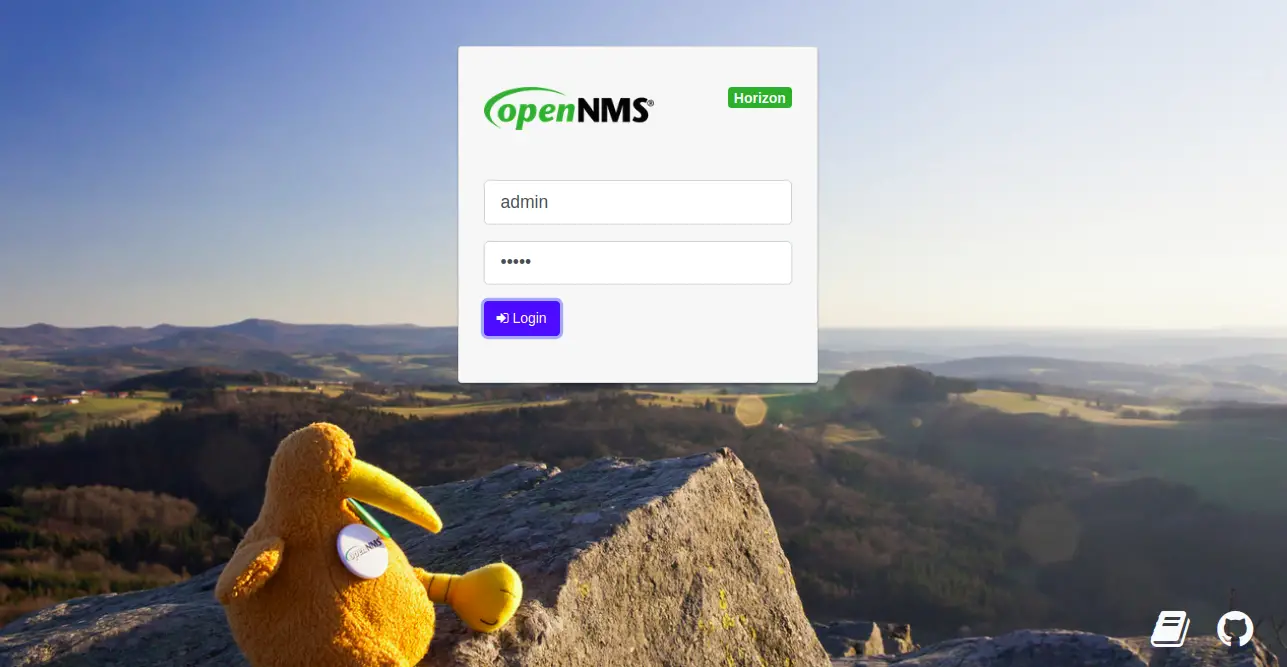
Provide default admin username as admin and password as admin then click on the Login button. You should see the following page:

Click on the Opt-in to send anonymous usage statistics to OpenNMS. You should see the OpenNMS dashboard in the following page:

Click on the Admin => Change password to change the default password. You should see the following page:
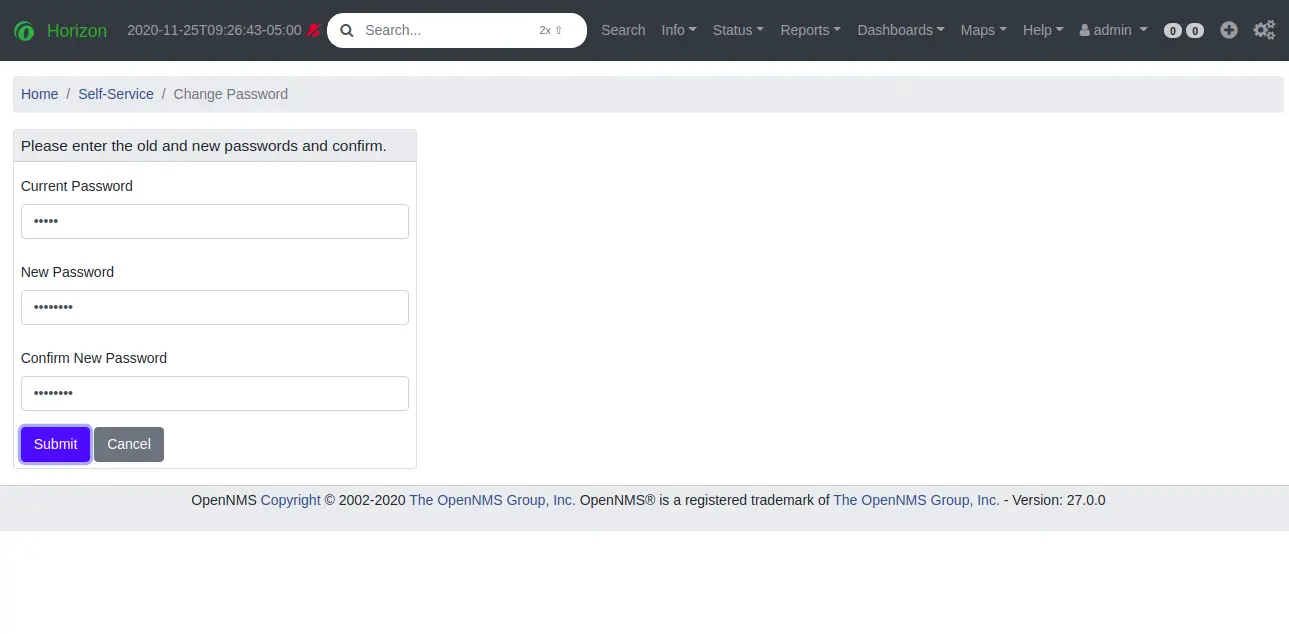
Change your default password and click on the Submit button. You should see the following page:

Click on the + icon to add the new host. You should see the following page:
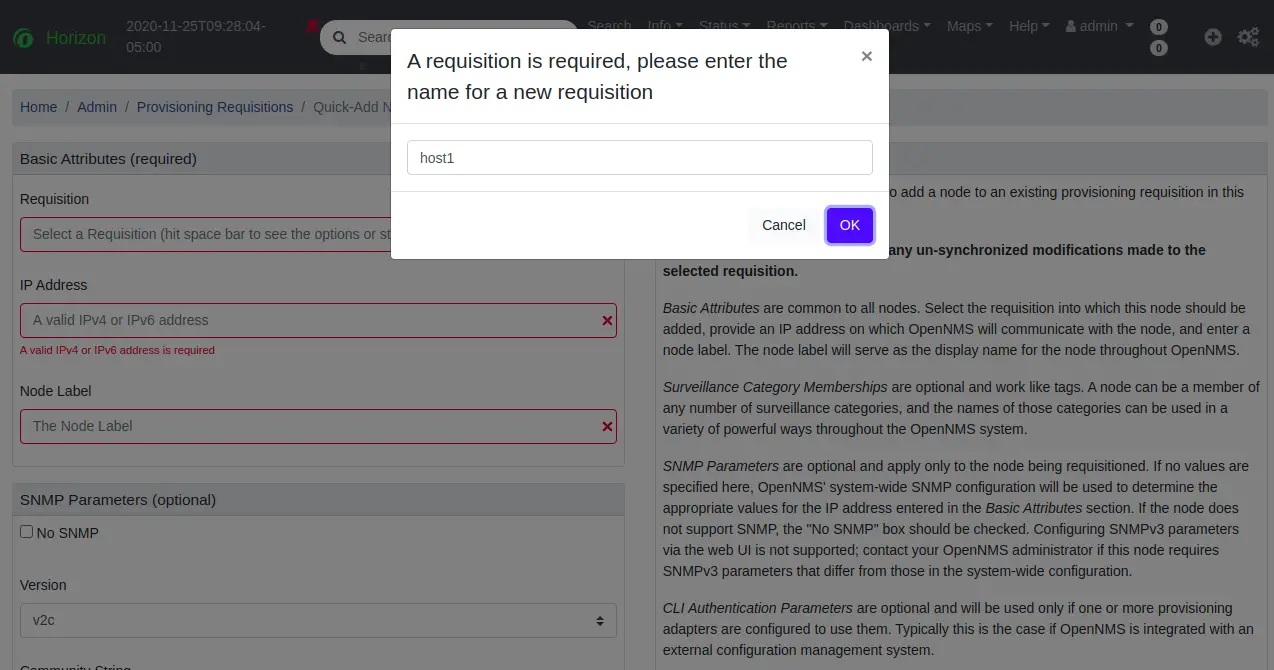
Provide the name of new requisition and click on the OK button. You should see the following page:
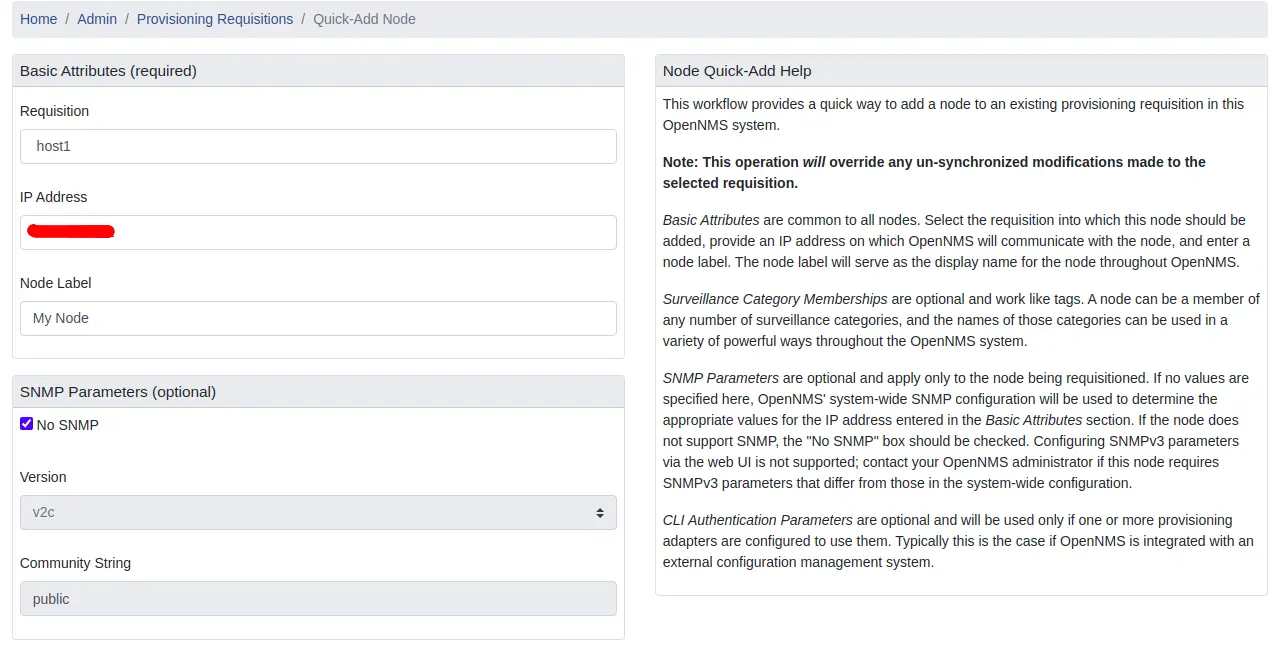
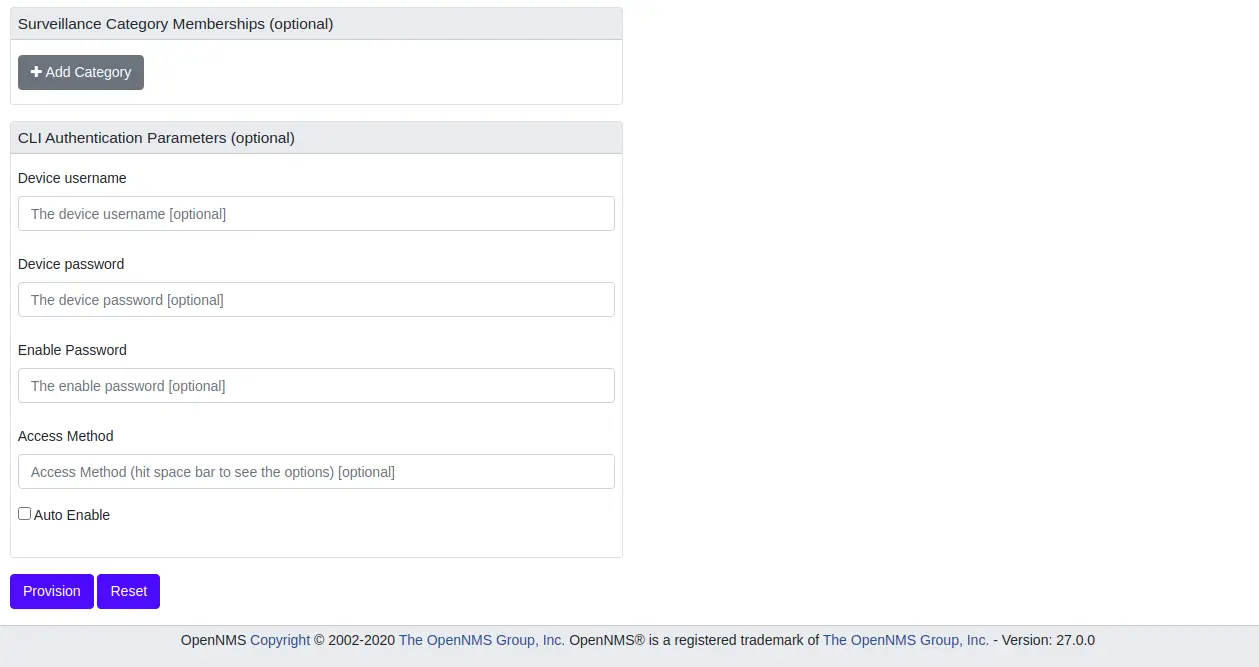
Provide your remote host details and click on the Provision button. Once the host is added, you should see the following page:

Now, click on the Info => Nodes. You should get details information of the remote host in the following page:

Conclusion
Congratulations! you have successfully installed OpenNMS on CentOS 8 server. You can now add unlimited network hosts and devices to the OpenNMS and start monitoring from the central location.

