Back in 2016, Microsoft raised the company’s level of confidence in the mobile world with the acquisition of Xamarin. Xamarin is Microsoft’s open source platform for building Android and iOS apps with .NET and C#.
C# has proven its worth through all these years and brought with it tons of mature projects as well as having a solid community. When it comes to the in-house solutions for mobile development, no one has beaten Xamarin.Forms. It extends the .NET developer platform to Android, iOS, and, of course, Windows apps. This is all from a single and shared codebase.
However, it’s not the only option out there. Now there is the Uno Platform. It offers even more options like targeting all the major platforms (iOS, Android, Windows), as well as native mobiles and web browsers.
The official documentation states:
Familiarity and richness of C# and XAML combined with productivity boosts of hot reload, hot restart, edit, and continue and more.
In addition to those features, Uno also supports WebAssembly, dev loops, automatic responsive designs, and more. You will find a couple of showcases on their official website, which you can browse through to learn more about Uno capabilities. However, this article explores the framework via the installation and creation of a simple app that converts a given temperature from Celsius to Fahrenheit and vice-versa. This way, you might experience the platform a bit deeper. So, come with me!
Install and configure
First, you need Visual Studio installed. The Community edition is just fine for this example.
You can also develop for Uno with VS Code, but this article sticks with Visual Studio since it offers more flexibility and ready-to-use options.
If you have already installed Visual Studio, chances are that you didn’t install at least one of the following workloads:
- Universal Windows Platform development
- Mobile Development with .NET
- ASP.NET and web
If that’s the case, no worries. I’ll help you to fix that.
Search for the Visual Studio Installer program and run it. Once it pops up, make sure that it has no available updates to install. If it has, just push the update button and wait until it gets finished.
Click the Modify button and select the needed workloads, then click the Install button.
Then, download the latest version of .NET Core for your OS, to make sure Uno will have the proper version to work with.
The Android Studio
You’ll also need to install the Android Studio on your computer. The reason I’m picking only Android to make the tests is that it is OS-agnostic, which means that anyone can run it regardless of if you have a Windows or macOS. However, feel free to go with iOS if you are comfortable enough to work with it.
Go ahead and install it according to the official installation instructions. Just remember that when you start the Android Studio for the first time, it’ll download several required libraries and dependencies, so make sure to start it right after the installation.
Finally, install the Uno extension for Visual Studio. To install it, open your Visual Studio IDE and go to Extensions > Manage Extensions, then search for the term uno. In the result list, select the option Uno Platform Solution Templates and download it.
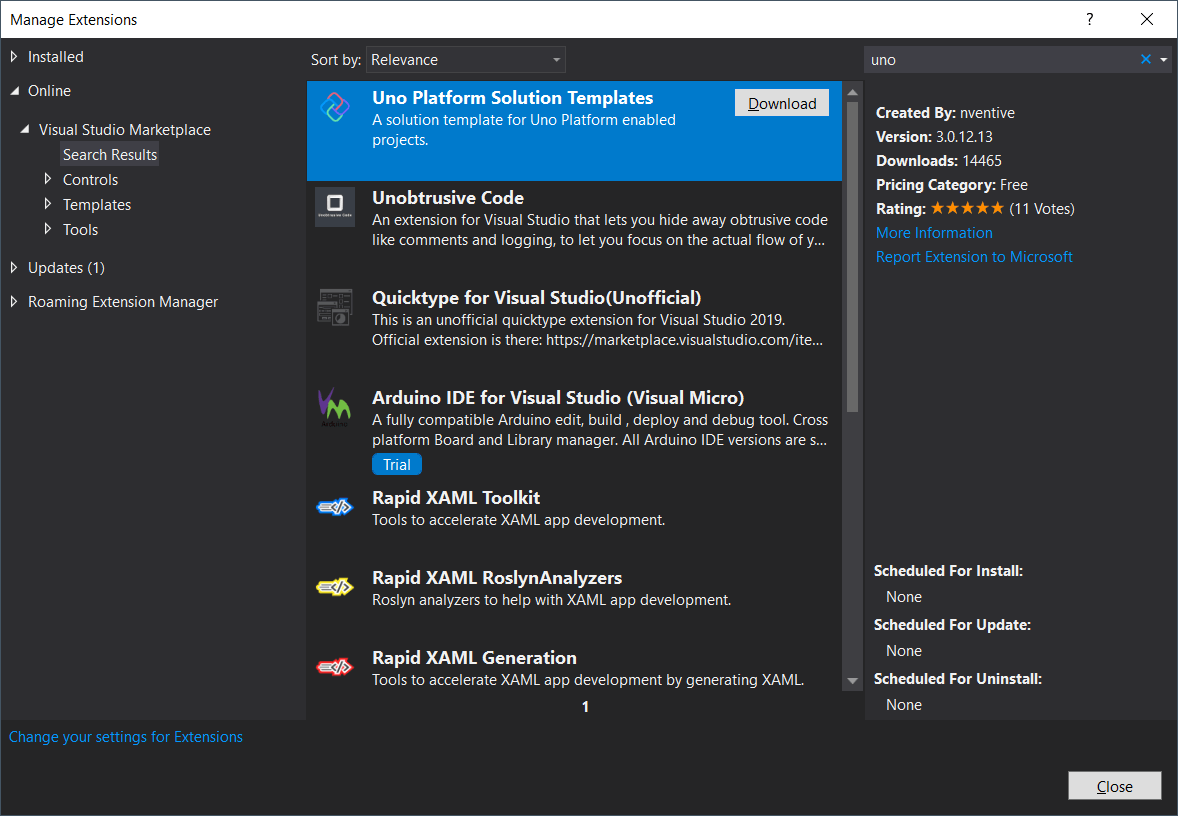
Figure 1. Installing Uno extension.
You’ll have to close Visual Studio to get it fully installed since the Uno extension only starts after such action. When the installation finishes, you’ll get a pop-up warning.
The project setup
When you start the IDE again, select the option Create a new project and, in the next window, once again, search for uno.
Select the option called Cross-Platform App (Uno Platform) and click Next. The window that follows will ask for a project and solution name, as well as the place to store the project (Figure 2).
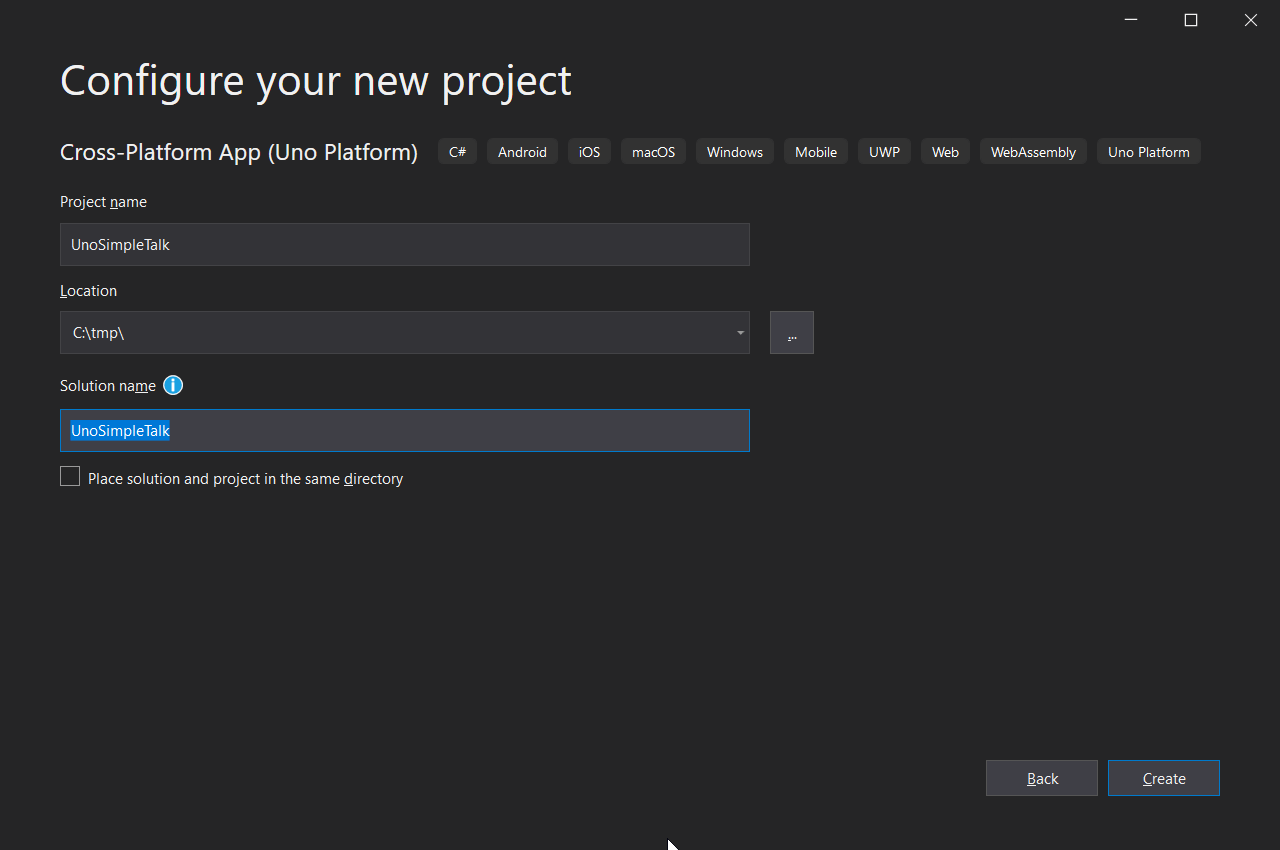
Figure 2. Setting up the new project.
When you do it, depending on the version of the Android you’ve installed, there are some chances that Uno will ask to update the Android SDK. If that happens, just click the Accept button as many times as it is prompted and then, click the OK button.
Also, Visual Studio may detect that the Windows SDK is not in the right version. In that case, a window like the one below may appear. Click the Install button and make sure to go through the steps until the end.
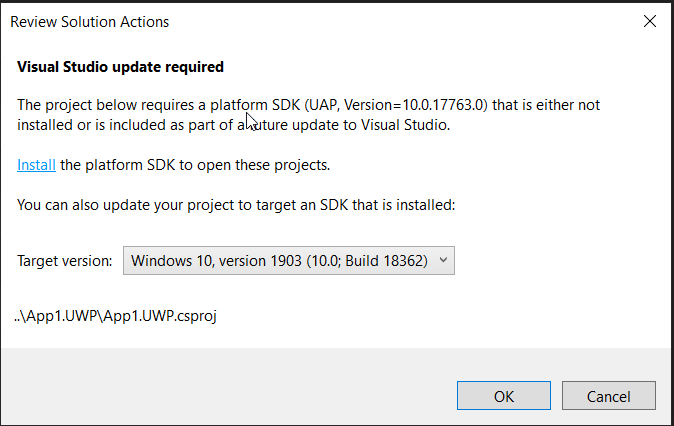
Figure 3. Updating the platform SDK
After this, Visual Studio will take some time to process the project creation.
One interesting thing to note is the number of auto-created projects on the solution. Take a look at Figure 4.
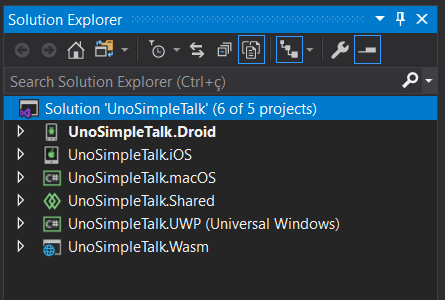
Figure 4. Auto-generated projects for the Uno solution.
Testing the project
To test it out, you just need to click the button Android Emulator at the top bar of the IDE:
![]()
Figure 5. Running project on Android Emulator
This will trigger the setup of a new emulator, considering that you have none yet. Just leave things as they are and keep moving on (Figure 6).
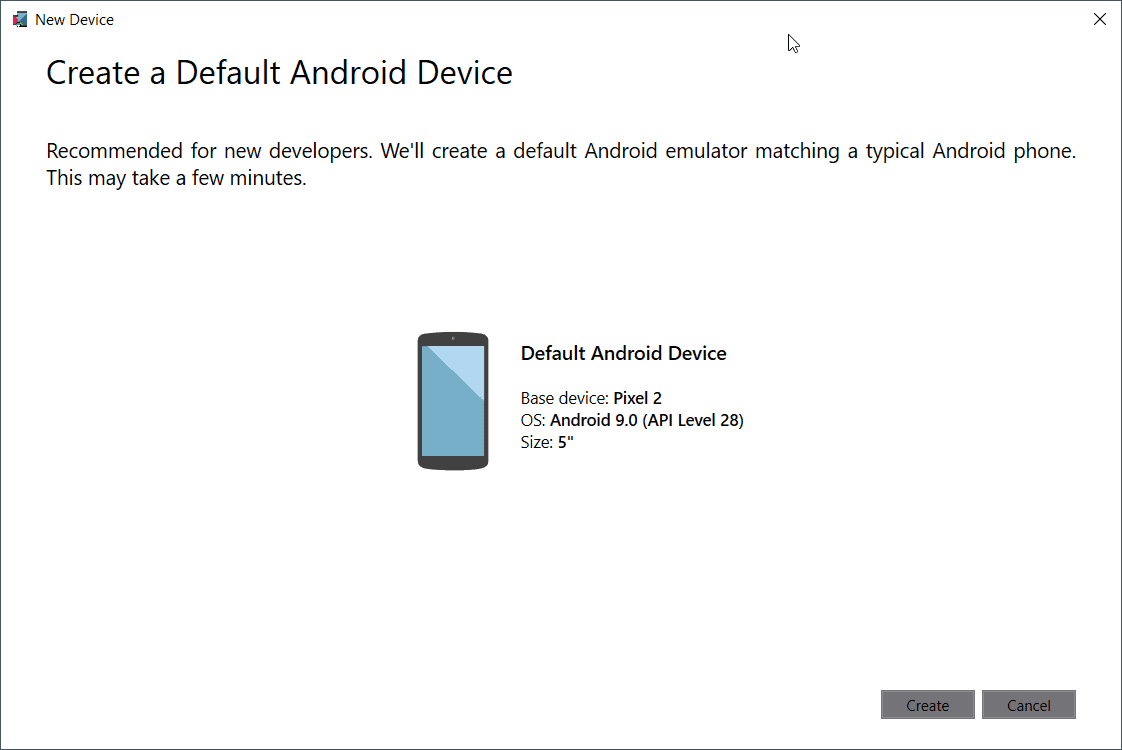
Figure 6. Creating a new Android device.
Accept the terms and wait until the device’s download finishes. When it’s done, click the Start button to start up the emulator.
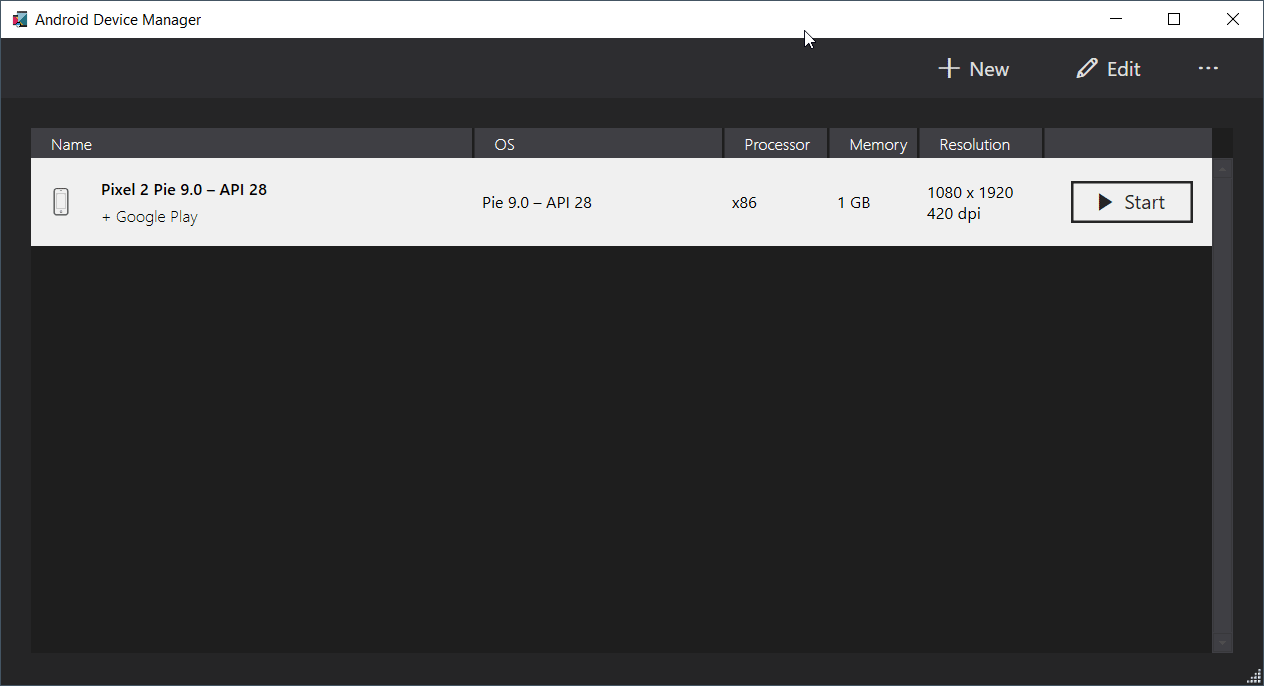
Figure 7. Downloaded Android device.
Normally, it takes a while to load since it is a bit heavy. Once it’s done, you should see the screen shown in Figure 8.
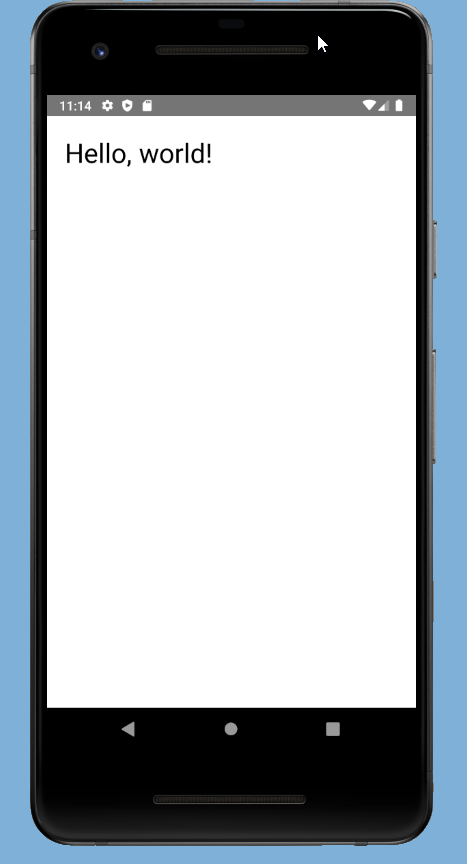
Figure 8. Hello World, Uno!
Fixing up the Uno packages
There are still some fixes to make. The first one is related to the Uno-related packages update. Right-click your solution and select the Manage NuGet Packages for Solution… option.
Then, go to the Updates tab, and you’ll probably see some pending updates to be made as shown in Figure 9.
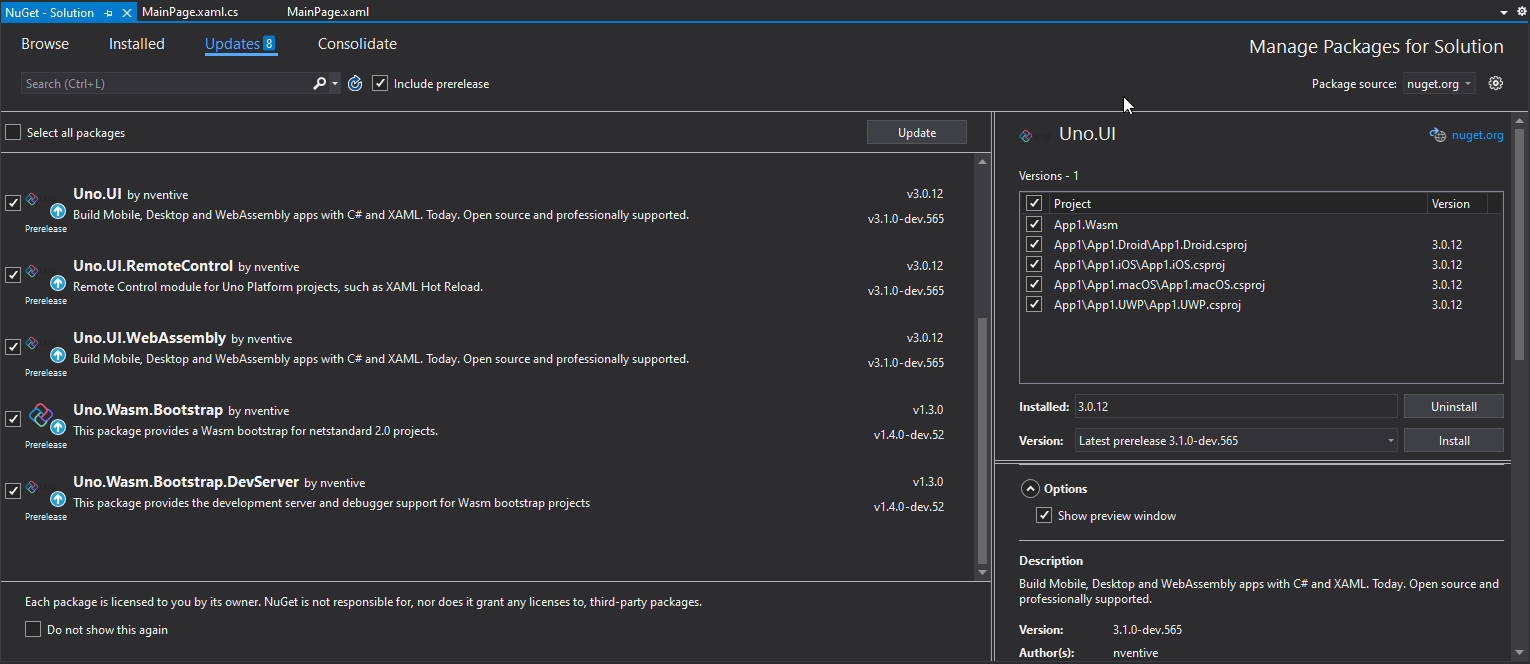
Figure 9. Pending update dependencies.
Select all the packages related to Uno and make sure to check the Include prerelease option too. Then, click Install making sure to mark all the projects of your solution.
Attention: be careful not to update all the listed dependencies, but just the ones related to Uno.
After that, go to the Browse tab and search for the Refractored.MvvmHelpers package, and install it (Figure 10). It will help with the two-way binding feature for the views and controllers.
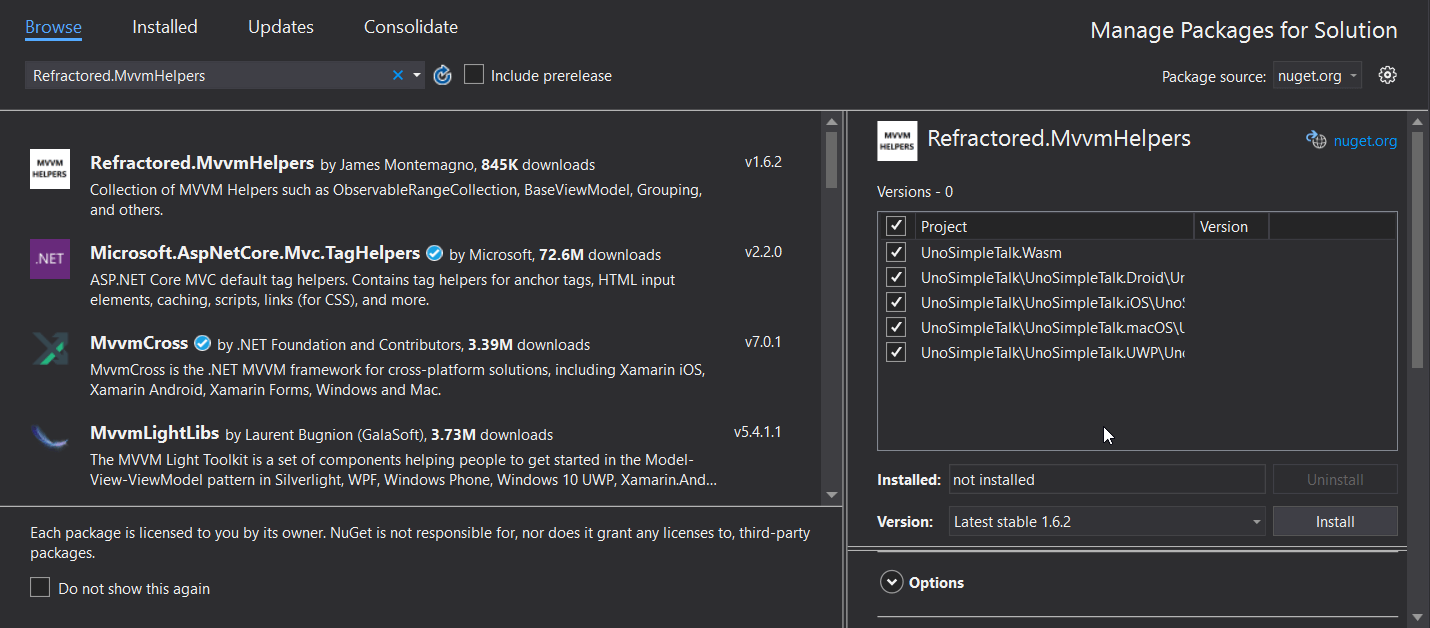
Figure 10. Installing MVVM Helpers package.
The model
Models are very important to Uno projects since the framework also adopts the MVVM pattern.
Within the UnoSimpleTalk.Shared project, create a new folder called Models as well as a new class called TempItem.cs in it. Place the code shown in Listing 1 into the file:
Listing 1. Temp Item model
|
1 2 3 4 5 6 7 8 9 10 11 12 13 14 15 16 17 18 19 20 21 22 23 24 25 26 27 28 29 30 31 32 33 34 35 36 37 38 39 40 41 42 43 |
using System; using MvvmHelpers; namespace UnoSimpleTalk.Models { public class TempItem : ObservableObject { private int id; public int Id { get => id; set => SetProperty(ref id, value); } private TempType type; public TempType Type { get => type; set => SetProperty(ref type, value); } private double tempValue; public double TempValue { get => tempValue; set => SetProperty(ref tempValue, value); } private double convertedValue; public double ConvertedValue { get => convertedValue; set => SetProperty(ref convertedValue, value); } private DateTimeOffset createdAt = DateTimeOffset.Now.ToLocalTime(); public DateTimeOffset CreatedAt { get => createdAt; set => SetProperty(ref createdAt, value); } } public enum TempType { Celsius, Fahrenheit } } |
Note that the ObservableObject class is imported to help with the auto-binding mentioned earlier. The rest of the model is very simple, with attributes that will bind to the view’s input fields.
The main page
The home page’s XAML code and the controller’s C# code is placed in MainPage.xaml.cs.
Start by opening the MainPage.xaml.cs file and substituting its contents by the following:
Listing 2. MainPage.xaml.cs code
|
1 2 3 4 5 6 7 8 9 10 11 12 13 14 15 16 17 18 19 20 21 22 23 24 25 26 27 28 29 30 31 32 33 34 35 36 37 38 39 40 41 42 43 44 45 46 47 48 49 50 51 52 53 54 55 56 57 58 59 60 61 62 63 64 65 66 67 |
using UnoSimpleTalk.Models; using System; using System.Collections.Generic; using System.IO; using System.Linq; using System.Runtime.InteropServices.WindowsRuntime; using Windows.Foundation; using Windows.Foundation.Collections; using Windows.UI; using Windows.UI.Xaml; using Windows.UI.Xaml.Controls; using Windows.UI.Xaml.Controls.Primitives; using Windows.UI.Xaml.Data; using Windows.UI.Xaml.Input; using Windows.UI.Xaml.Media; using Windows.UI.Xaml.Navigation; // The Blank Page item template is documented // at http://go.microsoft.com/fwlink/?LinkId=402352&clcid=0x409 namespace UnoSimpleTalk { /// <summary> /// An empty page that can be used on its own or /// navigated to within a Frame. /// </summary> public sealed partial class MainPage : Page { public static readonly DependencyProperty ItemProperty = DependencyProperty.Register(nameof(Item), typeof(TempItem), typeof(MainPage), new PropertyMetadata(default(TempItem))); public MainPage() { Item = new TempItem { Id = 1, Type = TempType.Celsius, TempValue = 23, CreatedAt = new DateTimeOffset(), ConvertedValue = (23 * 1.8) + 32 }; this.InitializeComponent(); } public TempItem Item { get => (TempItem)GetValue(ItemProperty); set => SetValue(ItemProperty, value); } public TempType[] TempTypeList => new[] { TempType.Celsius, TempType.Fahrenheit }; private void Calculate_Temp(object sender, RoutedEventArgs args) { switch (TempTypeBox.SelectedItem) { case TempType.Fahrenheit: Item.ConvertedValue = (Item.TempValue * 1.8) + 32; break; case TempType.Celsius: Item.ConvertedValue = (Item.TempValue - 32) * 0.5556; break; } } public string FormatTemperature(double temp) => $"{Math.Round(temp, 2)}º"; } } |
Chances are that your code shows some errors, like:
- App does not contain a definition for InitializeComponent. If that happens, just ignore it for a while. Apparently, Uno has a bug to recognize this method before the first couple of builds. After some runs, and IDE restarts, you’ll see that the error disappears.
- It can’t find TempTypeBox either. This also happens due to the lack of builds and runs, since VS needs to run the whole codebase first to generate the object links. Don’t worry; it won’t affect the execution on the device.
The first line of the class starts with a DependencyProperty object. In Uno, every time you want to make a controller object visible to the views, you need to expose it via this class. The first parameter refers to a name, the second is the property type, the third’s the owner of this object, and the last one relates to the metadata information to construct this object and make it injectable to the views.
Following it, you may find the constructor. It’s nothing special; it just initiates an item object to make sure the view will have something to show right after the startup.
The TempTypeList method is important because it provides the list of temperature scales for the combo that’ll be built in a few minutes. The Calculate_Temp method is the one which receives the click action to calculate the new temperature based on the form inputs. Finally, the FormatTemperature method helps with text formatting. It also rounds up the decimal places of the temperature value, since it is a double number.
Now, open the MainPage.xaml file and place the contents shown in Listing 3.
Listing 3. Mainpage.xaml code
|
1 2 3 4 5 6 7 8 9 10 11 12 13 14 15 16 17 18 19 20 21 22 23 24 25 26 27 28 29 30 31 32 33 34 35 36 37 38 39 40 41 42 43 44 45 46 47 |
<Page x:Class=" UnoSimpleTalk.MainPage" xmlns="http://schemas.microsoft.com/winfx/2006/xaml/presentation" xmlns:x="http://schemas.microsoft.com/winfx/2006/xaml" xmlns:local="using:App1" xmlns:d="http://schemas.microsoft.com/expression/blend/2008" xmlns:mc="http://schemas.openxmlformats.org/markup-compatibility/2006" mc:Ignorable="d"> <Grid Background="{ThemeResource ApplicationPageBackgroundThemeBrush}" RowSpacing="8"> <Grid.RowDefinitions> <RowDefinition Height="Auto" /> <RowDefinition Height="Auto" /> <RowDefinition Height="Auto" /> <RowDefinition Height="Auto" /> <RowDefinition Height="Auto" /> </Grid.RowDefinitions> <TextBlock Text="Temperature Converter" Grid.Row="0" HorizontalTextAlignment="Center" HorizontalAlignment="Center" Margin="30" FontWeight="Bold" FontSize="30" /> <TextBox Text="{x:Bind Item.TempValue,Mode=TwoWay}" AcceptsReturn="True" Grid.Row="1" Header="Temperature:" Margin="10,0" FontSize="20" PlaceholderText="Enter your temperature here" /> <ComboBox x:Name="TempTypeBox" Header="Convert to:" Grid.Row="2" FontSize="20" Margin="10,0" ItemsSource="{x:Bind TempTypeList}" SelectedItem="{x:Bind Item.Type,Mode=TwoWay}" HorizontalAlignment="Stretch" /> <Button Grid.Row="3" Click="Calculate_Temp" Margin="10,0" FontSize="20">Calculate</Button> <StackPanel Background="LightGray" Padding="20" Grid.Row="4" Margin="10,0"> <TextBlock Text="Converted Temperature:" FontWeight="Bold" FontSize="26" /> <TextBlock Text="{x:Bind FormatTemperature(Item.ConvertedValue),Mode=OneWay}" FontWeight="Bold" FontSize="20" /> </StackPanel> </Grid> </Page> |
You’re probably going to see a bunch of errors on this file. They happen because of Intellisense, the code-completion tool for XAML pages, is only supported when the UWP head is active. Make sure to select it as shown in Figure 11.
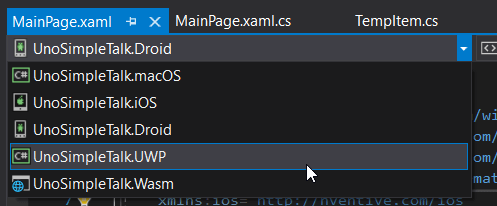
Figure 11. Selecting the UWP head.
If the error persists, try closing the XAML document as well as restarting VS.
Here, it’s being mounted a basic template for the view. Since every screen component must be stacked on top of each other within the Grid tag, you need first to define how this stacking must happen.
The Grid.RowDefinitions tag does exactly this. It sets the blank spaces in which the next components will be placed, one after another. The tags are very intuitive and self-explanatory. It also resembles the HTML tags, if you’re familiar with them.
Special attention goes to the x:Bind spread through the code. This represents the structure Uno uses to inform that there’s an injection going on there.
You also need to specify which binding mode you want:
- TwoWay indicates that the binding happens back and fourthly
- OneWay indicates that it only happens from views to classes
Testing the calculator
Well, this is it! Now, you can move on to the tests. Just hit the Android start button again, wait for the build to end, and check out the result on the emulator. Figure 12 shows how your app will look:
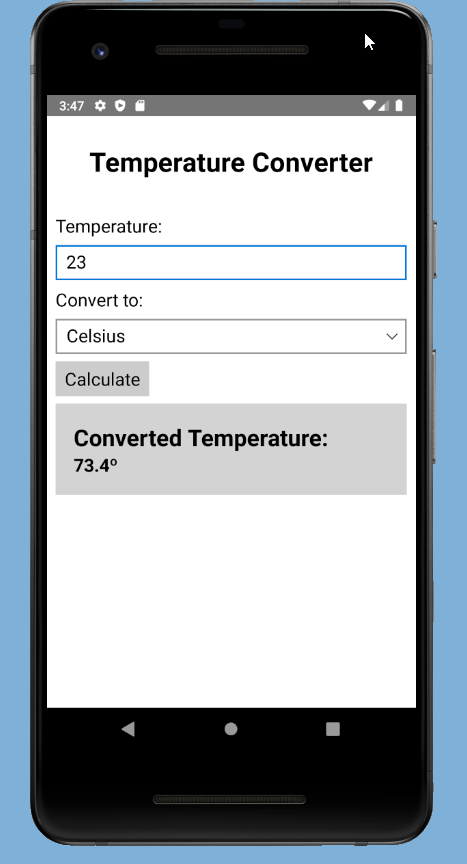
Figure 12. Temperature app on the Android device
You can also test it on other devices, like your own Windows (or in a built-in Windows simulator). Just remember that you’ll need to enable the developer mode of your Windows, as shown below.
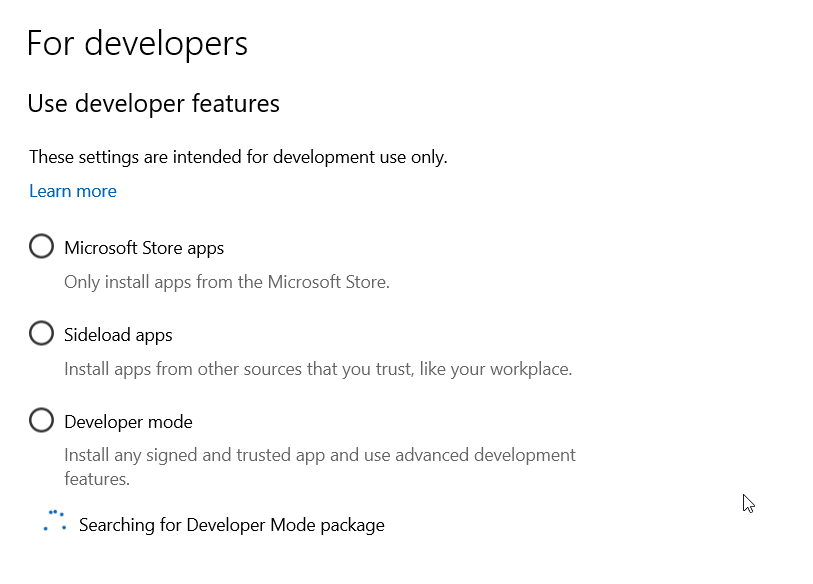
Figure 12. Enabling Developer Mode on Windows
Visual Studio will automatically open this configuration window for you when you try to run on this mode.
Conclusion
Even though the Uno platform is new compared to other, more mature players, it is very promising and powerful. Its community is growing and embracing more and more members all the time. Make sure to spend some time going over its GitHub repository and the official docs.
As homework, you can increment the sample to add more advanced features from the docs or even incorporate some of the available ones provided by the Uno Platform Code Samples page.

Load comments