
This tutorial demonstrates how to set up notifications for these events using a Stream Feed in conjunction with AWS S3.
We will walk through a basic set up that shows how to create a timeline (flat feed) to display a list of events tied to an AWS S3 bucket – think user uploads, downloads, and views of assets.

Note: If you want to monitor notifications from
Google Drive,OneDrive,SharePoint, or any other cloud, we'll touch on that, too, later on!
While AWS offers notifications for certain actions, neither S3 nor CloudWatch (EventBridge) nor SNS offers a notification when a file has been viewed or downloaded from S3. This tutorial will show you how to 1) create custom AWS notifications, and 2) quickly and efficiently build a notification feed using Stream's Notification Feeds (which you can try out by creating a free trial with Stream).
To generate our notification feed for S3 activities, we will use a few AWS provided tools – S3, CloudTrail, CloudWatch, and Lambda. Download the git repository for this project here to follow along.

Prerequisites
While one of the pivotal technologies used in this example is AWS, setting up AWS won't require specific prior knowledge. On the other hand, to display the data in a notification feed, we'll use basic express and React; you won't need to be an expert in either of these technologies, but some familiarity would be helpful. With that being said, the concepts covered below are easy to port to other languages and frameworks, too.
Creating an S3 Bucket
Let's start on the Amazon site by setting up all the AWS apps; the first tool we'll set up is S3:
-
If you don't have one already, sign up for an AWS account here. It's free, but you'll need to enter your credit card details.
-
Log in to your AWS Console as the
Root user. -
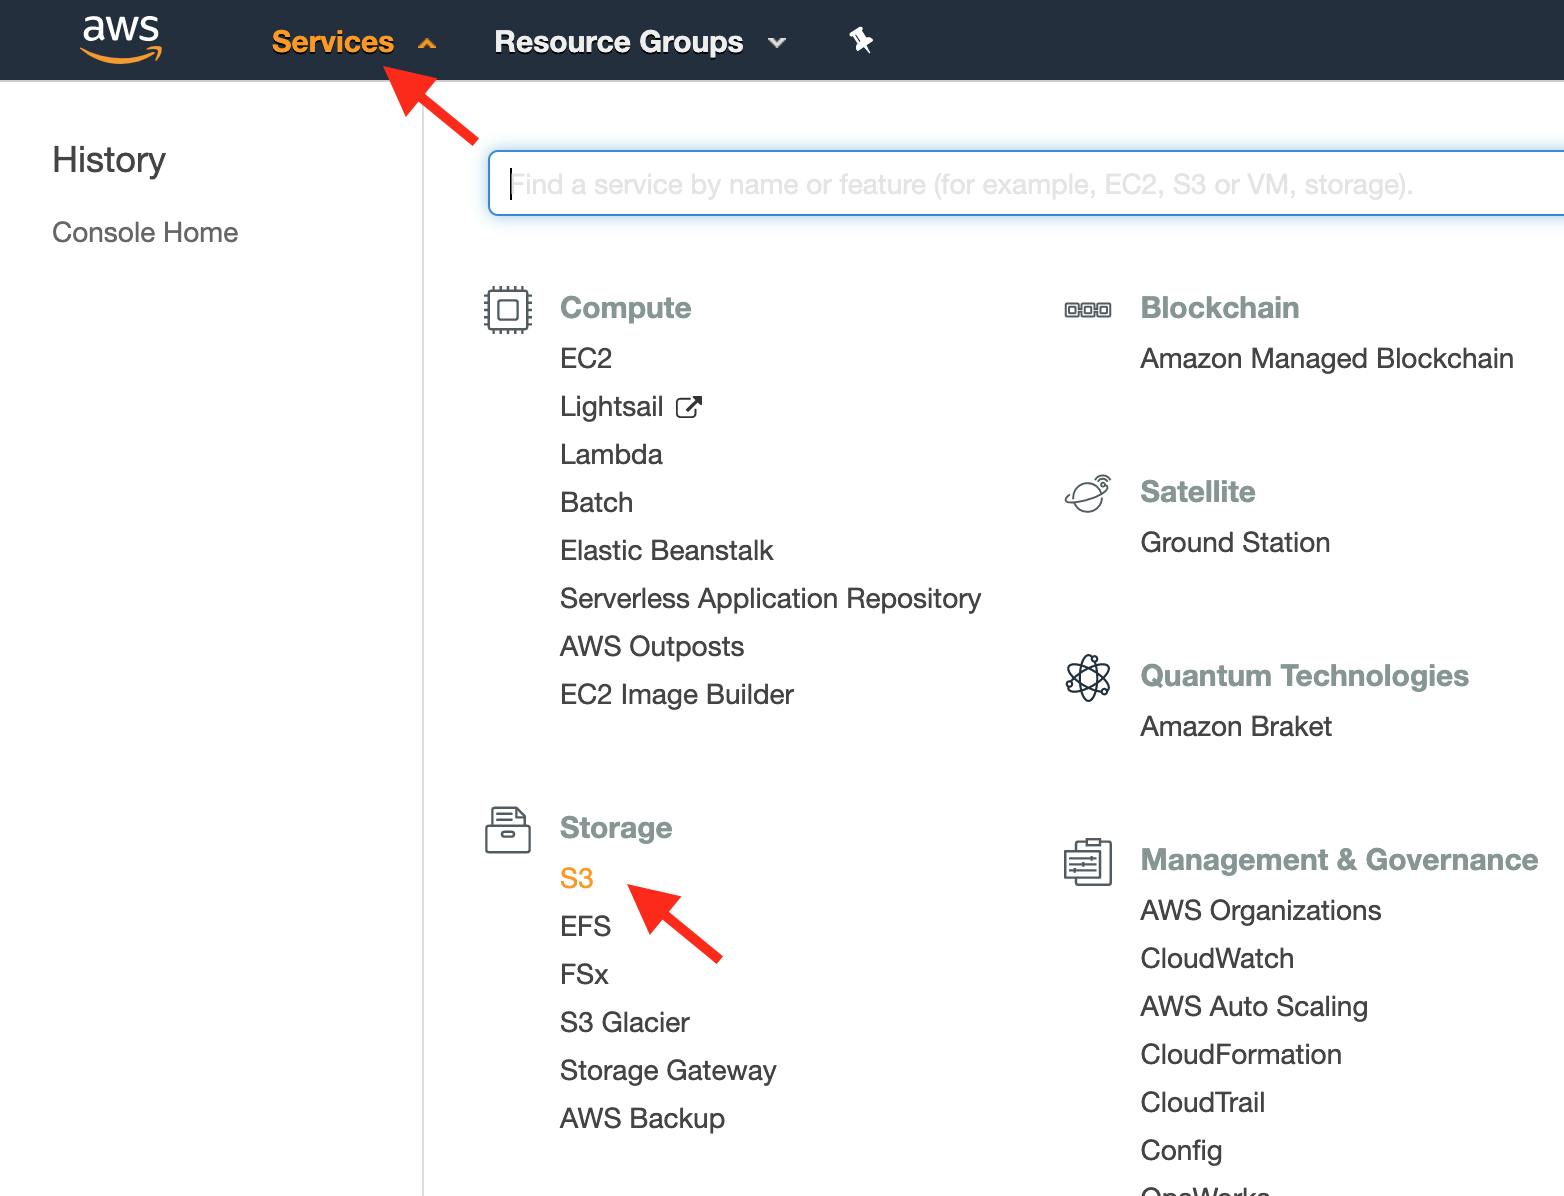
Click Services and select S3:
-
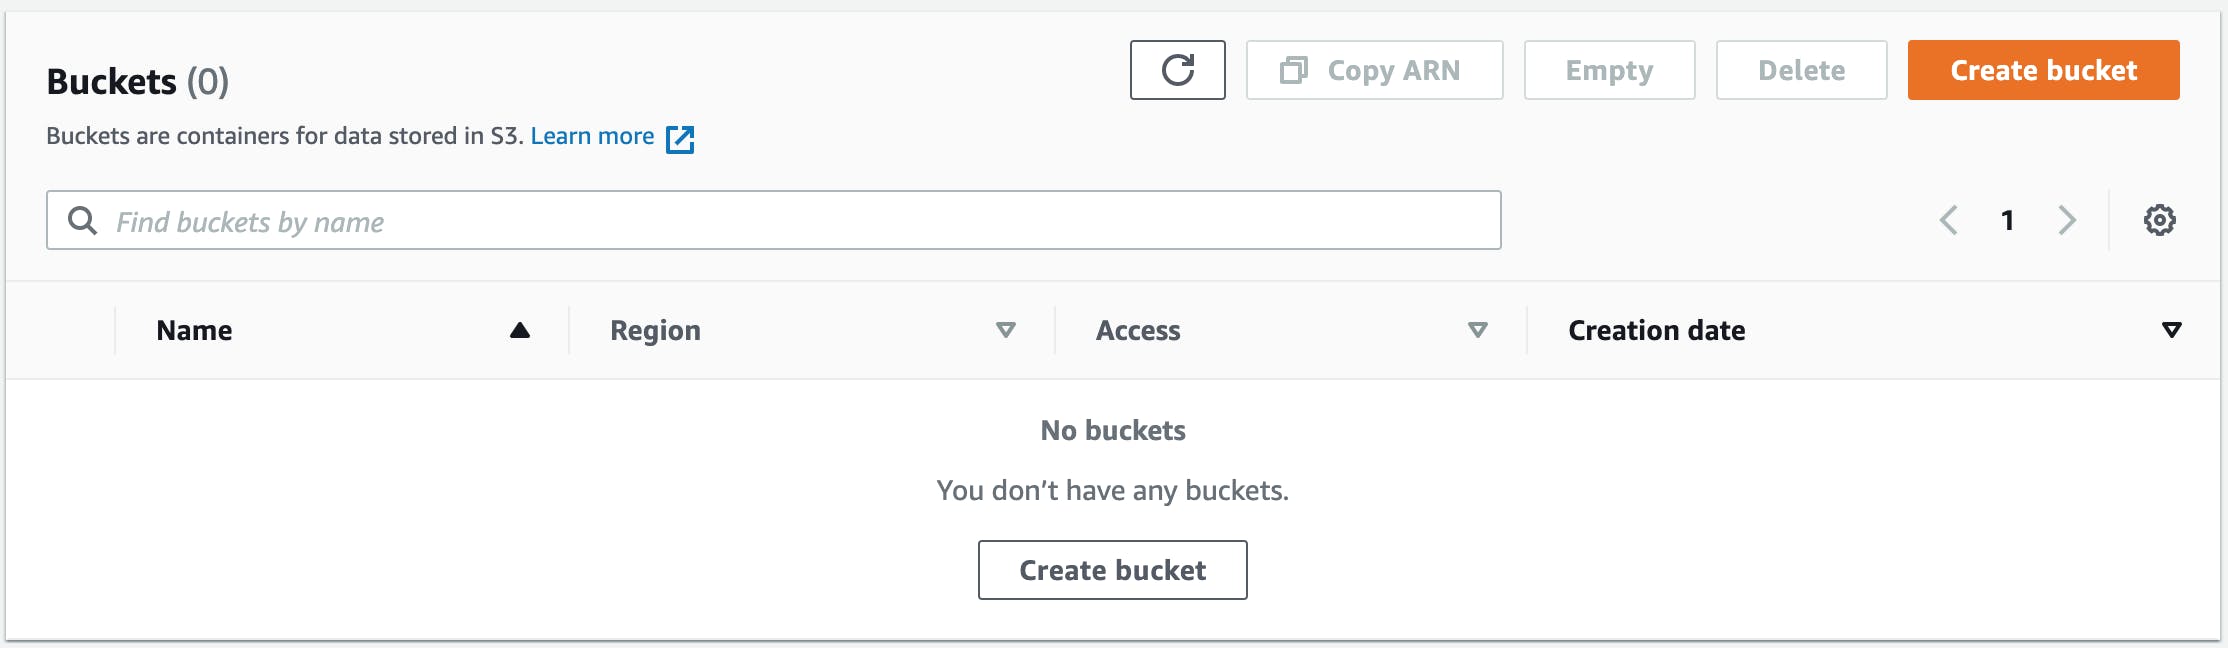
In the S3 console, create a new bucket:
-
Give your bucket a unique name. We'll call this one "scuttlebucket" (take note of the region your bucket will be hosted in; this will be important later). The default settings ("Block all public access" Enabled, "Bucket Versioning" Disabled, "Server-side encryption" Disabled, "Object Lock" Disabled) are acceptable for our use case:
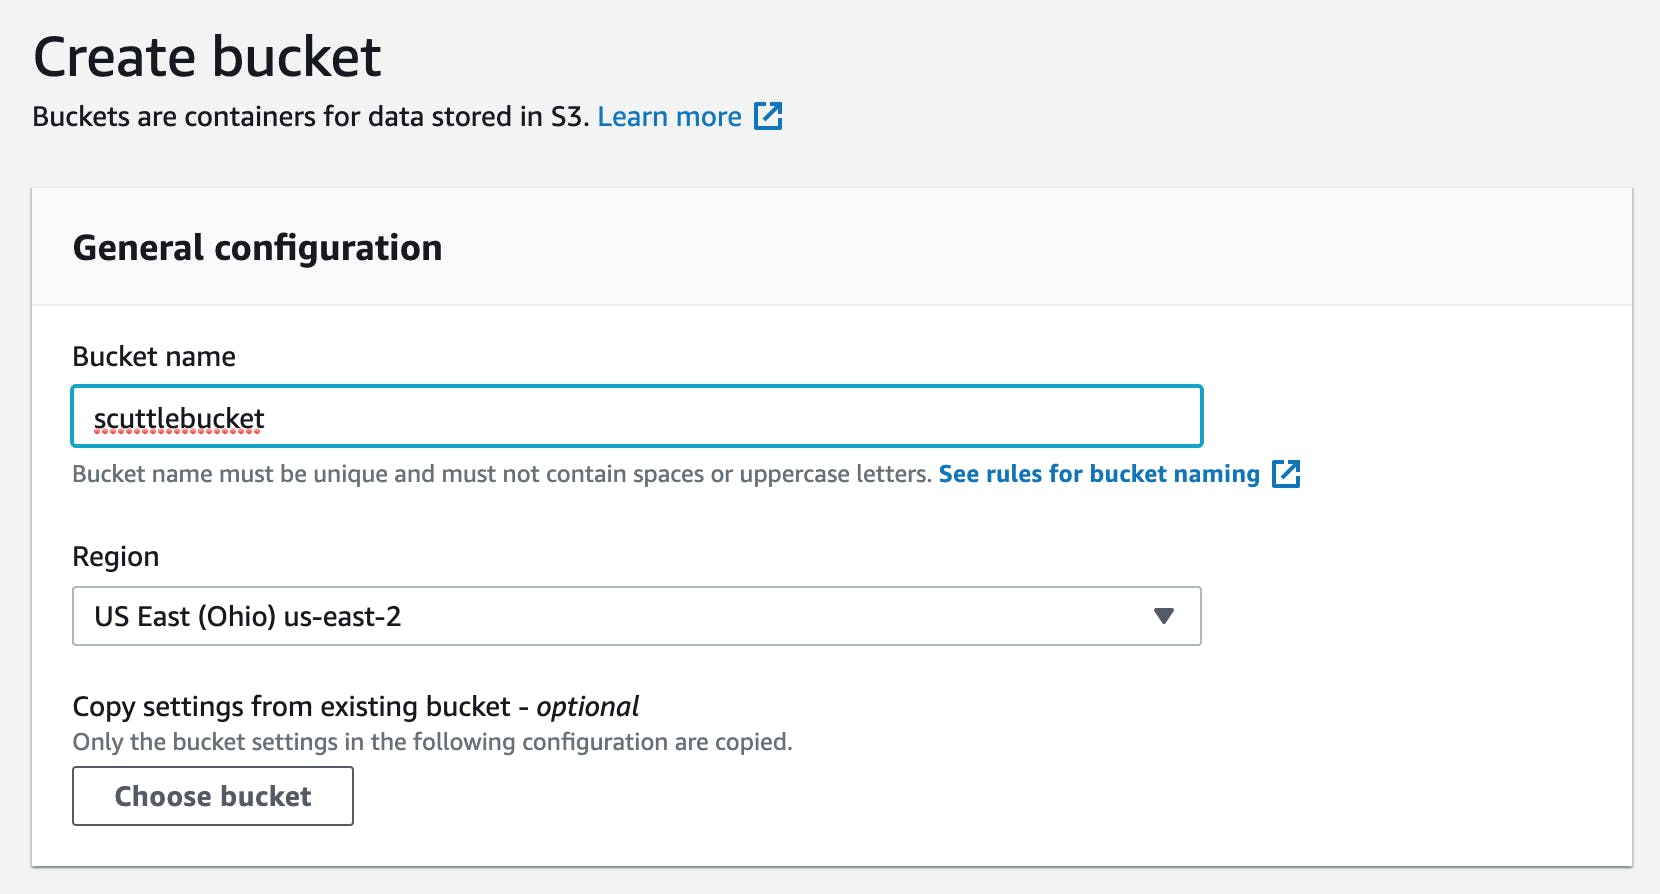
Note: if you're using an Organizational AWS account structure, be sure to check Enable for all accounts in my organization. You may have to modify some of your account permissions to give CloudWatch and CloudTrail access across your organization.
-
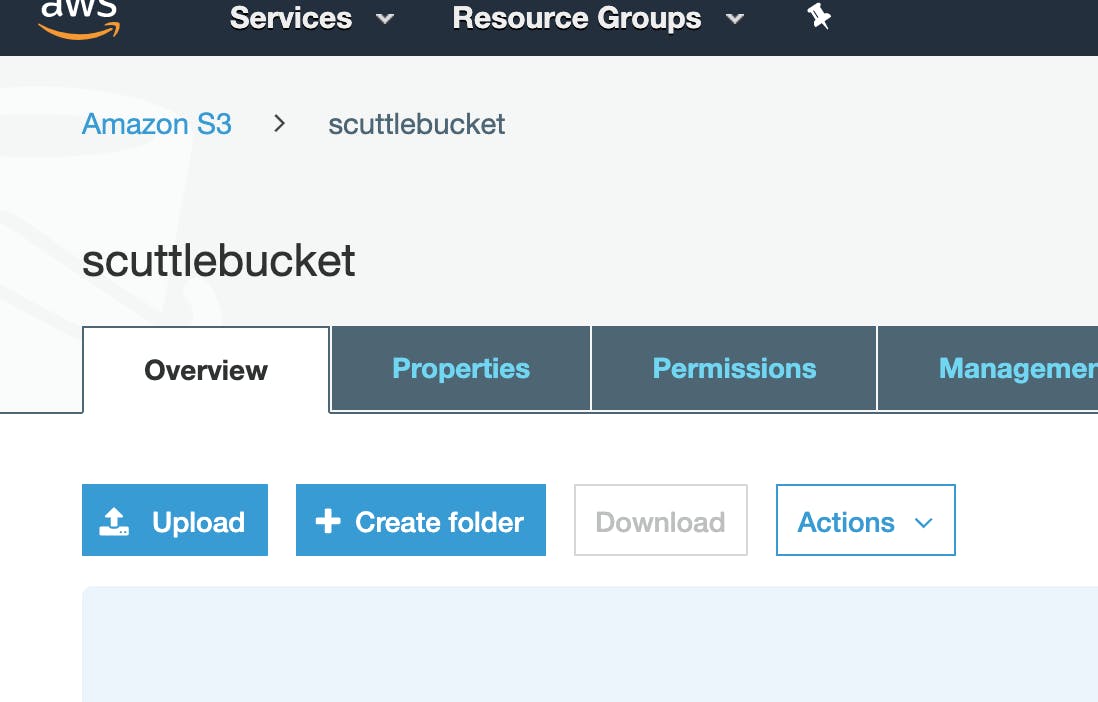
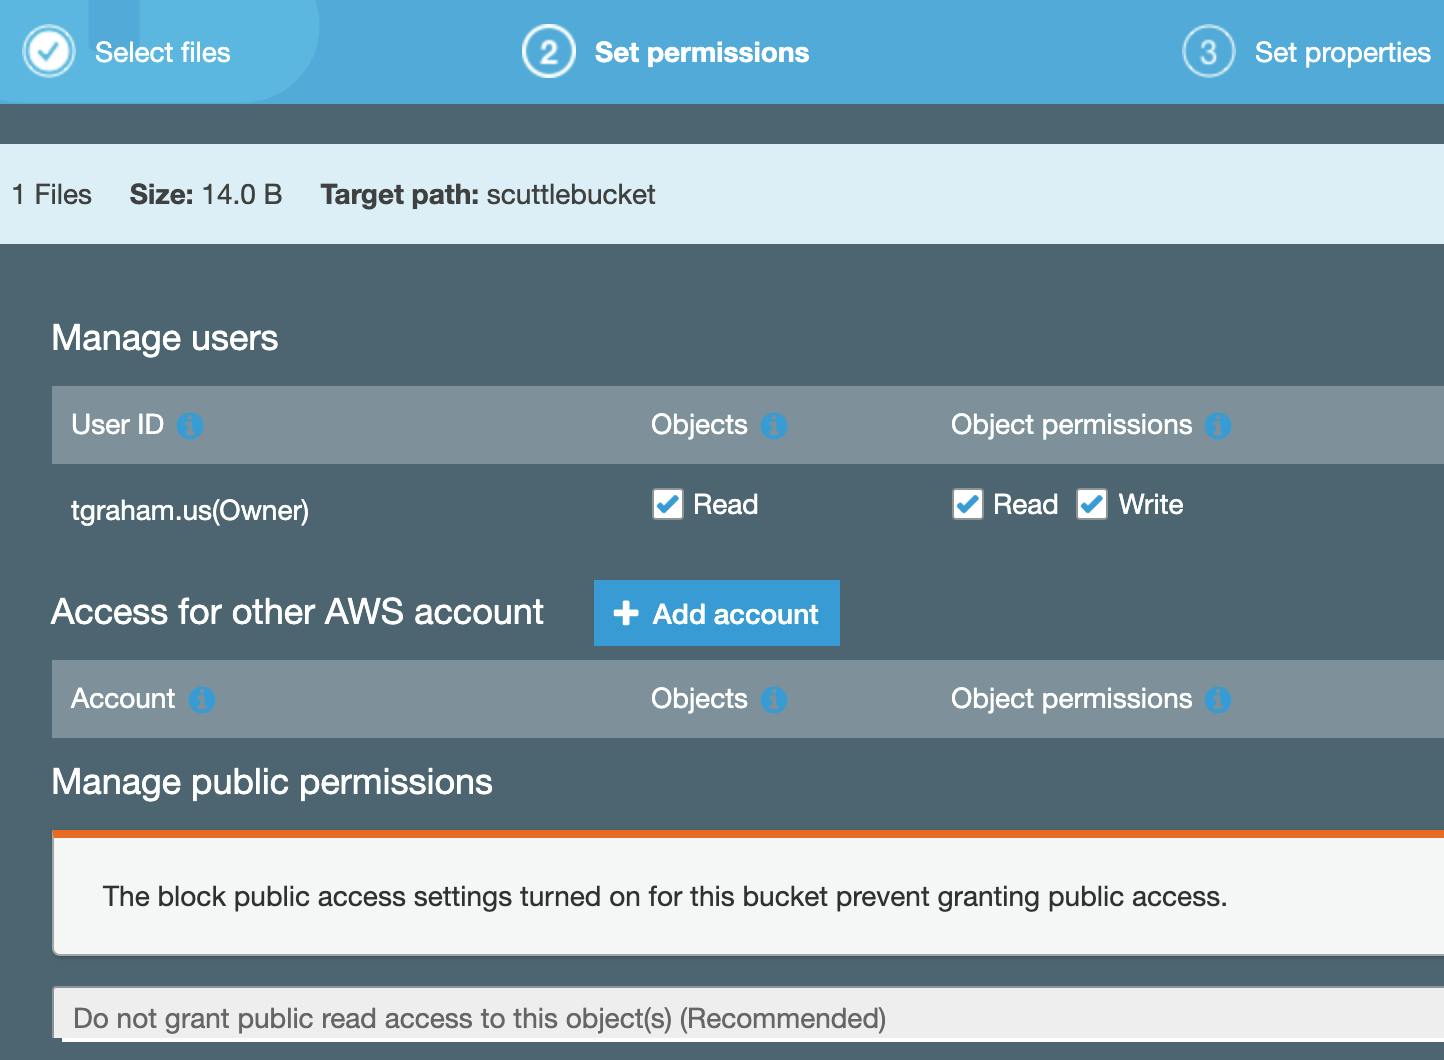
Click on your bucket, then Upload an "object" (any file will do).:
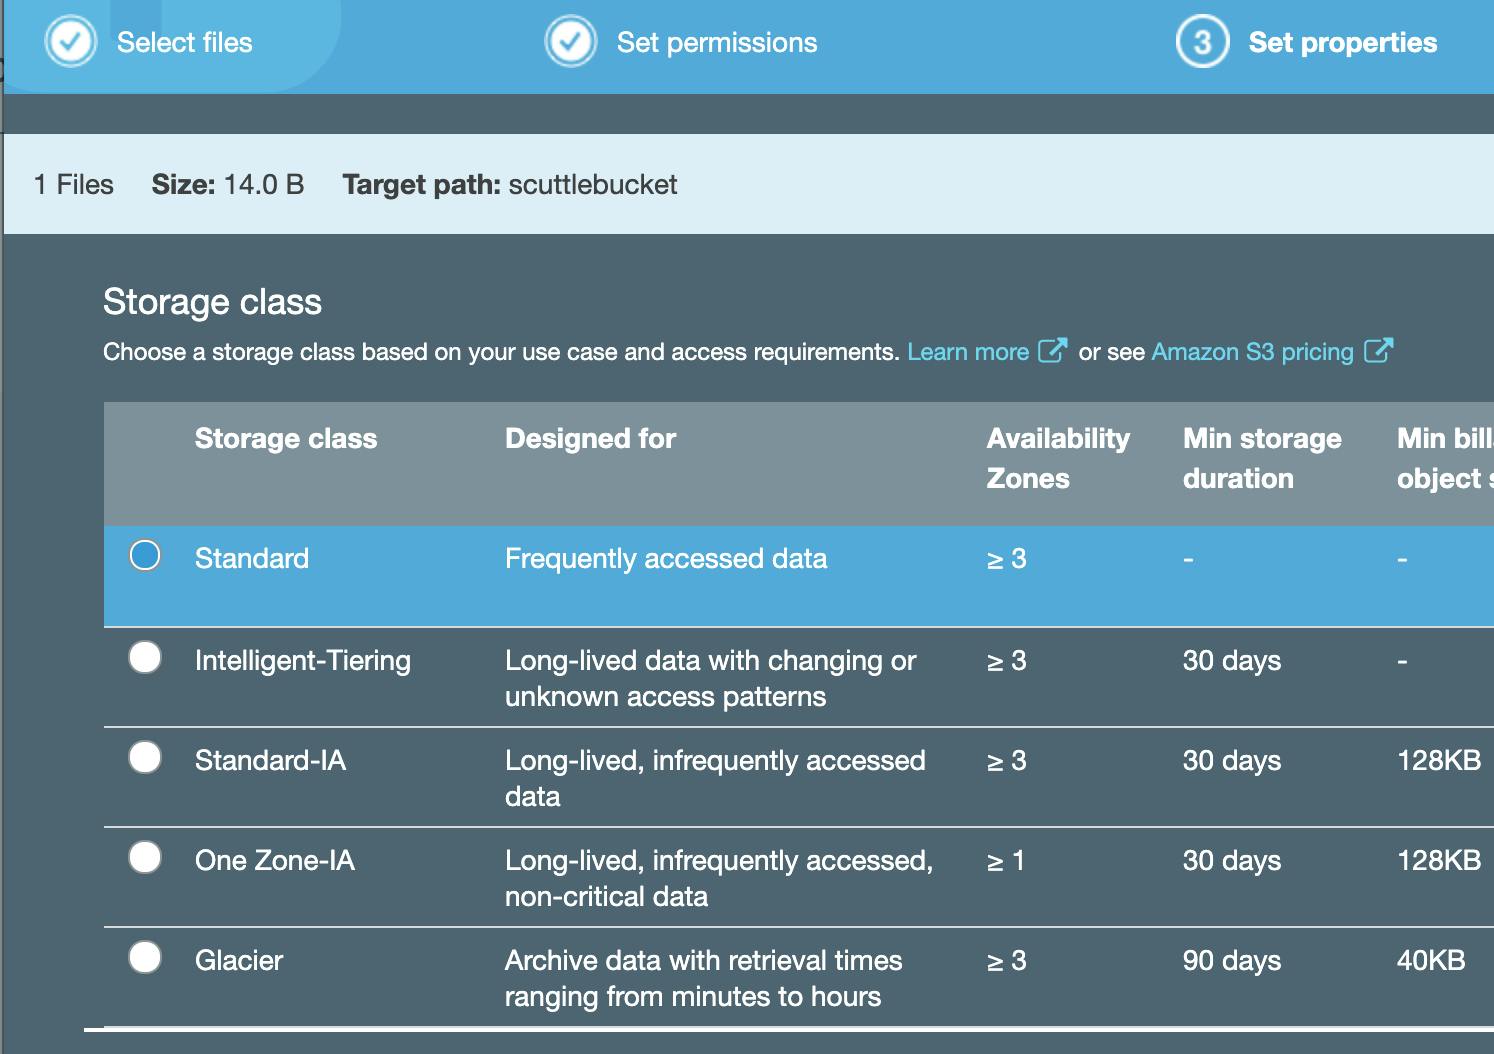
Note: AWS refers items in buckets as "objects". Default object permissions and properties (see below) are fine.
Excellent! Now, let's go to CloudTrail to set up logging.
Configuring CloudTrail
We're ultimately going to use CloudWatch to monitor events in S3, but CloudWatch can't tell you anything about "object" downloads without a CloudTrail. Here are the steps to create a CloudTrail that will deposit logs into your S3 account:
-
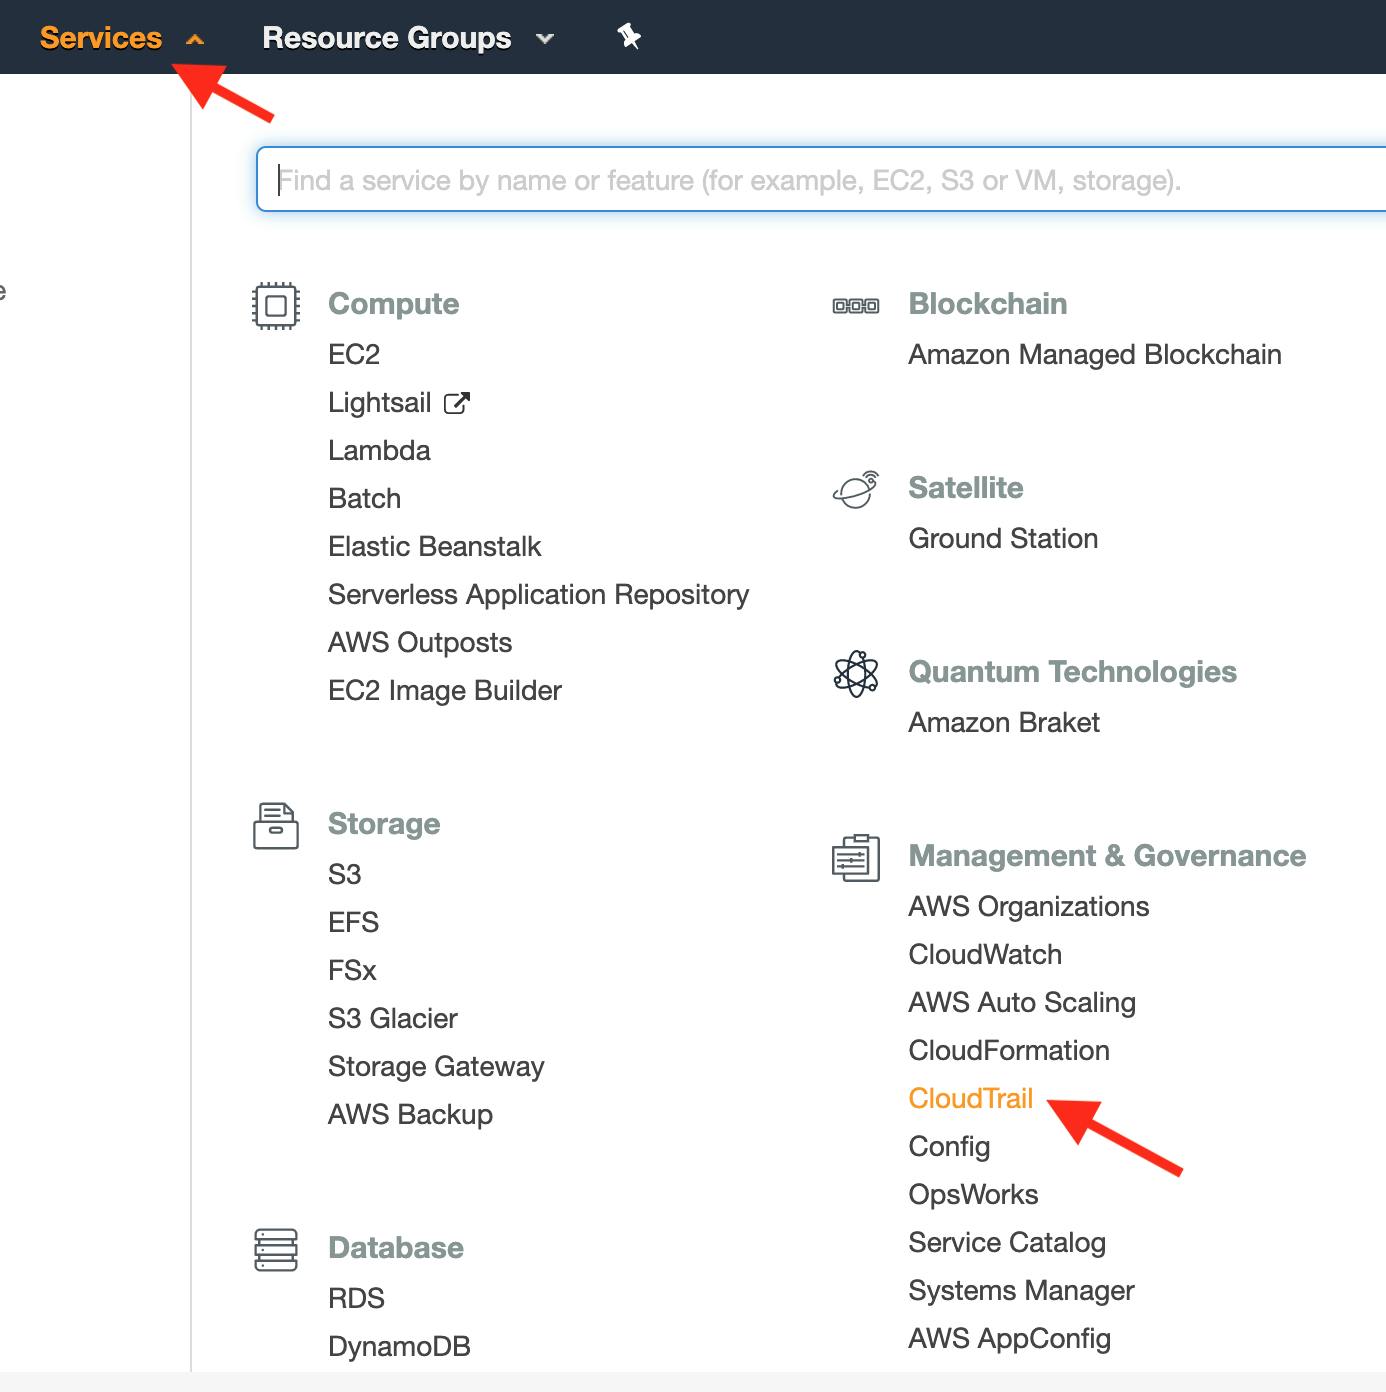
In the Services navbar dropdown, select CloudTrail:
-
In the upper-right portion of the navbar, confirm the server location matches the location you created your S3 bucket. Our CloudTrail instance must be in the same region to monitor our S3 bucket's logs:

-
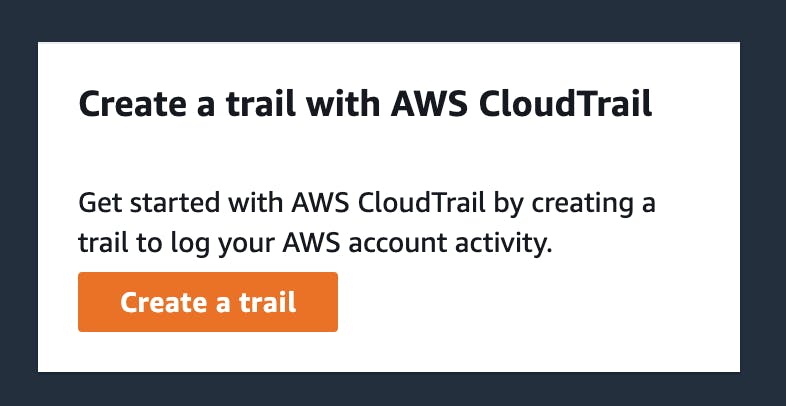
Select Create a trail from the CloudTrail home screen:
-
Name this trail "my-trail" and use the Create new S3 bucket option. This creates the folder where the CloudTrail logs will get stored. It's best to allow AWS to configure this bucket for security and permissions reasons (learn more here). We'll keep things simple by deselecting "Log file SSE-KMS encryption", "Log file validation", and "SNS notification delivery":
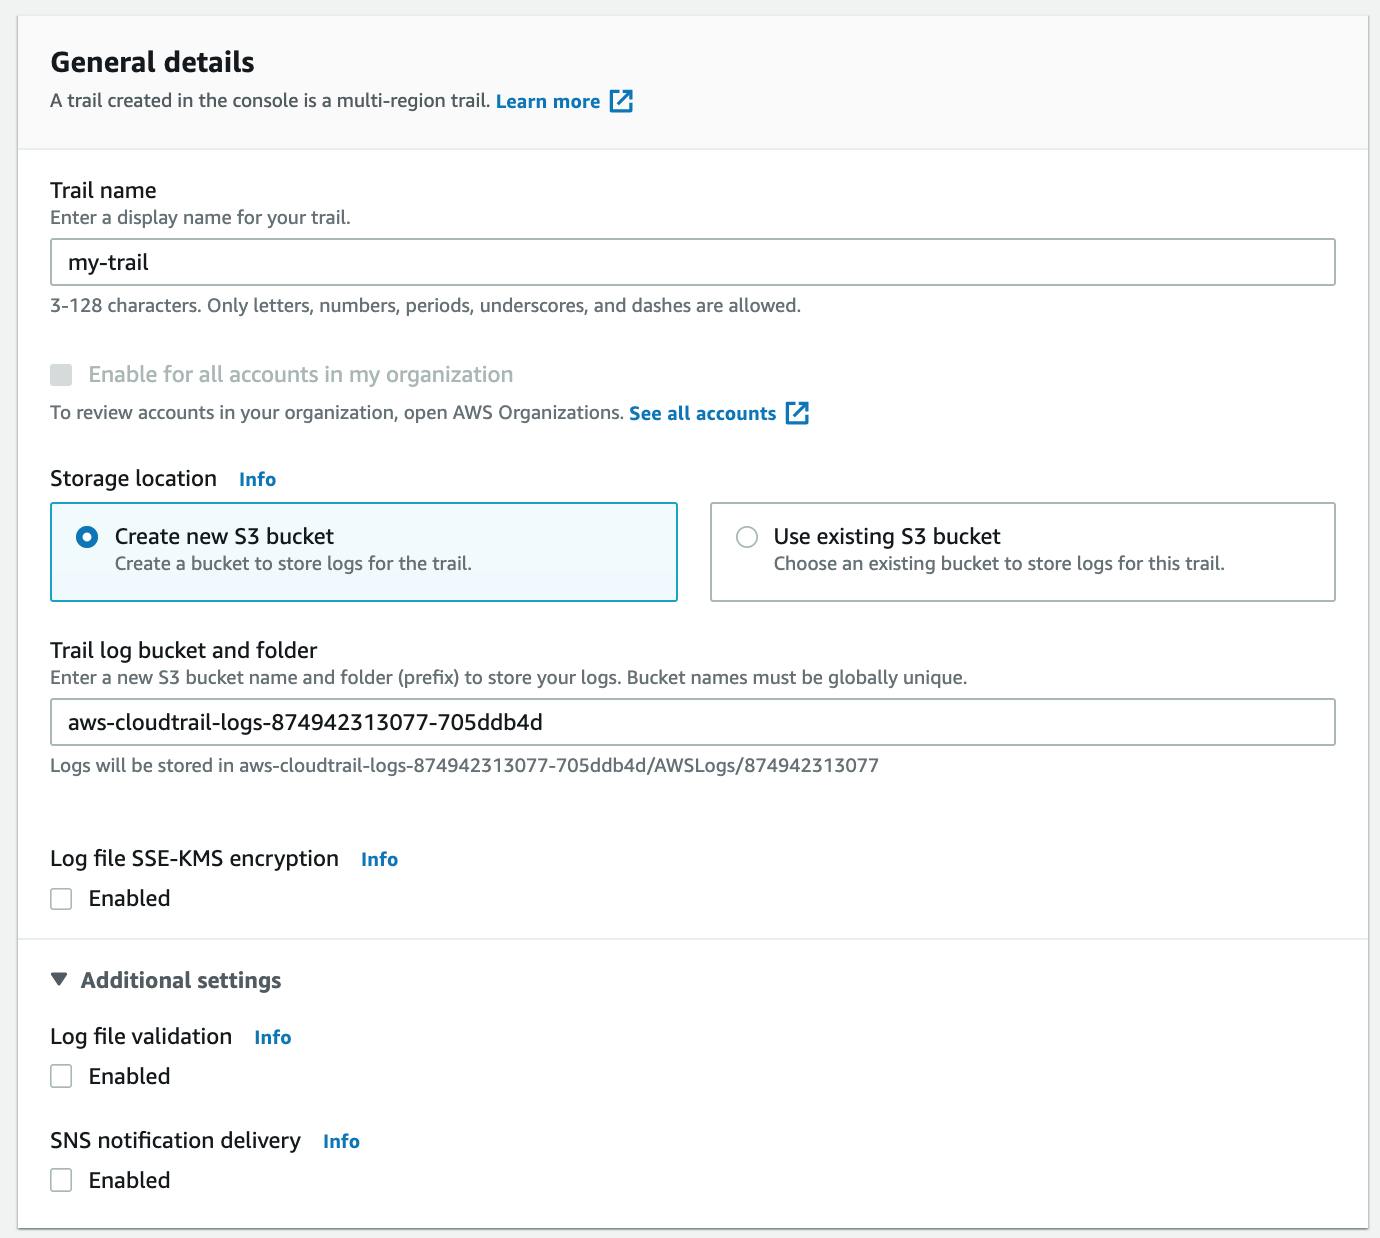
Note: Don't Log your logs! Avoid monitoring the bucket or folder where you set your CloudTrail logs to be stored; you don't want to create logs of logs!
-
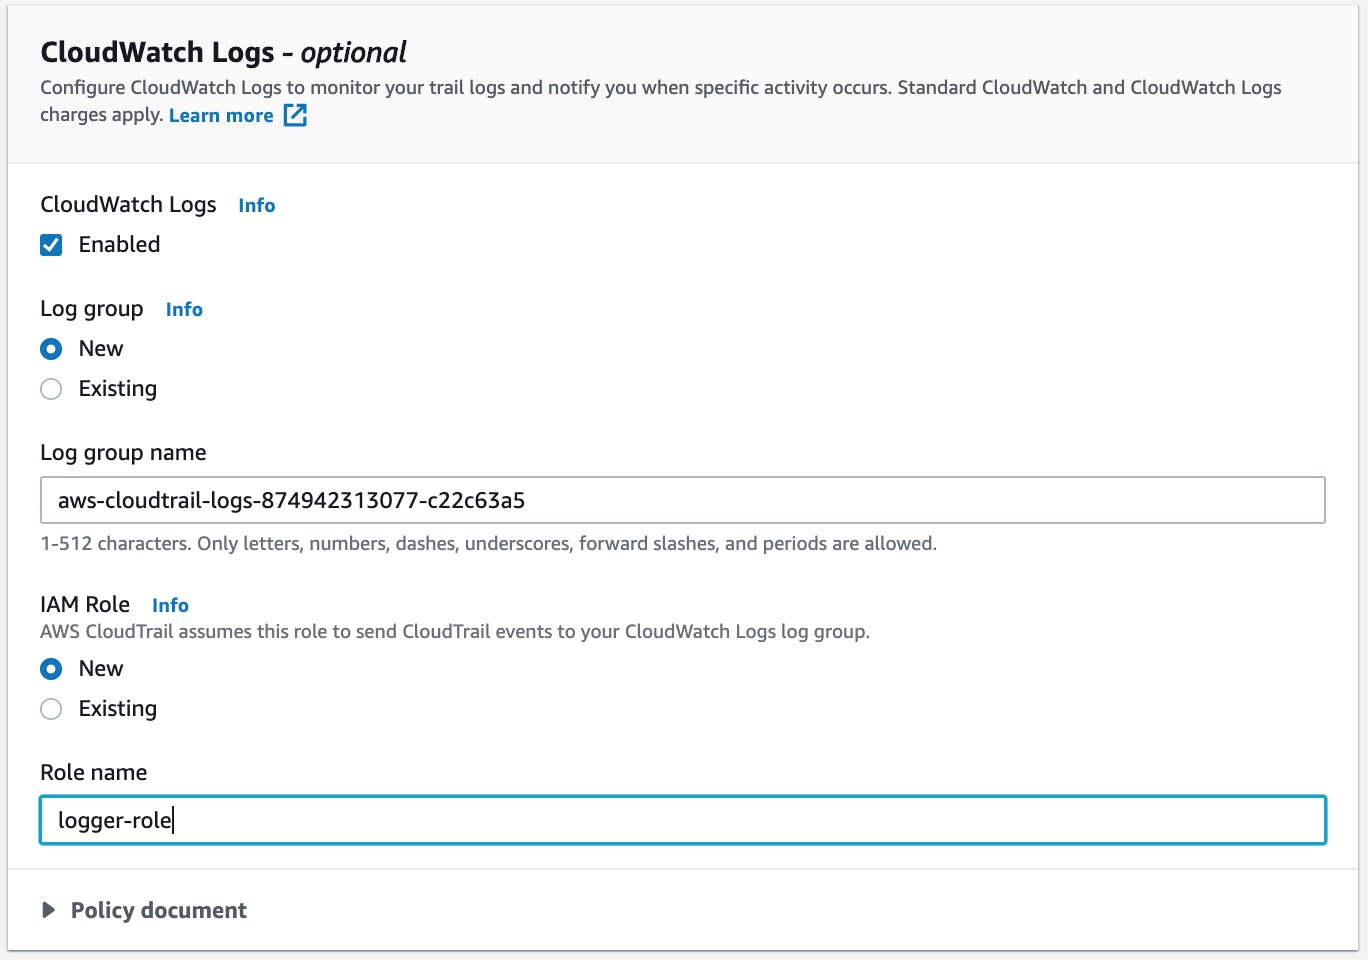
Check the box to enable "CloudWatch Logs", use a New "Log group", and a New "IAM Role". Then, click Next:
-
By default, CloudTrail will log "Management" events for "all current and future buckets". This is a good way to create way too much data! Let's fix this:
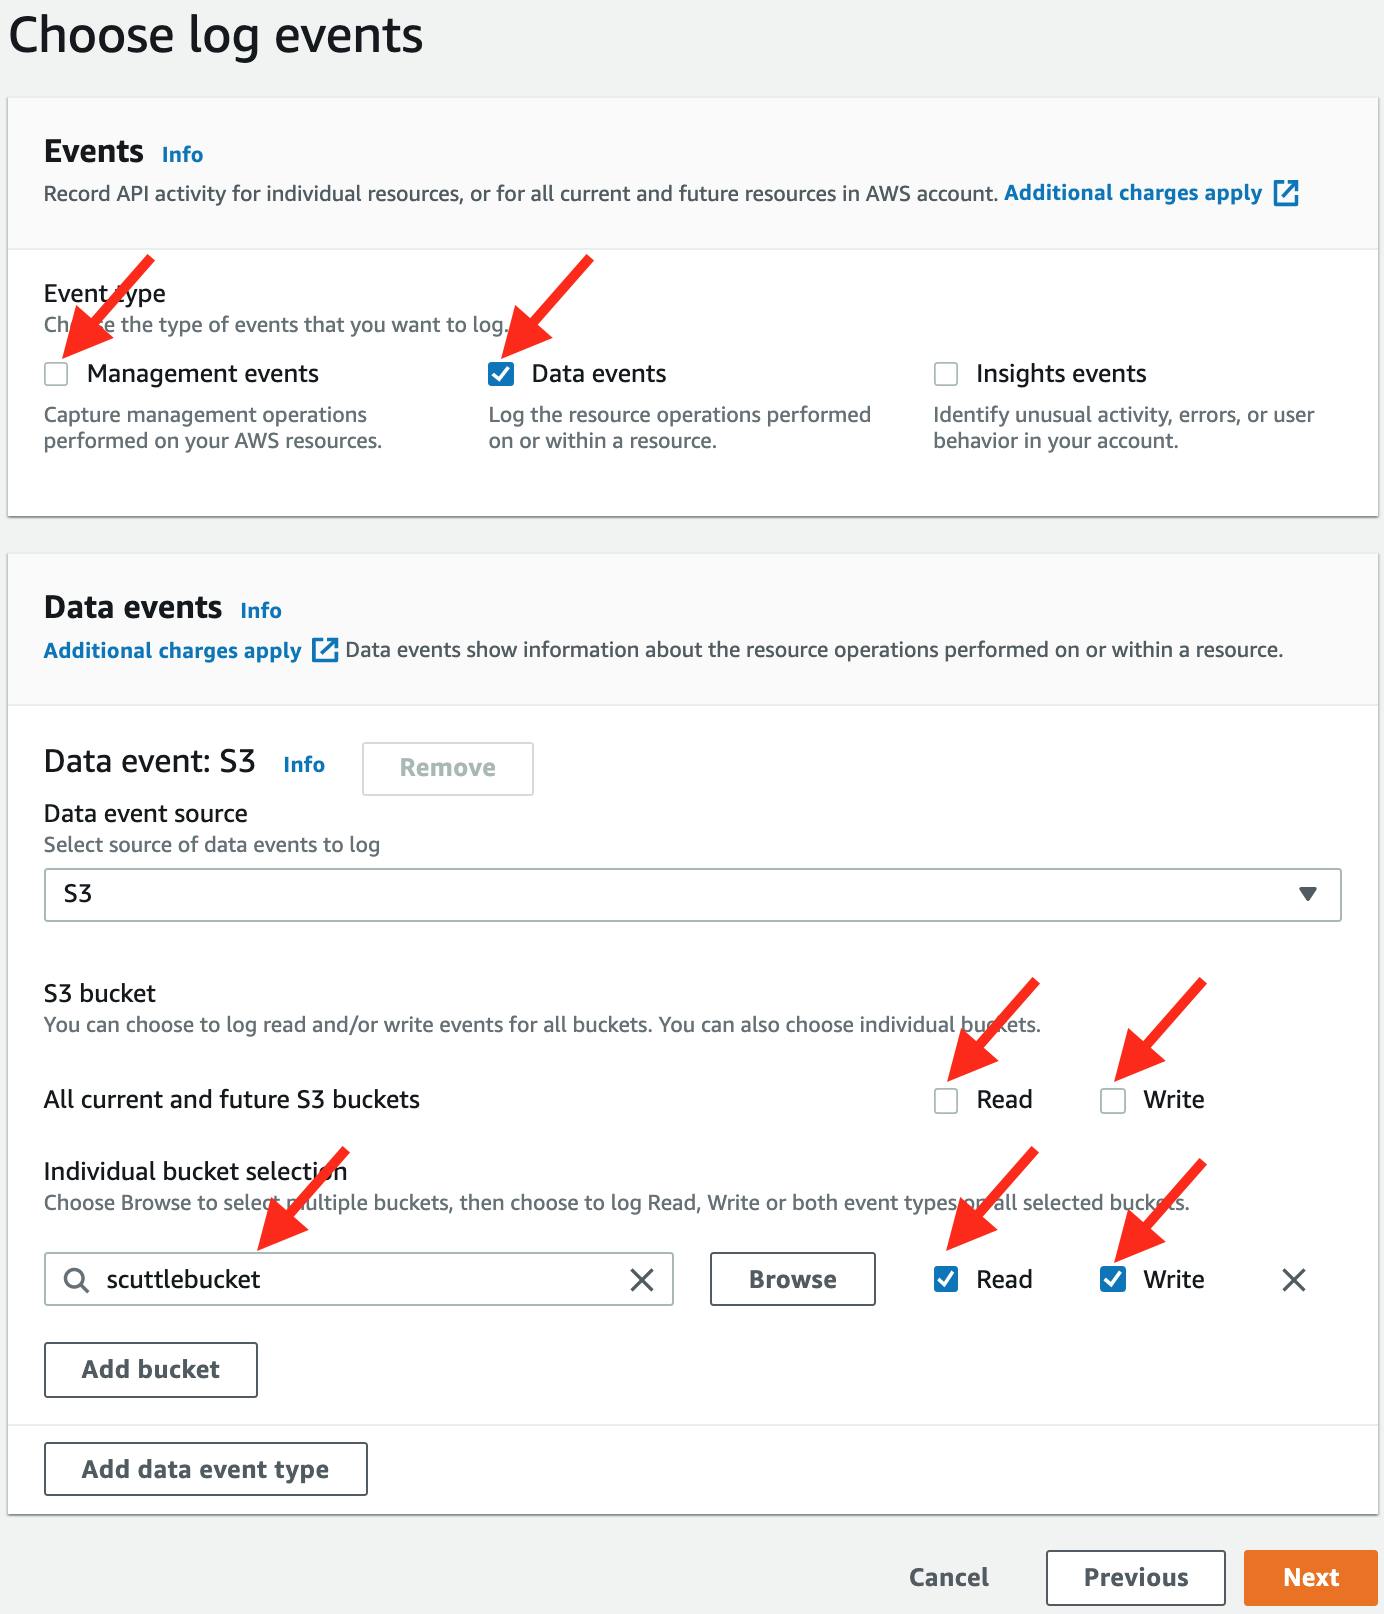
- On the "Choose log events" page, deselect Management events and choose Data events; the default event source is "S3".
- Deselect Read and Write in "All current and future S3 buckets".
- In "Individual bucket selection" add the exact bucket name that you just created (mine is "scuttlebucket"). Allow for Read and Write permissions.
-
Click Next, Review, then Create Trail on the following screens to finish. Your new CloudTrail log bucket will now be visible in your S3 dashboard:

Note: At this point, your AWS account is liable for charges. Charges will occur if you exceed the data allotted for the
Free tierplan (5GB of Data consumed by ingestion, archive storage, and data scanned by Logs Insights queries). If you're working with just a handful of buckets and objects, this app will produce only KBs of data, but be careful if you're running a large S3 service. Read here for more pricing info.
Excellent! Now let's set up the CloudWatch to monitor these logs.
Setting Up CloudWatch Monitoring
To have CloudWatch monitor the logs that CloudTrail creates, we will create a "CloudWatch Rule"; this "rule" will be set to monitor only "downloads", "views", and "uploads" of objects in specific buckets:
-
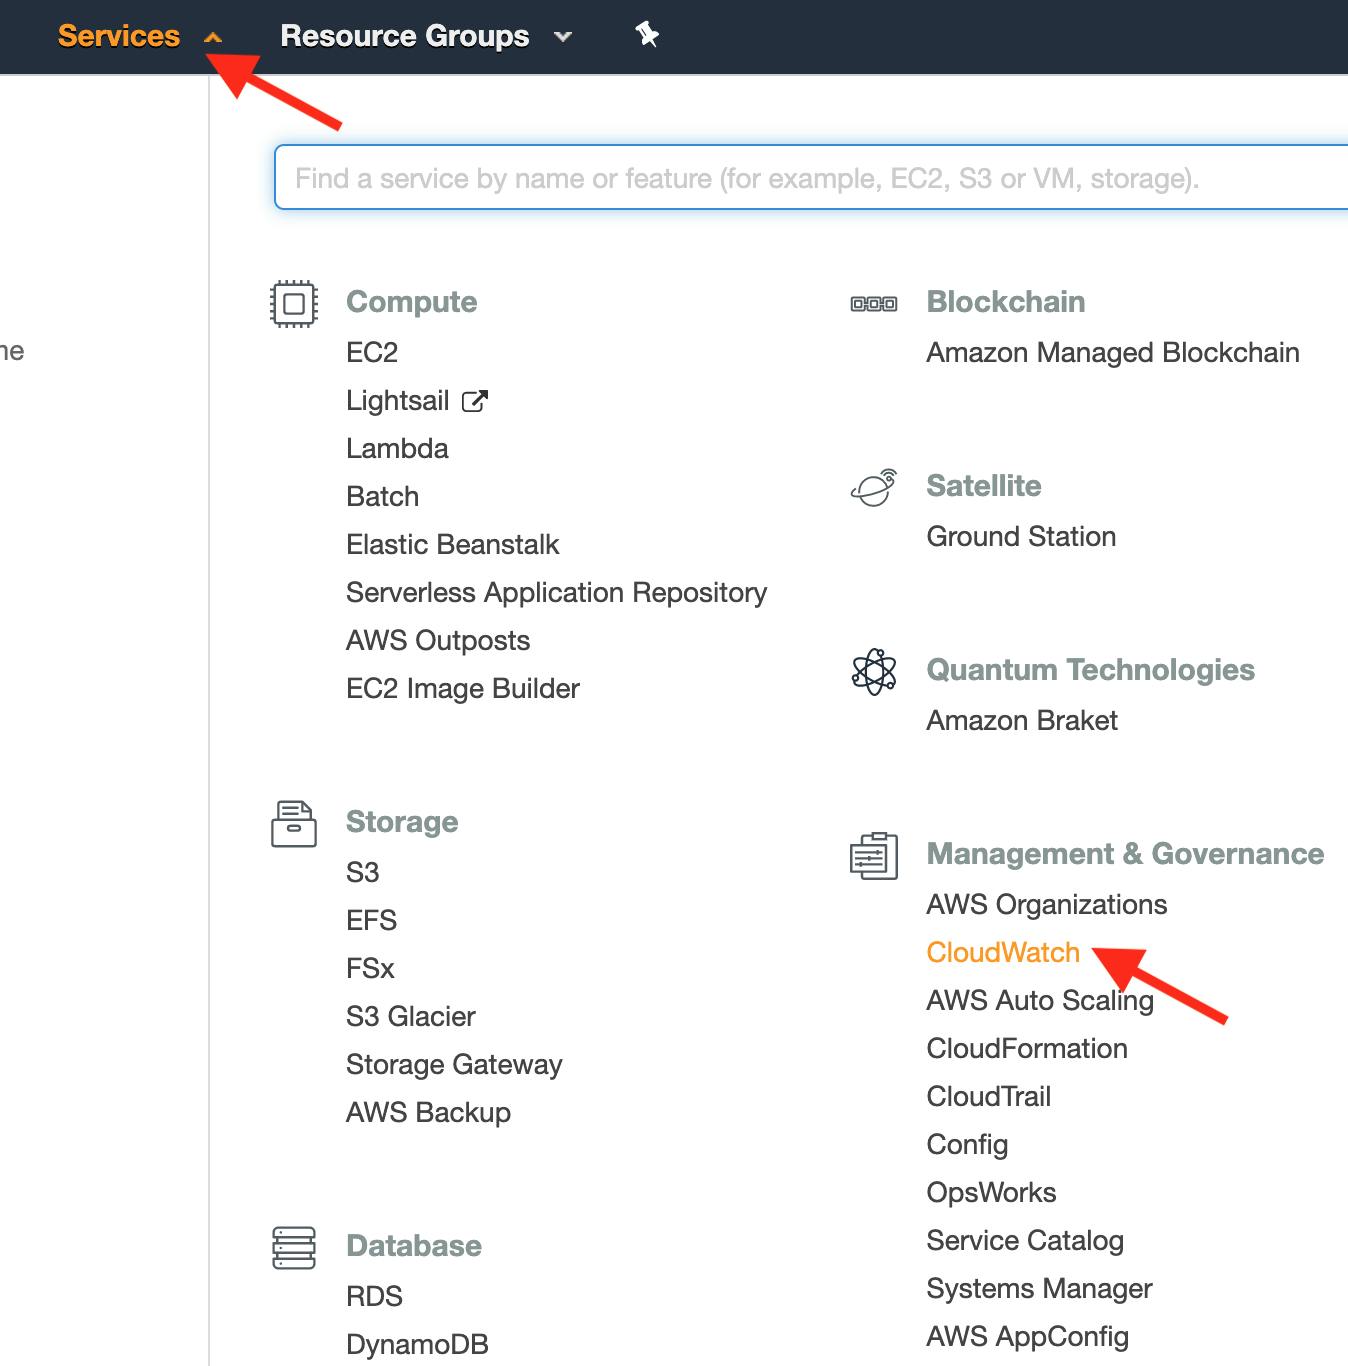
Navigate to the CloudWatch console:
-
In the left nav pane, select Rules and click Create rule:

-
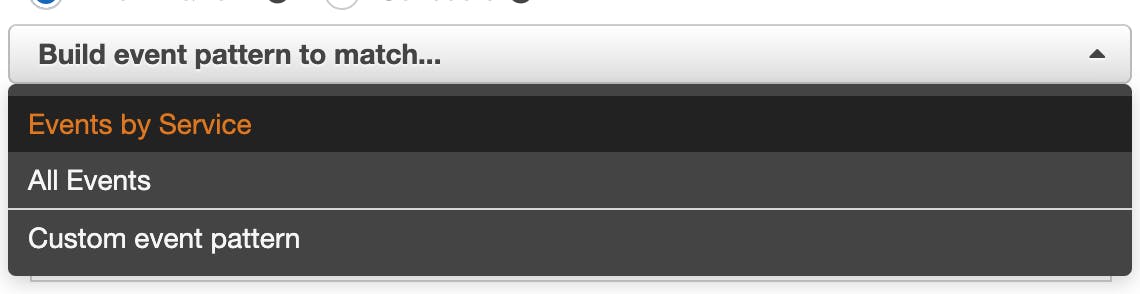
In the "Build event pattern to match events by service" dropdown, select Events by Service:
-
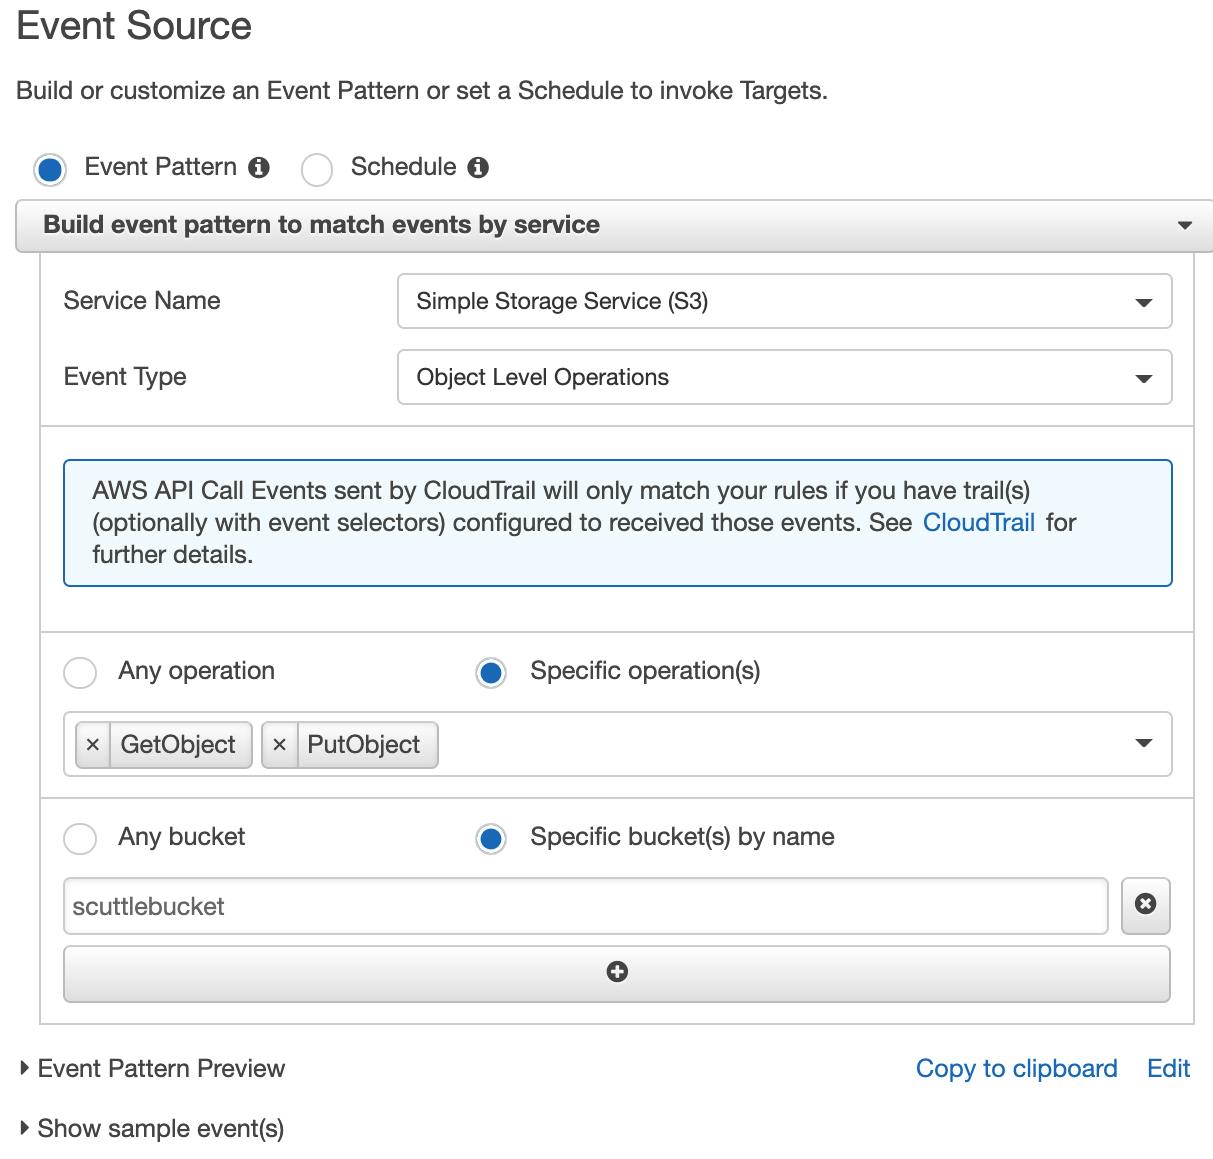
For "Service Name" select Simple Storage Service (S3). For "Event Type", select Object Level Operations:

-
Select the radio button for Specific operation(s), and add the multi-select options "GetObject" and "PutObject". This CloudWatch will monitor the CloudTrail logs for any events with the "GetObject" or "PutObject" operators. For the bucket, enter the exact name of the first "bucket" you created in your S3 (mine was "scuttlebucket"), not the logging bucket:
Note: Step 5 is where you can really customize your notification feed to fit your needs. Once you've got this app running, play around with other operations you'd like to monitor.
-
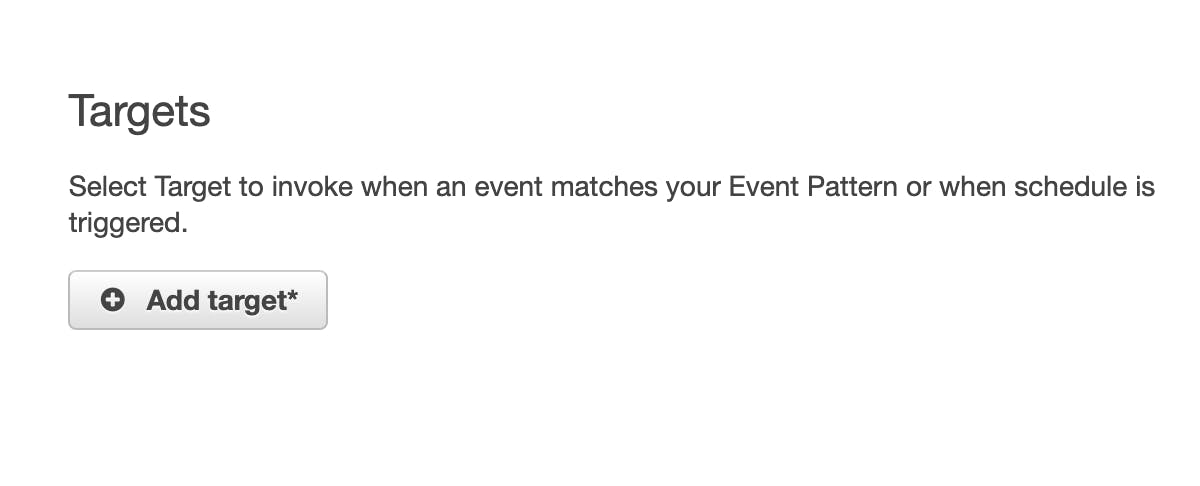
This CloudWatch now needs a "Target" to point to. As you might have guessed, our "target" is going to be an AWS Lambda function:
Keep your current browser tab open and open a second tab, where we will create an AWS Lambda function that will make an HTTP POST to our app.
Creating an AWS Lambda Function
The AWS Lambda created here will take the data from CloudWatch and POST it to our express API.
-
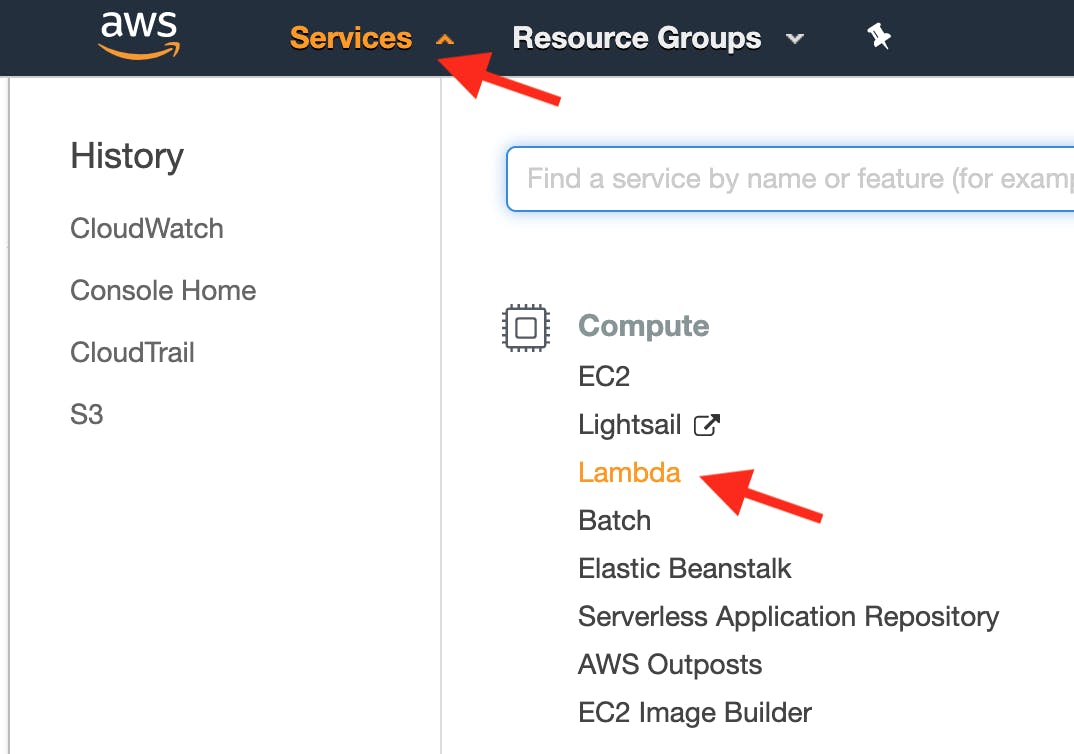
Navigate to the Lambda page using the Services navbar dropdown:
-
Click Create function:

-
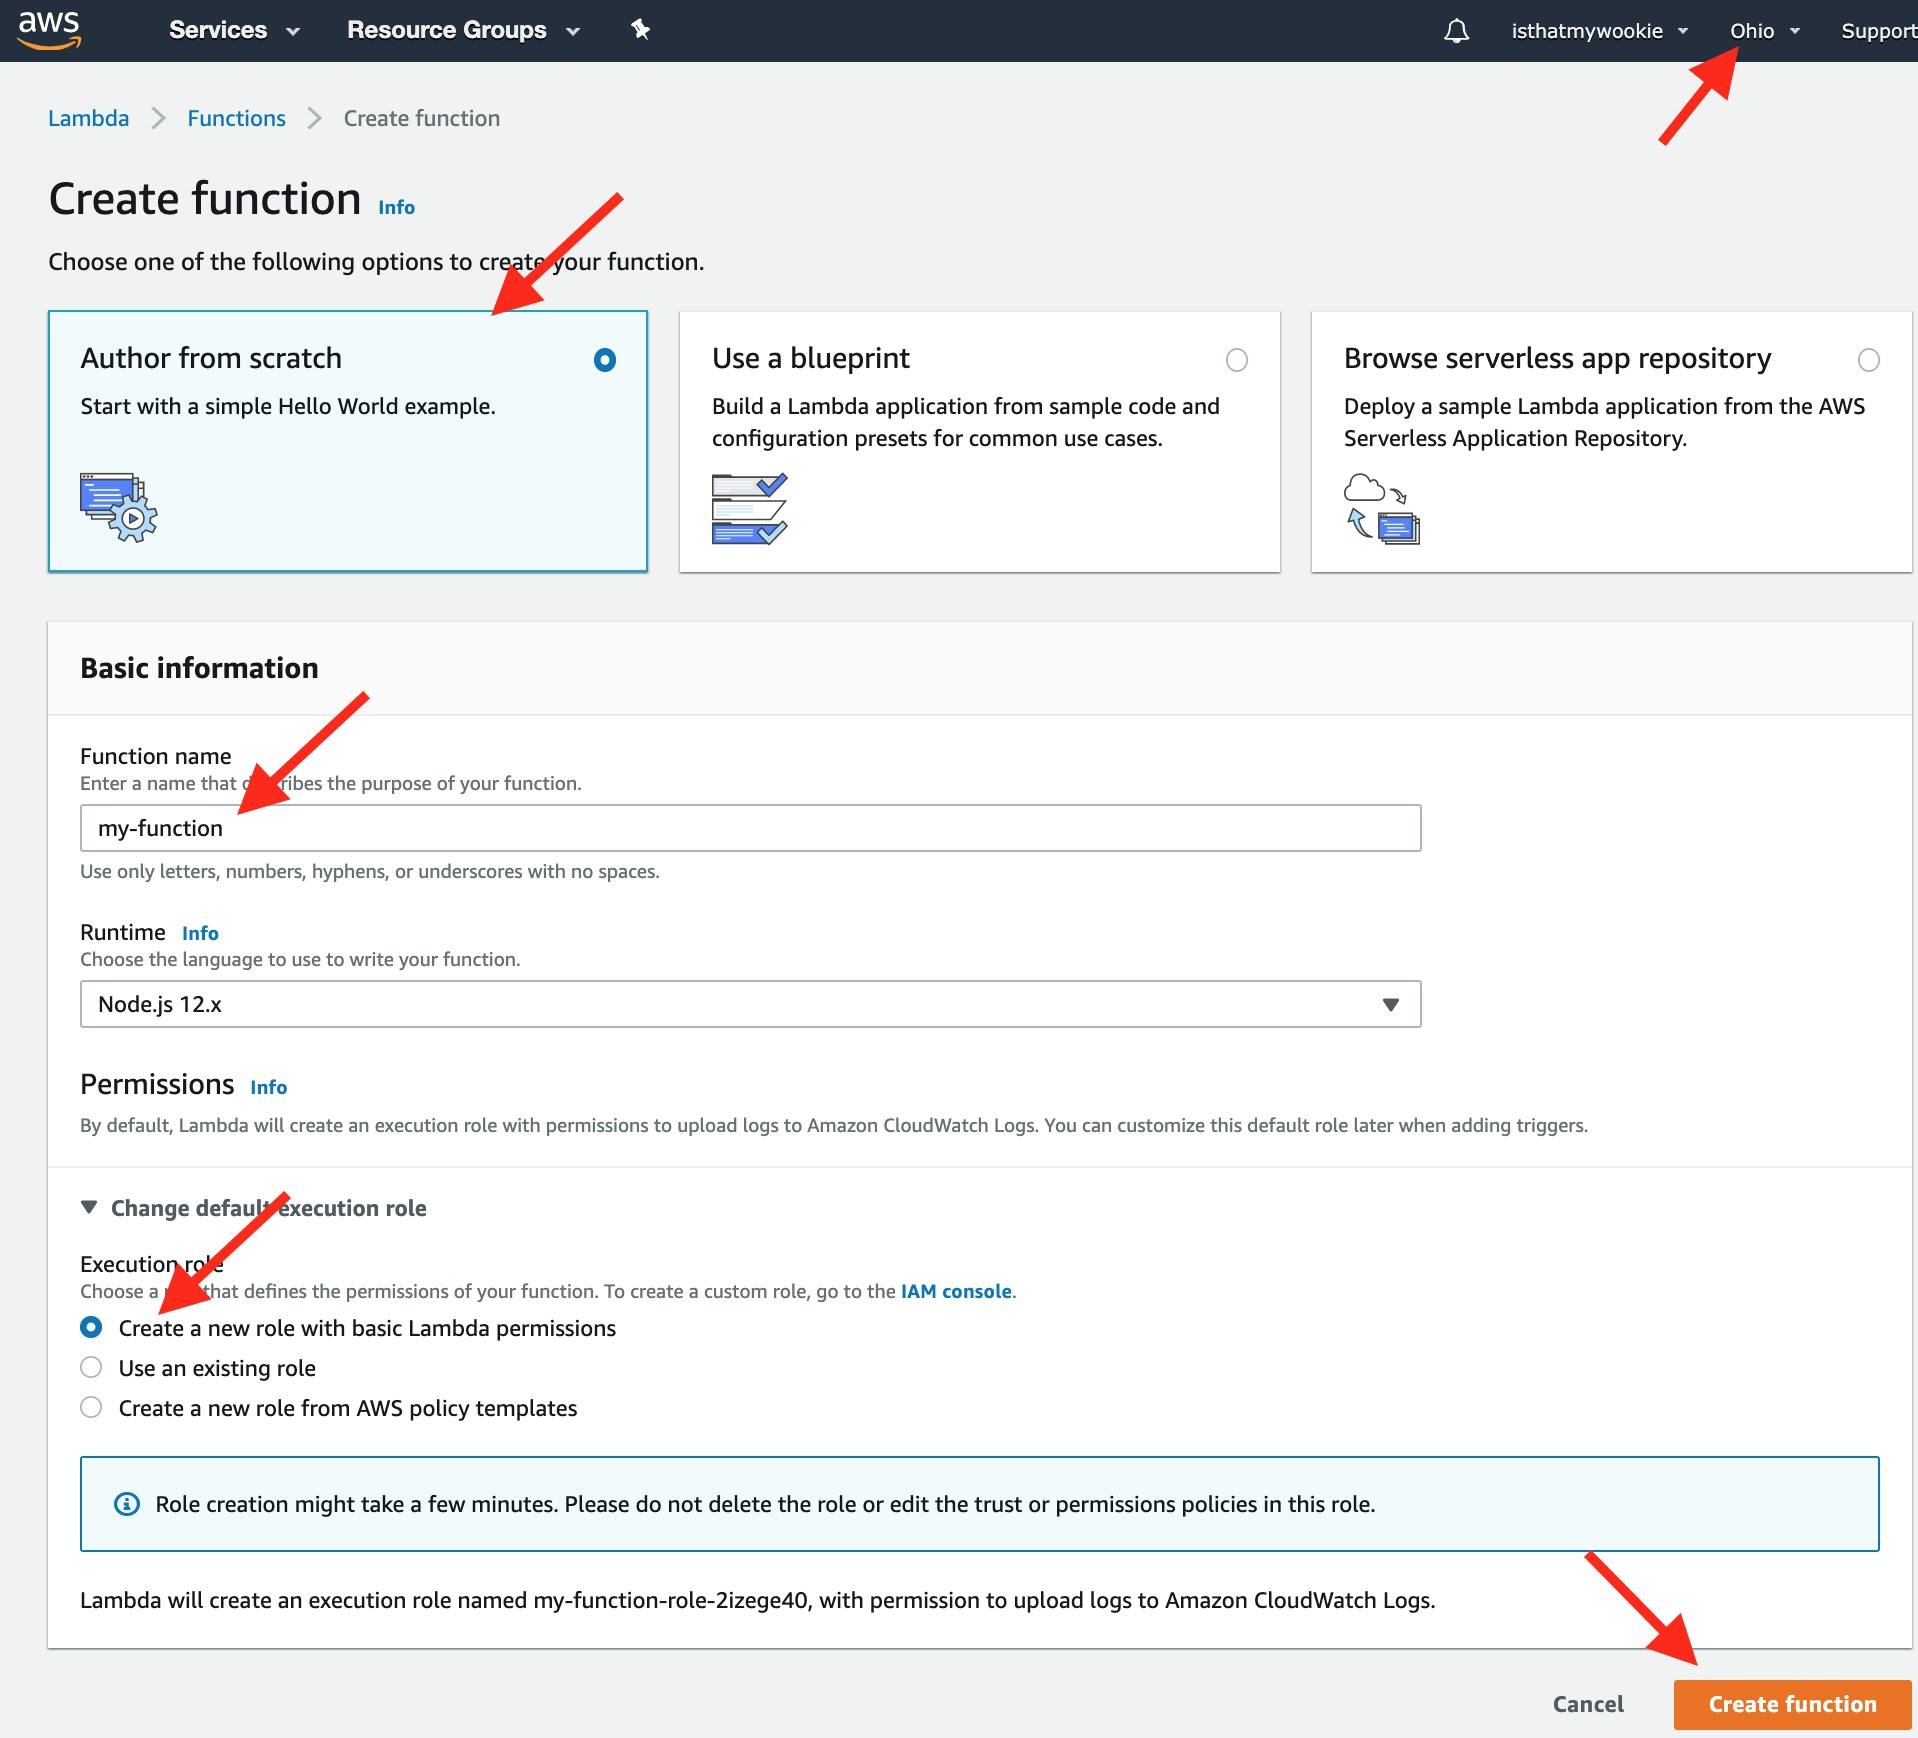
Confirm the server location matches the server location from our previous steps, then:
- Choose Author From Scratch (default).
- Name your function "my-function".
- For the Execution role use "Create a new role with basic Lambda permissions".
- Click Create Function.
-
Copy and paste the following into your AWS Lambda's
index.jsfile://Lambda/my-function/index.js:1 const https = require('https'); exports.handler = (event, context, callback) => { if (event.detail.eventName === 'PutObject' | event.detail.requestParameters['response-content-disposition']) { const payload = JSON.stringify({ user: event.detail.userIdentity.userName, eventName: event.detail.eventName, bucketName: event.detail.requestParameters.bucketName, objectName: event.detail.requestParameters.key, eventTime: event.detail.eventTime }); const options = { hostname: "YOUR-URL-GOES-HERE.com", method: "POST", path: "/lambda", headers: { 'Content-Type': 'application/json', 'Content-Length': payload.length } }; const req = https.request(options, (res) => res.on("data", () => callback(null, "OK"))) req.on("error", (error) => callback(JSON.stringify(error))); req.write(payload); req.end(); } }
Note: For the
hostnamedo not includehttps://protocol or any other prefixes to your URL. For example, usegoogle.com, nothttps://google.com.
-
Deploy the function:

CloudWatch Rule Configuration (Continued)
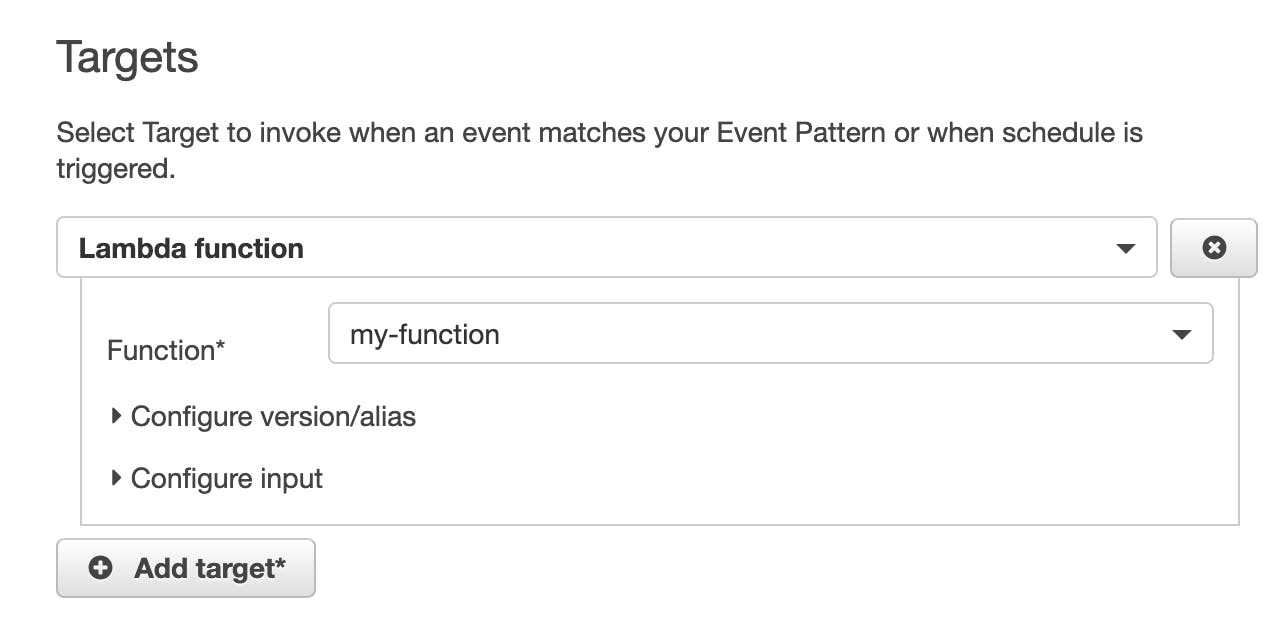
-
Back in our CloudWatch, we can now add "my-function" as the "trigger" for our rule. Do so, then click next (you might need to re-load the page for your AWS Lambda function to appear):
-
Name your rule "my-rule". Make sure "State" is set to Enabled, then, click Create Rule:

Your AWS Lambda function will now be triggered whenever a user downloads, views, or uploads an object in the buckets you specified!

Note: To view your AWS Lambda's logs from the "my-function" page, click Monitoring, then click View logs in CloudWatch, and, finally, select the appropriate "log group" folder. A log group won't be created until the function has been run. You can test your function in the function editor, or wait a few seconds for the logs to appear after uploading or downloading a file.
Awesome Job! Our AWS services are now entirely configured. Now, let's build the app that will receive the AWS Lambda POSTs and add them to a notification feed using Stream.
Creating Your Custom Notification Feed App
From here on out, we'll focus on our app. We'll bounce a bit between the frontend and a backend API so that you can get an idea of the workflow. We will also demonstrate how fast and easy it can be to build a custom feed app when using the Stream Feeds infrastructure to do all the heavy lifting!
Initializing Stream Dashboard
When our user logs in, they will be logging in to a Stream client, so we will have to register our client with the Stream API.
Grab your free Stream trial here, and see this post if you need help with signing up.
Once you're signed up, create a Stream Feed app:
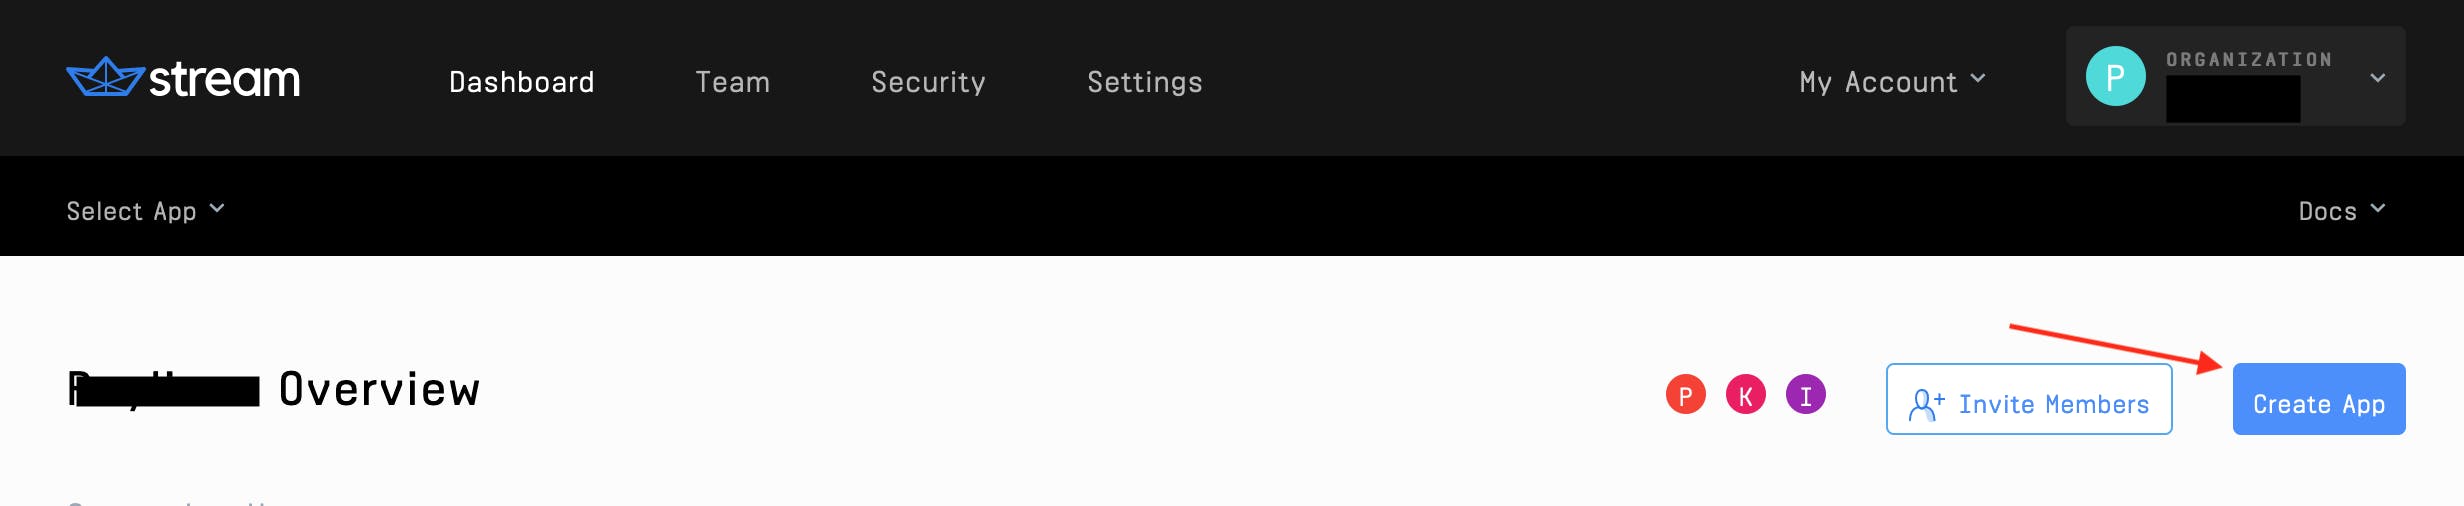
-
From the Stream Dashboard, click the Create App button:
-
Choose any name for the app and select development mode:

Next, we'll learn about and set up some feed groups.
Feed Groups
Stream uses feed groups to help organize your feeds and customize their behavior. It's helpful to have one feed group for adding activities and another for consuming them.
Feed Types
Stream offers 3 feed group types, each with varying behavior:
-
Flat feed groups are the only feeds that can be followed, and therefore are a good type to set up for adding activities. We'll use a flat feed for both of our feed groups in this app.
-
Aggregated feed groups are good for consuming grouped activities. EG: "Ada Lovelace liked 3 of your pictures".
-
Notification feed groups make it easy to add notifications to your app. Other feeds cannot follow notifications - but you can write directly to a notification feed. To keep our app simple, we'll use a flat feed, but check out this page to learn more about notification feed behaviors.
Creating Stream Feed Groups
-
In the App Dashboard, we will add two new "feed groups" to your app. Name the first one "s3_activities" with the default flat group type (later, we'll create an S3 Stream user that will curate this feed):

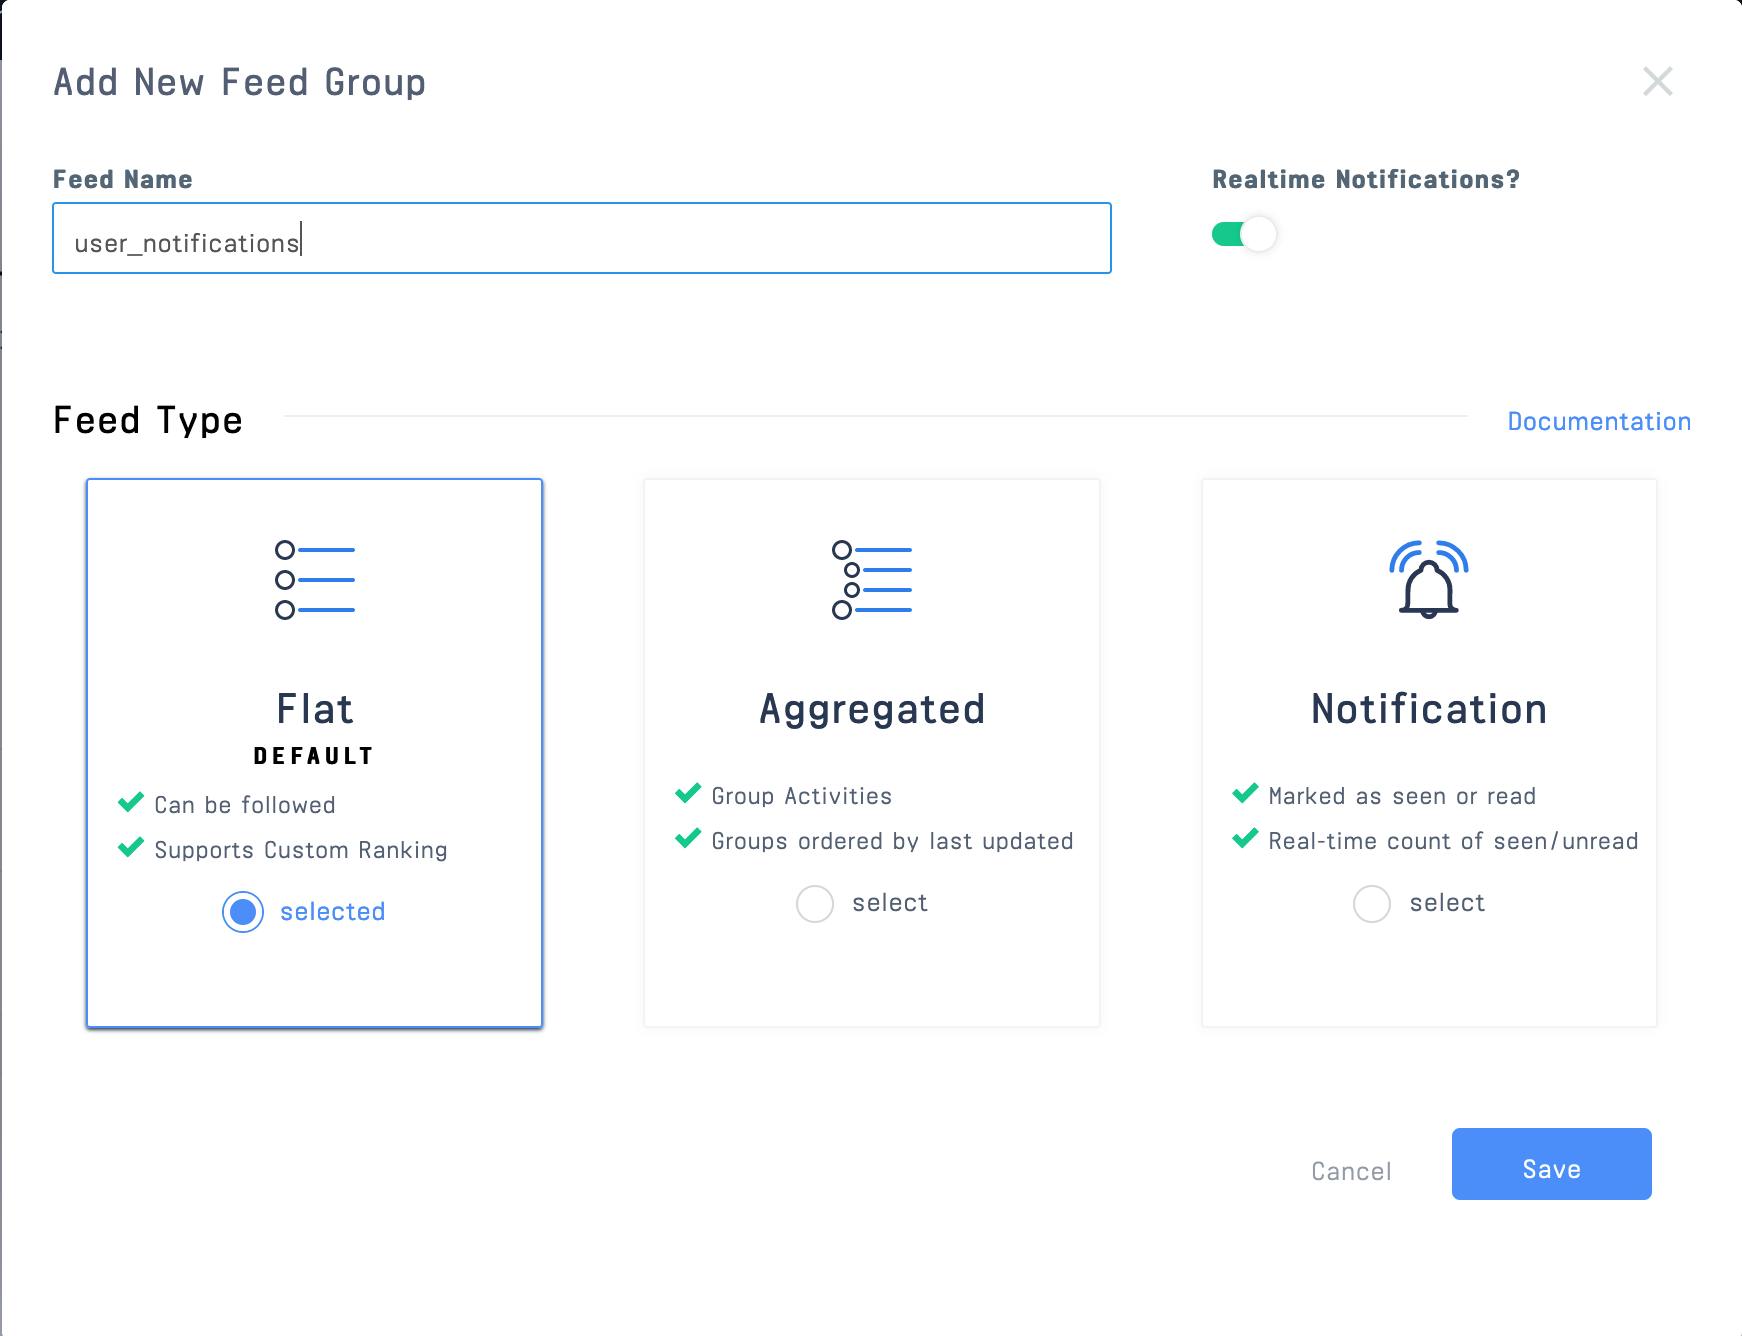
-
Name the second feed group "user_notifications" with the feed group type flat. Each user who uses our app will have a "user_notifications" feed that "follows" the "s3_activities" feed:
Your app's feed groups should now look like this:

Configuring Environment Variables
Now, let's snatch the Stream API Key and Secret, which we'll use in our app to establish our connection with the Stream API:
-
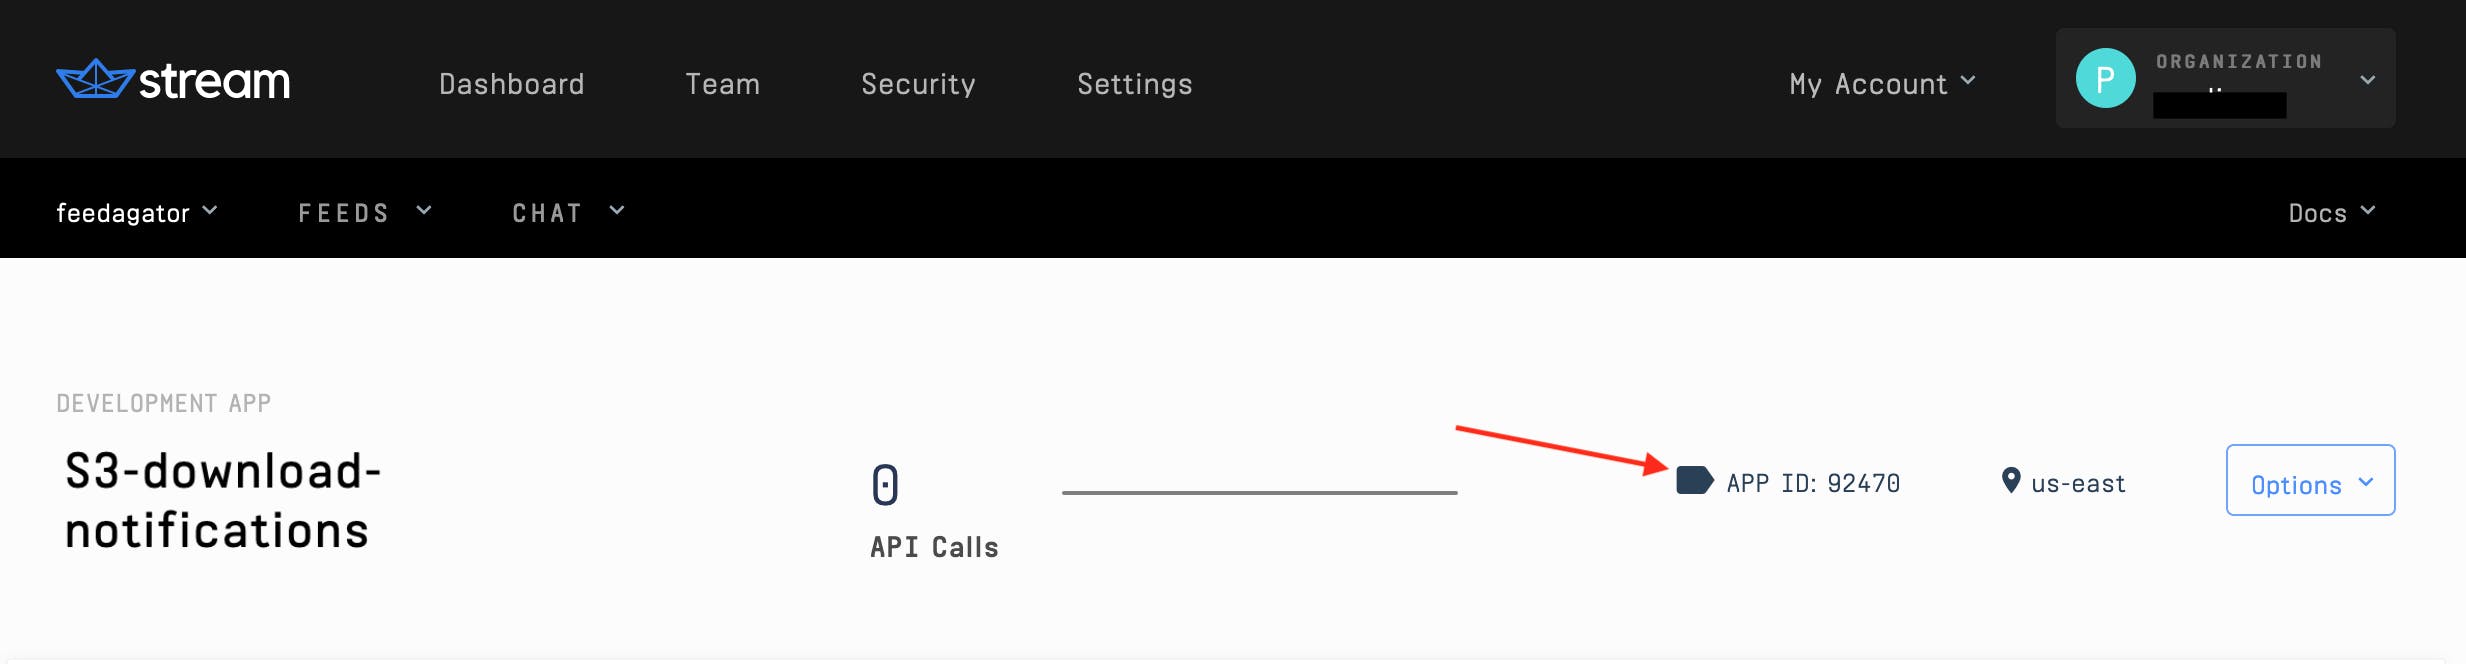
Copy the API key, API secret, and app ID from the app dashboard:
-
In your app, (original repo here) paste these items into the file named
.env.example:NODE_ENV=development PORT=8080 STREAM_API_KEY='your stream api key here' STREAM_API_SECRET='your stream secret here' STREAM_APP_ID='your app id here'
-
Finally, change the filename from
.env.exampleto just.env.
Now, we're ready to flow with the app UI!
Setting Up Frontend Registration
This app is separated into a frontend that registers users and renders feeds, and a backend API that communicates with Stream and our AWS Lambda function.
Here's the first page our user will interact with at localhost:3000:

Here's the jsx rendering this component:
//frontend/src/App.js:58
return (
  <div className="App container">
    <form className="card" onSubmit={register}>
      <label className="label-font">Username</label>
      <input
        className="input-style"
        type="text"
        value={username}
        onChange={(e) => setUsername(e.target.value)}
        placeholder="username"
        required
      />
      <button type="submit">Log in</button>
    </form>
  </div>
);
This is a simple React form with the state variable "username". For more help on creating this form, check out this post.
The Log in button triggers the register function:
//frontend/src/App.js:18
const register = async (e) => {
  try {
    e.preventDefault();

    var response = await axios.post("http://localhost:8080/registration", {
      frontendUser: username,
    });

    setStreamCredentials({
      token: response.data.userToken,
      apiKey: response.data.streamApiKey,
      appId: response.data.appId,
    });
  } catch (e) {
    console.error(e, e.error);
  }
};
This function sends an axios request to our backend API and includes the username (we call it frontendUser to help organize our backend). Our backend will generate a userToken, apiKey, and appId in response. These three items are required for rendering the Stream client.
Let's initialize our backend API and look at that /registration endpoint.
Initializing the Backend
The heart of the backend is in index.js. Let's start by instantiating Stream with the npm package getstream. (If you're starting from scratch, use npm install --save getstream). This package gives us all of our infrastructure for a feed right out of the box!
//api/routes/index.js:3
const stream = require("getstream");

require("dotenv").config();

const streamApiKey = process.env.STREAM_API_KEY;
const streamApiSecret = process.env.STREAM_API_SECRET;
const appId = process.env.STREAM_APP_ID;

const client = stream.connect(streamApiKey, streamApiSecret);
In the snippet above, we declare the environment variables coming from .env, then declare a new server-side Stream client using stream.connect.
Backend Registration Endpoint
Here's the /registration endpoint:
//api/routes/index.js:13
router.post("/registration", async (req, res) => {
  try {
    const frontendUser = req.body.frontendUser
      .replace(/\s/g, "_")
      .toLowerCase();

    const userToken = client.createUserToken(frontendUser);

    await client.user(frontendUser).getOrCreate({
      name: frontendUser,
    });

    await client.user("s3").getOrCreate({
      name: "s3",
    });

    const userFeed = client.feed("user_notifications", frontendUser);

    await userFeed.follow("s3_activities", "s3");

    res.status(200).json({
      userToken,
      streamApiKey,
      frontendUser,
      appId,
    });
  } catch (err) {
    console.error(err);
    res.status(500).json({ error: err.message });
  }
});
First, this endpoint normalizes the frontendUser (the user's username); Stream allows for characters a-z, A-Z, and 0-9. Next, we getOrCreate the frontendUser in Stream. You can add a lot more information about users at this point, but we'll keep it bare-bones for this app.
We also getOrCreate an "s3" user. Amazon S3's feed is where all the S3 activities will be recorded. There are multiple ways to create and get users with Stream. We used getOrCreate as a convenient way to accomplish this in this demo app. In your production application, each user would only be created once. Learn more here.
Clarifying Feeds vs Users
The "s3" user will post activities about uploads and downloads occurring in S3 to the "s3_activities" feed. Each frontentUser will have a "user_notifications" feed, which can "follow" other feeds. In the above snippet, we have our frontentUser's "user_notifications" feed follow the "s3_activities" feed.
Following Multiple Feeds
Say we want to track events occurring in Google Drive, as well. We can register a Stream user with the name "googledrive" and give them a feed called "google_activities". The "google_drive" user will then POST activities about Google Drive in the "google_activities" feed. Our frontentUser can then choose to have their "user_notifications" feed "follow" the "google_activities" _and "s3_activities" feeds. Now, the frontentUser's "user_notifications" feed will feature activities coming from both S3 and Google Drive!
Back to the snippet above... we declared:
const userFeed = client.feed("user_notifications", username);
This line is simply declaring that we will use the constant, userFeed to refer to our user's (username's) "user_notifications" feed. We then tell userFeed to follow S3's s3_notifications feed.
Finally, we respond to the frontend with the required credentials to initialize a Stream client in a browser.
Rendering Stream In The Frontend
Let's continue the frontend flow. When the credentials are returned to the frontend, the register function sets the state variable "streamCredentials". We use a boolean on this state to determine what to render:
//frontend/src/App.js:33 if (streamCredentials) { return (
<div ref="{containerRef}">
  <StreamApp
    apiKey="{streamCredentials.apiKey}"
    token="{streamCredentials.token}"
    appId="{streamCredentials.appId}"
  >
    <div className="stream-app">
      <h3 className="app-title">S3 Monitor</h3>
    </div>
    <FlatFeed feedGroup="user_notifications" notify options={{ limit: 6 }}
    Paginator={(props) => ( <InfiniteScrollPaginator useWindow={false}
    threshold={10} {...props} getScrollParent={() => containerRef} /> )}
    Activity={Post} />
  </StreamApp>
</div>
); } else { return ( // Registration form ... ); }
Note: Stream has an entire library for React feeds called
react-activity-feed. It includes some slick components with excellent built-in functionality.
The snippet above is the heart of the frontend and uses a few Stream components to render the user's "user_notifications" feed. <StreamApp/> is the general wrapper, which requires the apiKey, token, and appId. The token is unique to the frontendUser, which allows their specific feeds to be rendered. Next up is the <FlatFeed /> component!
Utilizing the Flat Feed Component
The Flat Feed component is built into Stream. It determines which feedGroup to display and accepts several optional arguments.
We use the 'limit: 20' property in the options prop to determine how many posts should get loaded at a time.
The Paginator prop handles scrolling functionality. This app utilizes Stream's <InfiniteScrollPaginator/> component, which gives our app a nice, modern scroll UX. <FlatFeed/> passes each activity from the frontendUser's "usernotifications" feed to the Activity prop. The Activity prop then determines _how to render each "activity".
But wait... where are these "activities" coming from? Let's hop back into the backend API to see how we create a Stream activity.
Creating Activities in Stream
Remember how the AWS Lambda function we created makes a post to the backend? Here's that endpoint:
//api/routes/index.js:44
router.post("/lambda", async function (req, res) {
  try {
    const s3 = client.feed("s3_activities", "s3");

    await s3.addActivity({
      actor: "s3",
      verb: "post",
      object: req.body.eventName,
      s3UserName: req.body.user,
      bucketName: req.body.bucketName,
      objectName: req.body.objectName,
      eventTime: req.body.eventTime,
    });

    res.status(200).send();
  } catch (error) {
    console.log(error);
    res.status(500).json({ error: err.message });
  }
});
To add an activity to a feed, we use client.feed([feed-group], [acting-user]) to tell Stream which user should be acting and to what feed they will add an activity.
Adding an activity is simple and flexible in Stream. The addActivity() method requires only an actor, verb, and object, and allows for unlimited custom properties. Learn more about Stream activities here.
Learn more about the JSON spec for activities here.
Let's cruise to the frontend to see how these activities are rendered!
Rendering Stream Activities in React
The Flat Feed component uses the Activity prop to render activities. As you might have guessed, Stream provides a built-in <Activity /> component, but let's create a custom component (<Post/>) to render "download" and "upload" activities differently.
Note: To keep things simple, we will use the term "viewed" when a user has downloaded or viewed an object.
Here's the code for our <Post/> component:
//frontend/src/Post.js:5
const Post = ((props) => {
  if (props.activity.object === 'GetObject') {
    return (
      <div>
        <hr className="hr-class" />
        <div className="post">
          <img className="actor-logo" alt="download-icon" src="{dlIcon}" />
          <div className="post-content">
            <p className="post-title">
              <b>{props.activity.s3UserName}</b> viewed
              <b>{props.activity.objectName}</b> from the bucket:
              <b>{props.activity.bucketName}</b>.
            </p>
            <p className="post-time">{props.activity.eventTime}</p>
          </div>
        </div>
      </div>
      );
    } else {
      return (
        <div>
          <hr className="hr-class" />
          <div className="post">
            <img className="actor-logo" alt="upload-icon" src="{ulIcon}" />
            <div className="post-content">
              <p className="post-title">
                <b>{props.activity.s3UserName}</b> uploaded
                <b>{props.activity.objectName}</b> to the bucket:
                <b>{props.activity.bucketName}</b>.
              </p>
              <p className="post-time">{props.activity.eventTime}</p>
            </div>
          </div>
        </div>
      );
    }
  }
);
This component first distinguishes whether the activity is a "download" or "upload", then renders the activity with a dlIcon or ulIcon, accordingly. Conversely, we could also have used the verb property to determine our formatting. This should get your imagination rolling on how to use Stream's power and flexibility to customize your app to your needs!
So there you have it! That's all it takes to render your feed on the Stream side. Here's a quick review of what we did:
- Created feed-groups in the Stream dashboard
- Initialized a server-side Stream client
- Created a form for users to register on the front side of our app
- Set up our backend API to register the user with this Stream API
- Configured the backend to send the frontend the App Key, App Token, and App ID
- Configured the frontend to render the
<StreamApp/>component - Used the
<FlatFeed/>component to accept arguments for the user and feed group to be rendered - Passed components to the
Activityprop to render each activity in the feed
Final Thoughts
Congrats! You've got a slick little notification app for S3 object uploads, downloads, and views! Also, we touched on how you can incorporate notifications for multiple platforms and discussed options for different ways to process actions like user creation. To continue digging deeper and enriching your app(s), check out the Stream Blog for more inspiration and tutorials.
Thanks for reading and happy coding! 😄