Build and Package with Docker
In this tutorial I am going to show you how to create a simple Python Flask REST API in Linux based CentOS 7 system. Then I am going to show you how to build, package and run this Python Flask application with Docker. Here I am creating an endpoint that returns Hello, World! in JSON format.
In my other tutorial I had discussed how to install docker on CentOS 7. I am not going to tell you here why do you need docker but you can read it from my previous tutorial.
Then you need to create a Dockerfile to build your flask based web application, followed by creating the image for your application.
Finally you need to run the container for your application and access the URL to get the response from the REST API.
Prerequisites
Python 3.8.5/3.11.5, Flask 1.1.2/2.3.3
Project Directory
Create a project root directory called python-flask-docker from your Unix shell terminal using the command $ sudo mkdir python-flask-docker.
I will put all Python files under the root directory. In the below sections I may not specify the project root directory but I will speak with respect to the root directory.
Configure Flask API
Flask is a light-weight and very good framework for building web based applications.
Configuring the flask API globally as shown below you can use app variable throughout the application. Put the below code into app.py file.
from flask import Flask

app = Flask(__name__)
REST Endpoint
Create a file called rest.py where you will write REST endpoint to return a response to the client. In the above file we are importing the required modules to work on our REST API.
I have created just a simple endpoint that returns Hello, World!. I have also passed parameter debug=true so that error will be displayed if occurred in the application.
from app import app
from flask import jsonify, request

@app.route('/')
def heelo():
        resp = jsonify('Hello, World!')
        resp.status_code = 200
        return resp

if __name__ == "__main__":
    app.run(debug=True,host='0.0.0.0')
Requirements File
You need to have a requirements.txt file, which is required to download and install the software inside the container. Here you need only one software, i.e., Flask, which is required to run your application.
For flask version 1.1.2, use the following content:
Flask==1.1.2For flask version 2.3.3, use the following content:
Flask==2.3.3Docker File
This step is very important as you need to create Docker file to build, package and run the Python Flask application.
So I will create a docker file under the directory python-flask-docker where you have your project files. The name of the docker file is Dockerfile.
For Python version 3.8.5, use the following content:
FROM python:3.8.5-alpine
COPY . /app
WORKDIR /app
RUN pip install -r requirements.txt
ENTRYPOINT ["python"]
CMD ["rest.py"]
For Python version 3.11.5, use the following content:
FROM python:3.11.5-alpine
COPY . /app
WORKDIR /app
RUN pip install -r requirements.txt
ENTRYPOINT ["python"]
CMD ["rest.py"]
Now let’s see what each of the lines in the above Dockerfile does for your application.
FROM allows you to initialize the build over a base image. In your case, you are using a python:3.8.5-alpine or python:3.11.5-alpine image. Alpine is a small Linux Distribution and is widely used by Docker applications because of its small size. In short, you are using a Linux environment with python 3.8.5/3.11.5 for your application.
The next line copy everything from current directory to app directory.
WORKDIR /app tells docker to create (if it does not exist) a new working directory /app and set as a working directory. All commands now will run from this directory.
RUN command executes commands needed to set up your image for your application, such as installing packages, editing files, making directory or changing file permissions, etc. from requirements.txt file.
ENTRYPOINT ["python"] command tells docker what command will run when a container gets starter from this image. You can also put multiple commands, each command is separated by comma (,).
CMD is executed when you start a container. Here, you are using CMD to run your Python application. There can be only one CMD per Dockerfile. If you specify more than one CMD, then the last CMD will take effect.
You can also combine the ENTRYPOINT and CMD together and replace by CMD, for example, CMD ["python","app.py"] to run your application.
Docker Image
You have defined the image in Dockerfile. So it’s time to build the image. To build docker image simply run the command docker image build -t python-flask-docker . from your Unix shell terminal on CentOS.
The -t option in the command allows you to specify the name and tag (optional). If you do not specify any name then docker will tag the image with latest.
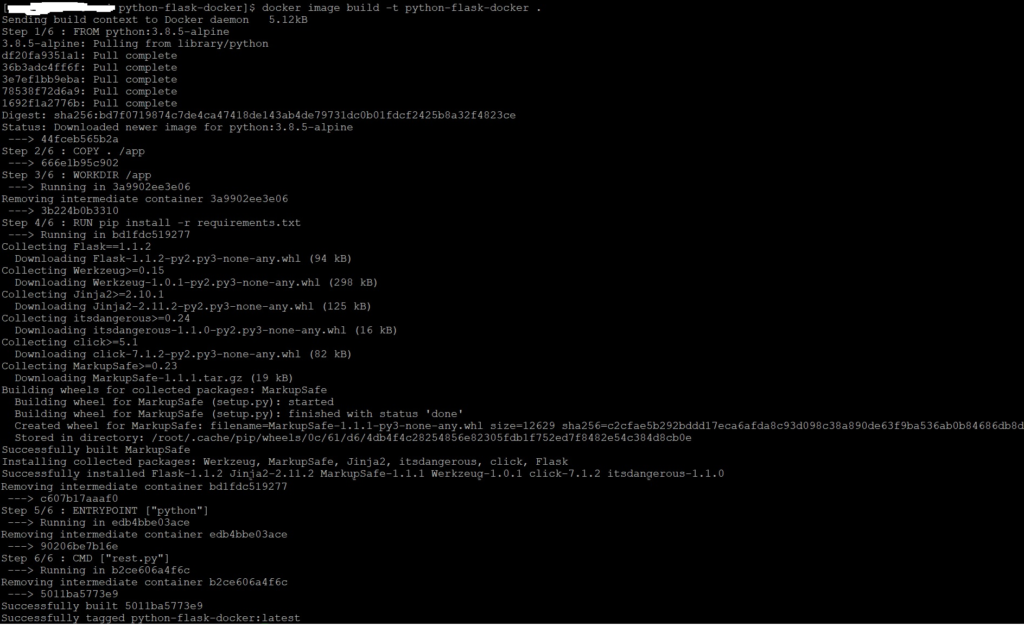
Running the above command will display output in the shell console as shown in the below image for the Python 3.8.5 and Flask 1.1.2.
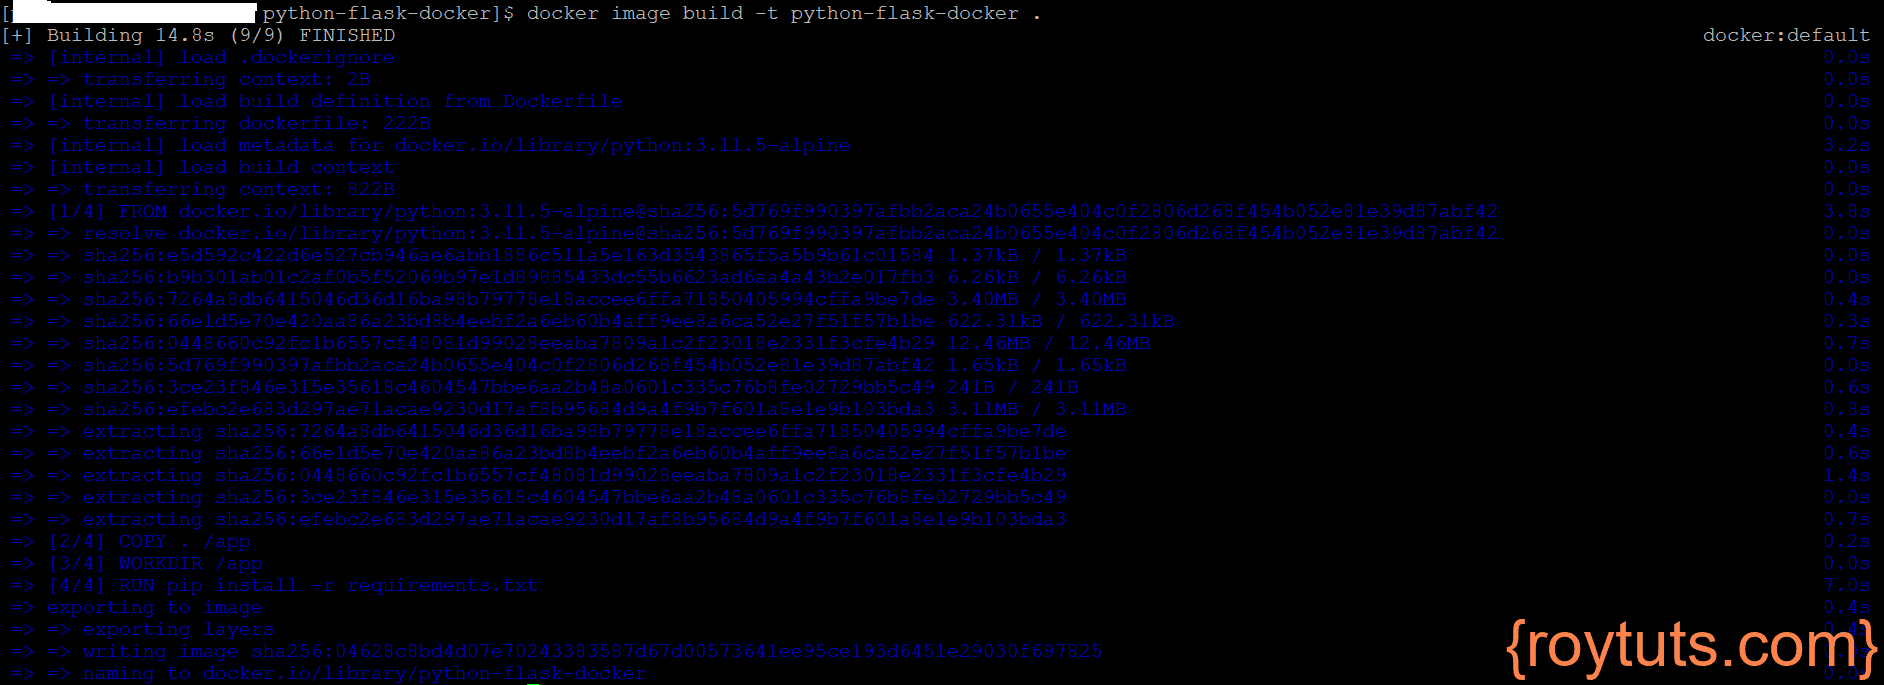
For Python 3.11.5 and Flask 2.3.3, you will see the following image:
From the above output you can see that the image was tagged to latest (the last line in the above image).
Now you can see your image by executing the command docker images. You will see similar to the following images.

Or

Run Container
You have built the image now let’s run the container with the following command:
docker container run -p 5000:5000 python-flask-dockerThe run command takes an optional -p parameter that allows you to map a port from the container to your host machine. As you know flask application runs on default port 5000. When you run the container, the application will start on port 5000 inside the container. In order to access the application running in the container you need to map the internal container port to a port on the host machine. The -p 5000:5000 parameter maps the container’s internal port 5000 to port 5000 on the host machine.
You will see the following output with your application starts on port 5000.

Or

Testing the Application
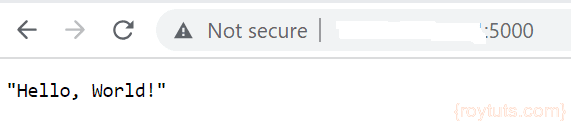
Now let’s see the output of your application. To access the REST API you have exposed you can execute the command links http://localhost:5000/ on your shell terminal.
If links is not installed on your system you can do so by using the command $ sudo yum install links.
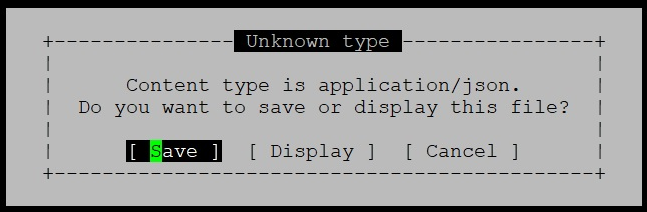
As the response type application/json, so it is asking you to input your option. You can save the file by pressing Enter key or navigate by right arrow key to display the content.
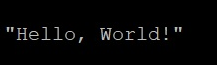
If you display the content then you will see the following output:
Now if you want to go back to your shell terminal then you can press q and it will ask for confirmation as shown below:
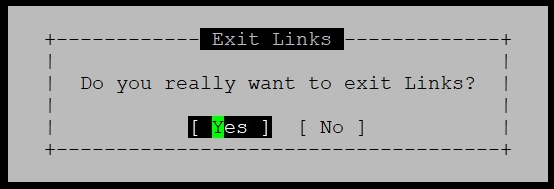
Press Enter key to go back.
You can also access the URL in the browser by IP address: <IP address of your server>:5000
That’l all. Hope you got an idea how to create, build, package and run the Python based Flask web application with Docker.