Generate QR Codes in Angular 10 with Ngx-qrcode2

In this tutorial, we'll learn how to generate QR codes in Angular by building a simple example application using the latest Angular 10 version.
First of all, what's a QR code and what does it serve?
According to Wikipedia:
A QR code (abbreviated from Quick Response code) is a type of matrix barcode (or two-dimensional barcode) first designed in 1994 for the automotive industry in Japan. A barcode is a machine-readable optical label that contains information about the item to which it is attached. In practice, QR codes often contain data for a locator, identifier, or tracker that points to a website or application. A QR code uses four standardized encoding modes (numeric, alphanumeric, byte/binary, and kanji) to store data efficiently.
The Quick Response system became popular outside the automotive industry due to its fast readability and greater storage capacity compared to standard UPC barcodes. Applications include product tracking, item identification, time tracking, document management, and general marketing
So it's simply a compact and efficient way for storing data.
Now let's see how to generate QR codes in your Angular 10 apps by example.
Prerequisites
Before getting started you need a few prerequisites:
- Basic knowledge of TypeScript. Particularly the familiarity with Object Oriented concepts such as TypeScript classes and decorators.
- A local development machine with Node 10+, together with NPM 6+ installed. Node is required by the Angular CLI like the most frontend tools nowadays. You can simply go to the downloads page of the official website and download the binaries for your operating system. You can also refer to your specific system instructions for how to install Node using a package manager. The recommended way though is using NVM — Node Version Manager — a POSIX-compliant bash script to manage multiple active Node.js versions.
Note: If you don't want to install a local environment for Angular development but still want to try the code in this tutorial, you can use Stackblitz, an online IDE for frontend development that you can use to create an Angular project compatible with Angular CLI.
Step 1 — Installing Angular CLI 10
In this step, we'll install the latest Angular CLI 10 version (at the time of writing this tutorial).
Angular CLI is the official tool for initializing and working with Angular projects. To install it, open a new command-line interface and run the following command:
$ npm install -g @angular/cli
At the time of writing this tutorial, angular/cli v10 will be installed on your system.
Step 2 — Creating a New Angular 10 App
Let's now create our project. Head back to your command-line interface and run the following commands:
$ cd ~
$ ng new angular10qrcode
The CLI will ask you a couple of questions — If Would you like to add Angular routing? Type y for Yes and Which stylesheet format would you like to use? Choose CSS.
Next, navigate to you project’s folder and run the local development server using the following commands:
$ cd angular10qrcode
$ ng serve
Open your web browser and navigate to the http://localhost:4200/ address to see your app running.
Next, open a new terminal and make sure to navigate to your project's folder and run the following command to install the ngx-qrcode library from npm using the following command:
$ npm install @techiediaries/ngx-qrcode
Next open the src/app/app.module.ts file, and import NgxQRCodeModule from @techiediaries/ngx-qrcode in your module as follows:
import { BrowserModule } from '@angular/platform-browser';
import { NgModule } from '@angular/core';
import { NgxQRCodeModule } from '@techiediaries/ngx-qrcode';
import { FormsModule } from '@angular/forms';


import { AppComponent } from './app.component';

@NgModule({
  declarations: [
    AppComponent
  ],
  imports: [
    BrowserModule,
    FormsModule,
    NgxQRCodeModule
  ],
  providers: [],
  bootstrap: [AppComponent]
})
export class AppModule { }
Once the library has been imported, you can use the ngx-qrcode component in your Angular application.
Please note that we have also imported
FormsModule.
Next, open the src/app/app.component.ts file and update it as follows:
import { Component } from '@angular/core';
import { NgxQrcodeElementTypes, NgxQrcodeErrorCorrectionLevels } from '@techiediaries/ngx-qrcode';

@Component({
  selector: 'my-app',
  templateUrl: './app.component.html',
  styleUrls: [ './app.component.css' ]
})
export class AppComponent  {
  elementType = NgxQrcodeElementTypes.URL;
  correctionLevel = NgxQrcodeErrorCorrectionLevels.HIGH;
  value = 'https://www.techiediaries.com/';
}
Next, open the src/app/app.component.html file and add the following code:
<ngx-qrcode
  [elementType]="elementType"
  [errorCorrectionLevel]="correctionLevel"
  [value]="value"
  cssClass="bshadow"></ngx-qrcode>
We use various properties for configuring our QR code such as:
- the type,
- the error correction level,
- the value,
- the CSS class.
You can find out more information about these properties and the other supported properties from the official ngx-qrcode docs.
Next, add a textarea for entering the value that you want to encode:
<textarea [(ngModel)] = "value"></textarea>
Finally open the src/styles.css file and add the following styles:
.bshadow {

  display: flex;
  align-items: center;
  justify-content: center;
  filter: drop-shadow(5px 5px 5px #222222);
  opacity: .5;

}

textarea {
    margin-top: 15px;
    display: block;
    margin-left: auto;
    margin-right: auto;
    width: 250px;
    opacity: .5;
}
This is a screenshot of our application:
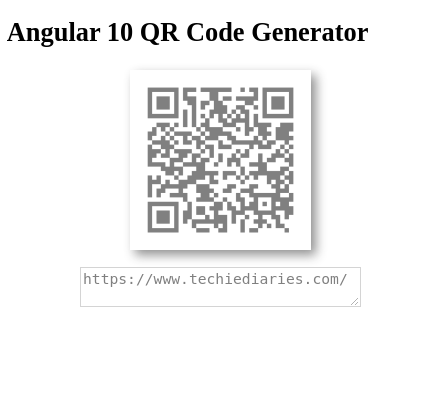
You can check out the application we've built in this article live on https://stackblitz.com/edit/angular-ngx-qrcode-example.
- Author: Ahmed Bouchefra Follow @ahmedbouchefra
-
Date:
Related posts
Hands-on Angular eBook
Subscribe to our Angular newsletter and get our hands-on Angular book for free!