Watch Now This tutorial has a related video course created by the Real Python team. Watch it together with the written tutorial to deepen your understanding: Django Admin Customization
The Django framework comes with a powerful administrative tool called admin. You can use it out of the box to quickly add, delete, or edit any database model from a web interface. But with a little extra code, you can customize the Django admin to take your admin capabilities to the next level.
In this tutorial, you’ll learn how to:
- Add attribute columns in the model object list
- Link between model objects
- Add filters to the model object list
- Make model object lists searchable
- Modify the object edit forms
- Override Django admin templates
Free Bonus: Click here to get access to a free Django Learning Resources Guide (PDF) that shows you tips and tricks as well as common pitfalls to avoid when building Python + Django web applications.
Prerequisites
To get the most out of this tutorial, you’ll need some familiarity with Django, particularly model objects. As Django isn’t part of the standard Python library, it’s best if you also have some knowledge of pip and pyenv (or an equivalent virtual environment tool). To learn more about these topics, check out the following resources:
- Get Started With Django Part 1: Build a Portfolio App
- What is Pip? A Guide for New Pythonistas
- Managing Multiple Python Versions With pyenv
- What Virtual Environments Are Good For
You may also be interested in one of the many available Django tutorials.
The code snippets in this tutorial were tested against Django 3.0.7. All the concepts predate Django 2.0, so they should work in whatever version you’re using, but minor differences may exist.
Setting Up the Django Admin
The Django admin provides a web-based interface for creating and managing database model objects. To see it in action, you’ll first need a Django project and some object models. Install Django inside a clean virtual environment:
$ python -m pip install django
$ django-admin startproject School
$ cd School
$ ./manage.py startapp core
$ ./manage.py migrate
$ ./manage.py createsuperuser
Username: admin
Email address: admin@example.com
Password:
Password (again):
You first create a new Django project named School with an app called core. Then you migrate the authentication tables and create an administrator. Access to the Django admin screens is restricted to users with staff or superuser flags, so you use the createsuperuser management command to create a superuser.
You also need to modify School/settings.py to include the new app named core:
# School/settings.py
# ...

INSTALLED_APPS = [
    "django.contrib.admin",
    "django.contrib.auth",
    "django.contrib.contenttypes",
    "django.contrib.sessions",
    "django.contrib.messages",
    "django.contrib.staticfiles",
    "core",    # Add this line
]
The core app directory will start with the following files inside:
core/
│
├── migrations/
│   └── __init__.py
│
├── __init__.py
├── admin.py
├── apps.py
├── models.py
├── tests.py
└── views.py
You’re interested in two of these files:
models.pydefines your database models.admin.pyregisters your models with the Django admin.
To demonstrate the outcome when you customize the Django admin, you’ll need some models. Edit core/models.py:
from django.core.validators import MinValueValidator, MaxValueValidator
from django.db import models

class Person(models.Model):
    last_name = models.TextField()
    first_name = models.TextField()
    courses = models.ManyToManyField("Course", blank=True)

    class Meta:
        verbose_name_plural = "People"

class Course(models.Model):
    name = models.TextField()
    year = models.IntegerField()

    class Meta:
        unique_together = ("name", "year", )

class Grade(models.Model):
    person = models.ForeignKey(Person, on_delete=models.CASCADE)
    grade = models.PositiveSmallIntegerField(
        validators=[MinValueValidator(0), MaxValueValidator(100)])
    course = models.ForeignKey(Course, on_delete=models.CASCADE)
These models represent students taking courses at a school. A Course has a name and a year in which it was offered. A Person has a first and last name and can take zero or more courses. A Grade contains a percentage score that a Person received on a Course.
Here’s a model diagram showing the relationships between the objects:
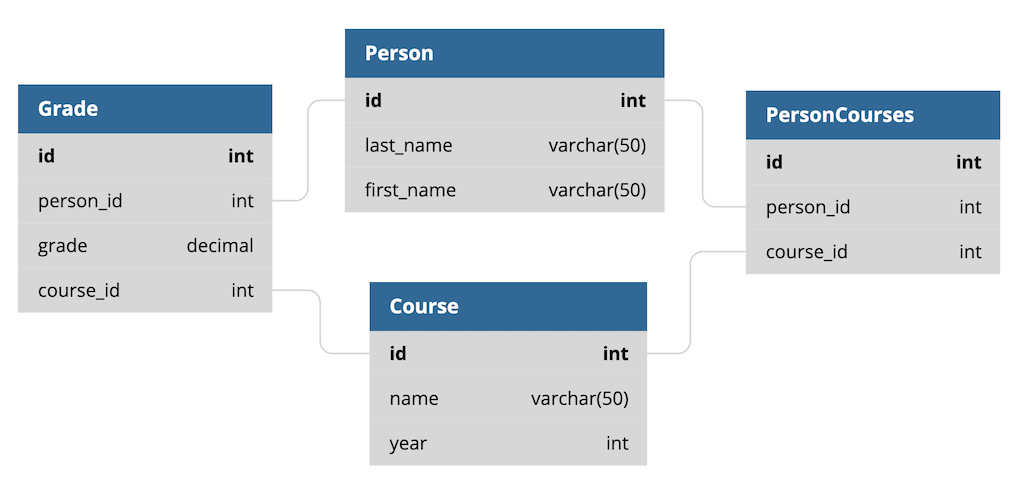
The underlying table names in the database are slightly different from this, but they’re related to the models shown above.
Each model that you want Django to represent in the admin interface needs to be registered. You do this in the admin.py file. Models from core/models.py are registered in the corresponding core/admin.py file:
from django.contrib import admin

from core.models import Person, Course, Grade

@admin.register(Person)
class PersonAdmin(admin.ModelAdmin):
    pass

@admin.register(Course)
class CourseAdmin(admin.ModelAdmin):
    pass

@admin.register(Grade)
class GradeAdmin(admin.ModelAdmin):
    pass
You’re almost ready to go. Once you’ve migrated your database models, you can run the Django development server and see the results:
$ ./manage.py makemigrations
$ ./manage.py migrate
Operations to perform:
  Apply all migrations: admin, auth, contenttypes, core, sessions
Running migrations:
  Applying contenttypes.0001_initial... OK
  Applying auth.0001_initial... OK
  Applying admin.0001_initial... OK
  ...
  Applying core.0001_initial... OK
  Applying core.0002_auto_20200609_2120... OK
  Applying sessions.0001_initial... OK
$ ./manage.py runserver
Watching for file changes with StatReloader
Performing system checks...

System check identified no issues (0 silenced).
Django version 3.0.7, using settings 'School.settings'
Starting development server at http://127.0.0.1:8000/
Quit the server with CONTROL-C.
Now visit http://127.0.0.1:8000/admin to see your admin interface. You’ll be prompted to log in. Use the credentials you created with the createsuperuser management command.
The admin home screen lists all the registered database models:
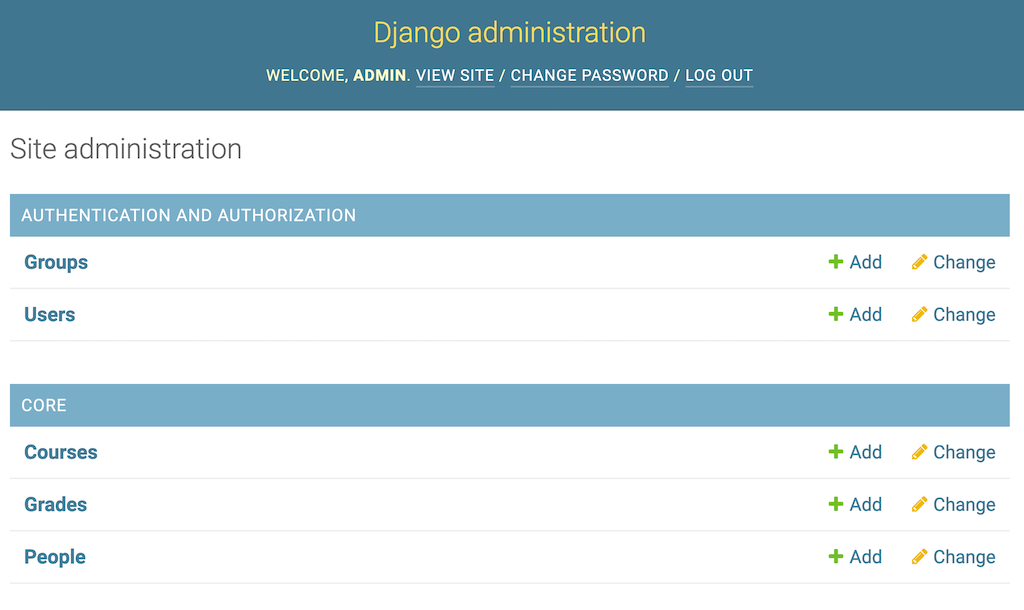
You can now use the interface to create objects in your database. Clicking a model name will show you a screen listing all the objects in the database for that model. Here’s the Person list:
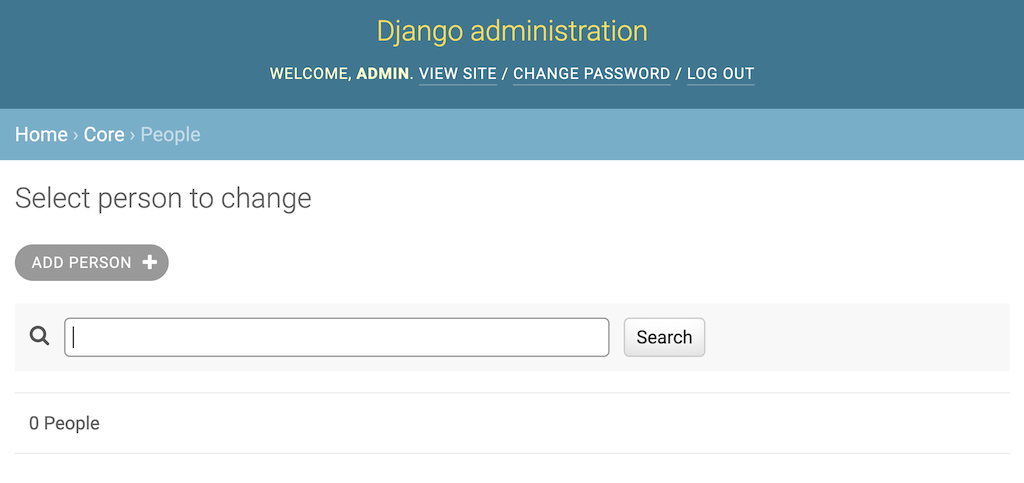
The list starts out empty, like your database. Clicking ADD PERSON allows you to create a person in the database. Once you save, you’ll be returned to the list of Person objects:
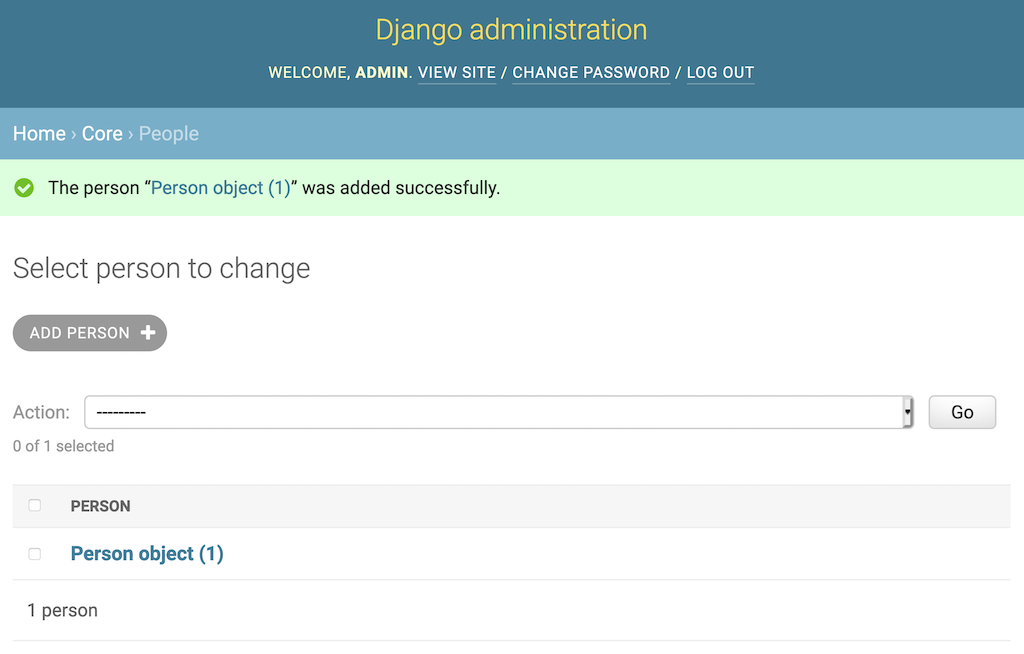
The good news is you’ve got an object. The bad news is Person object (1) tells you the id of the object and nothing else. By default, the Django admin displays each object by calling str() on it. You can make this screen a little more helpful by adding a .__str__() method to the Person class in core/models.py:
class Person(models.Model):
    last_name = models.TextField()
    first_name = models.TextField()
    courses = models.ManyToManyField("Course", blank=True)

    def __str__(self):
        return f"{self.last_name}, {self.first_name}"
Adding Person.__str__() changes the display to include the first and last name of the Person in the interface. You can refresh the screen to see the change:
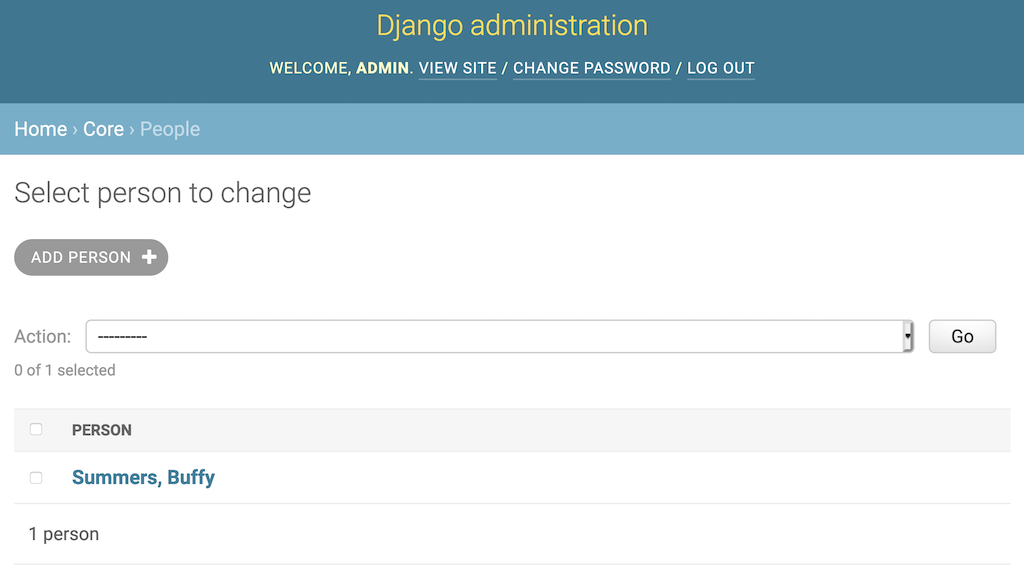
That’s a little better! Now you can see some information about the Person object. It’s a good idea to add similar methods to both the Course and the Grade objects:
class Course(models.Model):
    # ...

    def __str__(self):
        return f"{self.name}, {self.year}"

class Grade(models.Model):
    # ...

    def __str__(self):
        return f"{self.grade}, {self.person}, {self.course}"
You’ll want to have some data in your database to see the full effect of your customizations. You can have some fun and create your own data now, or you can skip the work and use a fixture. Expand the box below to learn how to load data using a fixture.
Django lets you load data to and from the database in files called fixtures. Copy the following into a file named core/fixtures/school.json:
[
    {
        "model": "core.person",
        "pk": 1,
        "fields": {
            "last_name": "Harris",
            "first_name": "Xander",
            "courses": [
                1,
                3
            ]
        }
    },
    {
        "model": "core.person",
        "pk": 3,
        "fields": {
            "last_name": "Rosenberg",
            "first_name": "Willow",
            "courses": [
                1,
                2,
                3
            ]
        }
    },
    {
        "model": "core.person",
        "pk": 16,
        "fields": {
            "last_name": "Summers",
            "first_name": "Buffy",
            "courses": [
                1,
                2,
                3
            ]
        }
    },
    {
        "model": "core.course",
        "pk": 1,
        "fields": {
            "name": "CompSci G11",
            "year": 1998
        }
    },
    {
        "model": "core.course",
        "pk": 2,
        "fields": {
            "name": "Psych 101",
            "year": 1999
        }
    },
    {
        "model": "core.course",
        "pk": 3,
        "fields": {
            "name": "Library Science G10",
            "year": 1997
        }
    },
    {
        "model": "core.grade",
        "pk": 1,
        "fields": {
            "person": 16,
            "grade": 68,
            "course": 1
        }
    },
    {
        "model": "core.grade",
        "pk": 2,
        "fields": {
            "person": 16,
            "grade": 87,
            "course": 2
        }
    },
    {
        "model": "core.grade",
        "pk": 3,
        "fields": {
            "person": 16,
            "grade": 76,
            "course": 3
        }
    },
    {
        "model": "core.grade",
        "pk": 4,
        "fields": {
            "person": 1,
            "grade": 58,
            "course": 1
        }
    },
    {
        "model": "core.grade",
        "pk": 5,
        "fields": {
            "person": 1,
            "grade": 58,
            "course": 3
        }
    },
    {
        "model": "core.grade",
        "pk": 6,
        "fields": {
            "person": 3,
            "grade": 98,
            "course": 3
        }
    },
    {
        "model": "core.grade",
        "pk": 7,
        "fields": {
            "person": 3,
            "grade": 97,
            "course": 2
        }
    }
]
Once you’ve created the file, you can use the Django management command loaddata to load it into your database:
$ ./manage.py loaddata school
Installed 13 object(s) from 1 fixture(s)
Your database now has some sample Person, Course, and Grade objects.
Now that you have some data to work with, you’re ready to start customizing Django’s admin interface.
Customizing the Django Admin
The smart folks who created the Django framework not only built the admin, but they did it in such a way that you can customize it for your projects. When you registered the PersonAdmin object earlier, it inherited from admin.ModelAdmin. Most of the customization you can do with the Django admin is done by modifying ModelAdmin, and you sure can modify it!
ModelAdmin has over thirty attributes and almost fifty methods. You can use each one of these to fine-tune the admin’s presentation and control your objects’ interfaces. Every one of these options is described in detail in the documentation.
To top it all off, the admin is built using Django’s templating interface. The Django template mechanism allows you to override existing templates, and because the admin is just another set of templates, this means you can completely change its HTML.
Although it’s beyond the scope of this tutorial, you can even create multiple admin sites. That might seem like overkill, but it allows you to get fancy and define different sites for users with different permissions.
The Django admin is split into three major areas:
- App index
- Change lists
- Change forms
The app index lists your registered models. A change list is automatically created for each registered model and lists the objects for that model. When you add or edit one of those objects, you do so with a change form.
In the earlier example, the app index showed the Person, Course, and Grade objects. Clicking People shows the change lists for Person objects. On the Person change list page, clicking the Buffy Summers object takes you to the change form to edit Buffy’s details.
Modifying a Change List Using list_display
Implementing .__str__() is a quick way to change the representation of a Person object from a meaningless string to understandable data. Since this representation will also show up in drop-downs and multi-selects, you definitely want to make it as easy to understand as possible.
You can customize change list pages in far more ways than just modifying an object’s string representation. The list_display attribute of an admin.ModelAdmin object specifies what columns are shown in the change list. This value is a tuple of attributes of the object being modeled. For example, in core/admin.py, modify PersonAdmin as follows:
@admin.register(Person)
class PersonAdmin(admin.ModelAdmin):
    list_display = ("last_name", "first_name")
The code above modifies your Person change list to display the last_name and first_name attributes for each Person object. Each attribute is shown in a column on the page:
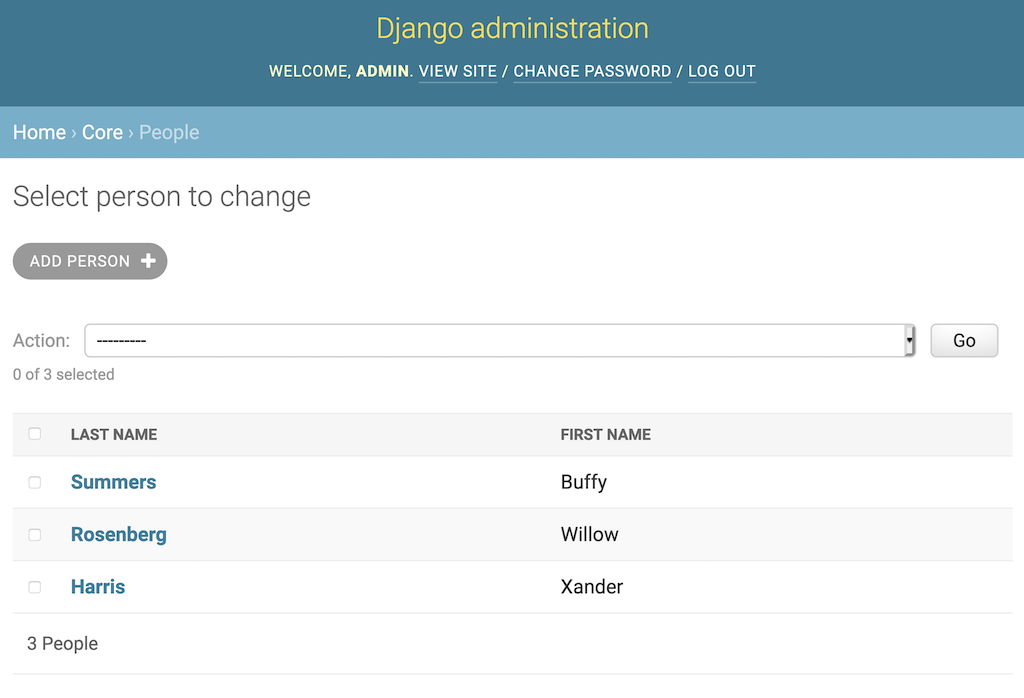
The two columns are clickable, allowing you to sort the page by the column data. The admin also respects the ordering attribute of a Meta section:
class Person(models.Model):
    # ...

    class Meta:
        ordering = ("last_name", "first_name")

    # ...
Adding the ordering attribute will default all queries on Person to be ordered by last_name then first_name. Django will respect this default order both in the admin and when fetching objects.
The list_display tuple can reference any attribute of the object being listed. It can also reference a method in the admin.ModelAdmin itself. Modify PersonAdmin again:
@admin.register(Person)
class PersonAdmin(admin.ModelAdmin):
    list_display = ("last_name", "first_name", "show_average")

    def show_average(self, obj):
        from django.db.models import Avg
        result = Grade.objects.filter(person=obj).aggregate(Avg("grade"))
        return result["grade__avg"]
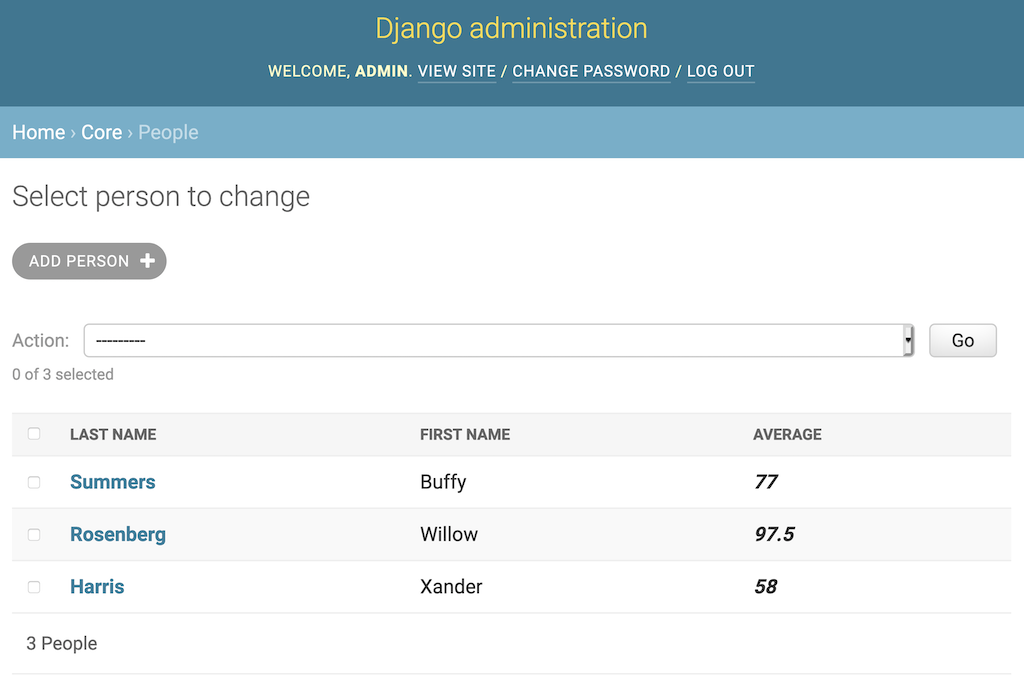
In the above code, you add a column to the admin that displays each student’s grade average. show_average() is called once for each object displayed in the list.
The obj parameter is the object for the row being displayed. In this case, you use it to query the corresponding Grade objects for the student, with the response averaged over Grade.grade. You can see the results here:

Keep in mind that the average grade should really be calculated in the Person model object. You’ll likely want the data elsewhere, not just in the Django admin. If you had such a method, you could add it to the list_display attribute. The example here shows what you can do in a ModelAdmin object, but it probably isn’t the best choice for your code.
By default, only those columns that are object attributes are sortable. show_average() is not. This is because sorting is performed by an
underlying QuerySet, not on the displayed results. There are ways of sorting these columns in some cases, but that’s beyond the scope of this tutorial.
The title for the column is based on the name of the method. You can alter the title by adding an attribute to the method:
def show_average(self, obj):
    result = Grade.objects.filter(person=obj).aggregate(Avg("grade"))
    return result["grade__avg"]

show_average.short_description = "Average Grade"
By default, Django protects you from HTML in strings in case the string is from user input. To have the display include HTML, you must use format_html():
def show_average(self, obj):
    from django.utils.html import format_html

    result = Grade.objects.filter(person=obj).aggregate(Avg("grade"))
    return format_html("<b><i>{}</i></b>", result["grade__avg"])

show_average.short_description = "Average"
show_average() now has a custom title, "Average", and is formatted to be in italics:
Unfortunately, Django hasn’t yet added f-string support for format_html(), so you’re stuck with str.format() syntax.
Providing Links to Other Object Pages
It’s quite common for objects to reference other objects through the use of foreign keys. You can point list_display at a method that returns an HTML link. Inside core/admin.py, modify the CourseAdmin class as follows:
from django.urls import reverse
from django.utils.http import urlencode

@admin.register(Course)
class CourseAdmin(admin.ModelAdmin):
    list_display = ("name", "year", "view_students_link")

    def view_students_link(self, obj):
        count = obj.person_set.count()
        url = (
            reverse("admin:core_person_changelist")
            + "?"
            + urlencode({"courses__id": f"{obj.id}"})
        )
        return format_html('<a href="{}">{} Students</a>', url, count)

    view_students_link.short_description = "Students"
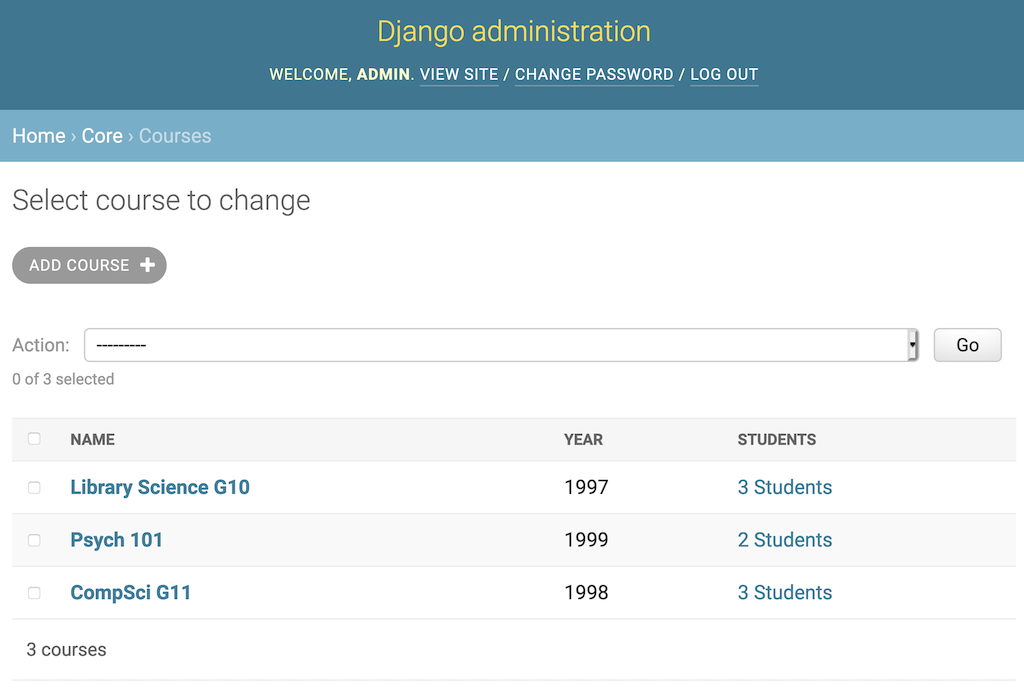
This code causes the Course change list to have three columns:
- The course name
- The year in which the course was offered
- A link displaying the number of students in the course
You can see the resulting change in the following screenshot:
When you click 2 Students, it takes you to the Person change list page with a filter applied. The filtered page shows only those students in Psych 101, Buffy and Willow. Xander didn’t make it to university.
The example code uses reverse() to look up a URL in the Django admin. You can look up any admin page using the following naming convention:
"admin:%(app)s_%(model)s_%(page)"
This name structure breaks down as follows:
admin:is the namespace.appis the name of the app.modelis the model object.pageis the Django admin page type.
For the view_students_link() example above, you use admin:core_person_changelist to get a reference to the change list page of the Person object in the core app.
Here are the available URL names:
| Page | URL Name | Purpose |
|---|---|---|
| Change list | %(app)s\_%(model)s\_changelist |
Model object page list |
| Add | %(app)s\_%(model)s\_add |
Object creation page |
| History | %(app)s\_%(model)s\_history |
Object change history page Takes an object_id as a parameter |
| Delete | %(app)s\_%(model)s\_delete |
Object delete page Takes an object_id as a parameter |
| Change | %(app)s\_%(model)s\_change |
Object edit page Takes an object_id as a parameter |
You can filter the change list page by adding a query string to the URL. This query string modifies the QuerySet used to populate the page. In the example above, the query string "?courses__id={obj.id}" filters the Person list to only those objects that have a matching value in Person.course.
These filters support QuerySet field lookups using double underscores (__). You can access attributes of related objects as well as use filter modifiers like __exact and __startswith.
You can find the full details on what you can accomplish with the list_display attribute in the Django admin documentation.
Adding Filters to the List Screen
In addition to filtering data on the change list through the calling URL, you can also filter with a built-in widget. Add the list_filter attribute to the CourseAdmin object in core/admin.py:
@admin.register(Course)
class CourseAdmin(admin.ModelAdmin):
    list_display = ("name", "year", "view_students_link")
    list_filter = ("year", )
# ...
The list_filter will display a new section on the page with a list of links. In this case, the links filter the page by year. The filter list is automatically populated with the year values used by the Course objects in the database:
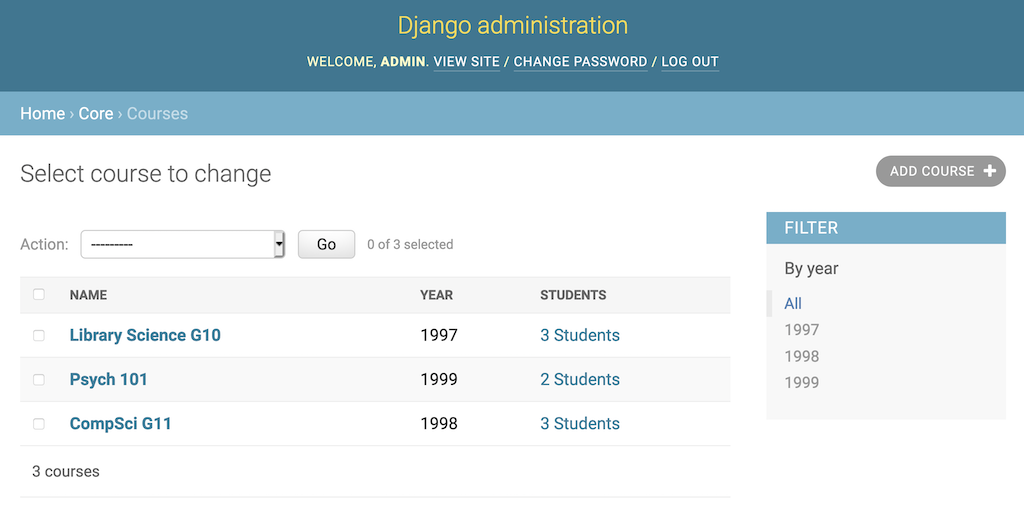
Clicking a year on the right-hand side will change the list to include only Course objects with that year value. You can also filter based on the attributes of related objects using the __ field lookup syntax. For example, you could filter GradeAdmin objects by course__year, showing the Grade objects for only a certain year of courses.
If you’re looking for more control over your filtering, then you can even create filter objects that specify the lookup attributes and the corresponding QuerySet.
Adding Search to the List Screen
Filters aren’t the only way to reduce the amount of data on the screen. Django admin also supports searching through the search_fields option, which adds a search box to the screen. You set it with a tuple containing the names of fields to be used for constructing a search query in the database.
Anything the user types in the search box is used in an OR clause of the fields filtering the QuerySet. By default, each search parameter is surrounded by % signs, meaning if you search for r, then any word with an r inside will appear in the results. You can be more precise by specifying a __ modifier on the search field.
Edit the PersonAdmin in core/admin.py as follows:
@admin.register(Person)
class PersonAdmin(admin.ModelAdmin):
    search_fields = ("last_name__startswith", )
In the above code, searching is based on last name. The __startswith modifier restricts the search to last names that begin with the search parameter. Searching on R provides the following results:

Whenever a search is performed on a change list page, the Django admin calls your admin.ModelAdmin object’s get_search_results() method. It returns a QuerySet with the search results. You can fine-tune searches by overloading the method and changing the QuerySet. More details can be found in the documentation.
Changing How Models Are Edited
You can customize more than just the change list page. The screens used to add or change an object are based on a ModelForm. Django automatically generates the form based on the model being edited.
You can control which fields are included, as well as their order, by editing the fields option. Modify your PersonAdmin object, adding a fields attribute:
@admin.register(Person)
class PersonAdmin(admin.ModelAdmin):
    fields = ("first_name", "last_name", "courses")
# ...
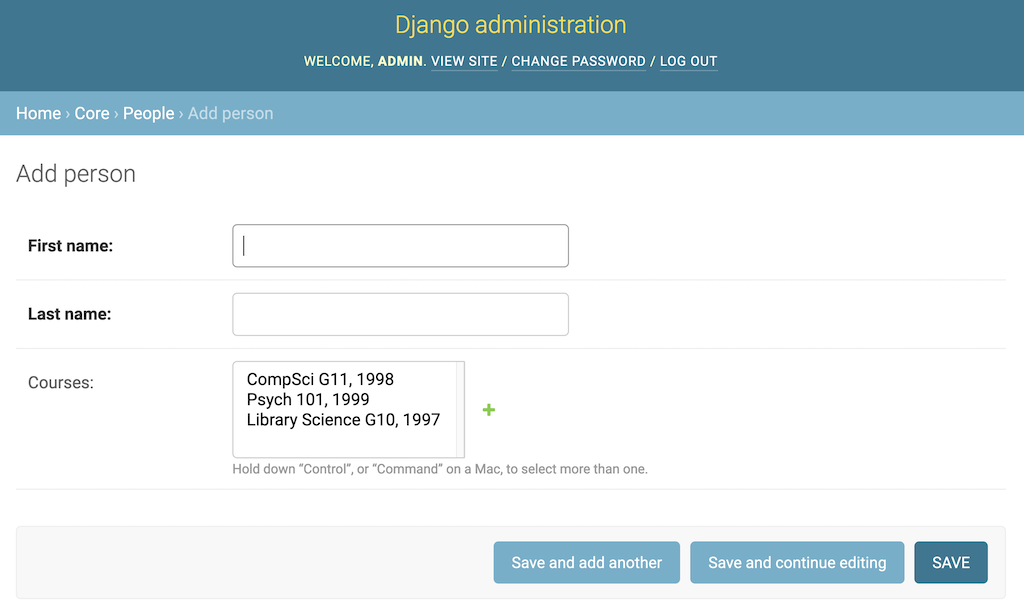
The Add and Change pages for Person now put the first_name attribute before the last_name attribute even though the model itself specifies the other way around:
ModelAdmin.get_form() is responsible for creating the ModelForm for your object. You can override this method to change the form. Add the following method to PersonAdmin:
def get_form(self, request, obj=None, **kwargs):
    form = super().get_form(request, obj, **kwargs)
    form.base_fields["first_name"].label = "First Name (Humans only!):"
    return form
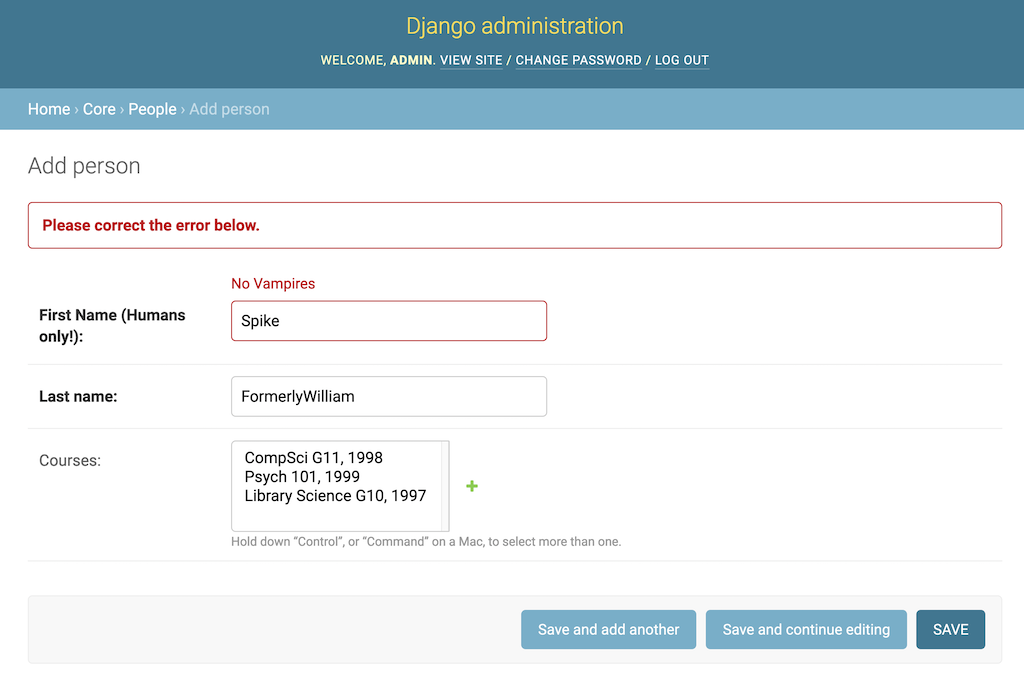
Now, when the Add or Change page is displayed, the label of the first_name field will be customized.
Changing the label might not be sufficient to prevent vampires from registering as students. If you don’t like the ModelForm that the Django admin created for you, then you can use the form attribute to register a custom form. Make the following additions and changes to core/admin.py:
from django import forms

class PersonAdminForm(forms.ModelForm):
    class Meta:
        model = Person
        fields = "__all__"

    def clean_first_name(self):
        if self.cleaned_data["first_name"] == "Spike":
            raise forms.ValidationError("No Vampires")

        return self.cleaned_data["first_name"]

@admin.register(Person)
class PersonAdmin(admin.ModelAdmin):
    form = PersonAdminForm
# ...
The above code enforces additional validation on the Person Add and Change pages. ModelForm objects have a rich validation mechanism. In this case, the first_name field is being checked against the name "Spike". A ValidationError prevents students with this name from registering:
By changing or replacing the ModelForm object, you can fully control the appearance and validation of the pages you use to add or change object pages.
Overriding Django Admin Templates
The Django developers implemented the admin using the Django template mechanism. This made their job a little bit easier, but it also benefits you by allowing you to override the templates. You can fully customize the admin by changing the templates used to render pages.
You can see all the templates used in the admin by looking inside the Django package in your virtual environment:
.../site-packages/django/contrib/admin/templates/
│
├── admin/
│   │
│   ├── auth/
│   │   └── user/
│   │       ├── add_form.html
│   │       └── change_password.html
│   │
│   ├── edit_inline/
│   │   ├── stacked.html
│   │   └── tabular.html
│   │
│   ├── includes/
│   │   ├── fieldset.html
│   │   └── object_delete_summary.html
│   │
│   ├── widgets/
│   │   ├── clearable_file_input.html
│   │   ├── foreign_key_raw_id.html
│   │   ├── many_to_many_raw_id.html
│   │   ├── radio.html
│   │   ├── related_widget_wrapper.html
│   │   ├── split_datetime.html
│   │   └── url.html
│   │
│   ├── 404.html
│   ├── 500.html
│   ├── actions.html
│   ├── app_index.html
│   ├── base.html
│   ├── base_site.html
│   ├── change_form.html
│   ├── change_form_object_tools.html
│   ├── change_list.html
│   ├── change_list_object_tools.html
│   ├── change_list_results.html
│   ├── date_hierarchy.html
│   ├── delete_confirmation.html
│   ├── delete_selected_confirmation.html
│   ├── filter.html
│   ├── index.html
│   ├── invalid_setup.html
│   ├── login.html
│   ├── object_history.html
│   ├── pagination.html
│   ├── popup_response.html
│   ├── prepopulated_fields_js.html
│   ├── search_form.html
│   └── submit_line.html
│
└── registration/
    ├── logged_out.html
    ├── password_change_done.html
    ├── password_change_form.html
    ├── password_reset_complete.html
    ├── password_reset_confirm.html
    ├── password_reset_done.html
    ├── password_reset_email.html
    └── password_reset_form.html
The Django template engine has a defined order for loading templates. When it loads a template, it uses the first template that matches the name. You can override admin templates by using the same directory structure and file names.
The admin templates come in two directories:
adminis for the model object pages.registrationis for password changes and logging in and out.
To customize the logout page, you need to override the right file. The relative path leading to the file has to be the same as the one being overridden. The file you’re interested in is registration/logged_out.html. Start by creating the directory in the School project:
$ mkdir -p templates/registration
Now tell Django about your new template directory inside your School/settings.py file. Look for the TEMPLATES directive and add the folder to the DIR list:
# School/settings.py
# ...

TEMPLATES = [
    {
        "BACKEND": "django.template.backends.django.DjangoTemplates",

        # Add the templates directory to the DIR option:
        "DIRS": [os.path.join(BASE_DIR, "templates"), ],
        "APP_DIRS": True,
        "OPTIONS": {
            "context_processors": [
                "django.template.context_processors.debug",
                "django.template.context_processors.request",
                "django.contrib.auth.context_processors.auth",
                "django.contrib.messages.context_processors.messages",
            ],
        },
    },
]
The template engine searches directories in the DIR option before the application directories, so anything with the same name as an admin template will be loaded instead. To see this in action, copy the logged_out.html file into your templates/registration directory, then modify it:
{% extends "admin/base_site.html" %}
{% load i18n %}
{% block breadcrumbs %}<div class="breadcrumbs"><a href="{% url 'admin:index' %}">{% trans 'Home' %}</a></div>{% endblock %}
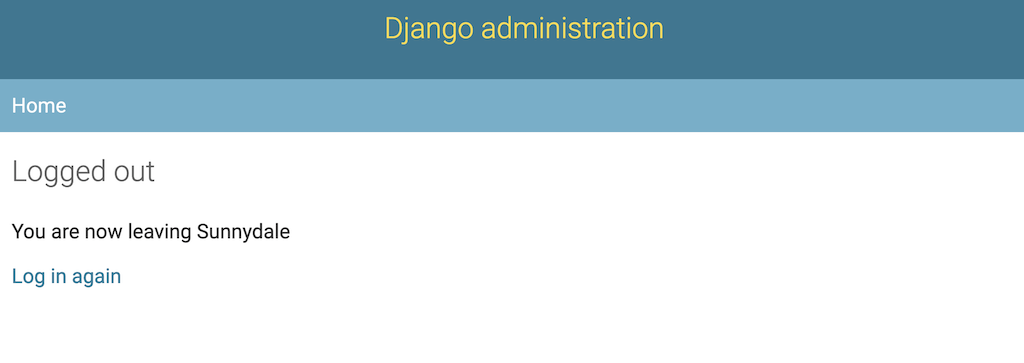
{% block content %}
<p>You are now leaving Sunnydale</p>
<p><a href="{% url 'admin:index' %}">{% trans 'Log in again' %}</a></p>
{% endblock %}
You’ve now customized the logout page. If you click LOG OUT, then you’ll see the customized message:
Django admin templates are deeply nested and not very intuitive, but you have full control over their presentation if you need it. Some packages, including Grappelli and Django Admin Bootstrap, have fully replaced the Django admin templates to change their appearance.
Django Admin Bootstrap is not yet compatible with Django 3, and Grappelli only recently added support, so it may still have some issues. That being said, if you want to see the power of overriding admin templates, then check out those projects!
Conclusion
The Django admin is a powerful built-in tool giving you the ability to create, update, and delete objects in your database using a web interface. You can customize the Django admin to do almost anything you want.
In this tutorial, you learned how to:
- Register your object models with the Django admin
- Add attributes as columns in the change list
- Create column values with calculated content
- Cross-reference admin pages through links
- Filter the change list page through query strings
- Make your change list searchable
- Customize the automatic
ModelFormobject - Change the HTML in Django admin templates
This tutorial only touches the surface. The amount of configuration you can do to customize the Django admin is staggering. You can take a deeper dive into the documentation to explore such topics as inline forms, multiple admin sites, mass editing, auto-completion, and much more. Happy coding!
Watch Now This tutorial has a related video course created by the Real Python team. Watch it together with the written tutorial to deepen your understanding: Django Admin Customization