How to Install a CentOS 8 Minimal Server
This tutorial exists for these OS versions
On this page
This document describes the installation of a CentOS 8 server. The purpose of this guide is to provide a minimal setup that can be used as basis for our other tutorials here at howtoforge like the perfect server guides or the SAMBA, LAMP and LEMP server tutorials.
Requirements
To get started with the CentOS 8 installation, we will need the installer ISO file. This can either be the CentOS minimal ISO or the DVD ISO file. If you plan to install just this one server then choose the minimal ISO as it is smaller, the installer will download the required packages during installation later. I will install several servers with CentOS 8, therefore I choose the DVD installer ISO so I don't have to download the same packages again for each server.
- Download the CentOS 8 ISO from a mirror next to you http://www.centos.org/download/. I will use this mirror:
http://ftp.hosteurope.de/mirror/centos.org/8.2.2004/isos/x86_64/CentOS-8.2.2004-x86_64-minimal.iso
I will do the installation on a VMware virtual machine. The installation steps on a physical server are the same. If your server is not able to boot from an ISO file, burn the ISO on a DVD and insert that into the DVD drive of the server.
Preliminary Note
This tutorial is based on CentOS 8 server, I use 192.168.0.100 as my IP address in this tutorial and server1.example.com as the hostname. These settings might differ for you, so you have to replace them where appropriate.
Install the CentOS 8 Base System
Boot from your CentOS 8 ISO image. Select Install CentOS 8.
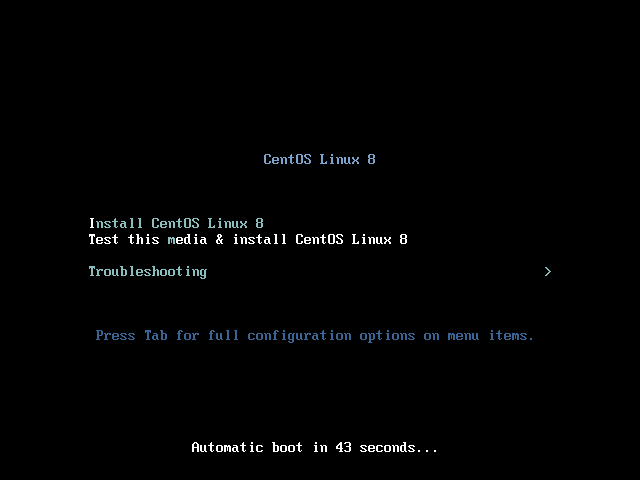
Next press ENTER.
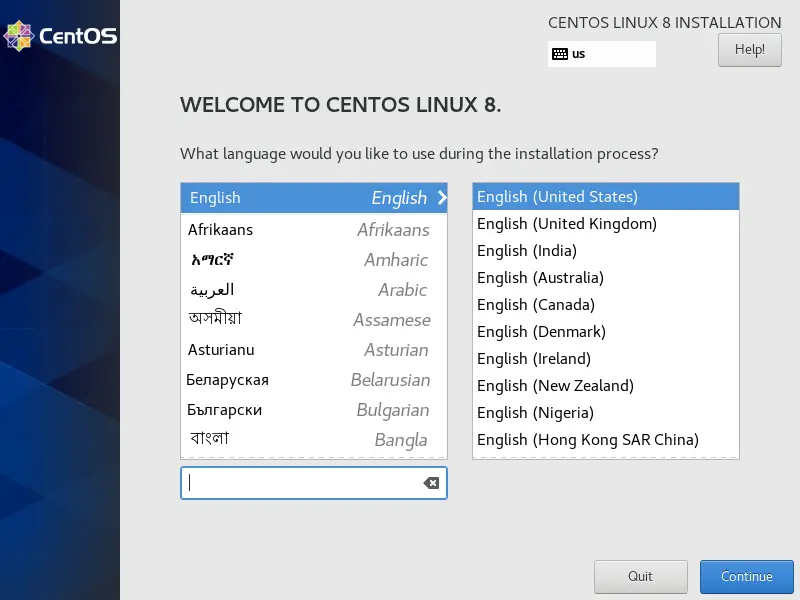
Choose the installation language. I am using English with English United States here, so I just press Continue:
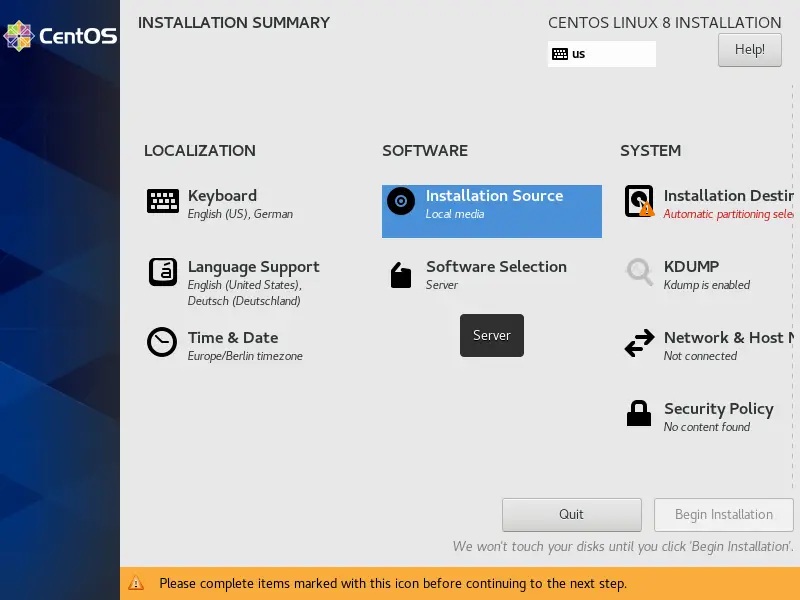
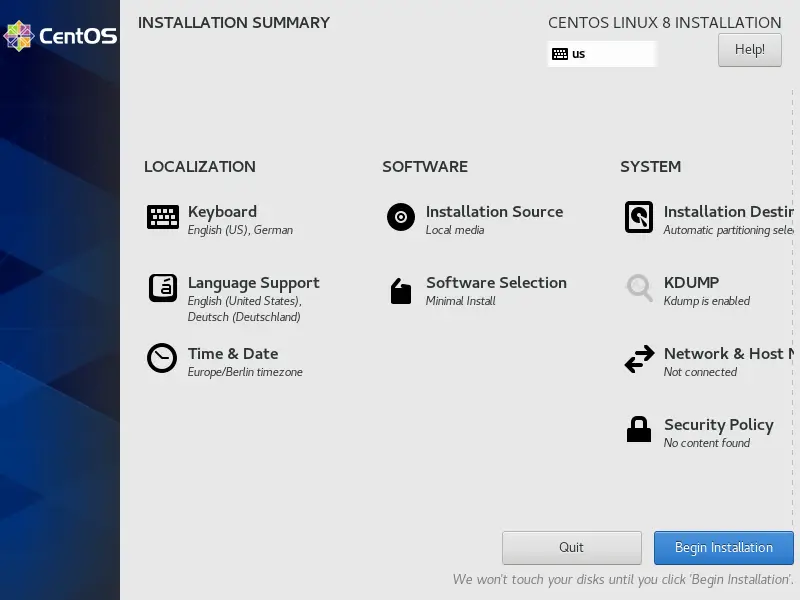
Next, we get the following screen:
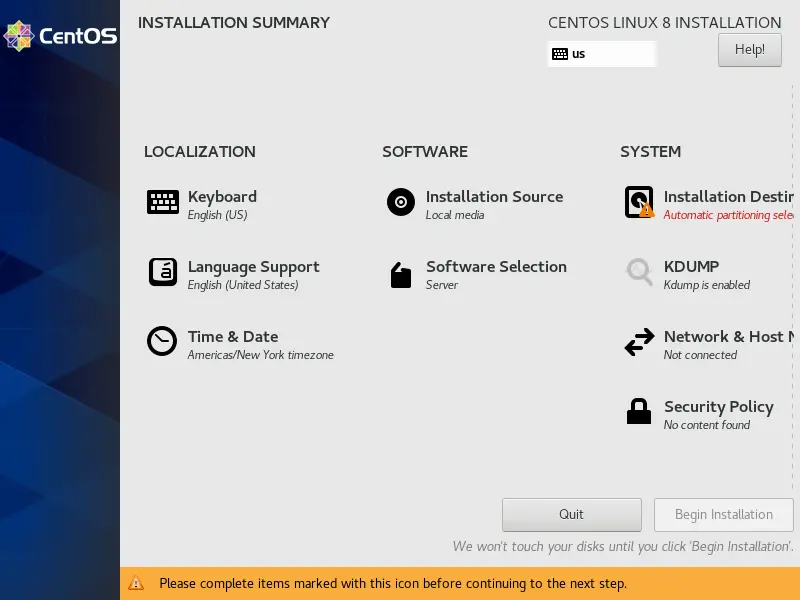
I will start to customize the settings starting with LOCALIZATION in DATE & TIME Click on DATE & TIME. Select your time zone, in my case, I am selecting Europe as Region and Berlin as City. Press Done when finished.
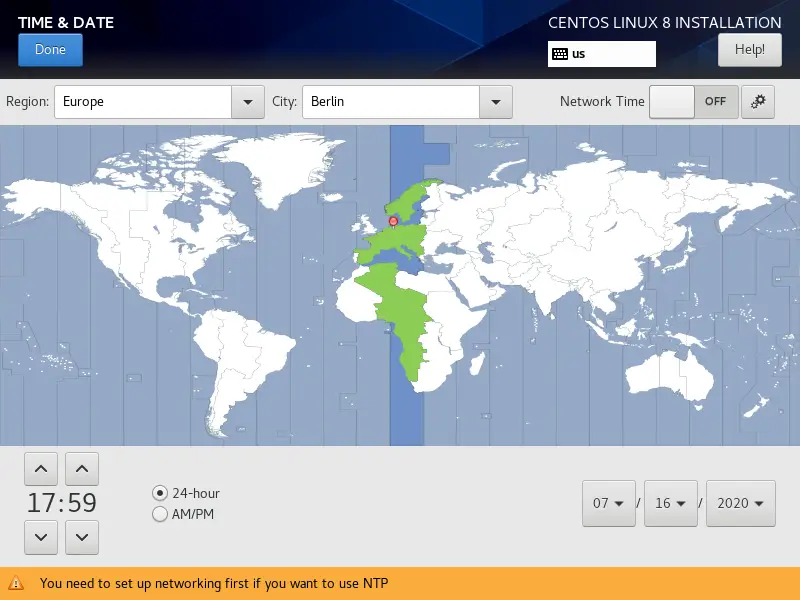
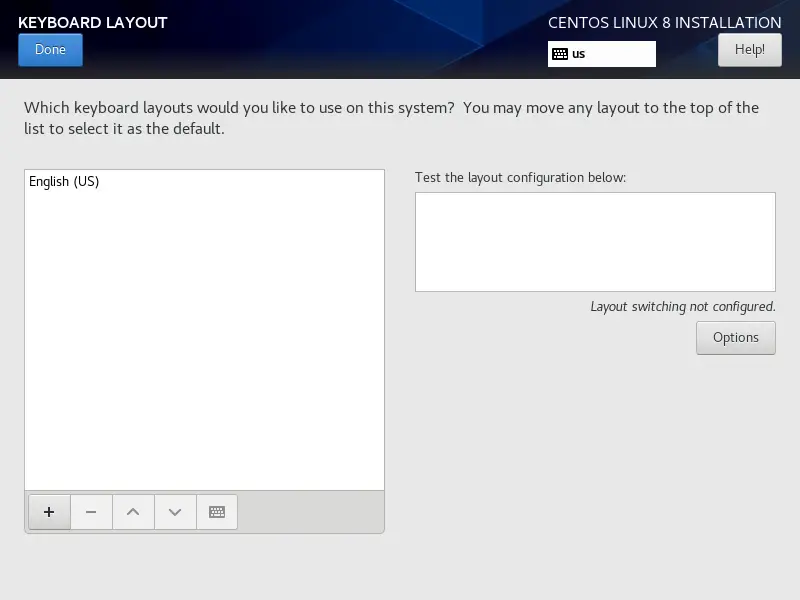
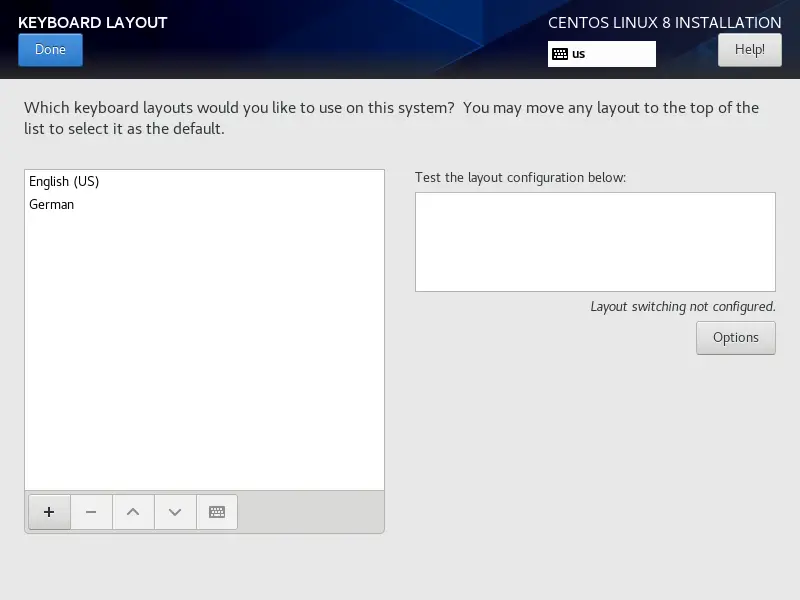
It will set the server DATE & TIME to the Europe/Berlin timezone. Next, I will customize the KEYBOARD layout, Click on the KEYBOARD to start the setup dialog. 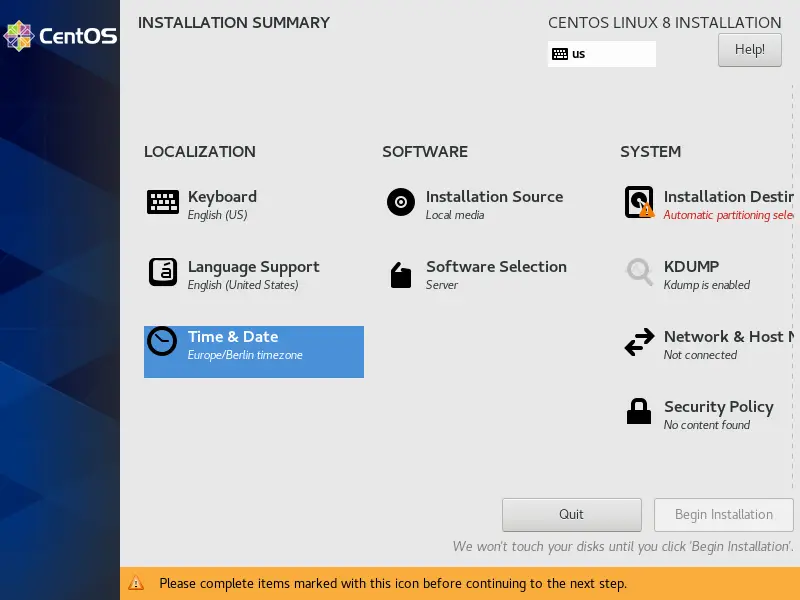
Press the + icon to add another keyboard layout:
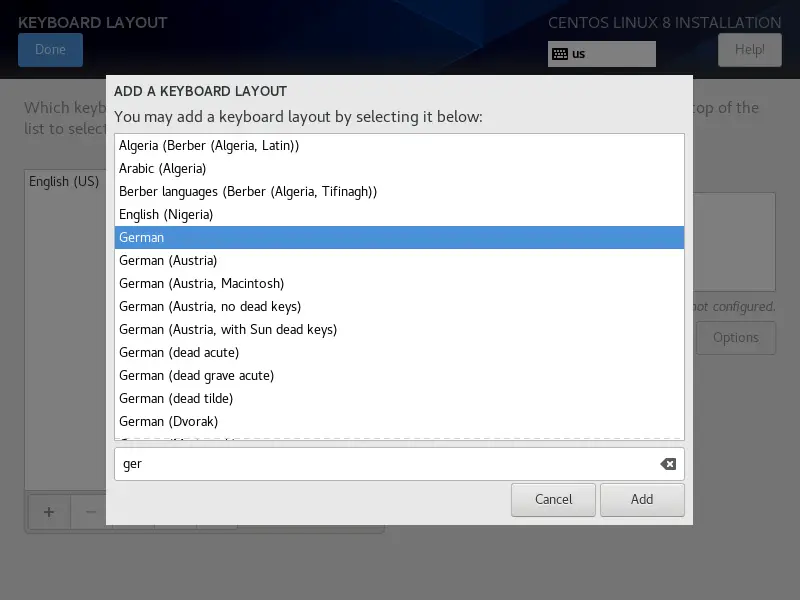
It will show the following window with the list of available keyboard layouts. In my case, I select German and click on the Add. button to add the keyboard layout.
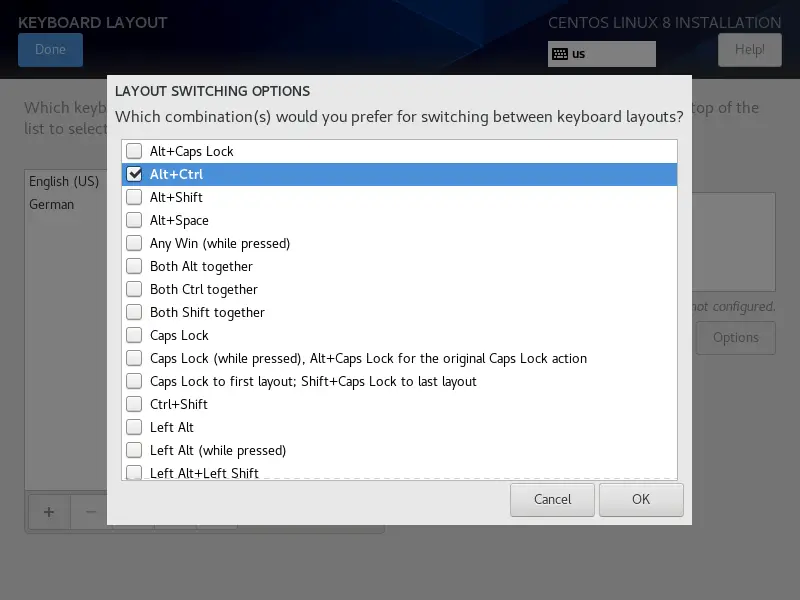
Next, we customize the LAYOUT SWITCHING OPTIONS by pressing Options:
You can use any key combination for switching between keyboards, in my case I am using Alt+Ctrl. After selecting your desired key combination, press Done.
Next press Done.
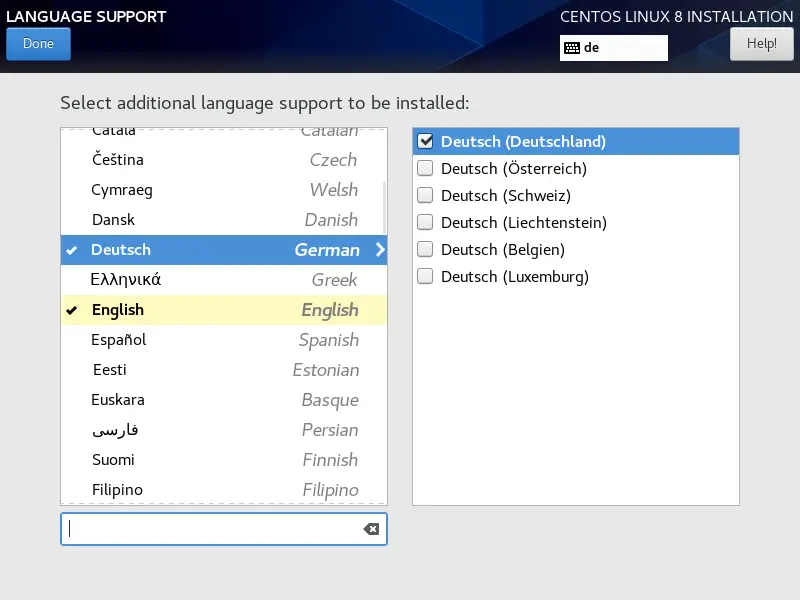
Now we can add LANGUAGE SUPPORT if you don't want to use English. Click on "LANGUAGE SUPPORT" to open the dialog.
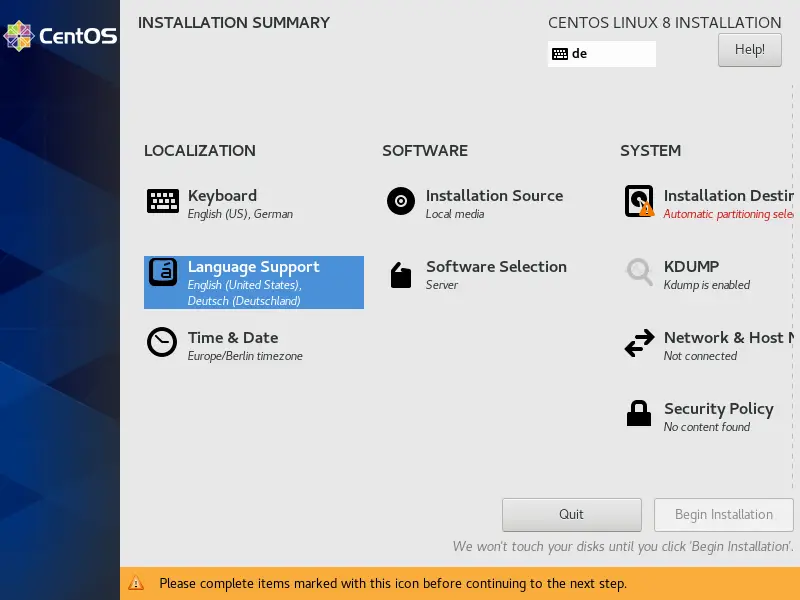
By default, CentOS comes with English language preinstalled, but we can add more languages easily. In my case, I am adding Deutsch German with Deutsch (Deutschland) as the additional language. Press Done after selection
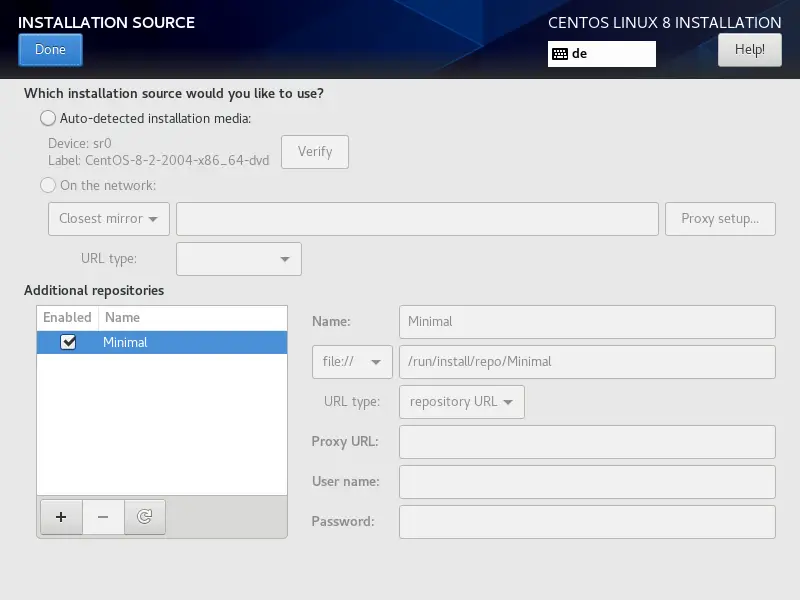
Next, we go to SOFTWARE > INSTALLATION SOURCE and select the installation media.
Next, you will see that the installation source is "Auto-detected installation media", if you have any other source of installation like a network install then you can set the path in the "On the network" field with and without proxy from Proxy Setup. Additionally, we can add Additional repositories if needed. Then press Done.
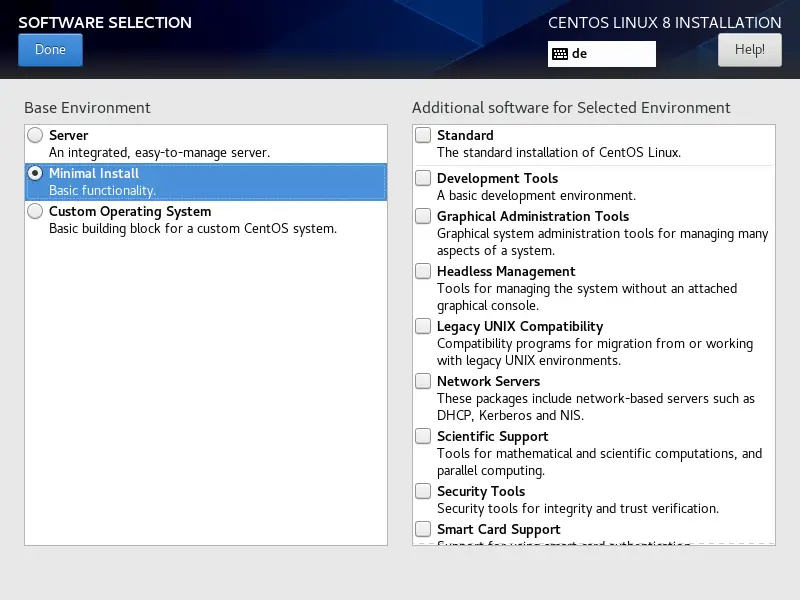
Next, we will proceed to SOFTWARE SELECTION, by default it comes with Minimal Install.
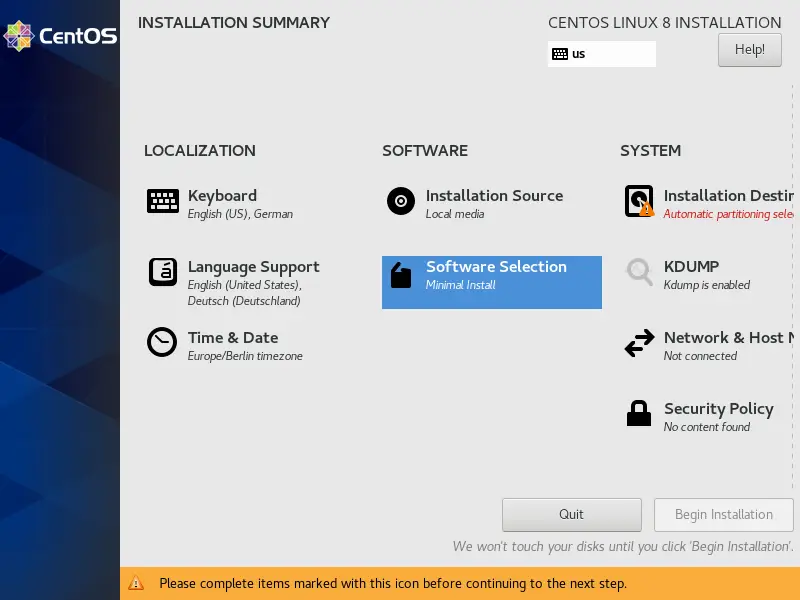
We can add more software packages if required (when you use the install DVD and not minimal installer). In my case, I need only a Minimal Install(Basic Functionality) setup to install the software later with yum, so I will save the settings by pressing Done.
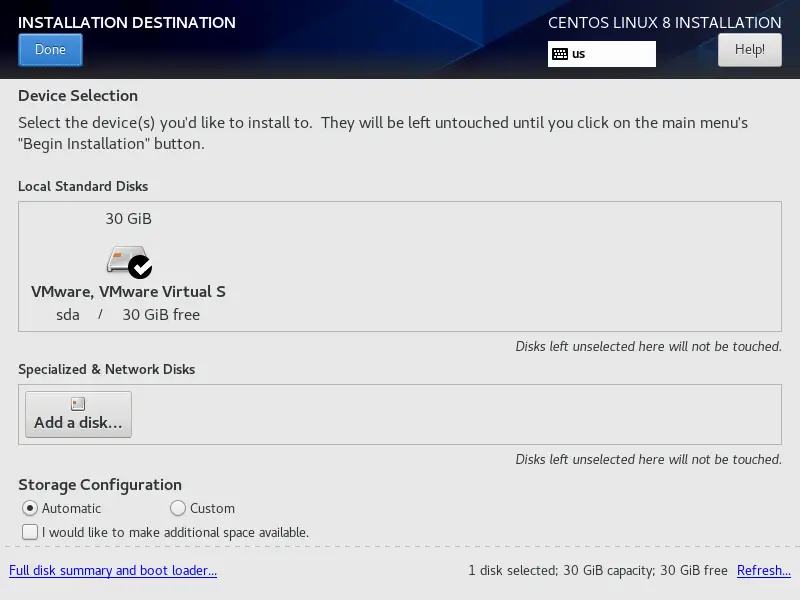
We move towards SYSTEM and select INSTALLATION DESTINATION.
When you need a manual partitioning scheme then you can select I will configure partitioning, in my case I will prefer Automatically configure partitioning after that press Done.
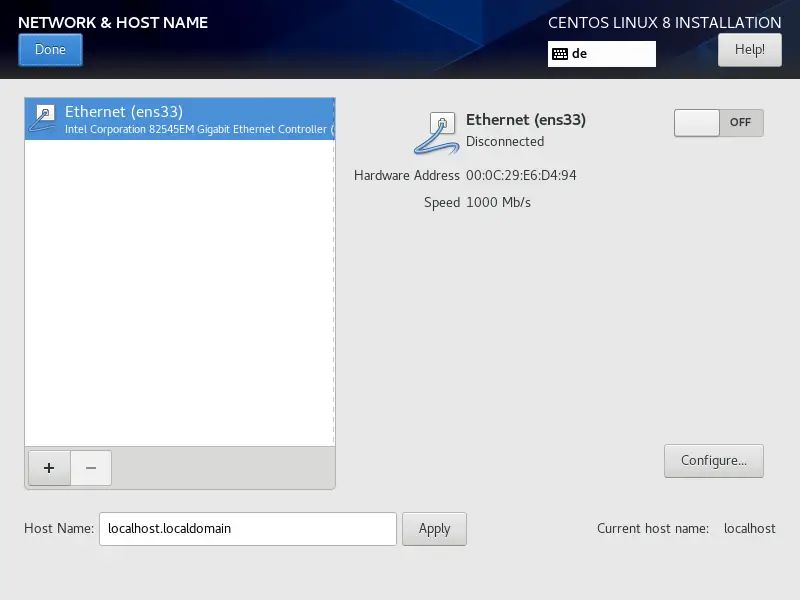
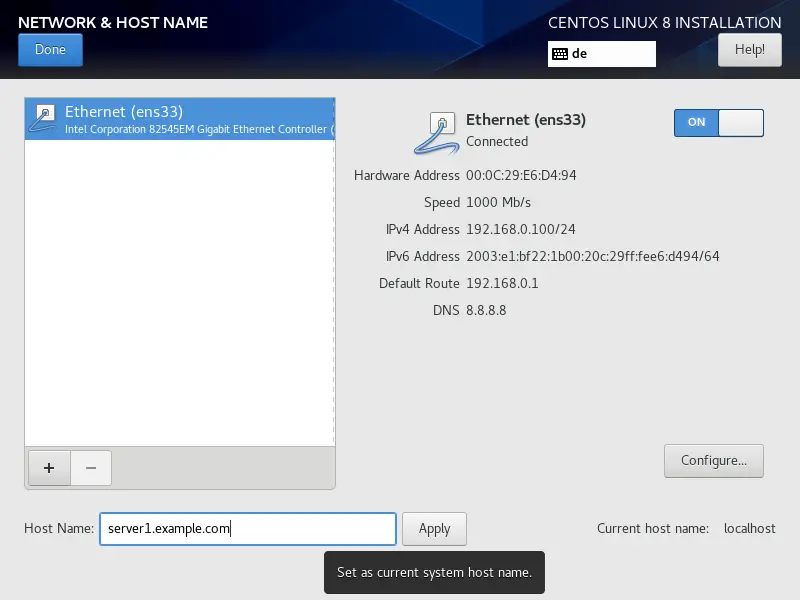
Next, we will customize our NETWORK & HOSTNAME by selecting that.
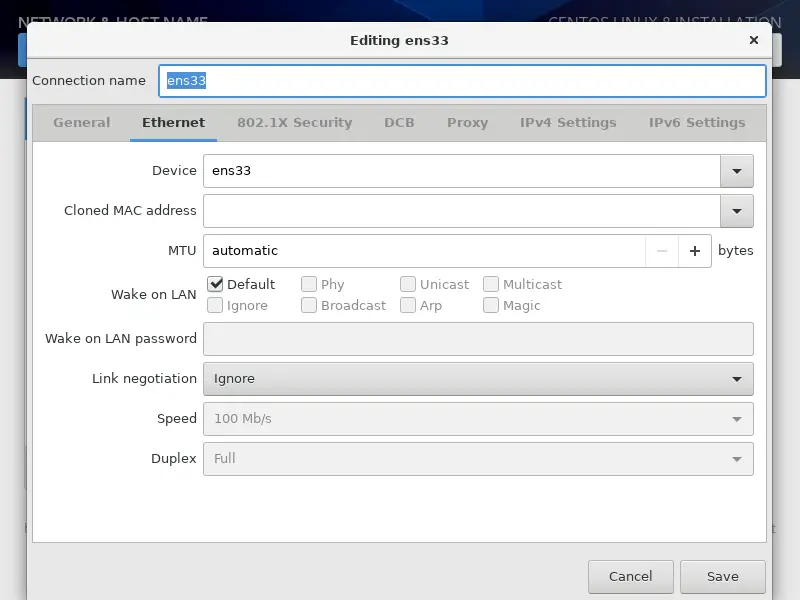
I will use the hostname server1.example.com and customize the ethernet setup by pressing Configure.
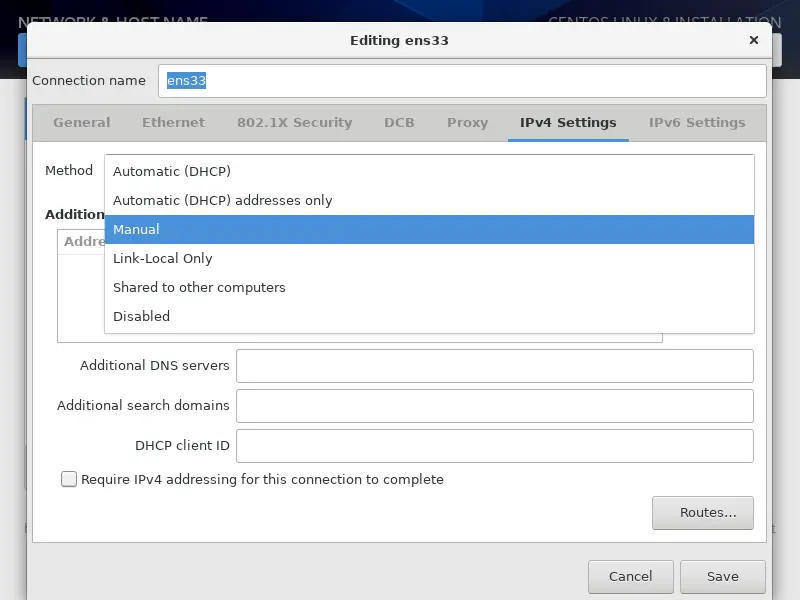
The next screen will look like this, now we add the IPv4 Settings by selecting the same. If you have IPv6 then you add it in IPv6 Settings.
Next, you can set up the network to match your local network setup. In my case, I use a static IP so I will select Manual
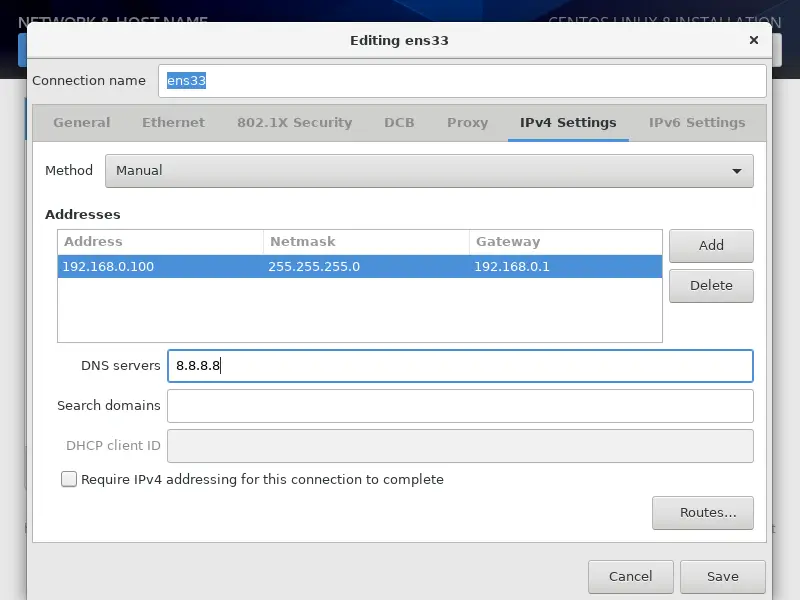
Add the entries for Address, Netmask and Gateway as per your static IP environment. In my case I am using Address as 192.168.0.100, Netmask as 255.255.255.0, Gateway as 192.168.0.1 and DNS servers as 8.8.8.8 8.8.4.4 These values may vary according to your network environment. After that press Save.
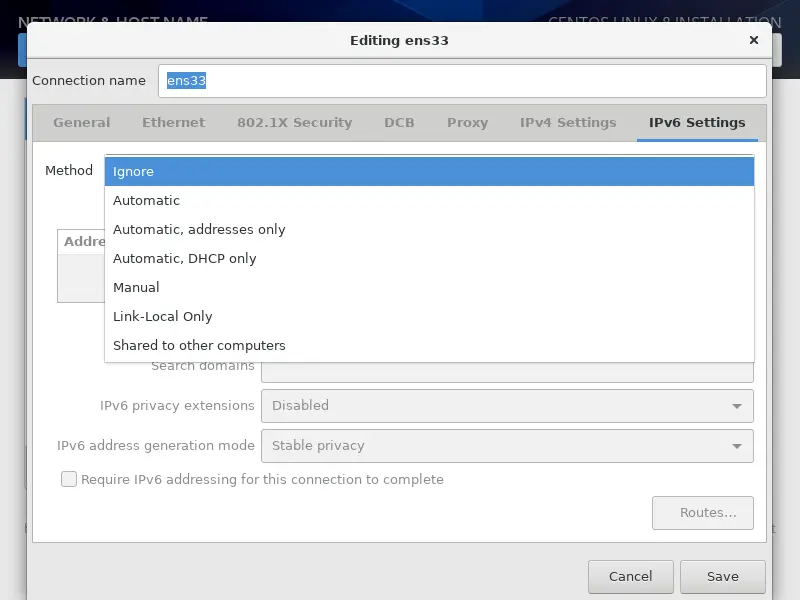
IMPORTANT: If you do not have an IPv6 internet connection, then set IPv6 from auto to ignore on the IPv6 tab, otherwise you won't be able to reach the internet from this server on IPv4 as CentOS seems to ignore the correct IPv4 setup then and uses IPv6 instead which fails.
Next, we have to turn the connection ON as shown in the screenshot below. Further press Done.
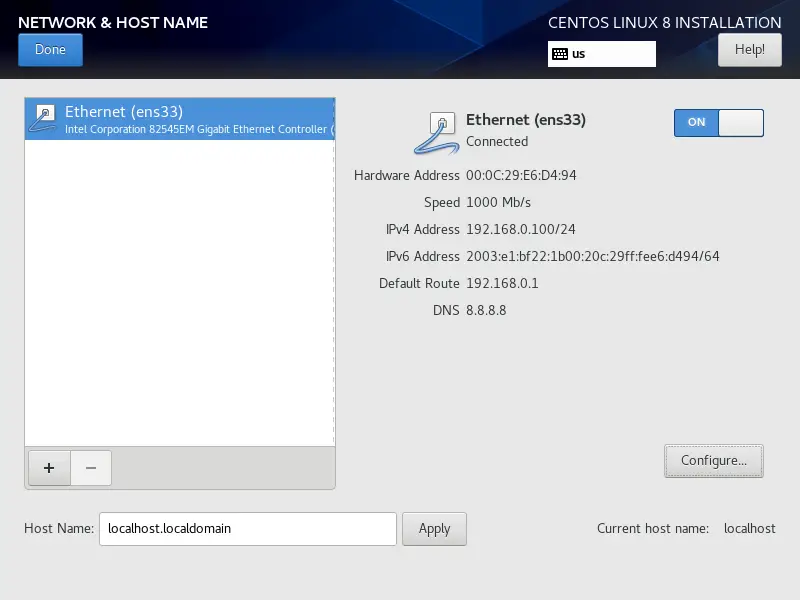
Set the server hostname in the "Host Name" field and click on apply button.
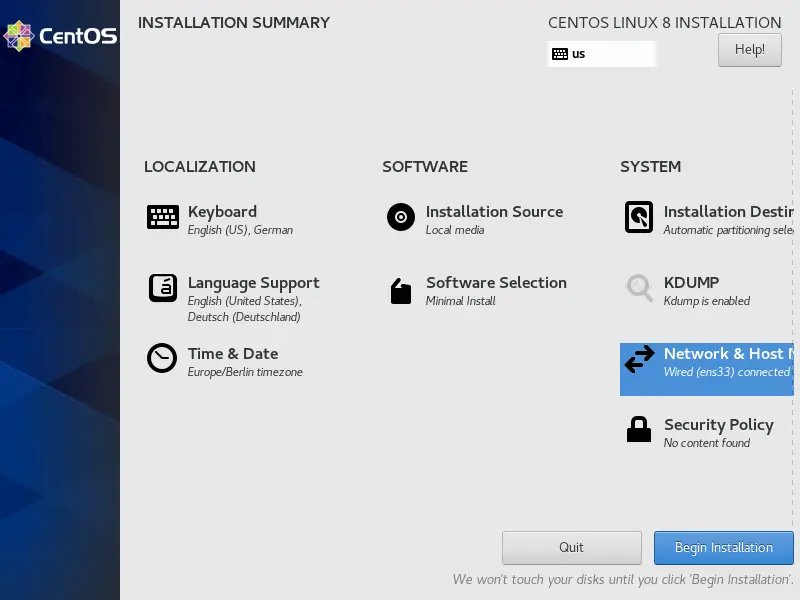
Now we are ready to start the installation process, you might want to cross-check all the settings and then press Begin Installation.
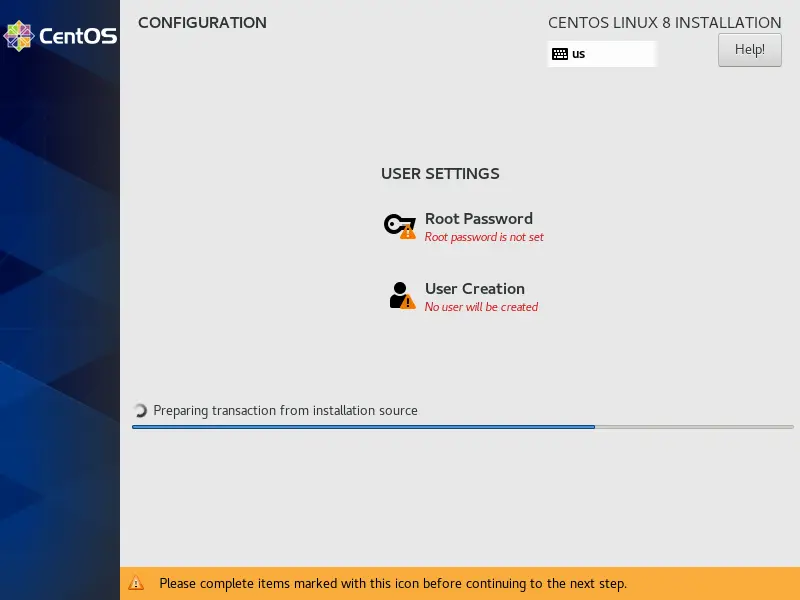
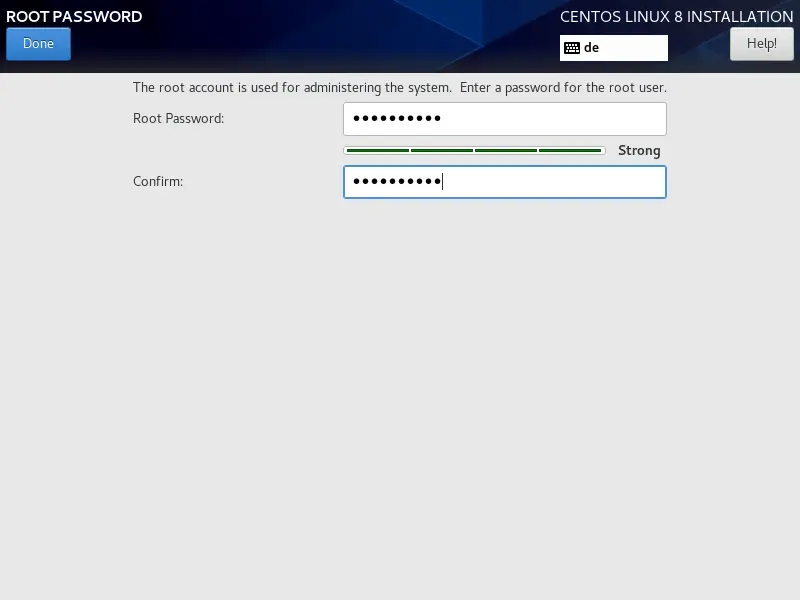
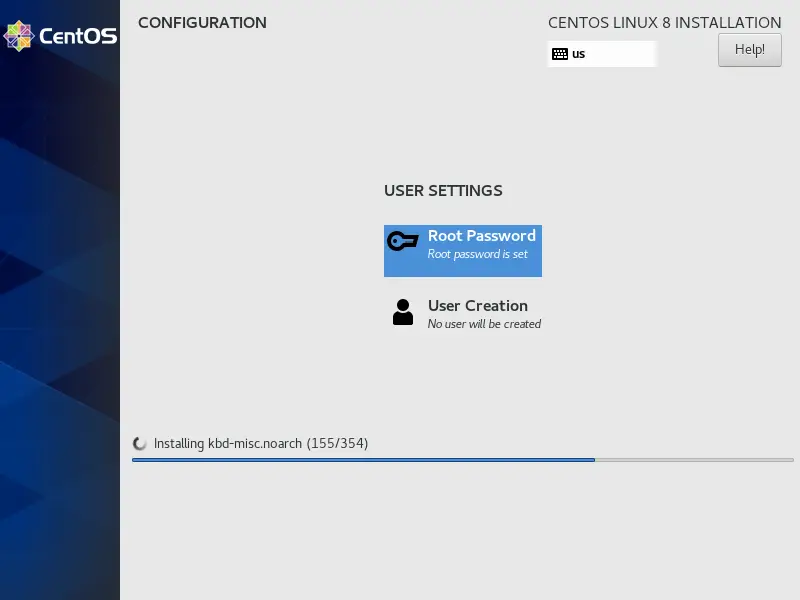
The installation process will start now and you get a small blue progress bar in the next windows. Now we have to set the ROOT PASSWORD and add a new non-root user in the USER CREATION option. I will first go for the root password.
Enter a secure password of your choice and press Done
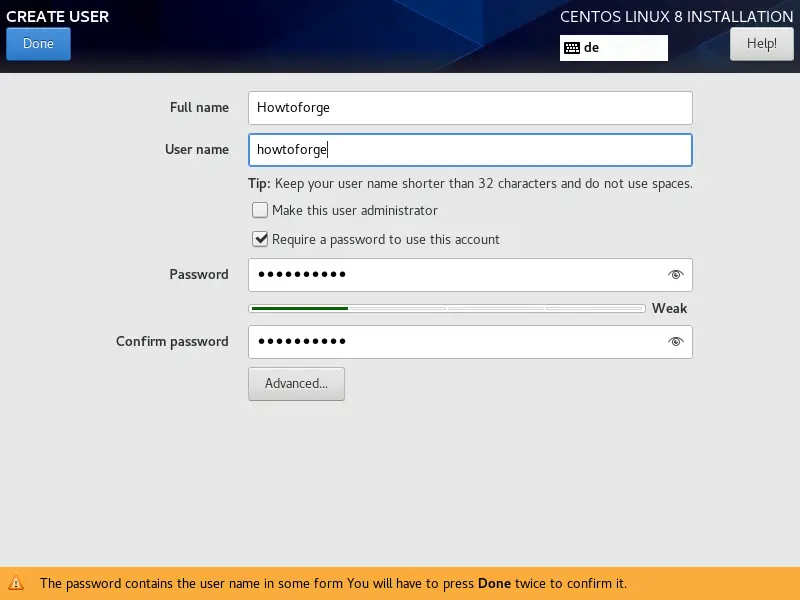
Next, we will go for USER CREATION.
Next, I will create a non-root user, as in my case I used the Full name "Howtoforge" and Username "howtoforge", check the option Require the password to use this account and then press Done. Off-course you should use a username and password of your choice.
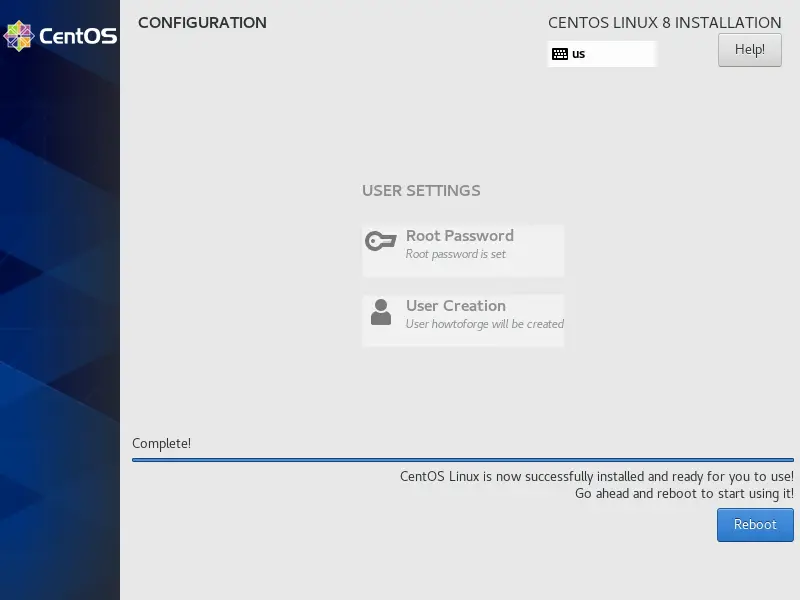
Press Done. Have patience and wait for the completion of the setup.
After completion of the installation, it will ask to reboot the server, just press Finish configuration.
The server reboots and will request your username and password afterwards.
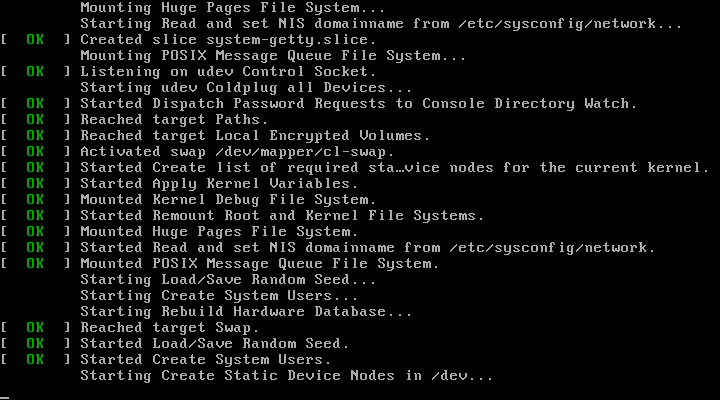
Now we are ready to log in with the user that we just created above or we can use the root credentials.
The first login on CentOS 8
Login as the root user to the server so we can do some final installation steps.

The first one is to install all available updates with dnf.
dnf update
confirm with "y" to proceed with the installation of the updates.
I will install two command-line editors to be able to edit configuration files on the shell:
dnf install nano vim
Network Configuration
CentOS 8 minimal doesn't come pre-installed with the ifconfig command we will install it as follows:
yum install net-tools
If you want to change or see the network configuration file, just edit the file
nano /etc/sysconfig/network-scripts/ifcfg-ens33
It will be like this when you configured a static IP address:
TYPE="Ethernet"
BOOTPROTO="none"
DEFROUTE="yes"
IPV4_FAILURE_FATAL="no"
IPV6INIT="no"
IPV6_AUTOCONF="yes"
IPV6_DEFROUTE="yes"
IPV6_PEERDNS="yes"
IPV6_PEERROUTES="yes"
IPV6_FAILURE_FATAL="no"
IPV6_ADDR_GEN_MODE="stable-privacy"
NAME="ens33"
UUID="233f2c1b-877c-4b28-b17d-1eb091ded288"
DEVICE="ens33"
ONBOOT="yes"
IPADDR="192.168.0.100"
PREFIX="24"
GATEWAY="192.168.0.1"
DNS1="8.8.8.8"
Or like this when you use DHCP:
TYPE="Ethernet"
BOOTPROTO="dhcp"
DEFROUTE="yes"
IPV4_FAILURE_FATAL="no"
IPV6INIT="yes"
IPV6_AUTOCONF="yes"
IPV6_DEFROUTE="yes"
IPV6_FAILURE_FATAL="no"
NAME="ens33"
UUID="233f2c1b-877c-4b28-b17d-1eb091ded288"
DEVICE="ens33"
ONBOOT="yes"
HWADDR="00:50:56:15:23:79"
PEERDNS="yes"
PEERROUTES="yes"
IPV6_PEERDNS="yes"
IPV6_PEERROUTES="yes"
IPV6_PRIVACY="no"
Change the values if required.
Note: The above DEVICE name may vary so please check the equivalent file in the directory /etc/sysconfig/network-scripts.
Adjust /etc/hosts
Adjust the file /etc/hosts as follows:
nano /etc/hosts
Make the values like this:
127.0.0.1   localhost localhost.localdomain localhost4 localhost4.localdomain4
192.168.0.100   server1.example.com     server1

::1         localhost localhost.localdomain localhost6 localhost6.localdomain6
Congratulations! Now we have basic minimal CentOS 8 server setup which provides a solid basis for our other tutorials.
Download CentOS 8 server as a virtual machine
This setup is available as a virtual machine download in ova/ovf format (compatible with VMWare and Virtualbox) for howtoforge subscribers.
Log in details for the VM
- The root password is: howtoforge
- The password of the "howtoforge" user is: howtoforge
Please change both passwords on the first login.
- The IP address of the VM is 192.168.0.100
Links
- CentOS: http://www.centos.org/

