How to Create a Cross-Platform App for Apple Vision Pro
Leandro Pontes Berleze | Mar 27, 2024

As a Q.A. analyst, I have learned that the integration between the backend API and the frontend can be difficult to test and somewhat overlooked since unit tests and end-to-end tests are more common. With this approach you’ll have not only a broader understanding of the solution compared to unit tests, but also an increase in test speed and stability.
In one of my tests I couldn’t understand why the app was returning a different result for my search, considering I was also using Postman to directly send a GET to the same endpoint. Then I remembered, once I used a web proxy program to bypass an online game by blocking an URL.
So I installed the web proxy and discovered that the request was pointing to a URL in another environment with the same data structure, but with different results.
Since I used a web proxy to forward all traffic from my mobile app to my computer, I could easily see all the requests the app was making.
How does this improve my integration testing?
If I had used a web proxy earlier, I would’ve seen on the fly why the result was wrong and who I could show it to in order to fix that bug.
In this article I’ll show you how to forward all your device traffic using proxying and SSL using Charles Webproxy. Note that you can also use Fiddler or another web proxy program with the same logic.
Before you start, let’s first setup your proxy from your mobile device to Charles Webproxy and see how the program works.
The first step is to know what’s your IP address. So, open your terminal and type ipconfig (windows) or ifconfig (mac) and type down your IP address.

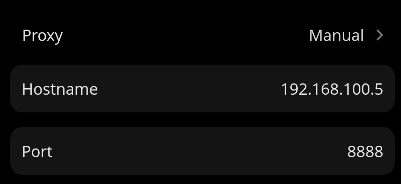
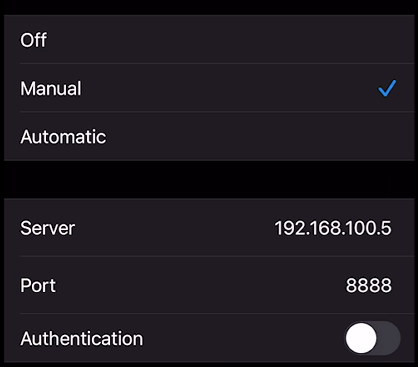
Now, go to your device and open the WIFI settings and change the proxy setting from automatic to manual and put your IP address on Hostname (Android) and/or Server (iOS) and port 8888 (you can change the port on Charles settings). Like this:
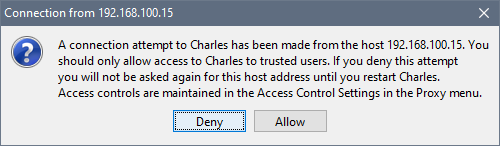
Once you do that, open Charles and you’ll see a warning asking you access to Charles. Click on Allow.
Charles will now forward all traffic that your device is doing on the Structure tab on the left panel.
The Overview and Contents tabs are the most important ones. After selecting an endpoint, you’ll be able to see all statuses about that connection on the Overview tab on the right panel. Keep an eye on Status and Response code values, those two are very valuable when testing an endpoint. On the Contents tab, you can see the request (top) and response (bottom) of the connection.
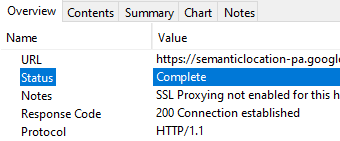
“But wait, there’s something wrong, I can’t see the server response, it’s all scrambled up!”. That’s because you are trying to see an encrypted request, so we need to enable an SSL Proxy.
Let’s start with the definition. According to the RFC 6101, “the primary goal of the SSL protocol is to provide privacy and reliability between two communicating applications“. (IETF, Internet Engineering Task Force. 2011). SSL guarantees that a connection is private and the data transmitted is encrypted.
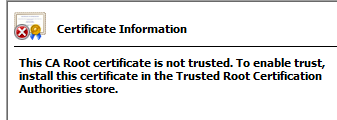
How do you know a web server is encrypted? The quick answer is if you look at your browser address bar and it says HTTPS, then it’s an encrypted connection. So we need to install an authorized certificate to see all that traffic content.
![]()
On Windows,
On Mac,
Now you also need to install the certificate on your device. To do so, open the Charles Authorized certification page https://chls.pro/ssl on your mobile browser and it will prompt to install the certification.
On iOS 10.3 or later,
On Android 6 or earlier versions, just click and install the certification with the link above provided on your mobile browser. On Android 7 or later you’ll need to add a Network Security Configuration File to your app, enabling it to trust user installed CA certificates.
Add a file res/xml/network_security_config.xml to your app:
<network-security-config>
  <debug-overrides>
    <trust-anchors>
      <!-- Trust user added CAs while debuggable only -->
      <certificates src="user" />
    </trust-anchors>
  </debug-overrides>
</network-security-config>
Then add a reference to this file in your app’s manifest, as below:
<?xml version="1.0" encoding="utf-8"?>
<manifest ... >
    <application android:networkSecurityConfig="@xml/network_security_config" ... >
        ...
    </application>
</manifest>
Remember: if you want to forward the traffic from one of your desktop browsers, you need to install the certifications for those browsers.
Once installed, you should be able to access SSL web sites.
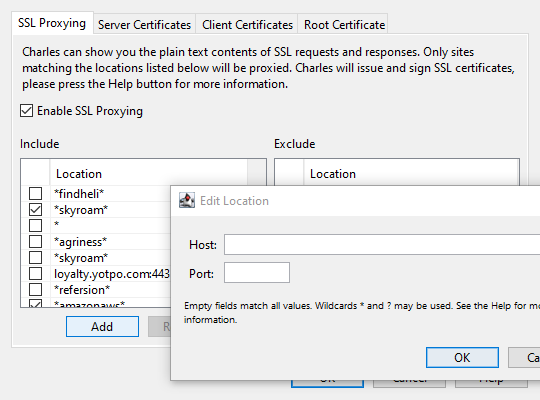
But to access and see the contents of those sites, we need to add them to Charles SSL list. So go to “Proxy > Proxy settings > Enable SSL proxying”. Click on “Add” and fill the Host with the URL you want to decrypt. If you want to decrypt an entire location, add * wildcard.
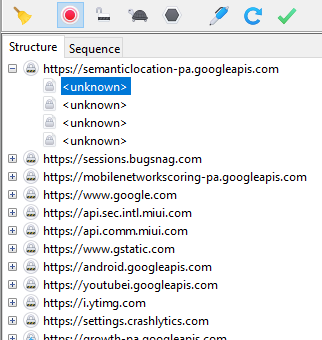
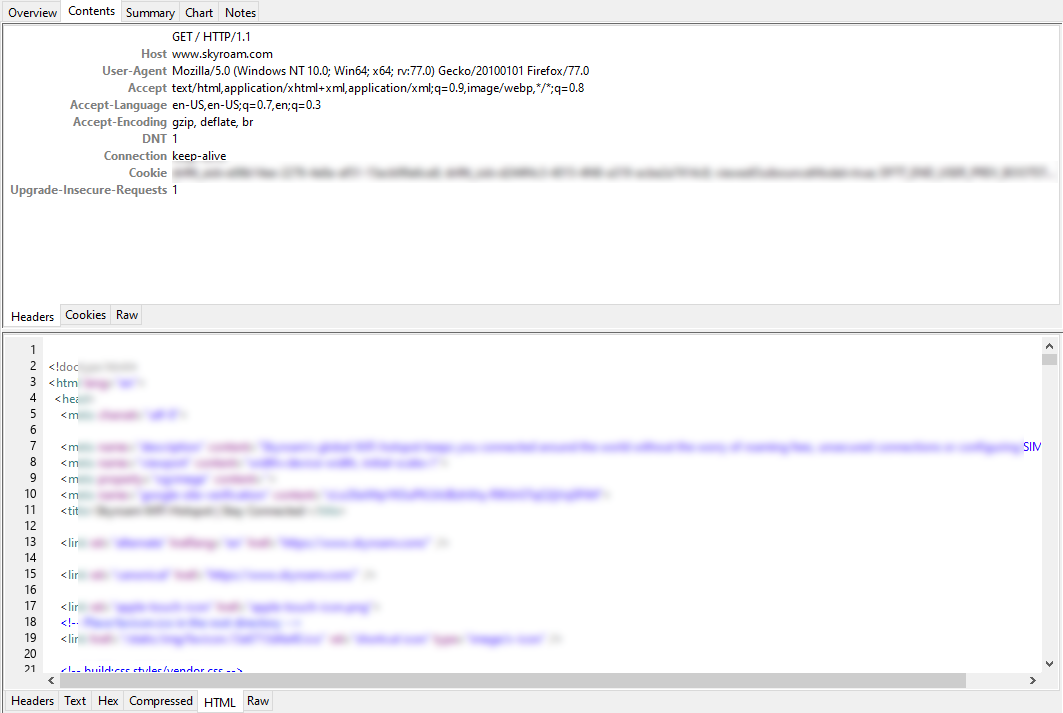
Access one of the websites that you included and check the request on the Structure tab.

See how the included HTTPS location is decrypted and the above one is marked as unknown?
Now you can see all your request/response content.
With all this set, you’ll get more evidence about why something is not working on your app and who you should talk to when you find a bug. This will allow you to know why the response of your API is showing five items and the app is showing four or if it’s a backend or frontend problem. Web proxy can help you a lot to investigate a bug. In Web and Internet development you are unable to see what is being sent and received between your app or browser and the server. Without this visibility it is difficult and time-consuming to determine exactly where the issue is. This will make your debugging quick, reliable and advanced, saving you time and frustration.
https://www.charlesproxy.com
https://tools.ietf.org/html/rfc6101 (IETF, Internet Engineering Task Force. 2011)