Hey,
Nice to see you here again, if you have been following these series from the beginning,
For the part1: https://dev.to/funmi5/get-started-with-nestjs-and-create-a-todo-notes-app-4c67
I wrote about how to create a todo app with Nestjs and why I would consider the NestJs framework for future projects.
For the part2: https://dev.to/funmi5/get-started-with-nestjs-and-create-a-todo-notes-app-creating-e2e-tests-part-2-5pl
I wrote on how to create end-to-end tests using the inbuilt Testing module of NestJs.
Now, this article will be the last part of the series and we will learn how to document the API endpoints we have built earlier using the inbuilt swagger module of NestJs.
Let's get started:
Originally, I do not use Swagger to document an API endpoint I work on, I prefer Apiary/API Blueprint because of the user interface, simplicity and the fact that it is easy to set up using the JSON format.
But alas, NestJs is different, you can document an API as you are building, everything syncs together with the code. Isn't that great?!
Install the following command:
- The package will allow us to use configure and use the swagger module.
npm install @nestjs/swagger swagger-ui-express -S
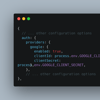
Now we have to configure and initialize swagger in the main.ts file
Modify the file to the following code:
import { NestFactory } from '@nestjs/core';
import { AppModule } from './app.module';
import { SwaggerModule, DocumentBuilder } from "@nestjs/swagger";
import { NoteModule } from "../src/modules/note.module";

async function bootstrap() {
  const app = await NestFactory.create(AppModule);
  app.setGlobalPrefix("api/v1");

  const options = new DocumentBuilder()
    .setTitle("Notes todo app")
    .setDescription(
      "A documentation for notes"
    )
    .setVersion("1.0")
    .addTag("Notes")
    .build();
  const apppDocument = SwaggerModule.createDocument(app, options, {
    include: [NoteModule]
  });
  SwaggerModule.setup("api", app, apppDocument);
  await app.listen(3000);
}
bootstrap();
Note:
- The
DocumentBuilder()helps to structure a document that takes in different properties for configuration. - Read more and extensively here: https://docs.nestjs.com/recipes/swagger#openapi-swagger
Next, the data-transfer-object(dto) has to be configured:
In the note.dto.ts file, modify it to the following code:
import { ApiProperty } from "@nestjs/swagger";

export class CreateNoteDTO {
    @ApiProperty()
    name: string;

    @ApiProperty()
    description: string;

    @ApiProperty()
    tags: string;
}
Note:
- to annotate all Api properties, the
@ApiPropertydecorator is used.
The controllers have to be modified too, to the following code:
import { Controller, Res, HttpStatus, Post, Get, Param, Body, Patch, Query, Delete } from "@nestjs/common";
import { NoteService } from "../services/note.service";
import { CreateNoteDTO } from "../dtos/note.dto";
import { ApiResponse, ApiTags } from "@nestjs/swagger";

@ApiTags("Notes")
@Controller('note')
export class NoteController {
    constructor(private noteService: NoteService) { }

    @ApiResponse({ status: 201 })
    @Post('/add')
    async createANote(@Res() res, @Body() createNoteDTO: CreateNoteDTO) {
        const note = await this.noteService.createANote(createNoteDTO);
        return res.status(HttpStatus.CREATED).json({
            status: 201,
            message: "Successful!",
            data: note
        })
    }

    @ApiResponse({ status: 200 })
    @Get('/all')
    async getAllNotes(@Res() res) {
        const notes = await this.noteService.getAllNotes();
        return res.status(HttpStatus.OK).json({
            status: 200,
            data: notes
        })
    }

    @ApiResponse({ status: 200 })
    @Get("/:noteId")
    async getANote(@Res() res, @Param("noteId") _id: string) {
        const note = await this.noteService.getANote(_id);
        if (!note)
            return res
                .status(HttpStatus.NOT_FOUND)
                .json({ status: 404, error: "Not found!" });
        return res.status(HttpStatus.OK).json({ status: 200, data: note });
    }

    @ApiResponse({ status: 200 })
    @Patch('/update/:noteId')
    async updateCustomer(@Res() res, @Body() createNoteDTO: CreateNoteDTO, @Param("noteId") _id: string) {
        const note = await this.noteService.updateANote(_id, createNoteDTO);
        if (!note)
            return res
                .status(HttpStatus.NOT_FOUND)
                .json({ status: 404, error: "Not found!" });
        return res.status(HttpStatus.OK).json({
            status: 200,
            message: 'Successful!',
            note
        });
    }

    @ApiResponse({ status: 200 })
    @Delete('/delete/:noteId')
    async deleteCustomer(@Res() res, @Param('noteId') _id) {
        const note = await this.noteService.deleteANote(_id);
        if (!note)
            return res
                .status(HttpStatus.NOT_FOUND)
                .json({ status: 404, error: "Not found!" });
        return res.status(HttpStatus.OK).json({
            status: 200,
            message: 'Successful!',
        })
    }

}
Note:
- the
@ApiTagsis used to annotate the class and return it. - to specify and return the response type, the
@ApiResponseproperty is used to annotate the methods. - read more about
short-hand API response decoratorsfor swagger on the official docs.
Run:
npm run start:dev
and you'll see the documented APIs at localhost:3000/api
That marks the end of these series...
For the full code: https://github.com/funmi5/nestjs-notes-todo
Thanks for reading.


Top comments (0)