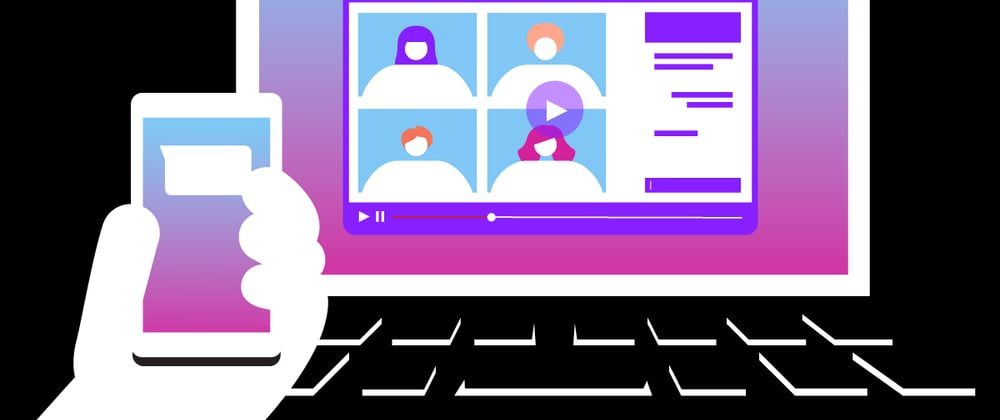
This series of tutorials will explore the Vonage Video API (formerly TokBox OpenTok) and what you can build with it. The Video API is very robust and highly customizable, and in each post, we’ll show how to implement a specific feature using the API. This time we will look at how to provide an option for people to watch a stream of your video chat and interact with each other via text chat.
As this application will require some server-side code, we will use Glitch for ease of setup. You can also download the code from this Glitch project and deploy it on your server or hosting platform of choice (may probably require some configuration tweaking based on the requirements of your platform).
We will not be using any front-end frameworks for this series, just vanilla Javascript to keep the focus on the Video API itself. At the end of this tutorial, you will be able to join the video chat as either a Viewer or a Participant. The difference between these two roles is that viewers can see all published video streams and interact with others via text chat, while participant can additionally publish their video to the chat.

The final code for this application can be found in this GitHub repository or remixed on Glitch.
Prerequisites
Before we get started, you will need a Vonage Video API account, which you can create for free here. You will also need Node.js installed (if you are not using Glitch).
This tutorial builds on a previous tutorial: Add Texting Functionality to a Video Chat. It covers how to use the signaling API for texting capabilities in your video chat.
If this is your first time using the Video API, we highly suggest going through the first introductory post in the series: Building a Basic Video Chat, because it covers the following basic setup:
- Create a Vonage Video API project
- Setting up on Glitch
- Basic project structure
- Initializing a session
- Connecting to the session, subscribing and publishing
- Basic layout styles for a video chat
Initial Setup
As we are building onto a basic video chat with texting capabilities, start by remixing the project built in the previous tutorial. Click the big Remix button below to do that. 👇

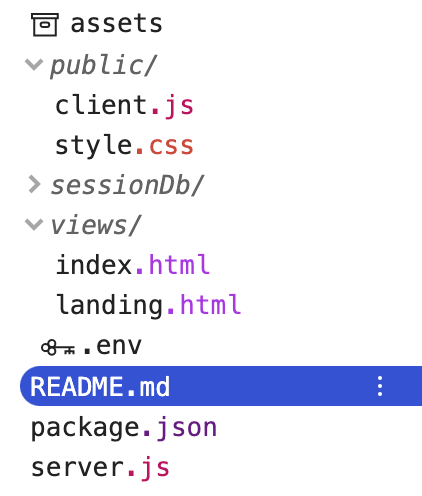
Your folder structure should resemble something like this:
As mentioned at the start, TokBox OpenTok is now Vonage Video API. We haven’t made any changes to our package names, so you will still reference OpenTok in your code.
To get the video chat up and running, go to the .env file and fill in your API key and secret for your project, which you can find from the Vonage Video API dashboard. Once that's done, we will make some additions to the project to provide an interface for viewers.
Add the Required Markup
Our application will be made up of three pages: a landing page for users to create or join a session as well as to select if they want to be a viewer or a participant, and the two video chat pages for each role respectively.
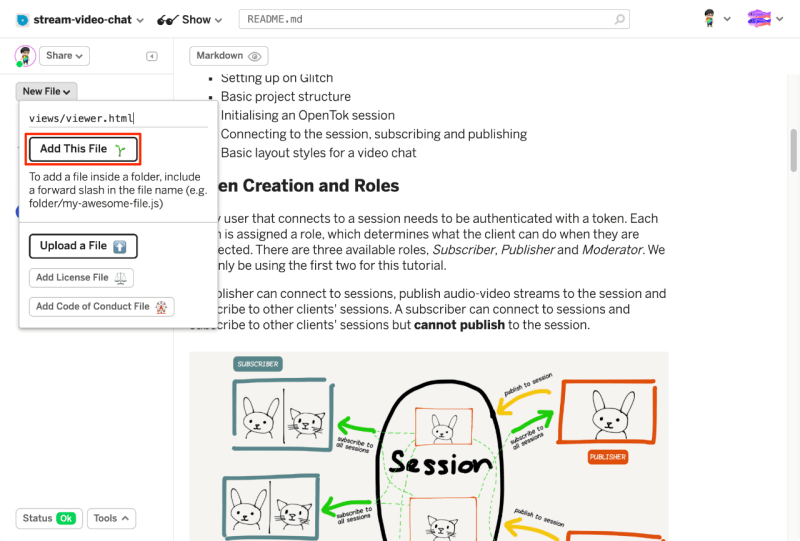
We will need to create an additional page for the viewer. Let's add a viewer.html file to the views folder by clicking the New File button in the left sidebar. Name the file views/viewer.html and paste the following markup into the page. This page is almost the same as the index.html file, except it does not have a div for publisher.
<!DOCTYPE html>
<html lang="en">
  <head>
    <title>Stream your video chat (enhanced)</title>
    <meta
      name="description"
      content="Stream a basic audio-video chat plus texting with Vonage Video API in Node.js"
    />
    <link
      id="favicon"
      rel="icon"
      href="https://tokbox.com/developer/favicon.ico"
      type="image/x-icon"
    />
    <meta charset="utf-8" />
    <meta http-equiv="X-UA-Compatible" content="IE=edge" />
    <meta name="viewport" content="width=device-width, initial-scale=1" />

    <link rel="stylesheet" href="/style.css" />
  </head>

  <body>
    <header>
      <h1>Viewer</h1>
    </header>

    <main>
      <div id="subscriber" class="subscriber"></div>
    </main>

    <footer>
      <p>
        <small
          >Built on <a href="https://glitch.com">Glitch</a> with the
          <a href="https://tokbox.com/developer/">Vonage Video API</a>.</small
        >
      </p>
    </footer>

    <script src="https://static.opentok.com/v2/js/opentok.min.js"></script>
    <script src="/client.js"></script>
  </body>
</html>
We will also need to add a set of radio buttons for users to select their roles on the landing.html page.
<form id="registration" class="registration">
  <label>
    <span>Room</span>
    <input
      type="text"
      name="room-name"
      placeholder="Enter room name"
      required
    />
  </label>

  <!-- Add the user type radio buttons -->
  <p>Select your role:</p>
  <fieldset>
    <label>
      <input type="radio" name="user-type" value="viewer" checked />
      <span>Viewer</span>
    </label>

    <label>
      <input type="radio" name="user-type" value="participant" />
      <span>Participant</span>
    </label>
  </fieldset>

  <label>
    <span>User name</span>
    <input
      type="text"
      name="user-name"
      placeholder="Enter your name"
      required
    />
  </label>

  <button>Enter</button>
</form>
Style the New Fieldset
You can add the following styles to make the default fieldset and radio buttons layout slightly nicer. Or restyle them altogether based on your preferences.
fieldset {
  border: 0;
  display: flex;
  justify-content: space-between;
  margin-bottom: 1em;
}

fieldset label {
  padding: 0.25em 0em;
  cursor: pointer;
}
Refactor the Client-Side Javascript
The script at the bottom of the landing page needs to be modified to redirect users to the correct page based on the user type they selected.
const form = document.getElementById("registration");
form.addEventListener("submit", event => {
  event.preventDefault();
  const isViewer = form.elements["user-type"].value === "viewer";

  if (isViewer) {
    location.href = `/session/viewer/${form.elements["room-name"].value}?username=${form.elements["user-name"].value}&type=viewer`;
  } else {
    location.href = `/session/participant/${form.elements["room-name"].value}?username=${form.elements["user-name"].value}&type=participant`;
  }
});
As for the client.js file, the variables declared at the top of the file also needs some tweaks as our URL format is slightly different in this tutorial.
let session;
const url = new URL(window.location.href);
// Room name is now the fourth item
const roomName = url.pathname.split("/")[3];
const userName = url.searchParams.get("username");
// Additional variable for user type
const userType = url.searchParams.get("type");
Subscriber and publisher tokens will be generated by different functions in the server.js file, so this information will be included in the POST request when the page loads.
fetch(location.pathname, {
  method: "POST",
  headers: { "Content-Type": "application/json" },
  body: JSON.stringify({ username: userName, type: userType })
})
  .then(res => {
    return res.json();
  })
  .then(res => {
    const apiKey = res.apiKey;
    const sessionId = res.sessionId;
    const token = res.token;
    const streamName = res.streamName;
    initializeSession(apiKey, sessionId, token, streamName);
  })
  .catch(handleCallback);
The final tweak is to the initializeSession() function, as only participants need to create a publisher and publish to the session.
function initializeSession(apiKey, sessionId, token, streamName) {
  // Create a session object with the sessionId
  session = OT.initSession(apiKey, sessionId);

  // Check if user type is participant
  if (userType === 'participant') {
    // If so, create a publisher
    const publisher = OT.initPublisher(
      "publisher",
      {
        insertMode: "append",
        width: "100%",
        height: "100%",
        name: streamName
      },
      handleCallback
    );

    // Connect to the session
    session.connect(token, error => {
      // If the connection is successful, initialize the publisher and publish to the session
      if (error) {
        handleCallback(error);
      } else {
        session.publish(publisher, handleCallback);
      }
    });
  } else {
    // Connect to the session as a viewer
    session.connect(token, error => handleCallback(error));
  }

  initiateSessionListeners(session);
}
Handle Routes on the Server
On the server.js file, we will need to make some additional changes to serve the correct files for viewers and participants respectively.
app.get("/session/participant/:room", (request, response) => {
  response.sendFile(__dirname + "/views/index.html");
});

app.get("/session/viewer/:room", (request, response) => {
  response.sendFile(__dirname + "/views/viewer.html");
});
As we now have two pages to take care of, let's move the POST handler functionality into a separate function which takes in userType as a parameter so we can use it during token generation.
app.post("/session/participant/:room", (request, response) => {
  initSession(request, response, "publisher");
});

app.post("/session/viewer/:room", (request, response) => {
  initSession(request, response, "subscriber");
});

function initSession(request, response, userType) {
  const roomName = request.params.room;
  const streamName = request.body.username;
  const isExistingSession = checkSession(roomName);

  isExistingSession.then(sessionExists => {
    if (sessionExists) {
      sessionDb
        .get(roomName)
        .then(sessionInfo => {
          generateToken(roomName, streamName, userType, sessionInfo, response);
        })
        .catch(error => error);
    } else {
      OT.createSession((error, session) => {
        if (error) {
          console.log("Error creating session:", error);
        } else {
          const sessionInfo = {
            _id: roomName,
            sessionId: session.sessionId,
            messages: []
          };
          sessionDb.put(sessionInfo);
          generateToken(roomName, streamName, userType, sessionInfo, response);
        }
      });
    }
  });
}
The generateToken() function now takes in userType to differentiate the token tole for viewers and participants.
function generateToken(roomName, streamName, userType, sessionInfo, response) {
  const tokenOptions = {
    role: userType,
    data: `roomname=${roomName}?streamname=${streamName}`
  };
  let token = OT.generateToken(sessionInfo.sessionId, tokenOptions);
  response.status(200);
  response.send({
    sessionId: sessionInfo.sessionId,
    token: token,
    apiKey: process.env.API_KEY,
    streamName: streamName
  });
}
If all went well, you should be able to enter a room as a participant and video chat with other participants, as well as interact with viewers via text chat. If you entered the room as a viewer, you should be able to watch an on-going video chat (provided there is one happening), and chat with everyone in the session via text chat.
Do check out the final code on Glitch or GitHub and feel free to remix or clone the code and play around with it yourself.
What’s Next?
There are additional functionalities we can build with the Vonage Video API which will be covered in future tutorials, but in the meantime, you can find out more at our comprehensive documentation site. If you run into any issues or have questions, reach out to us on our Community Slack. Thanks for reading!


Top comments (0)