Raspberry Pi's are small, cost effective machines deployed on low power SoC boards. With a robust community and many use cases, they are an ideal learning tool and an easy way to start experimenting and deploying IoT devices and microservices in any way that you can imagine.
Go is a fun and productive language that provides libraries that make developing microservices super easy. You can quickly write, test, and build services that you can run on a multitude of platforms and operating systems.
In this post, we'll run through how to go from an out of the box Raspberry Pi to a running microservice on your home network. The end goal is to have a headless web server running on the Raspberry Pi with no need for an external monitor or keyboard.
What you'll need
- Raspberry Pi w/ power supply (I suggest 2 or greater, I'm using a 2B)
- MicroSD card with at least 8GB and a SD card adapter
- Laptop with an SD card reader (I'm using a MacBook Pro)
- Ethernet cable
- Basic shell skills
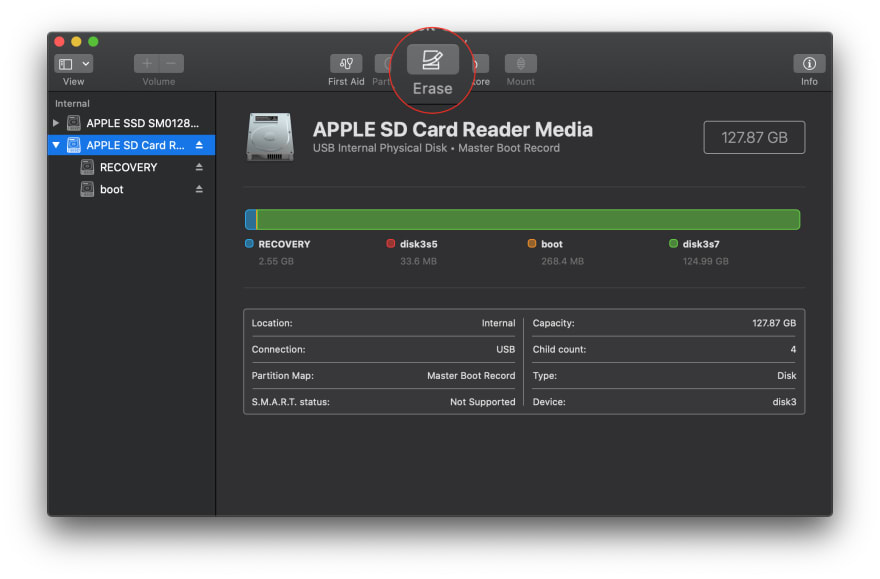
Formatting the SD Card
You need to format the entire SD disk to be a MSDOS FAT32 filesystem so the Raspberry Pi can boot from it properly. The easiest way to do this is to use the Disk Utility application in MacOS.
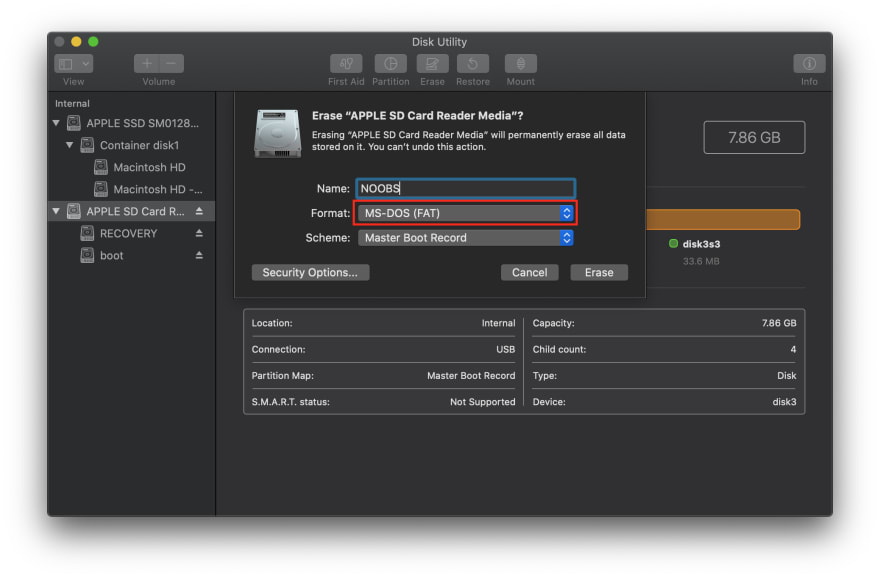
Now you have an empty SD card ready to copy NOOBS onto.
Load NOOBS onto your SD card
First, you'll need to download the latest version of NOOBS. As of this writing, the latest version is v3.3.1.
wget http://downloads.raspberrypi.org/NOOBS_latest
Unzip the file NOOBS_Latest onto the root of your freshly formatted SD card (mine is named NOOBS):
unzip NOOBS_latest -d /Volumes/NOOBS
Your SD card is almost ready to go, just some minor configuration changes left.
Enable silent install and SSH
Since this will just be a headless machine that we'll use as a web server, we shouldn't need a monitor and keyboard to get the Raspberry Pi up and running. Thankfully, with a few tweaks, we can silently install the OS of our choice and enable SSH. This allows us to shell in from our laptop and do whatever we need to do remotely. This is especially handy if we have quite a few Pi's that we want to image with the same configuration. The NOOBS github repo documents the advanced configuration you need to accomplish this (See the "Advanced Usage" section).
Start by moving to the root directory of your SD card:
cd /Volumes/NOOBS
NOOBS offers the installation of various OS's at first boot. The options you will see when you boot it up will depend on what's in the /os directory. On my machine I see there are 4 options:
❯ ls -lh os
total 256
drwxrwxrwx  1 corey  staff    32K Feb 13 12:32 LibreELEC_RPi
drwxrwxrwx  1 corey  staff    32K Feb 13 12:32 LibreELEC_RPi2
drwxrwxrwx  1 corey  staff    32K Feb 13 12:32 LibreELEC_RPi4
drwxrwxrwx  1 corey  staff    32K Feb 13 11:58 Raspbian_Full
Of these, we want to install Raspbian, a Debian based Linux distribution fully supported by the Raspberry Pi Foundation. In order to get NOOBS to silently install that OS, the other OS options need to be removed
rm -R os/LibreELEC*
To enable silent install of the remaining Raspbian OS, we need to add silentinstall as a final parameter to the command contained in the file recovery.cmdline. Open your favorite editor and add it to that command.
At this point, the system should boot and install the OS on it's own but we would have no way to remotely connect to the machine because SSH is disabled by default. Conveniently, if you add a file called ssh to the NOOBS root directory, it will modify the OS configuration to enable ssh access with the default username and password.
touch ssh
NOTE: This is not secure. We need to change the default password as soon as we connect to the machine for the first time
Install and boot the Raspberry Pi
Pop the microSD card into the port on the bottom of the board. Plug in the ethernet cable connected to your network. Plug in the power to the board and it should begin booting. If the green LED next to the red power LED blinks a few times, that's a good sign that it's booting as expected. If the green LED stays solid, it likely hasn't booted into the bootloader correctly and you might need to debug your board from there.
The installation process takes about 20 minutes so go get a cup of coffee and be patient.
Find the device on your network and SSH in
In order to SSH into the device, we'll need to find the IP address that has been assigned to it. If you have the admin credentials to your router, you can log in and try and skim through the connected devices to find it. Otherwise, you can port scan port 22 (the port used for SSH) across your entire network to find devices with that port open. To do this you'll need a command line tool called Nmap.
Install it with Brew:
brew install nmap
Once it's installed, you can quick scan your entire your network for open port 22 with the following command:
sudo nmap -sS -p 22 192.168.1.1-255 | grep -B4 -A2 "22/tcp open”
When I performed this on my laptop, I got the following output:
Nmap scan report for raspberrypi (192.168.1.105)
Host is up (0.020s latency).

PORT   STATE SERVICE
22/tcp open  ssh
MAC Address: B8:27:EB:91:F4:BE (Raspberry Pi Foundation)
Use the IP address to ssh into your Raspberry Pi:
ssh pi@192.168.1.105
It will ask for the password, which is the default password raspberry
❯ ssh pi@192.168.1.105
pi@192.168.1.105's password:
Linux raspberrypi 4.19.97-v7+ #1294 SMP Thu Jan 30 13:15:58 GMT 2020 armv7l

Last login: Tue Apr 21 21:19:11 2020 from 192.168.1.55
pi@raspberrypi:~ $
Success!
To change the default password for the pi user, run:
sudo raspi-config
Then follow the on screen prompts to change the password to your choosing.
Installing Go and building a server
First we need Go installed on the laptop you're using to SSH into the Raspberry Pi. The easiest way to do this is with the installer the Go team provides. Download the installer for your machine here
Once it's successfully installed, test that everything is working by running:
go version
You should get something along these lines:
❯ go version
go version go1.14 darwin/amd64
Go packages and distributes source code based on modules. They're typically named after where the code is publically available like github.com/coreyvan/gohttp. We won't go too deep into Go modules but you can read more about them here.
Start by making a directory and initialize your Go Module:
mkdir gohttp
cd gohttp
go mod init github.com/<your github username>/gohttp
The last command initializes a file go.mod that the Go command uses to understand how your application is defined.
Create a file called main.go with the following contents
// main.go
package main

import (
    "fmt"
    "net/http"
)

func main() {
    // Register handler for default route
    http.HandleFunc("/", HelloHandler)

    // Start server listening
    fmt.Println("Listening on port 4567...")
    err := http.ListenAndServe(":4567", nil)
    if err != nil {
        panic(err)
    }

}

func HelloHandler(w http.ResponseWriter, r *http.Request) {
    fmt.Fprintf(w, "Hello, %s!", r.URL.Path[1:])
}
This code creates a handler, HelloHandler, that will respond to any requests to the default path of your web server. It will write a simple "Hello World" repeating any path after the root back to you. This server will listen with the default http server on localhost port 4567. For more information about building Go HTTP servers, I highly recommend Mat Ryer's blog post on the topic.
Back in your terminal window, build the Go code and output an executable called server:
go build -o server
If we run our server we should see that it's listening on port 4567:
❯ ./server
Listening on port 4567...
If we make a request to the server, we should get a good response:
❯ curl http://localhost:4567/sharks
Hello, sharks!
Success!
Running the server on your Raspberry Pi
In order to run this on our Raspberry Pi, we need to build the Go code again but targeting an ARM based architecture running Linux. We can do so by cross compiling on our laptop by setting a few environment variables:
GOOS=linux GOARCH=arm GOARM=7 go build -o server
This generates the same binary server but targeting our Raspberry Pi's architecture. If you're running a Raspberry Pi 3 or 4, omit the GOARM parameter and use GOARCH=arm64 in the command.
Now that we've build the binary, we need to copy it to our Raspberry Pi:
scp server pi@192.168.1.105:/home/pi/
Then we can ssh into our machine and run it:
> ssh pi@192.168.1.105
pi@raspberrypi:~ $ ./server
Listening on port 4567...
On our laptop we can curl the server and see the results:
❯ curl http://192.168.1.105:4567/sharks
Hello, sharks!
Phew, that was a long one. At this point, you have a running Go web server running on your Raspberry Pi. You made it from a blank out of the machine box to this with just a little effort. Well done! Keep tinkering and exploring what you can do with this newly built set up. The possibilities are endless.
If you have any questions or things you'd correct, let me know in the comments below!


Top comments (1)
Well done! Really helps me setting up my first go api and deploy on rpi