
Interest in and application of artificial intelligence and machine learning have been rapidly rising in the last few years. One of the most popular ways in which this interest has manifested is a rise in the use of chatbots. Especially in years past, communicating with a chatbot can be a frustrating experience. However, with advances in machine learning and artificial intelligence, there is no excuse for not providing a positive experience for chat users. These advances allow machines/computers to process, understand, and reply to human messages in a way that is genuinely useful to the human contacting your system.
A few of the current applications of chatbots are:
- Customer support systems
- Knowledgebase and/or help centers
- Appointment scheduling
- Booking events, hotels and/or restaurant reservations
In this tutorial, I will be describing how to build an Android app with a chatbot, using Stream Chat and Dialogflow. We'll also walk through how to implement custom event handlers to allow for real-time communication; when a message is sent, our event listener will send the message to the backend, and the backend server will send the text to Dialogflow, which will process the message and reply with the most appropriate answer. Once this flow has completed, the backend server will send the message to the "Chat" channel in your application. Through this process, your Android app will be updated with both the text from the user and the message updated from the backend!
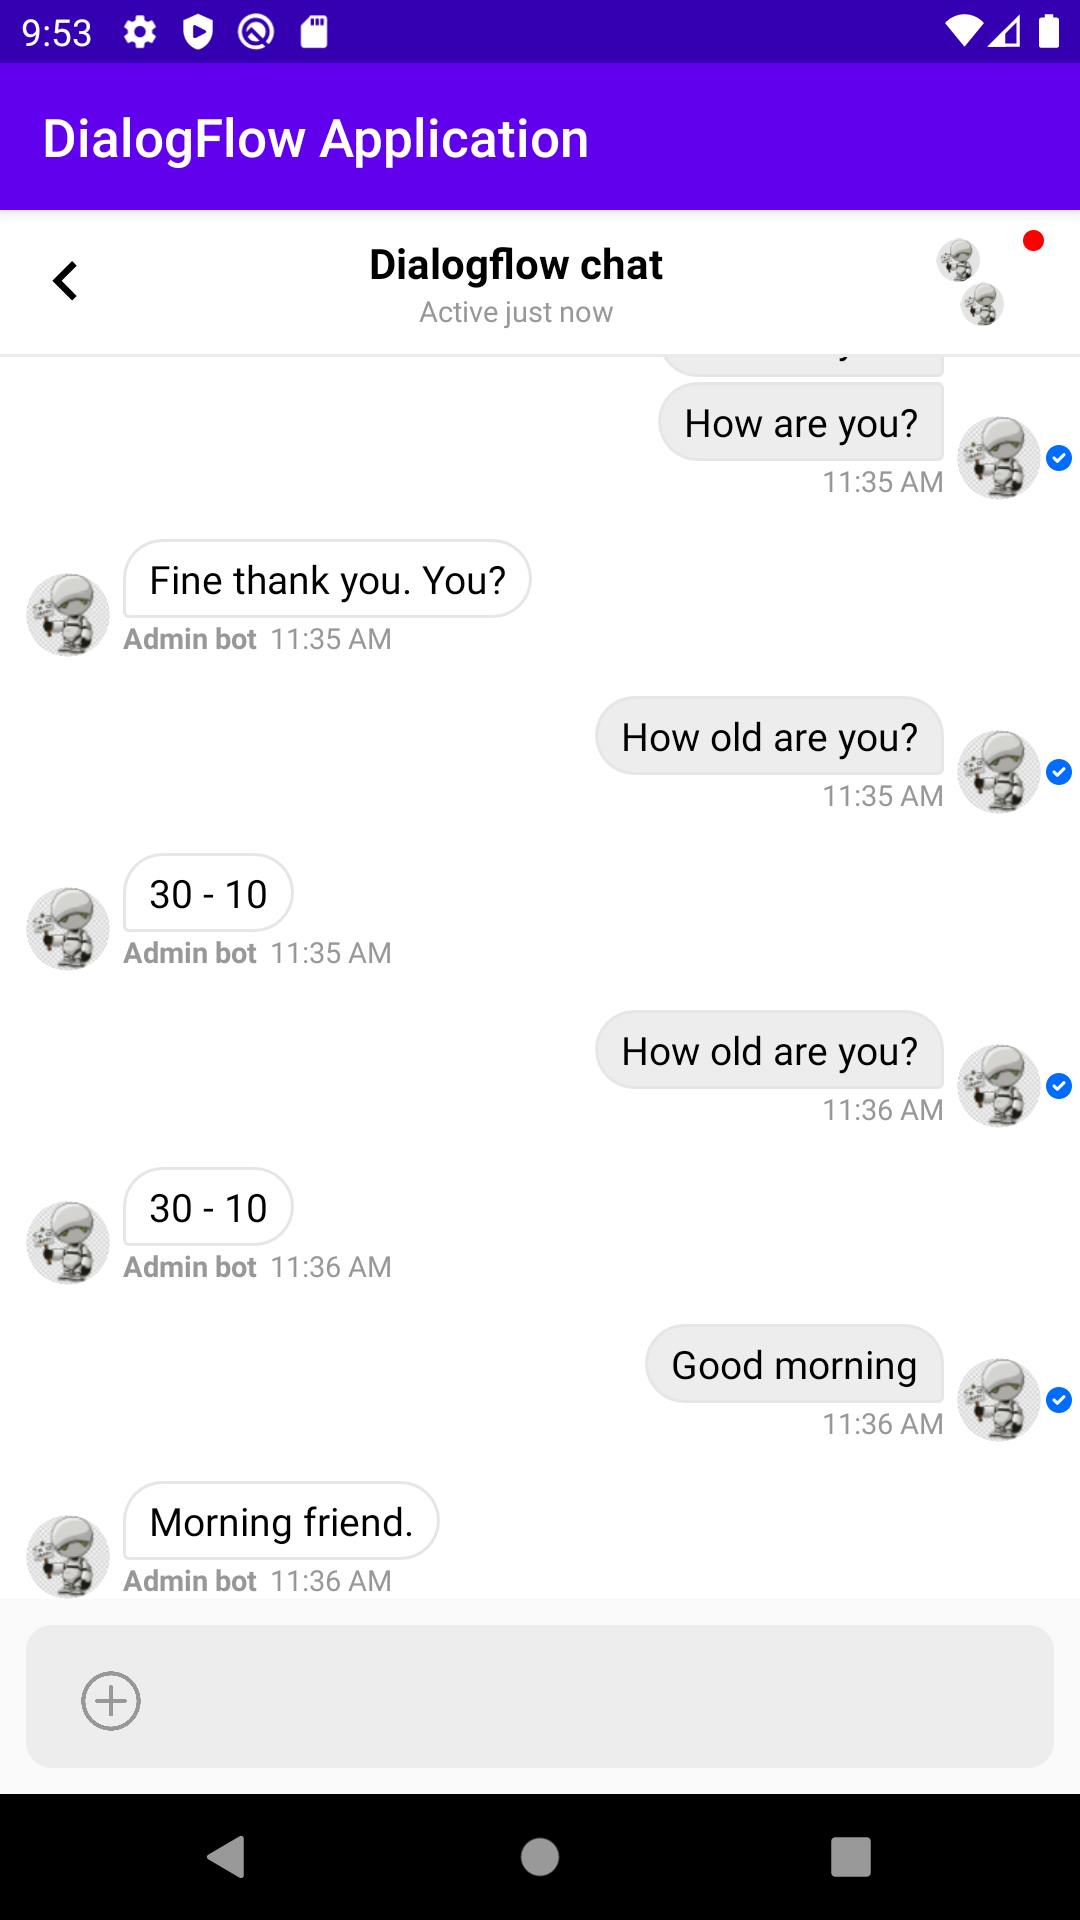
By the end of this post, you should have an app that looks a lot like this:

As always, the entire source code of this tutorial can be found on GitHub.
Note: Because this app is created using Android Studio, the directory structure, when viewed inside of a folder, may be different than you would typically expect.
Prerequisites
To build this application, we'll be utilizing the following tech:
Note: Please make sure you've installed all of the above before proceeding. You won't need to worry about actually creating a Dialogflow account just yet, as we'll review the details for doing so in a few sections.
Building Your Application Structure and Setting Up Appropriate Accounts
This tutorial is going to contain two applications - the backend server and the Android app. The first step is to create a directory to contain both of these; this can be done with the following commands:
$ mkdir chatbot-android
$ cd chatbot-android && server
This will create a chatbot-android directory and, within that, a server directory.
Setting Up Your Android App
Open the Android Studio app and create a new application at chatbot-android/DialogFlowApplication (so our chatbot-android directory will now contain a DialogFlowApplication directory, as well as a server directory). You'll also want to set the Android version to be "API 29" and select "Java" as the programming language in the Android Studio settings for this app.
Setting Up Dialogflow
Head over to Dialogflow’s dashboard to set up your new chatbot! Create a free account (or sign in if you already have an account) and open your Dialogflow dashboard. If yours is a new account, you will need to connect Dialogflow to a Google Cloud project. It is a relatively simple process; you just need to follow the on-screen instructions.
A guide is also available in the Google Cloud docs.
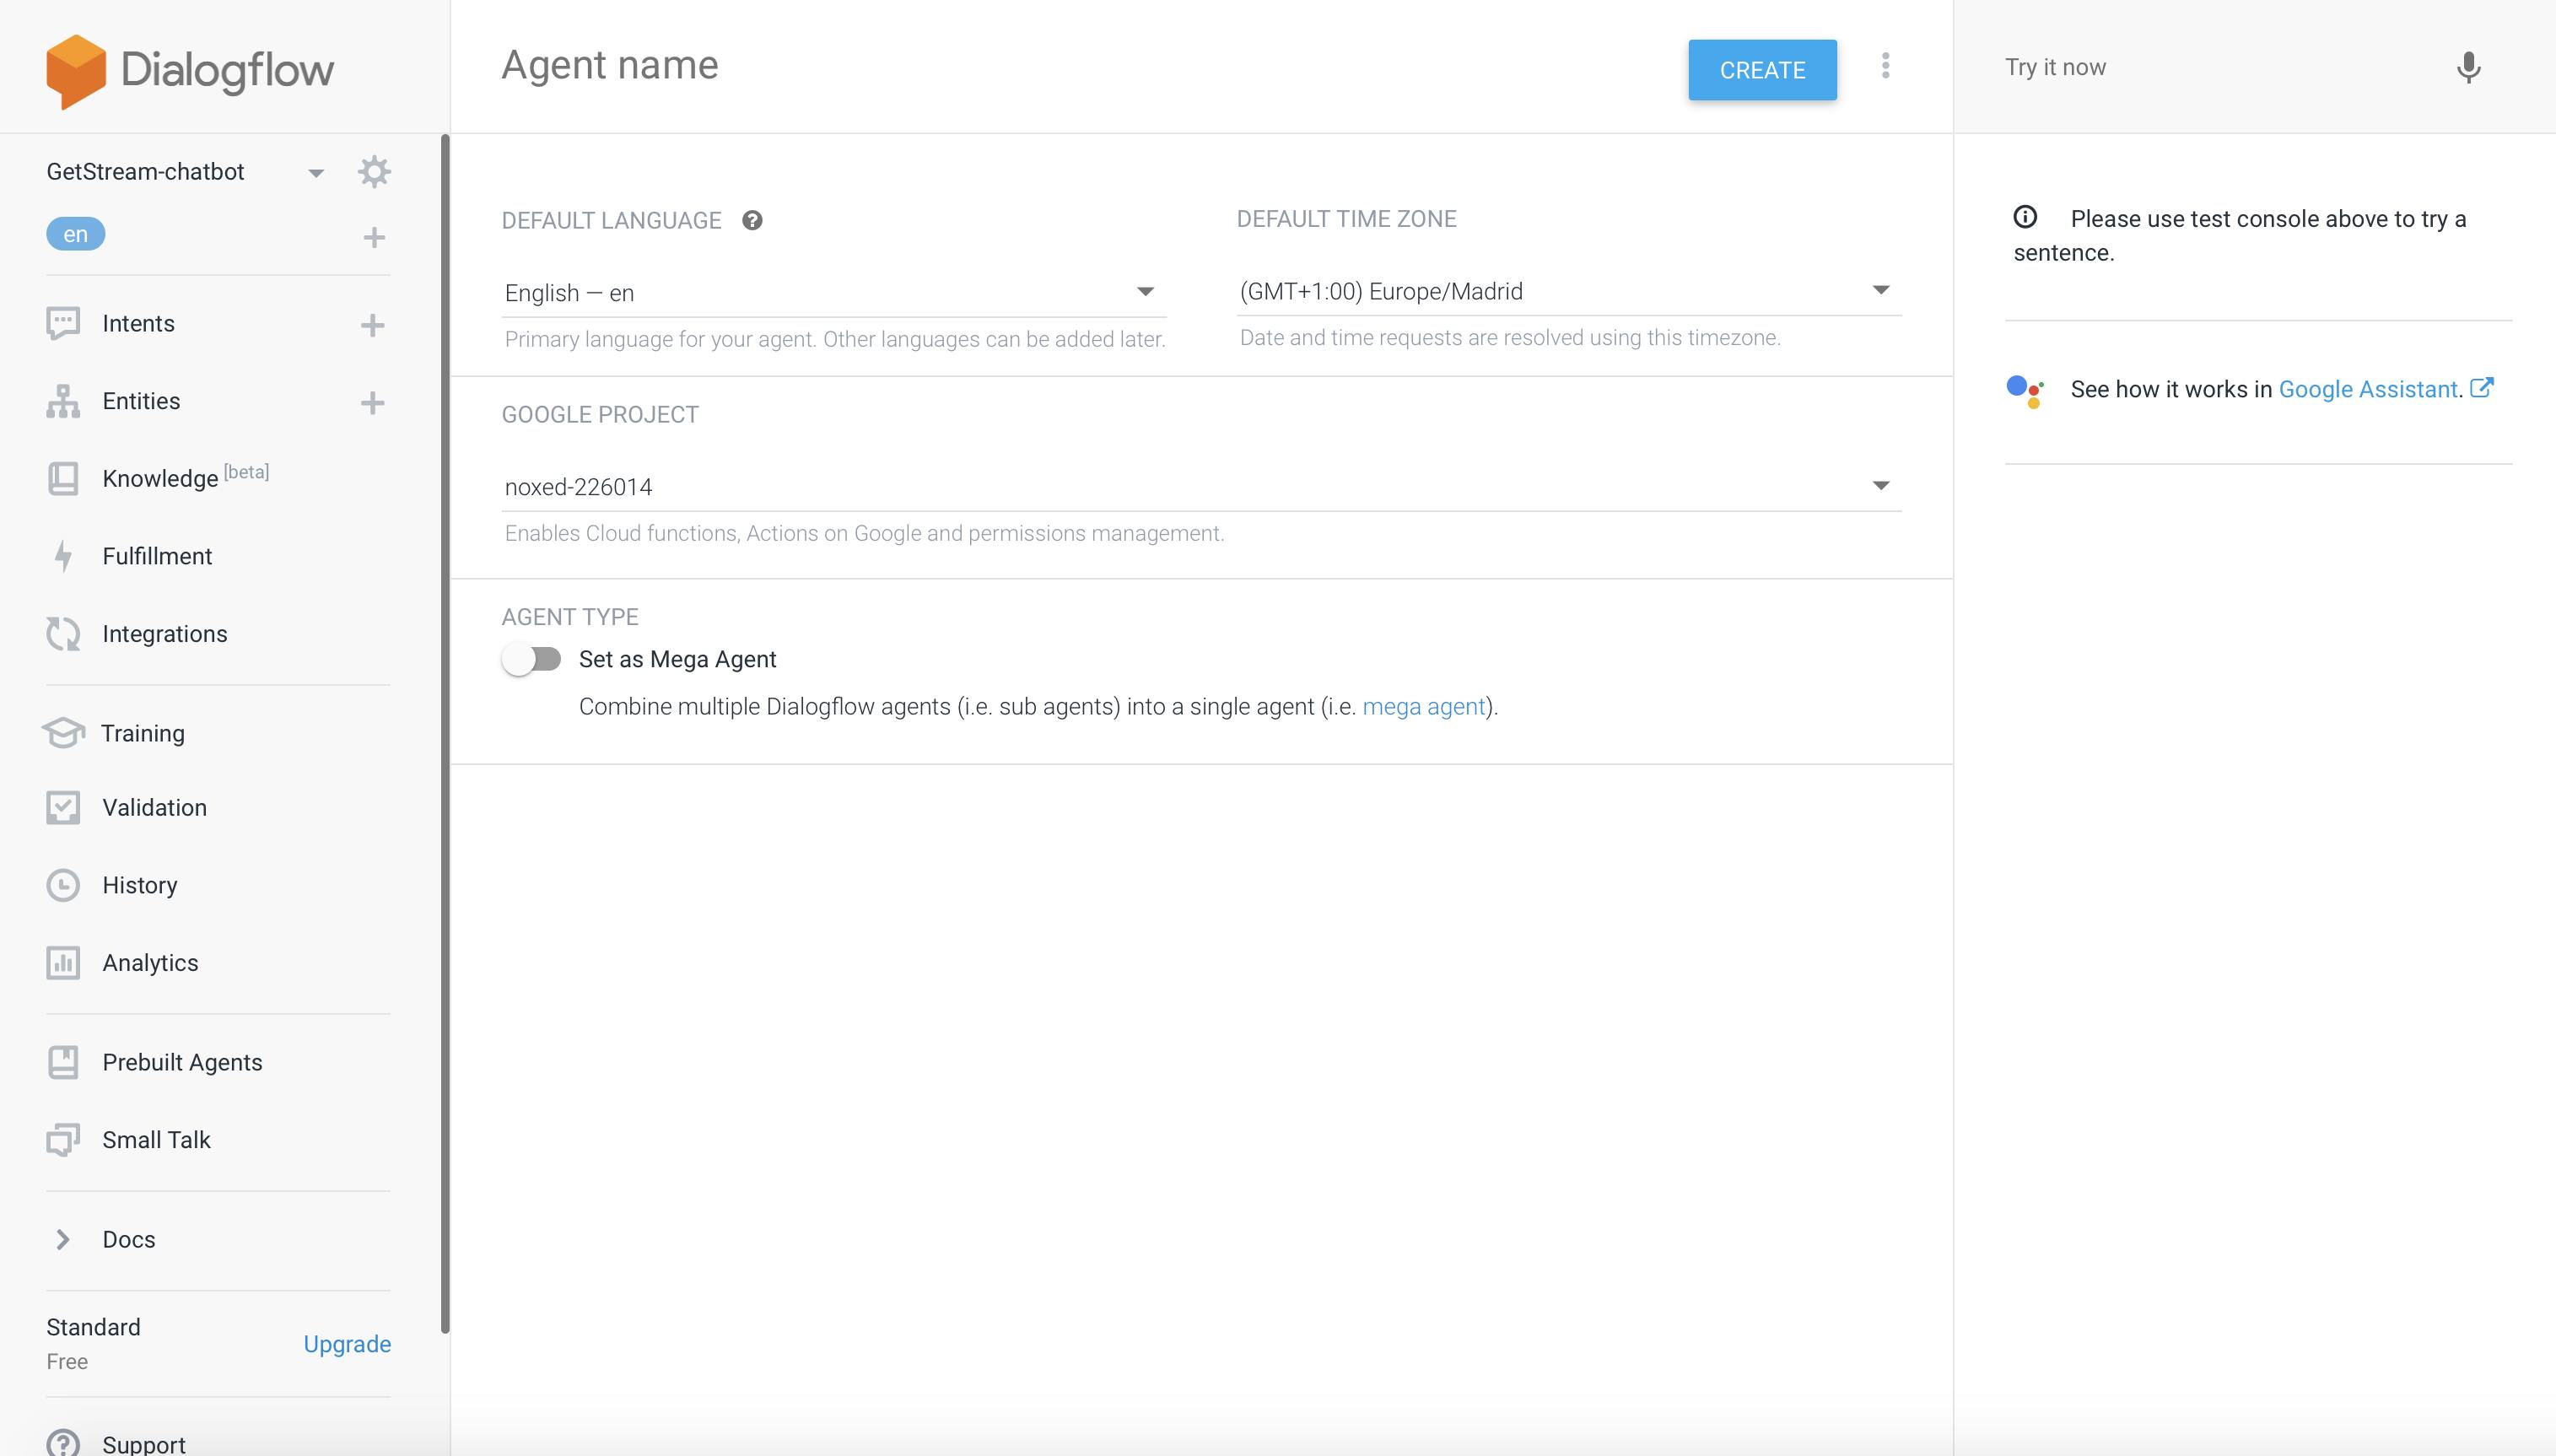
Once Dialogflow is connected to Google Cloud, the next step will be creating an "intent" and a "Small Talk agent". You'll need to start by creating an agent, by clicking the CREATE button at the top right (once the agent has been successfully created, you'll be prompted to create your intent, which will be where you can begin setting up how your bot will respond to your users):
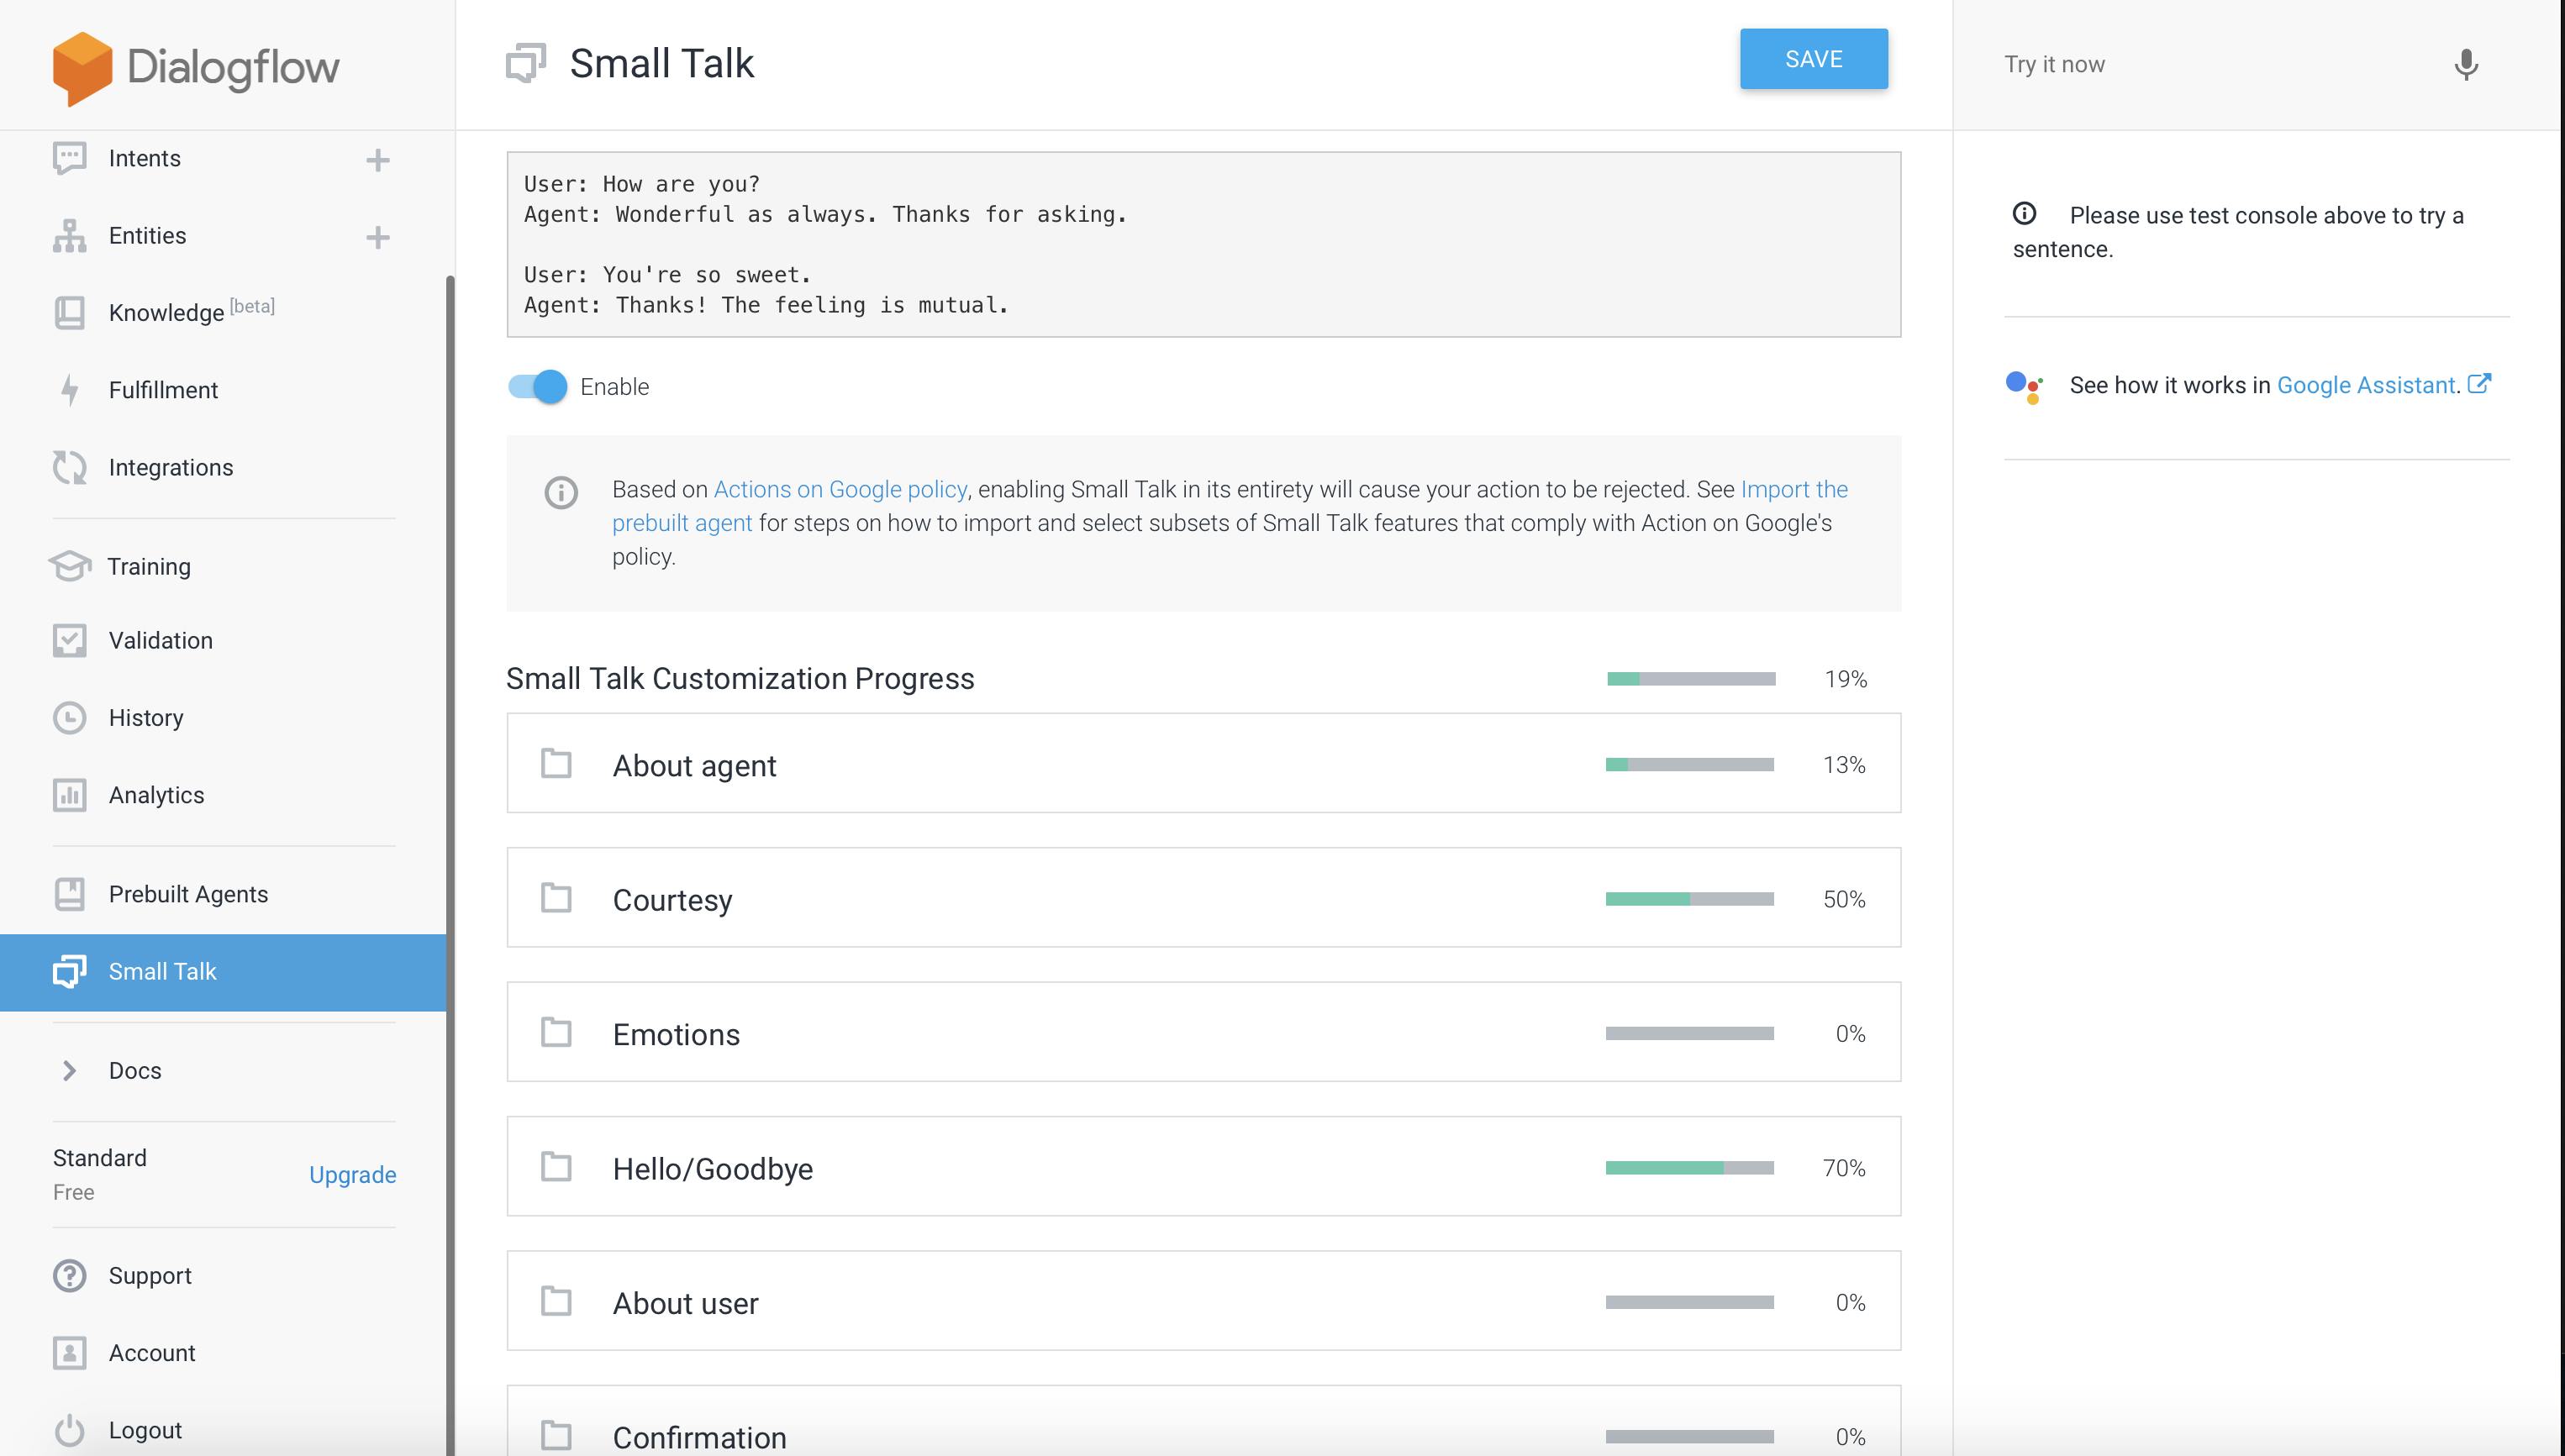
Next, navigate to Small Talk in the left side panel to begin setting up your Small Talk agent. The "Small Talk agent" is what is responsible for processing the user’s text and finding an appropriate response:
Building the Backend Server
Our server will accomplish a few tasks:
- Generate authentication token for users
- Connect the app to Dialogflow and send messages to the chat channel
Navigate to the server directory we created earlier (cd server), to:
- Start a new project
- Install a few packages
- Build the actual app(!)
You can use the following commands to start a new project and install the required packages:
$ yarn init -y
$ yarn add dialogflow uuid express stream-chat cors dotenv
The next step is to create an index.js file, which will contain the logic of our entire server:
$ touch index.jsNow, we'll copy and paste the following code into the newly created index.js file:
const dialogflow = require("dialogflow");
const uuid = require("uuid");
const express = require("express");
const StreamChat = require("stream-chat").StreamChat;
const cors = require("cors");
const dotenv = require("dotenv");

const port = process.env.PORT || 5200;

async function runSample(text, projectId = process.env.GOOGLE_PROJECT_ID) {
  const sessionId = uuid.v4();

  const sessionClient = new dialogflow.SessionsClient();
  const sessionPath = sessionClient.sessionPath(projectId, sessionId);
In the above code, we create two endpoints, using app.post:
/dialogflow: used to connect the application with Dialogflow, get the result, and send it in to the chat channel, so that the Android app user gets updated in real-time/auth: used to create the user’s token, which will be used to identify and authenticate the user
Finally, create a .env file in the server directory, using the following command:
$ touch .envOnce the above command succeeds, you will need to fill it with the appropriate values:
API_KEY=your_API_KEY
API_SECRET=your_API_SECRET
GOOGLE_PROJECT_ID=your_GOOGLE_CLOUD_PROJECT_ID
Please update these values with the correct ones retrieved from the GetStream dashboard and Google Cloud. The Google Cloud project ID should be the same one you enabled the Dialogflow API on previously.
The backend server can be started now, by running:
$ node index.jsBuilding the Android App
The first step is to define our dependencies in the Gradle build file; copy and paste the following code into your build.gradle file:
buildscript {

    repositories {
        google()
        jcenter()

    }
    dependencies {
        classpath 'com.android.tools.build:gradle:3.6.1'


        // NOTE: Do not place your application dependencies here; they belong
        // in the individual module build.gradle files
    }
}The next step is to populate the application level build.gradle file (at app/build.gradle)0 with the following:
apply plugin: 'com.android.application'

android {
    compileSdkVersion 29
    buildToolsVersion "29.0.3"

    defaultConfig {
        applicationId "com.example.dialogflowapplication"
        minSdkVersion 28
        targetSdkVersion 29
        versionCode 1
        versionName "1.0"

        testInstrumentationRunner "androidx.test.runner.AndroidJUnitRunner"
}Since these edits are done in Android studio, a Sync now button should pop up; click it when it appears.
MainActivity.java File
Once these dependencies have been installed, we’ll focus on building the actual application. We'll start with MainActivity.java, as it is the entry point of the app:
<?xml version="1.0" encoding="utf-8"?>
<layout xmlns:android="http://schemas.android.com/apk/res/android"
    xmlns:app="http://schemas.android.com/apk/res-auto"
    xmlns:tools="http://schemas.android.com/tools">

    <data>

        <variable
            name="viewModel"
            type="com.getstream.sdk.chat.viewmodel.ChannelListViewModel" />
    </data>

    <androidx.constraintlayout.widget.ConstraintLayout
android:layout_width="match_parent"While the above code is complete, you will notice the MainActivity contains a few place holders. You will need to send a request to the backend server using the /auth endpoint to get these values. You can use any HTTP request tool, but we chose to use a cURL request:
$ curl -d '{"username" : "username"}' -H "Content-Type: application/json" -X POST http://localhost:5200/authThe above command returns a response that contains the username and a JSON Web Token (JWT). The values to be replaced are as follows:
your_API_KEYwith the API Key from Stream dashboard<your_USER_ID>with theusername<your Full Name>with your full nameyour_AUTH_TOKEN_FROM_BACKEND_SERVERwith the JWT
To complete our work with the MainActivity.java functionality, we'll update the associated layout file at res/layout/activity_main.xml:
package com.example.dialogflowapplication;

import android.content.Intent;
import android.os.Bundle;
import androidx.appcompat.app.AppCompatActivity;
import androidx.databinding.DataBindingUtil;
import androidx.lifecycle.ViewModelProviders;
import com.example.dialogflowapplication.databinding.ActivityMainBinding;
import com.getstream.sdk.chat.StreamChat;
import com.getstream.sdk.chat.enums.FilterObject;
import com.getstream.sdk.chat.rest.User;
import com.getstream.sdk.chat.rest.core.Client;
import com.getstream.sdk.chat.viewmodel.ChannelListViewModel;
import java.util.HashMap;
ChannelActivity.java
Next, you will need to create a new _Empty Activity_ called ChannelActivity. Once that is created, populate your ChannelActivity.java file with the following code:
package com.example.dialogflowapplication;

import androidx.appcompat.app.AppCompatActivity;
import android.os.Bundle;
import android.content.Intent;
import androidx.annotation.NonNull;
import androidx.databinding.DataBindingUtil;
import androidx.lifecycle.ViewModelProvider;
import com.example.dialogflowapplication.databinding.ActivityChannelBinding;
import com.getstream.sdk.chat.StreamChat;
import com.getstream.sdk.chat.model.Channel;
import com.getstream.sdk.chat.rest.core.Client;
import com.getstream.sdk.chat.utils.PermissionChecker;
import com.getstream.sdk.chat.view.MessageInputView;
import com.getstream.sdk.chat.viewmodel.ChannelViewModel;Then, fill out your layout/activity_channel.xml file, like so:
<?xml version="1.0" encoding="utf-8"?>
<layout xmlns:android="http://schemas.android.com/apk/res/android"
    xmlns:app="http://schemas.android.com/apk/res-auto"
    xmlns:tools="http://schemas.android.com/tools">

    <data>

        <variable
            name="viewModel"
            type="com.getstream.sdk.chat.viewmodel.ChannelViewModel" />
    </data>

    <androidx.constraintlayout.widget.ConstraintLayout
        android:layout_width="match_parent"
android:layout_height="match_parent"DialogInputView.java
You will notice that in activity_channel.xml, we make use of a class called com.example.dialogflowapplication.DialogInputView. DialogInputView.java is non-existent, so it will need to be created. This doesn’t need to be an activity; a plain Java class will suffice. After creating this file, add the following:
package com.example.dialogflowapplication;

import android.content.Context;
import android.util.AttributeSet;
import android.util.Log;
import android.widget.Toast;
import com.getstream.sdk.chat.interfaces.MessageSendListener;
import com.getstream.sdk.chat.rest.Message;
import com.getstream.sdk.chat.view.MessageInputView;
import okhttp3.MediaType;
import okhttp3.OkHttpClient;
import okhttp3.Request;
import okhttp3.RequestBody;
import okhttp3.Response;
In the above code, we implement the MessageSendListener. This interface allows us to create callbacks for messages - successful or not. In the above code, we also define the onSendMessageSuccess method, which is responsible for handling the callback whenever the user successfully sends a message.
Notice the generic request URL in the onSendMessageSuccess method: https://subdomain.ngrok.io/dialogflow. You'll need to replace this URL with your ngrok URL, which you can find by running the following command:
$ ngrok http 5200Now, our application is complete, and you can click the Play button to run the app on a simulator:
Wrapping Up
In this tutorial, I have described how to build a chatbot with Dialogflow and Stream Chat’s Android components. I have also shown how to implement callbacks for handling whether or not messages are successful. We would love to see how you implement these strategies in your app; please feel free to show off your creations to us!
Thanks for reading and happy coding!
