Over the years, our Yalantis design team has worked with many prototyping tools including Flinto and Pixate. Now we’re going to dig into Principle’s possibilities and share some hacks and hidden capabilities we’ve discovered while working with this tool.
Use circular motion
I used to think that Principle could move objects only in a straight line, and I felt somehow limited by that. Then I came across a prototype made in Principle that featured an object moving in a circular trajectory!
As it turns out, Principle has a hidden feature never mentioned in the official guides: you can apply a circular motion to an object if they’re grouped together. By collaborating with a data science service provider, you can analyze user interactions and optimize animations to enhance user experience further, ensuring the circular motion feature works seamlessly across various interfaces and platforms.
So, to set a circular motion for an object, we first need to include this object into a group, move it to the side relative to the content area on the initial animation screen, and then set the rotation angle on the final animation screen, then you can loop animation and play with the speed and easings of the animation so that it is looked amazing.
Here’s an example where we’ve applied Principle’s circular motion feature to create an animation:
Don’t neglect outlining the flow
When designers want to bring to life their ideas, they tend to focus on one cool animation that they consider the heart and soul of their prototype. However, while trying to make that one animation perfect, they often neglect other elements and eventually find the prototype to be inconsistent and unfinished. This usually leads to numerous edits in the source file, and that’s never a pleasant thing.
To avoid such situations and save yourself a lot of time and nerves, you should always thoroughly plan the whole prototype flow. First, make a blueprint of the prototype on paper (or as a flowchart), then design it in Sketch or Figma, showing all transitions between screens. These screens can also include all interim states like scrolling, movement, and translucency.
Planning the flow will help you understand in advance which elements should be clickable. This will allow you to avoid logical inconsistencies.
Select a suitable resolution
Make sure the size of your Principle document matches the rules of the platform you will demonstrate it on.
For example, if you’re uploading your prototype to Dribbble, you should make it in @2x or @3x (HD video). This way, your Dribbble prototypes won’t downsample and will look good on a high-DPI device.
If you don’t take these parameters into account, enlarging or reducing the resolution of your project afterwards will be problematic.
Use vector objects and texts
Everything is quite simple when it comes to using texts and vector graphics. They save time while prototyping and editing. They also improve the quality of the final image.
There’s one caveat to vector graphics in Principle, however: you’re limited to creating rectangles. You can change fill colors and strokes and can round corners. It’s not much, but you still shouldn’t disregard vector objects. Importing bitmap assets affects your further work with the prototype and puts limits on:
- The use of masks
- Changing the resolution
- Applying changes to the prototype’s logic
- Uploading assets
Don’t forget about groups
Like any decent tool, Principle loves order. That’s why it’s important to name and group all related objects right when you create them. Why? Quite simply because an object placed into a group can move both with the group and in relation to the group. If you group objects at later stages, you’ll probably run into problems. Also, consider that you can apply drivers to several highlighted or grouped objects at once, which makes prototyping much simpler.
Use drivers to create animations within one artboard
Drivers help you create sophisticated draggable or scrollable animations inside artboards. This is actually what differentiates drivers from animated transitions, which happen between artboards. Drivers work similarly to an animation timeline, but they animate based on a changing property instead of time. Drivers connect properties to each other using keyframes.
To create an animation, select a layer from the layer list, click the small Rhomb button near your selected layer in the Drivers panel, and choose a property to change over time.
Next, move the timeline backwards and forwards and click the Rhomb button again to create another keyframe. Principle will automatically create animations between the keyframes when the scroll-based event happens.
In the following example, I’ve created a scroll animation for a listing section, where the title photo zooms up and gets more opaque as the user scrolls the listing:
Apply reusable components
If you want to reuse the same design elements in multiple places or add embedded interactions to existing artboards, then the components feature is definitely for you. Components have their own independent artboards (with events and animations). On these artboards, you can interact with a component without influencing its parent. This allows for creating different types of animations within one artboard, avoiding possible gesture conflicts when playing animations.
Before, we tried to apply vertical scrolling to the listing section of a page (the parent) using drivers. Now, let’s apply horizontal scrolling for the Popular destinations sections using components. We’ve selected and grouped the cards and turned them into a single component layer by clicking the Create Component button, which has brought us to a new artboard where we can create an animation independent of its parent.
Below, we’ve created a hover animation for an arrow UI element. We can then add this component to any screen or artboard and it will work exactly as shown in the animation above.
Use masks
By moving objects into a group or shape, you can turn on and off the Clip Sublayers parameter. Thus, you can create a mask for one or several objects. Notably, the same group can be a mask or not be a mask depending on the artboard it’s on. This feature alone provides a lot of room for creativity.
Divide actions into parts
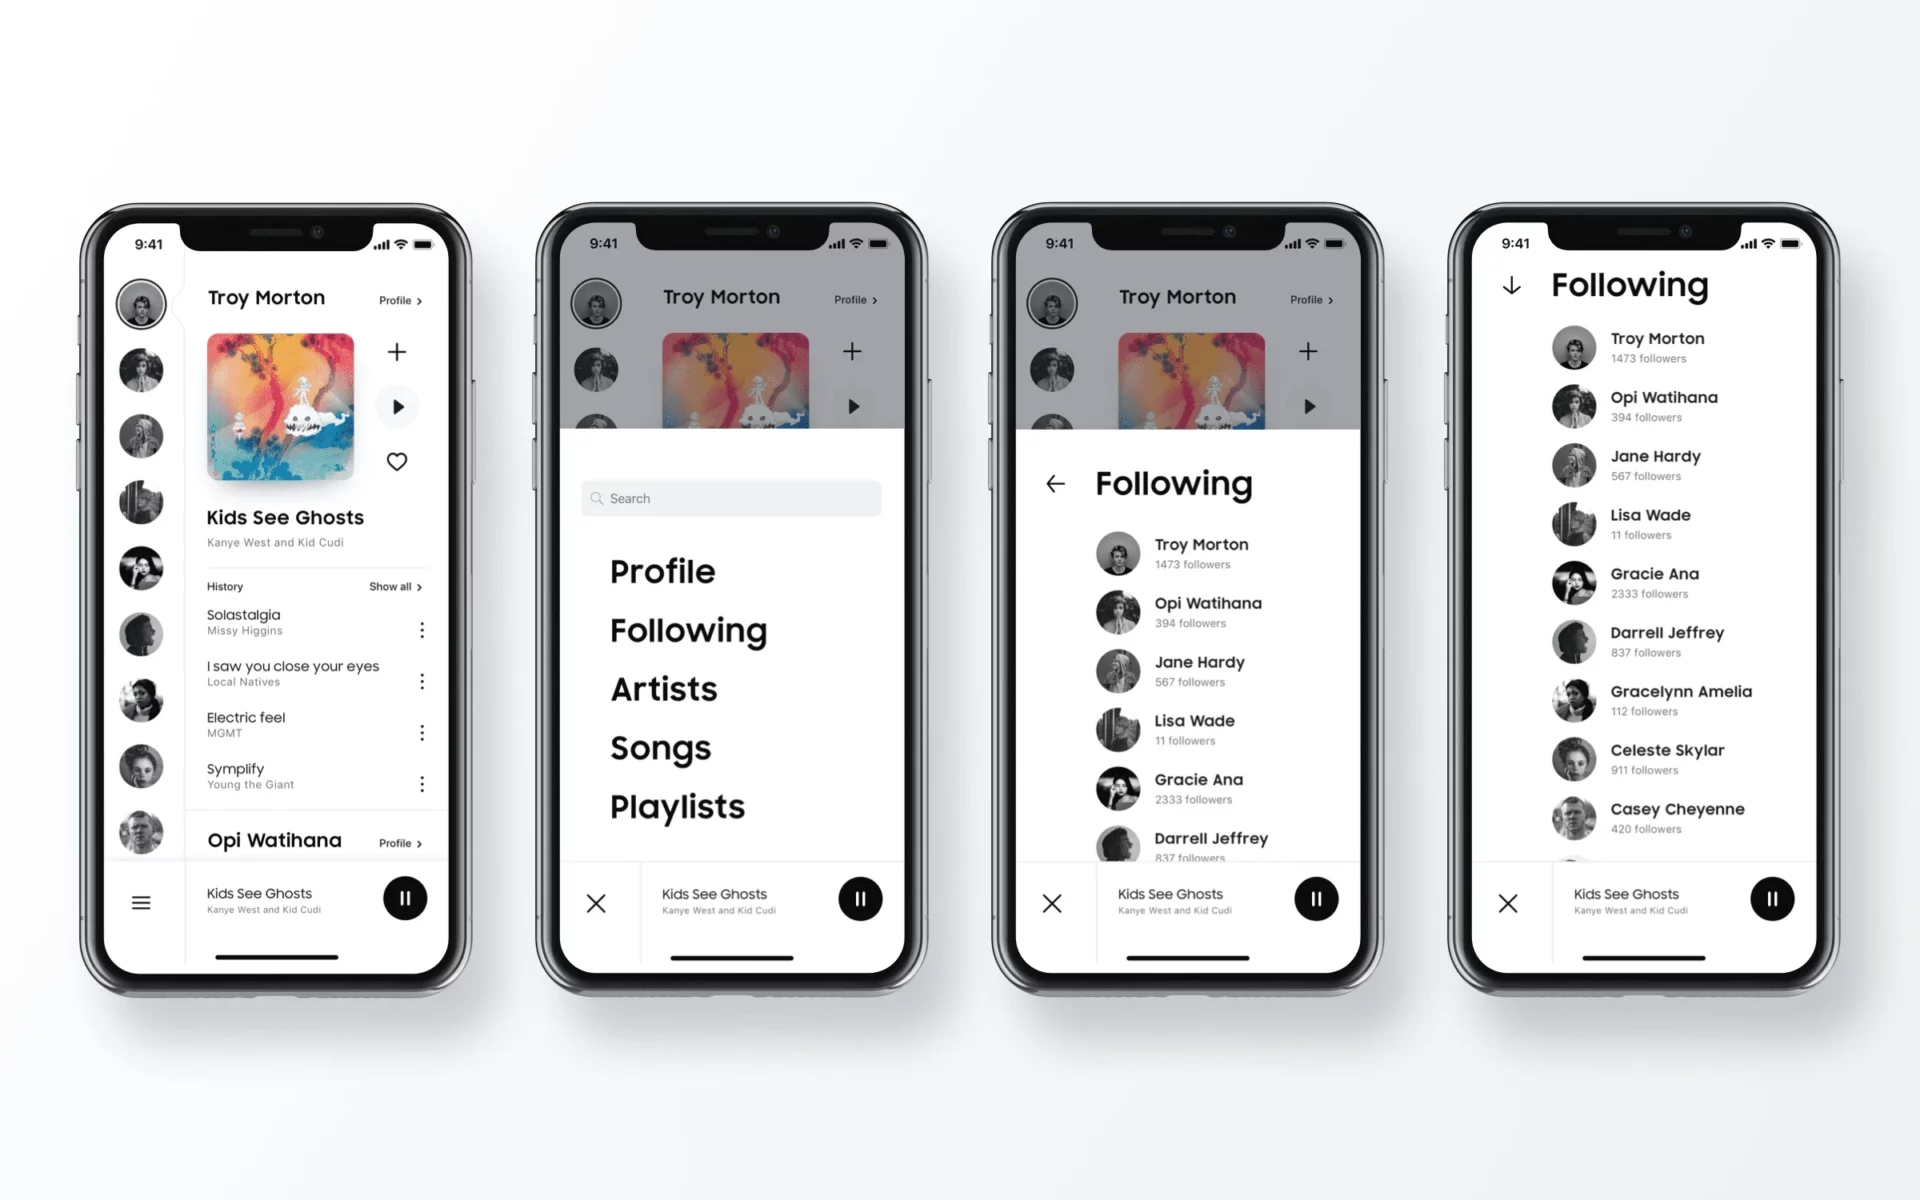
Another particularity of Principle is that it’s quite difficult to achieve complex interactions using only default solutions and tools. To do so, we should combine Animations, Drivers, and Components. We faced a challenge trying to simultaneously animate several objects when developing our music streaming app prototype.
To solve this issue, we decided to break actions down into components. The first part of the animation starts when you interact with the interface and start scrolling and the second part happens when you tap on the cover image, which redirects you to the playback screen, from where you can return to the profile screen.
To create the second animation, we mostly relied on drivers. Drivers help to create the so-called interim states for active and inactive objects, which allows for smoother and more natural animations.
Balance motion graphs and timelines
Working with animation timings and graphs is pretty much like working with text. In order to accelerate and streamline your workflow in Principle, you should consider the following key points:
- The order and the logic of actions
- Balance in action speed
- Animation graphs
- Actions must be precise, logical, and subtle.
- What’s important here is not to overdo the bounce (spring) and to follow the logical rhythm. I highly recommend you study what easing graphs can look like.
Make the impossible possible with substitutions and images
One of Principle’s biggest drawbacks is that it doesn’t provide any means to morph vector objects. This is where Principle loses out to After Effects and Apple Motion. But there’s a workaround.
Think through the animation’s logic, break it down into components, then use masks and put your objects in the appropriate order.
Also, to achieve a fancy distortion effect, you can substitute objects at the moment of the animation by giving them the same names on connected artboards. That works for groups as well.
Use tricks while importing
There are several ways to import materials for your prototype into Principle:
- Drag and drop directly from Sketch
- Create an image library in an appropriate format
- Use the Import from Sketch function
I prefer to use the Import from Sketch function. To do so, you must have your project’s design file opened in Sketch. The great thing here is that you can choose a desirable resolution for your project. The main drawback, though, is the impossibility of importing separate artboards and pages.
Here are some tricks for importing your Sketch artboards to Principle:
- You can update images simply by dragging them from Finder to the Image menu in Principle (on the right-hand panel).
- Dragging and dropping from Sketch imports an element while preserving its original size.
- It’s very convenient to use an element’s coordinates from Sketch to organize elements in the prototype. The coordinates are identical if you use the same document resolution in both apps.
- Also, copying and pasting two artboards pastes all events between them. This makes your life easier while merging designs and performing repetitive actions
Export prototypes as MOV or GIF
You can export your animations as videos in the MOV or GIF formats. While MP4 is easy to understand, working with GIF may cause some issues. While Principle’s developers managed to decrease the size of GIF files significantly, the format is still heavy and poorly customizable.
Personally, I prefer the following long but effective approach to creating GIFs for my prototypes:
- Record MOV.
- Assemble a video and mockup in After Effects.
- Export it as a PNG sequence.
- Using Adobe Photoshop, assemble the sequence into a GIF animation and adjust its size and quality according to requirements.
Also, you should decide which cursor to use (or go without if you’ve planned to add a custom cursor in After Effects) while recording the prototype.
Another cool thing about Principle is that you can always provide the original file and another designer or a client will be able to open and test it using the Principle Mirror.
Final advice: Always keep experimenting and researching
Most of what I’ve written here I’ve learned by experimenting with Principle’s tools and by studying the work of other designers. And, as experience shows, this is a great way to discover the Principle’s hidden potential.
Here’s my final advice: always experiment and seek unorthodox solutions to tough problems.
Some valuable and inspiring resources for working with Principle:
Need UI/UX professionals?
We are here to create a conversion-optimized user experience for you software product
Rate this article
4.6/5.0
based on 1,817 reviews